
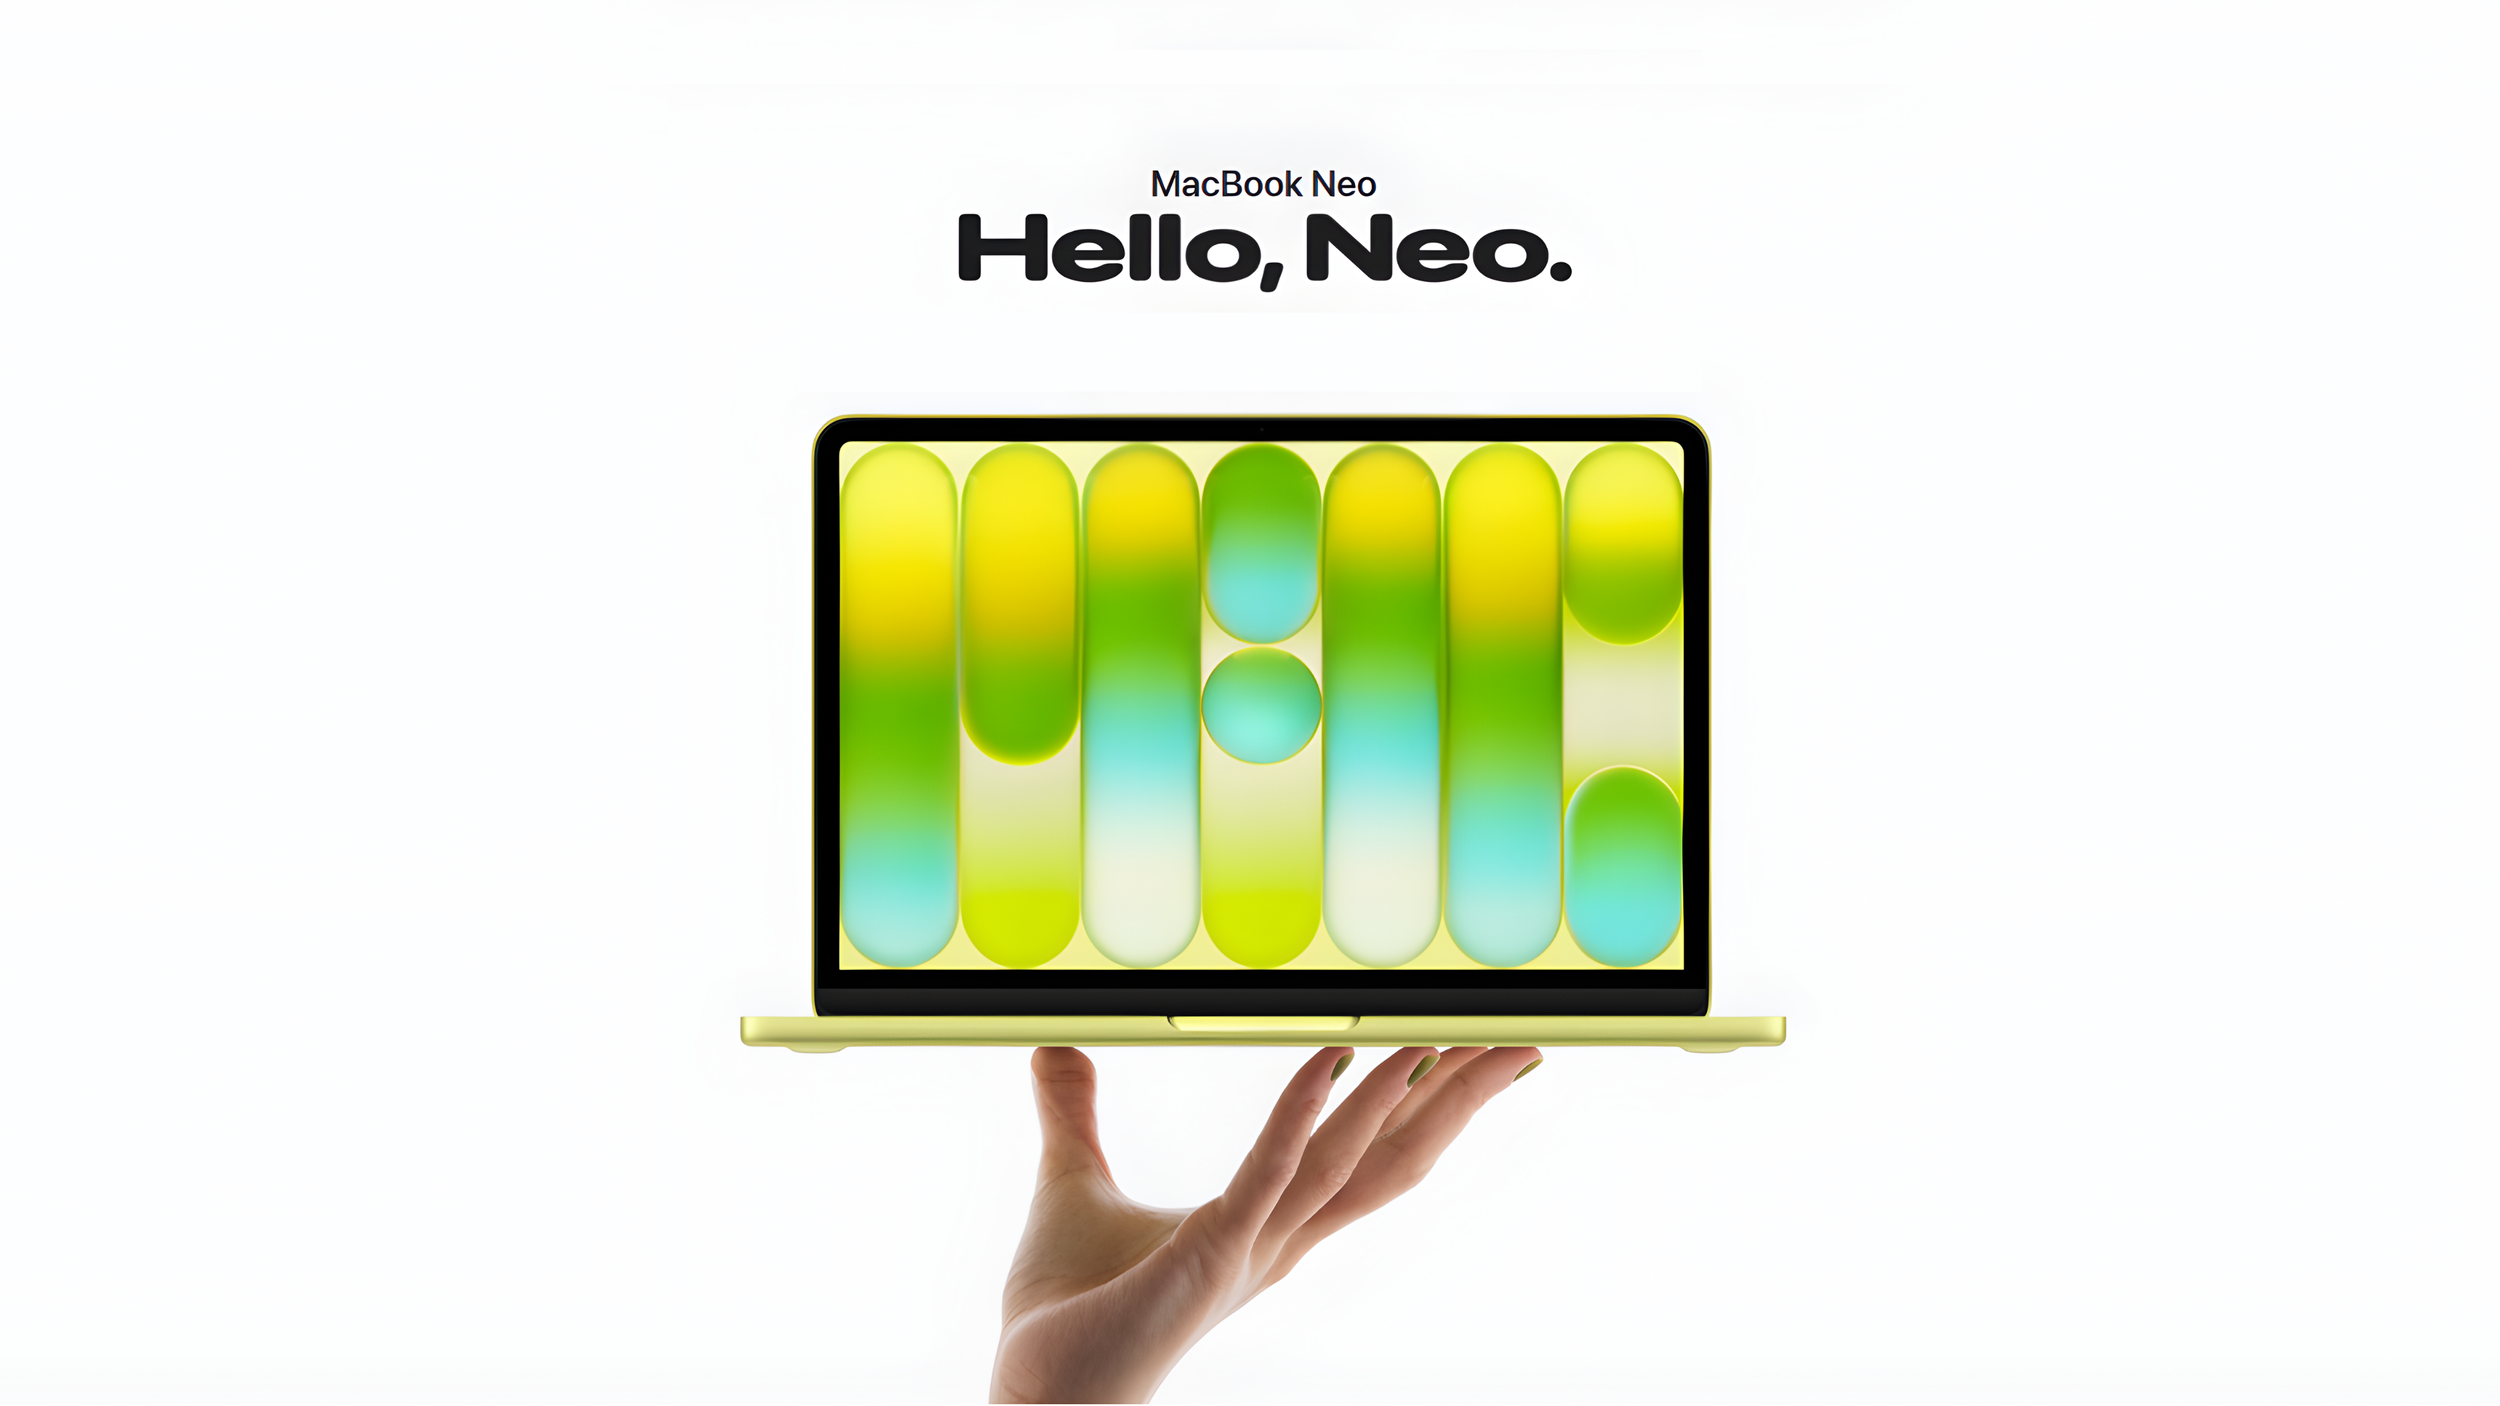
MacBook Neo Teardown: Apple’s Budget Laptop with an iPhone Chip
Apple may have just shaken up the entire laptop industry with the new MacBook Neo.
This thing is cheap by Apple standards, which means it is almost guaranteed to end up everywhere. Schools, students, libraries, classrooms. That makes repairability extremely important because if something breaks and it cannot be fixed easily, these machines quickly become e-waste.
But this laptop is also different for another reason. It is the first MacBook to run the same chip you would normally find inside an iPhone. So the big question was simple. What does a budget Apple laptop actually look like on the inside, and did Apple design this one with repairability in mind?
To find out, we had to open it up.
Unboxing the MacBook Neo
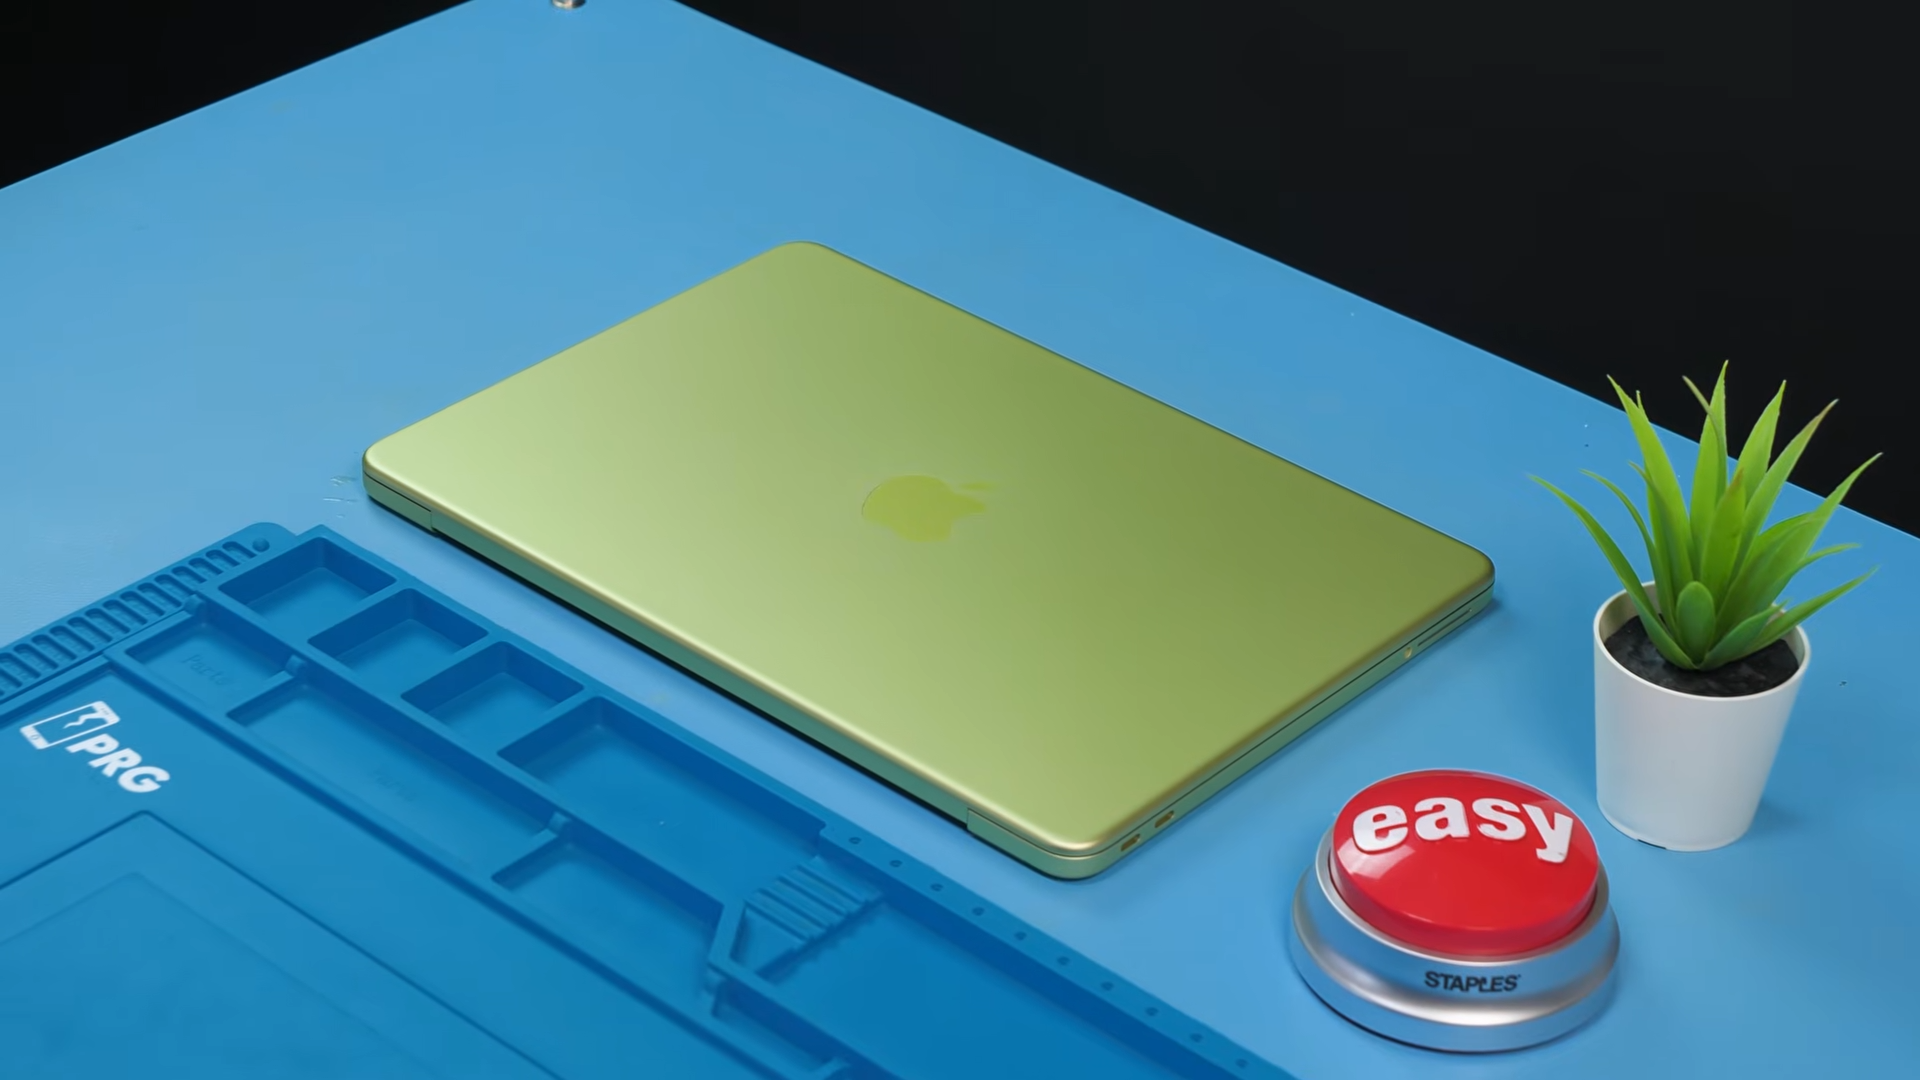
Here it is, the MacBook Neo.
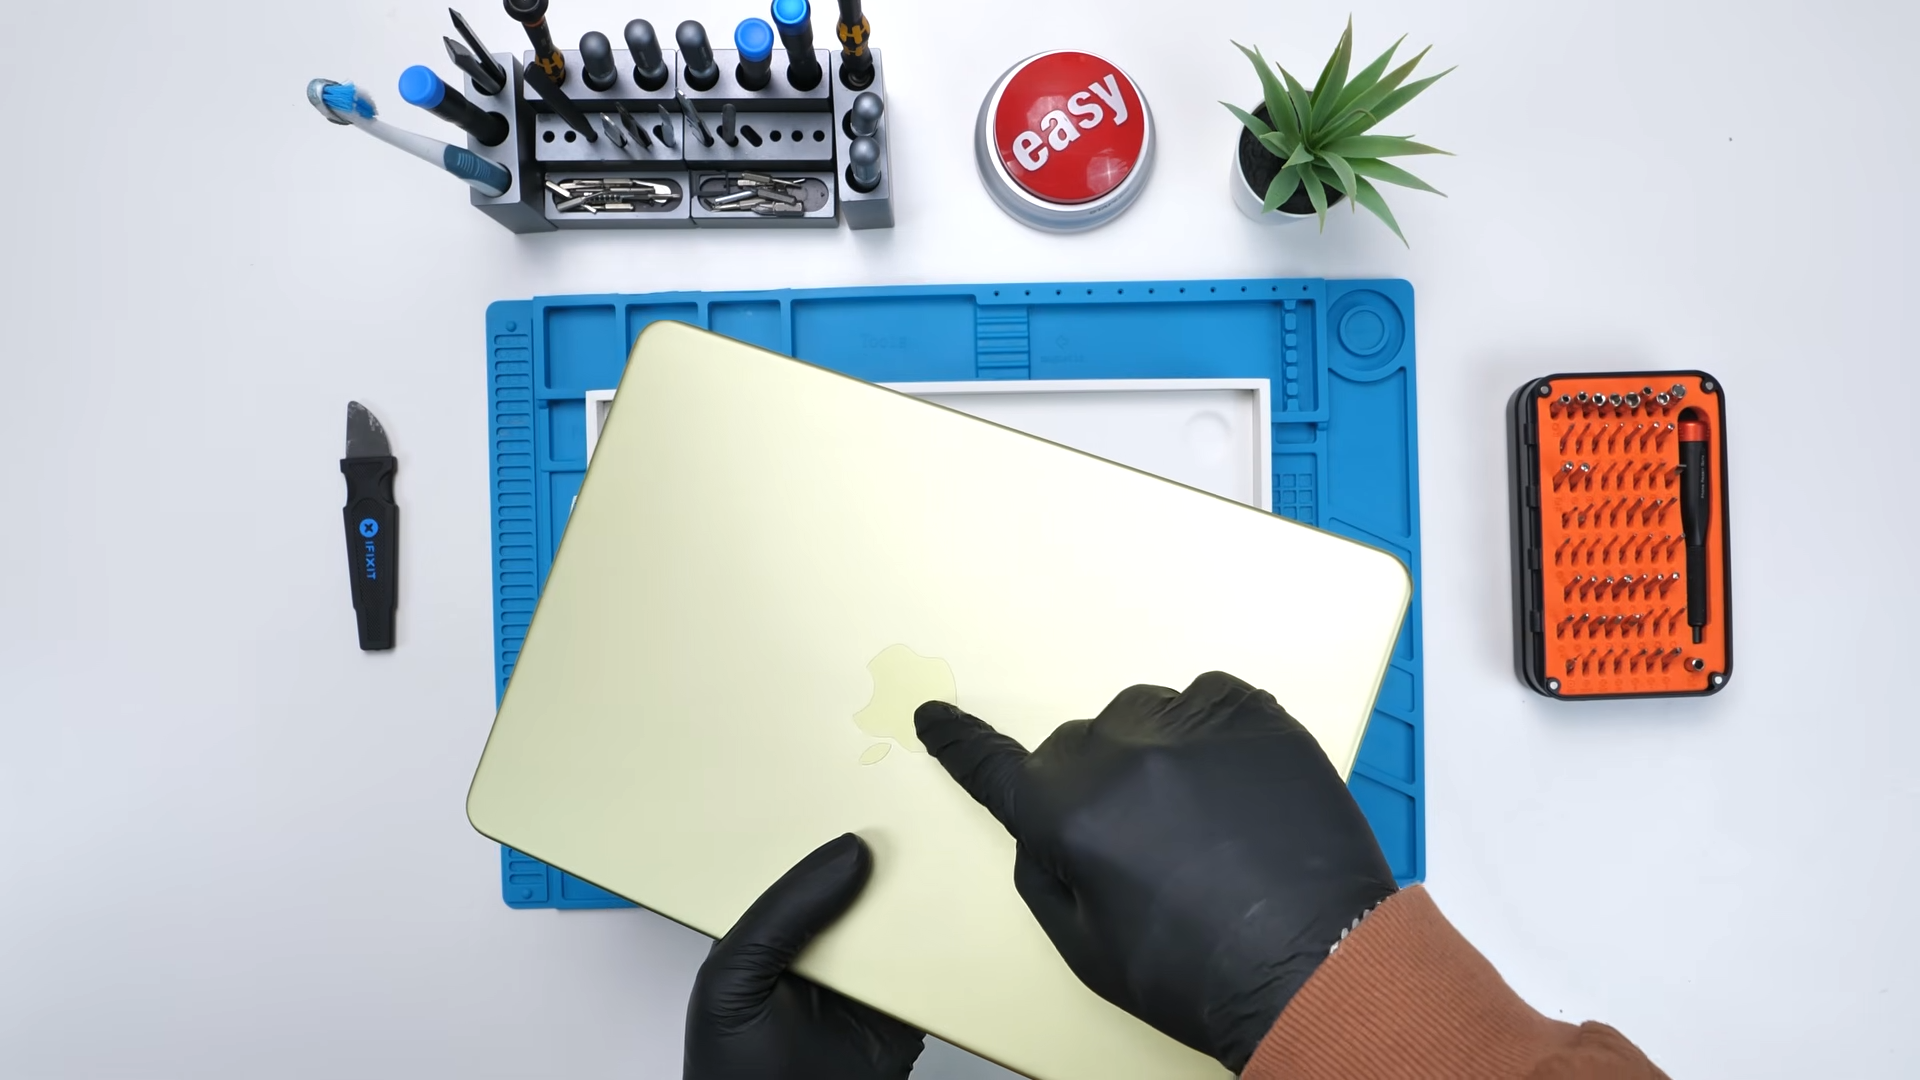
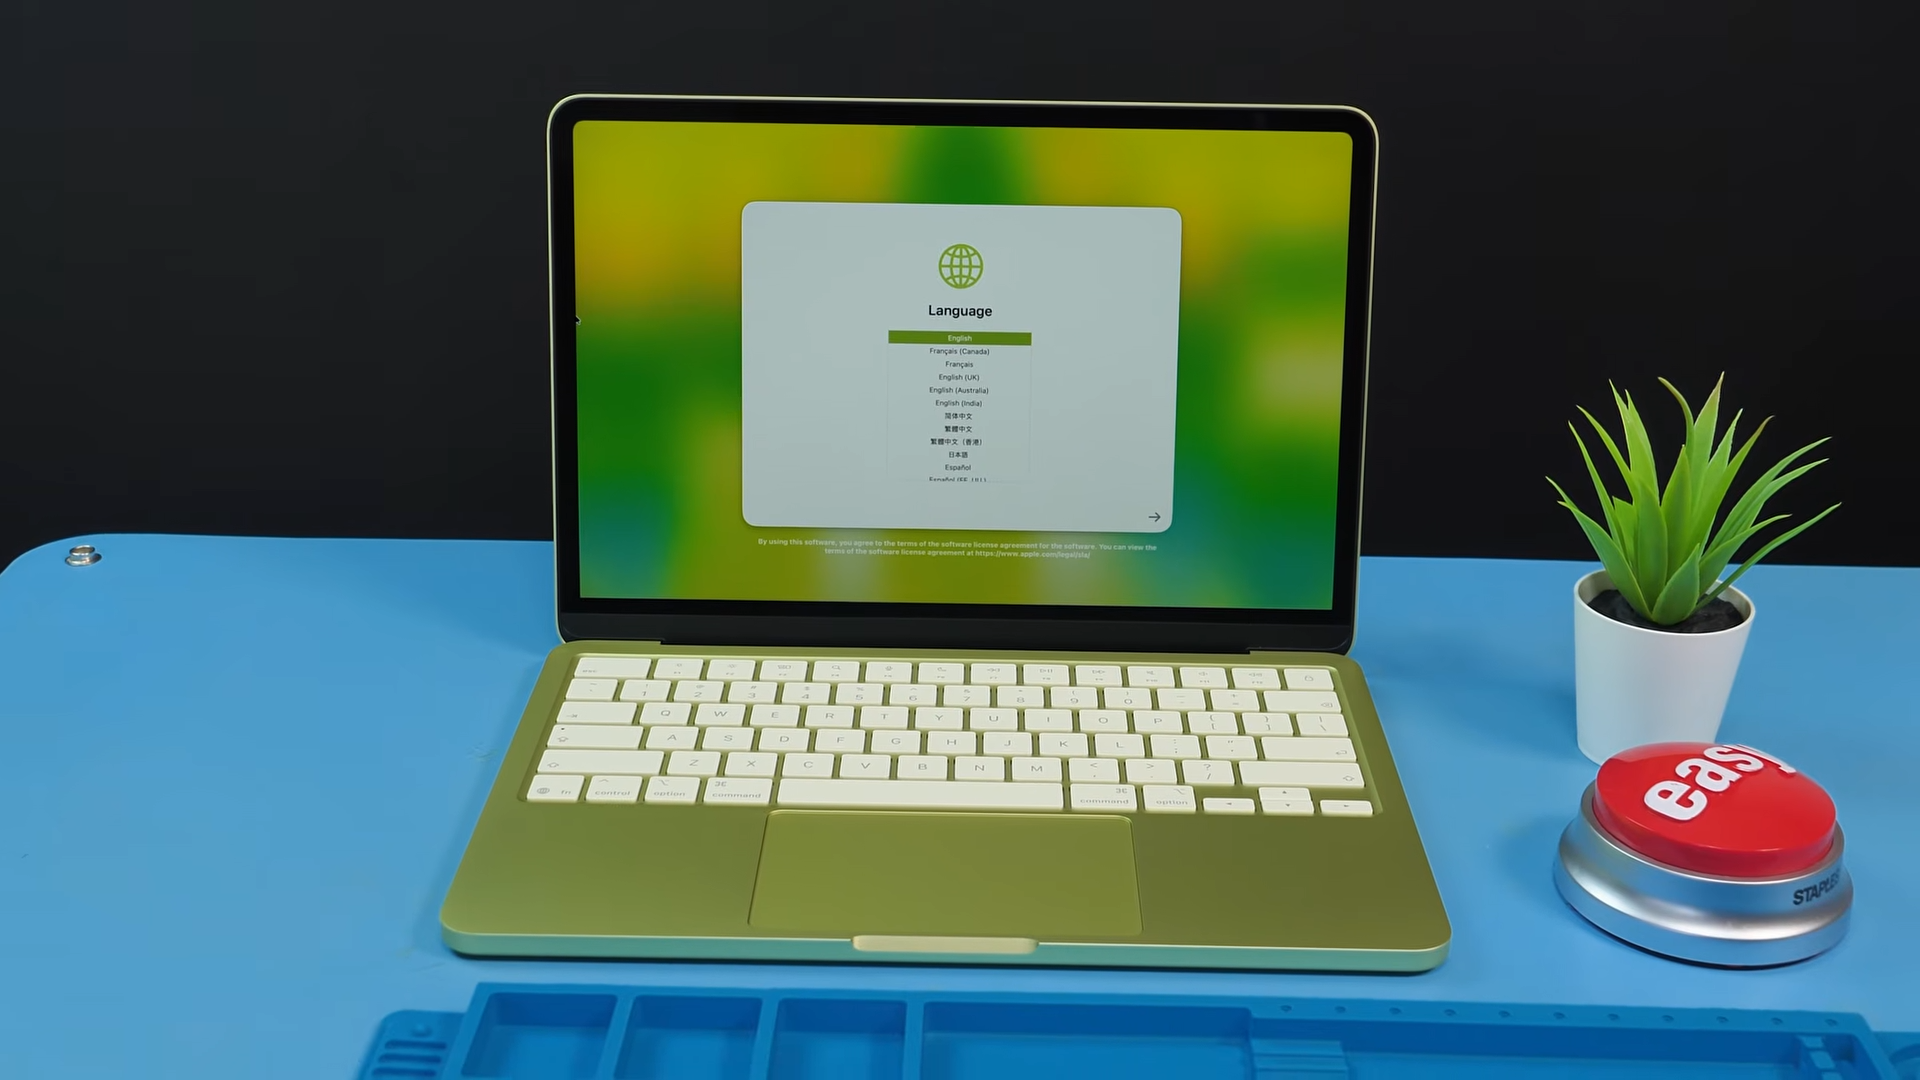
The first thing that immediately stands out is the Apple logo. Instead of the usual silver finish, it is actually color-matched to the chassis. That is something we do not usually see on MacBooks, and it looks surprisingly good.

Inside the box we get the usual paperwork, a 20W charger which is technically enough to power the device even though the MacBook Neo can charge at up to 30W, and a USB-C to USB-C cable.
The laptop itself looks great. Apple matched the internal theme with the color you pick when buying it, which gives the whole device a very cohesive look.
For this teardown we used the base 256GB model without Touch ID. Later on we also test something interesting by swapping in the motherboard from the 512GB version to see if Touch ID can be added later.
But before we get to that, we need to open it.
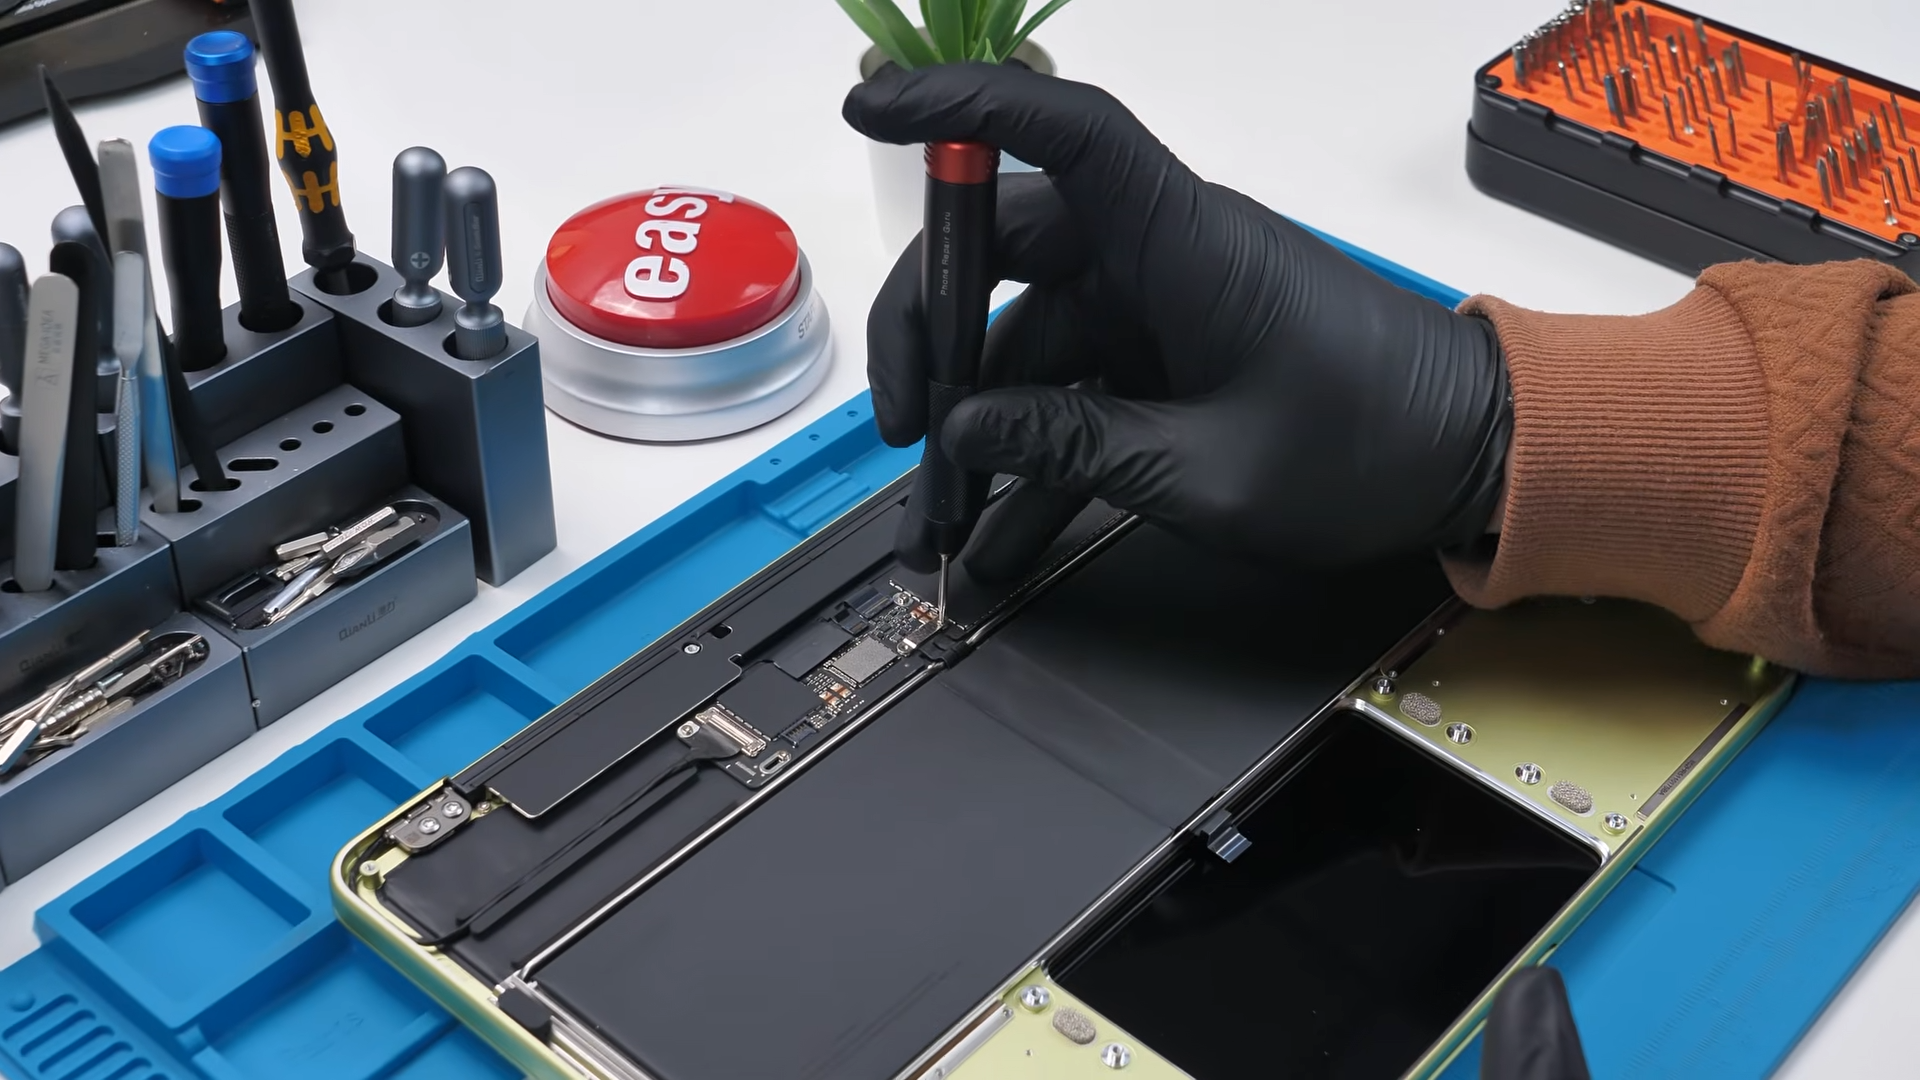
Opening the MacBook Neo
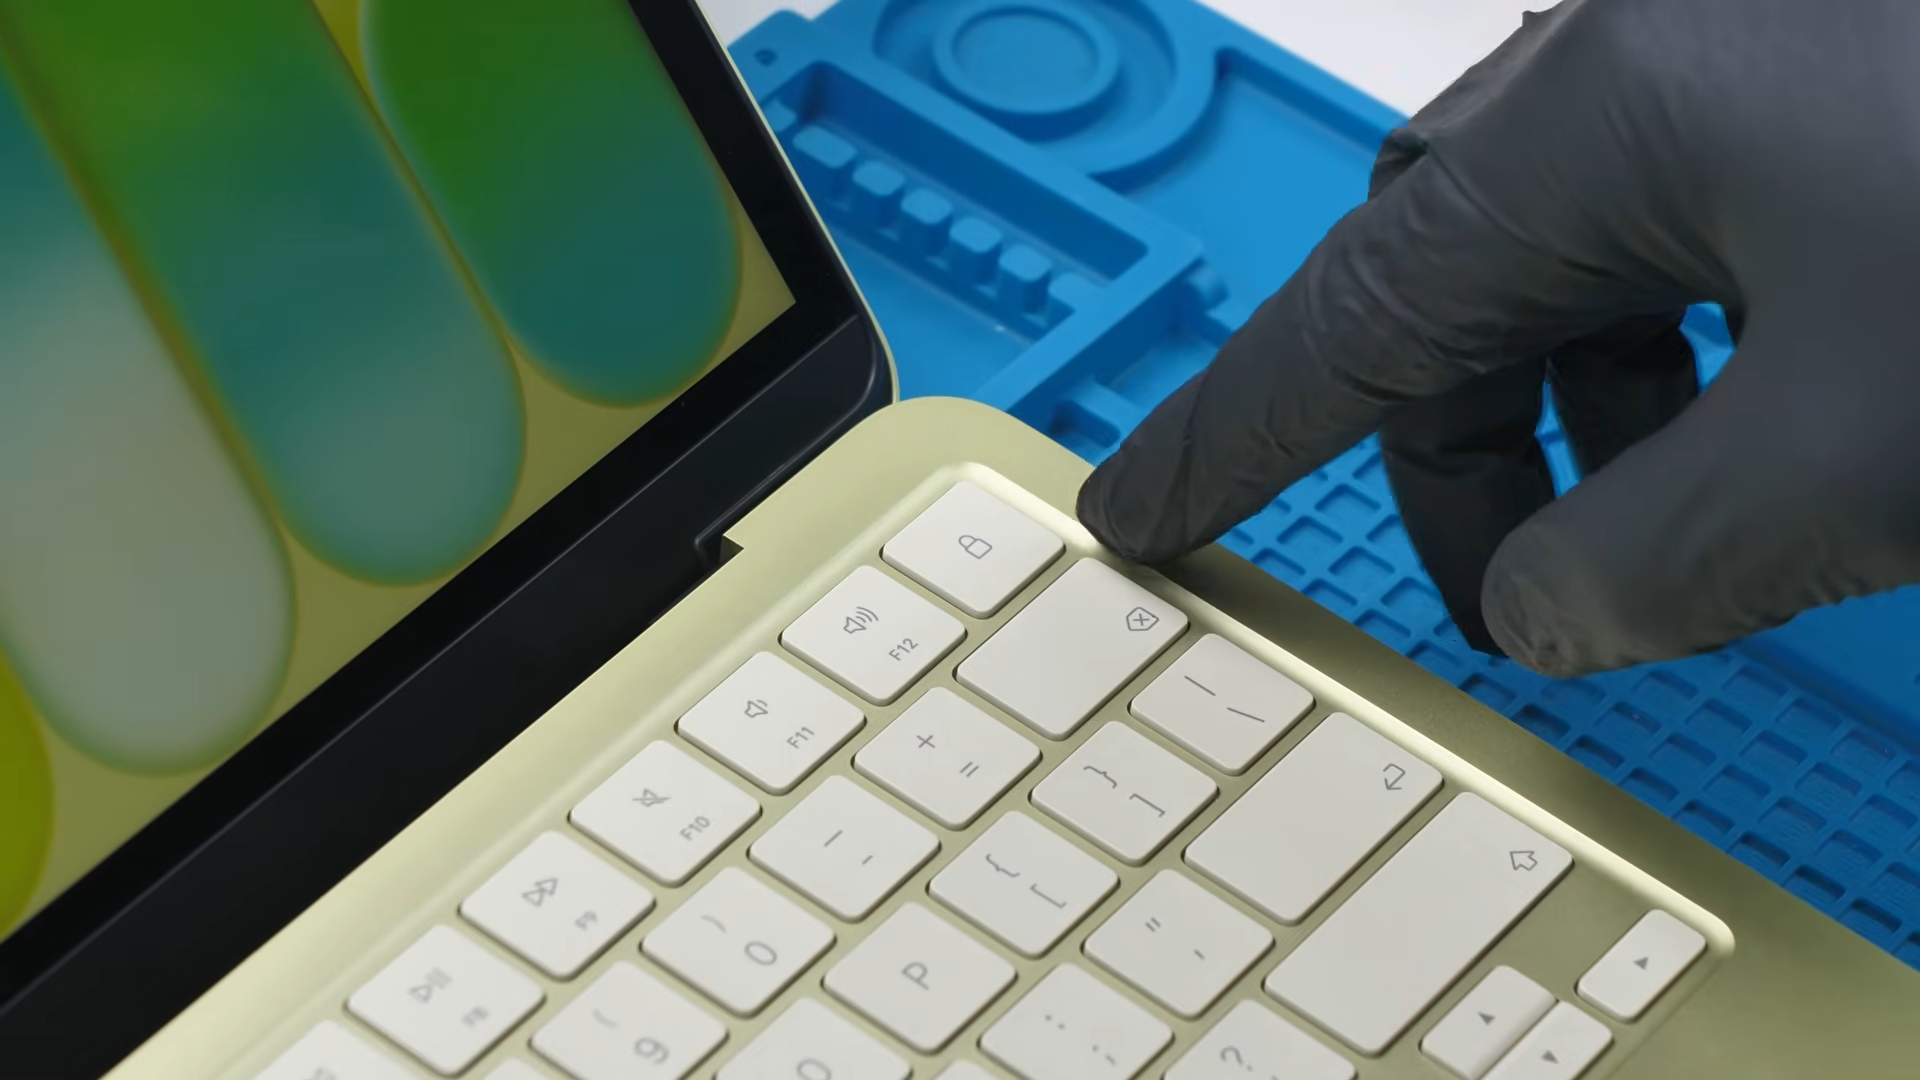
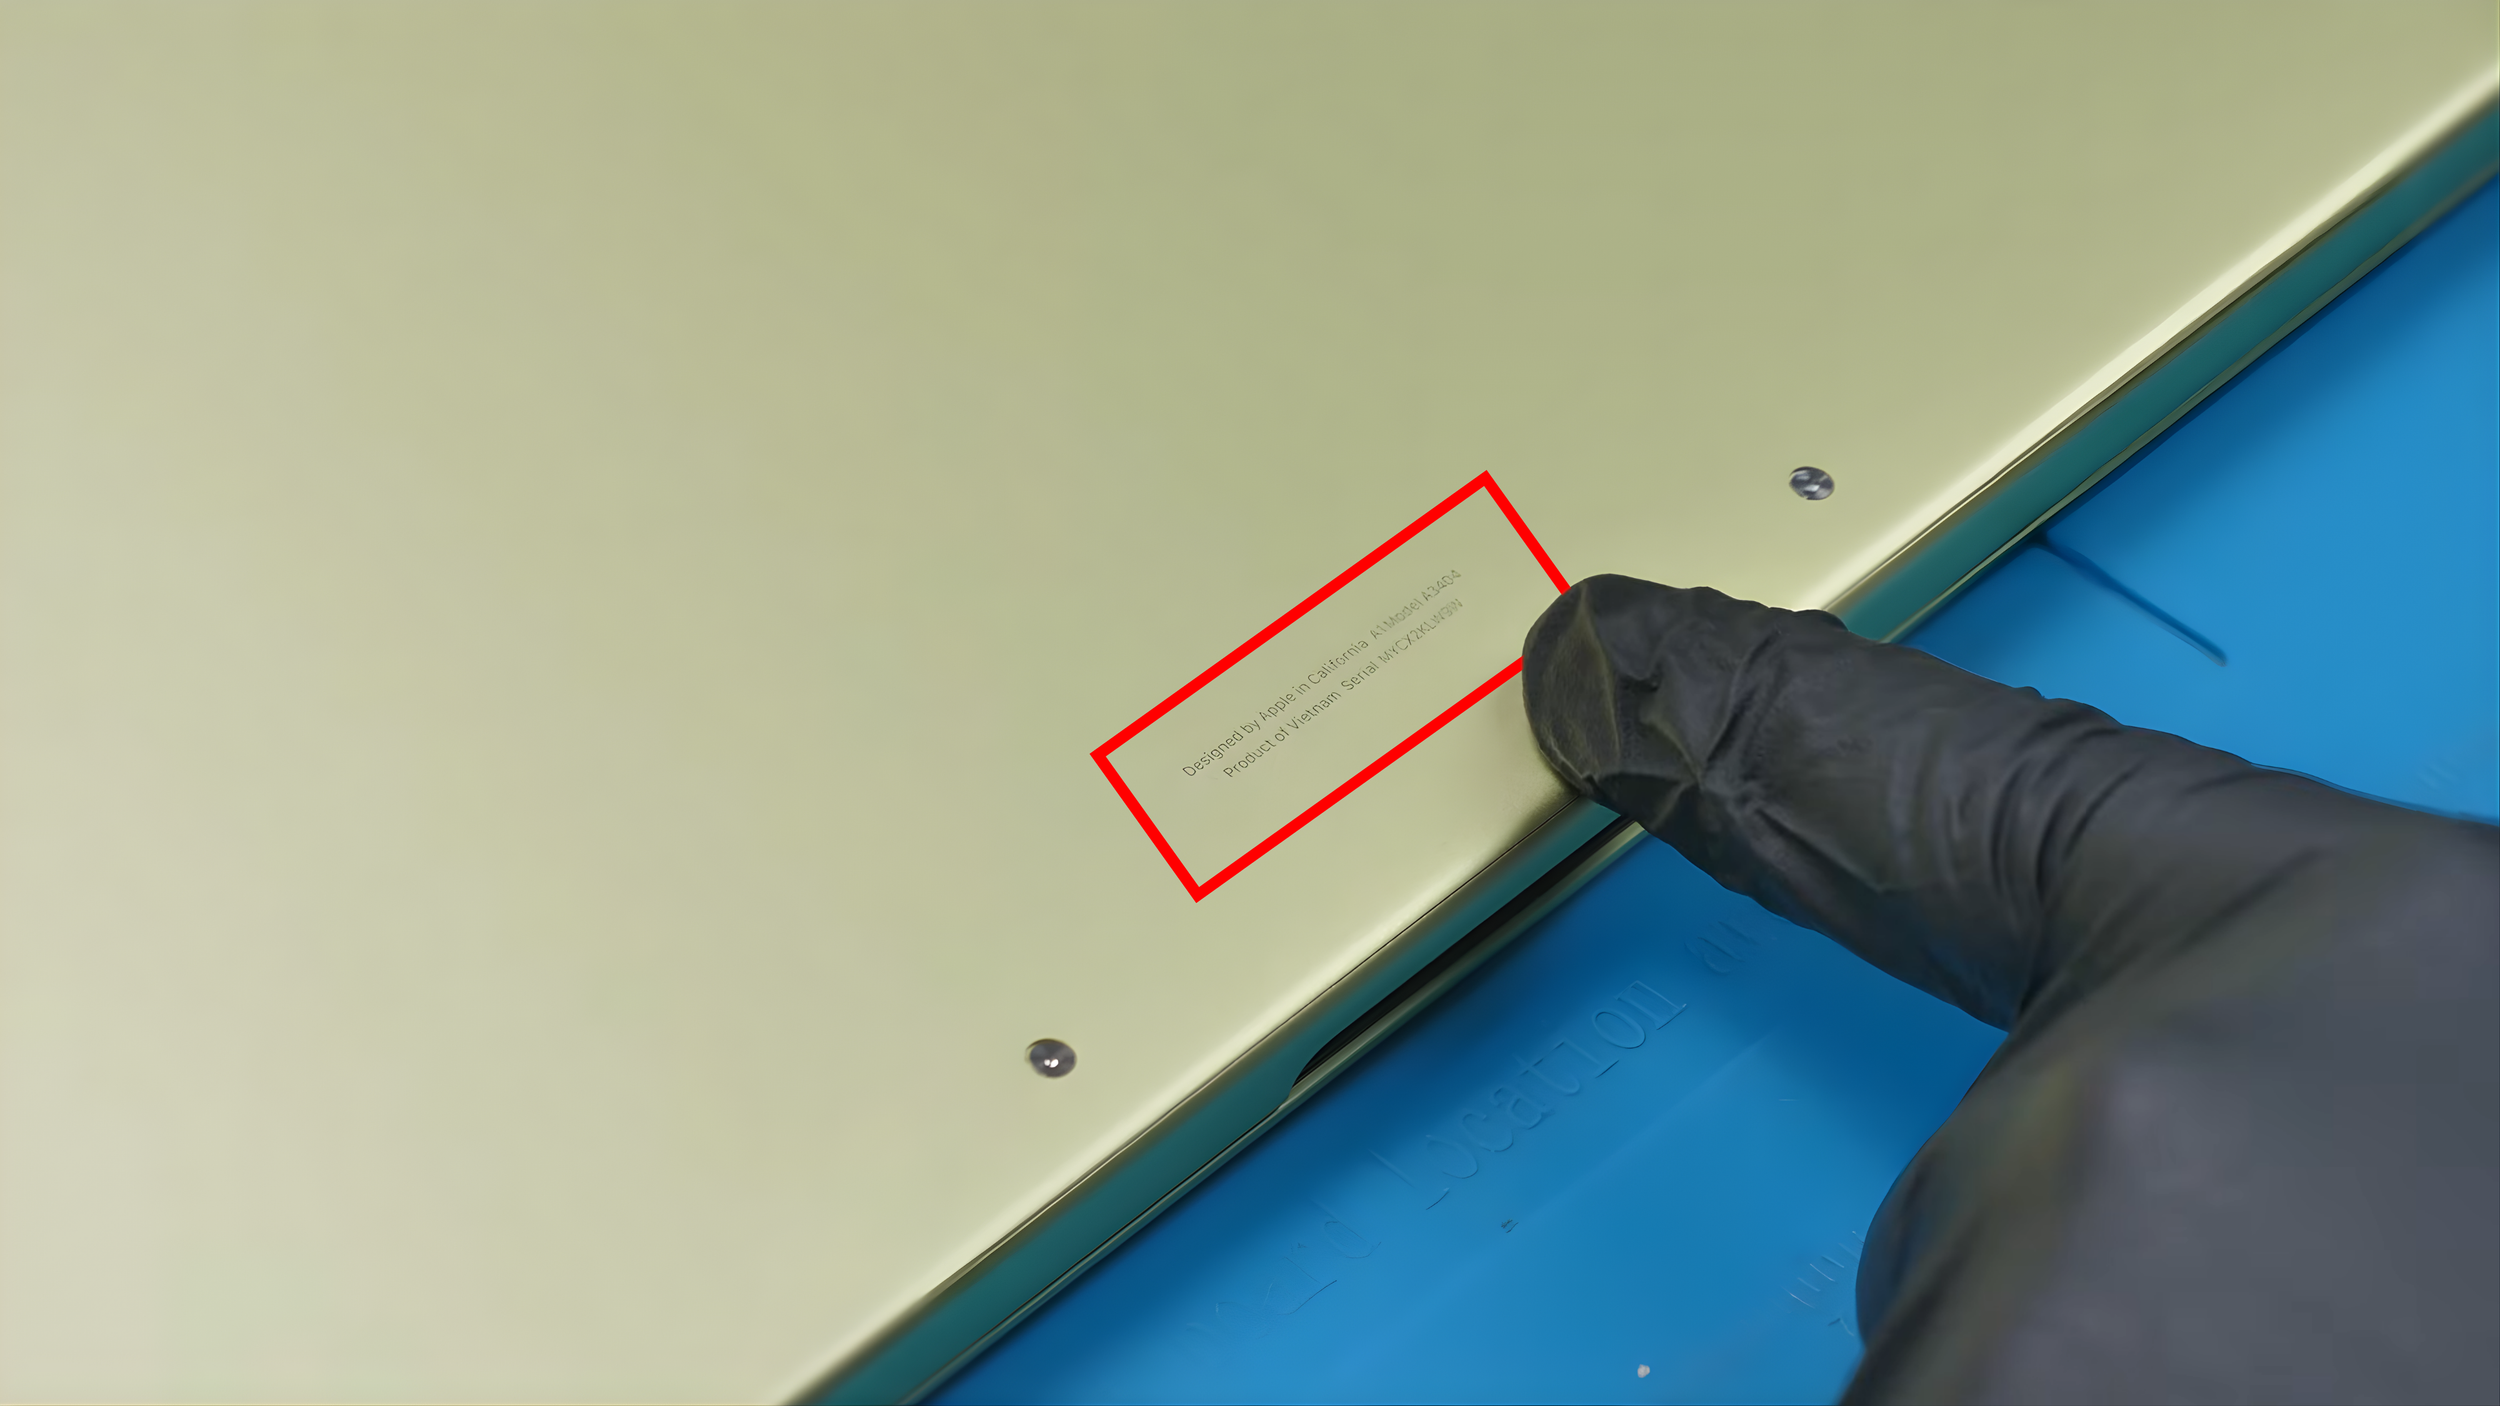
Flipping the laptop over reveals the model number A3404 along with the serial number and a set of pentalobe screws.
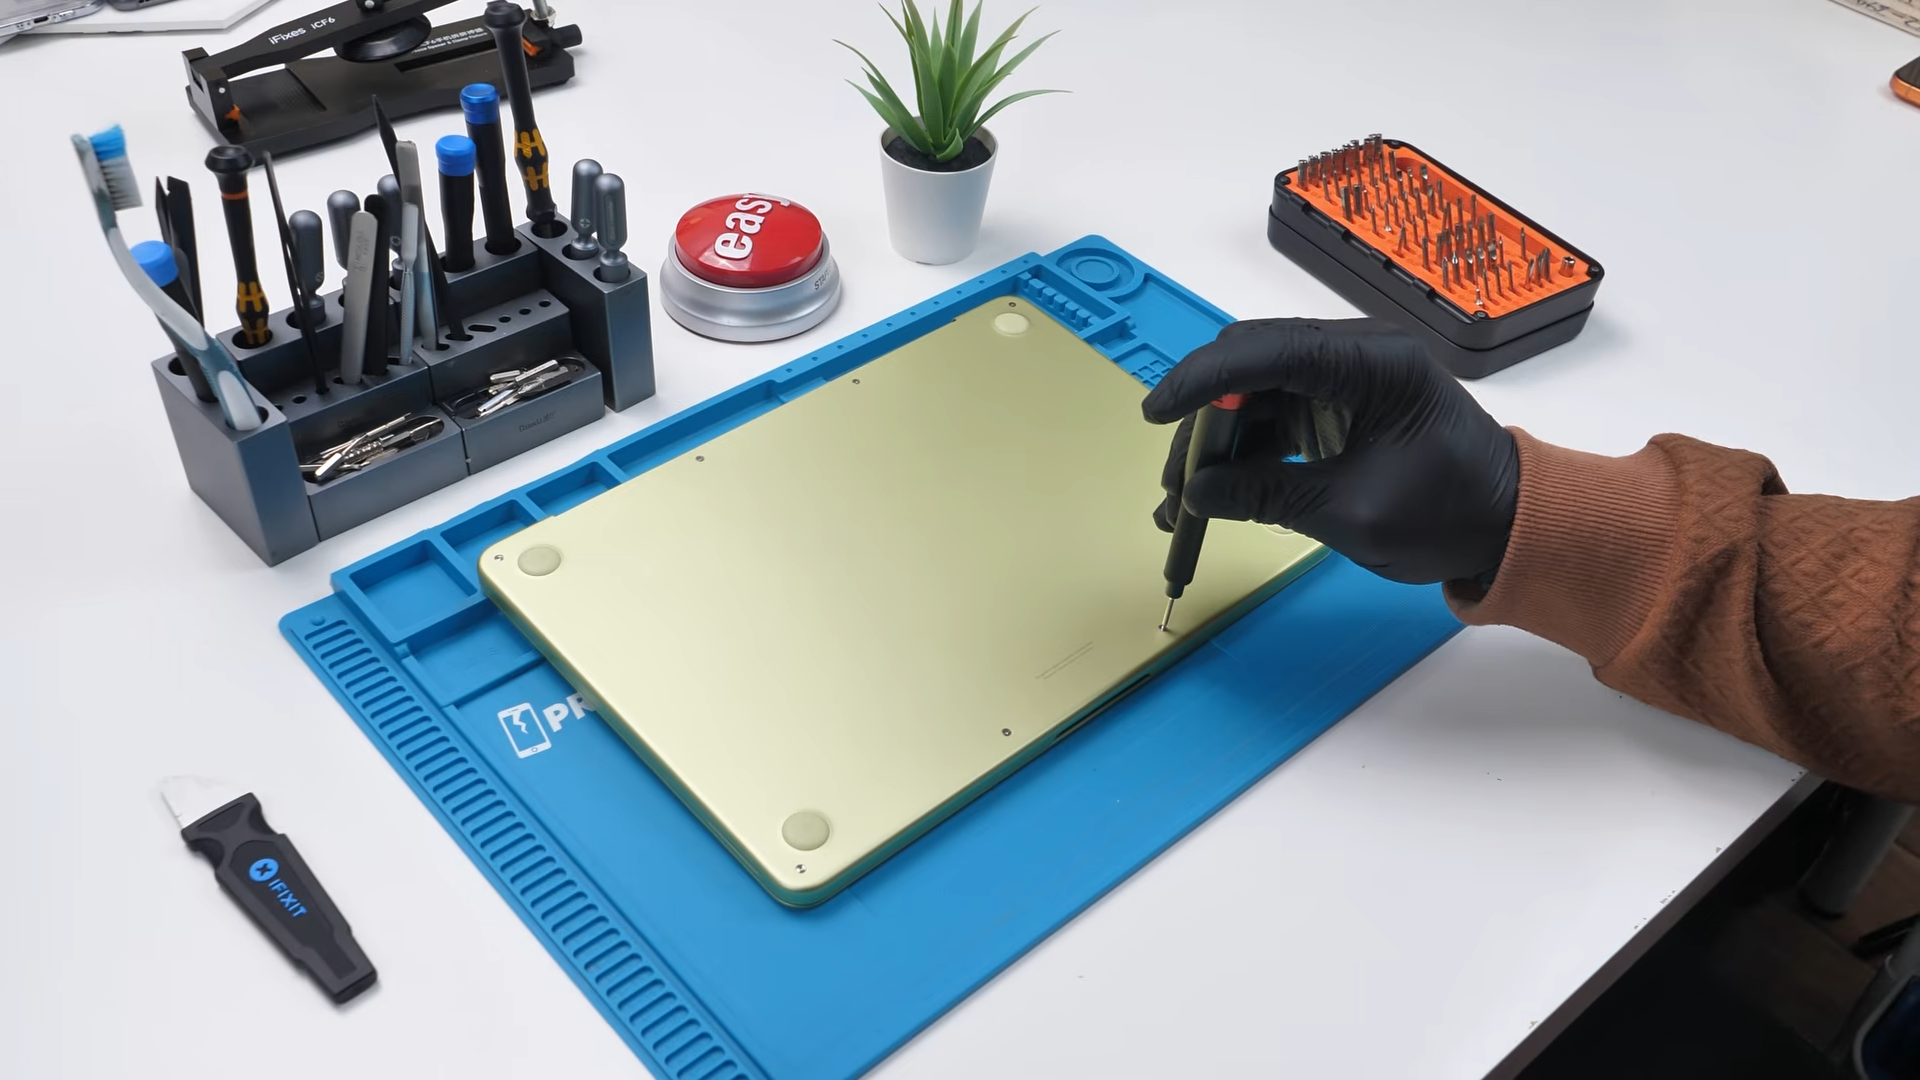
Using a P5 screwdriver bit, the screws come out easily. Because this is meant to be a more affordable laptop, repairability matters even more. If these are used in schools and something small breaks, it needs to be fixable instead of disposable.

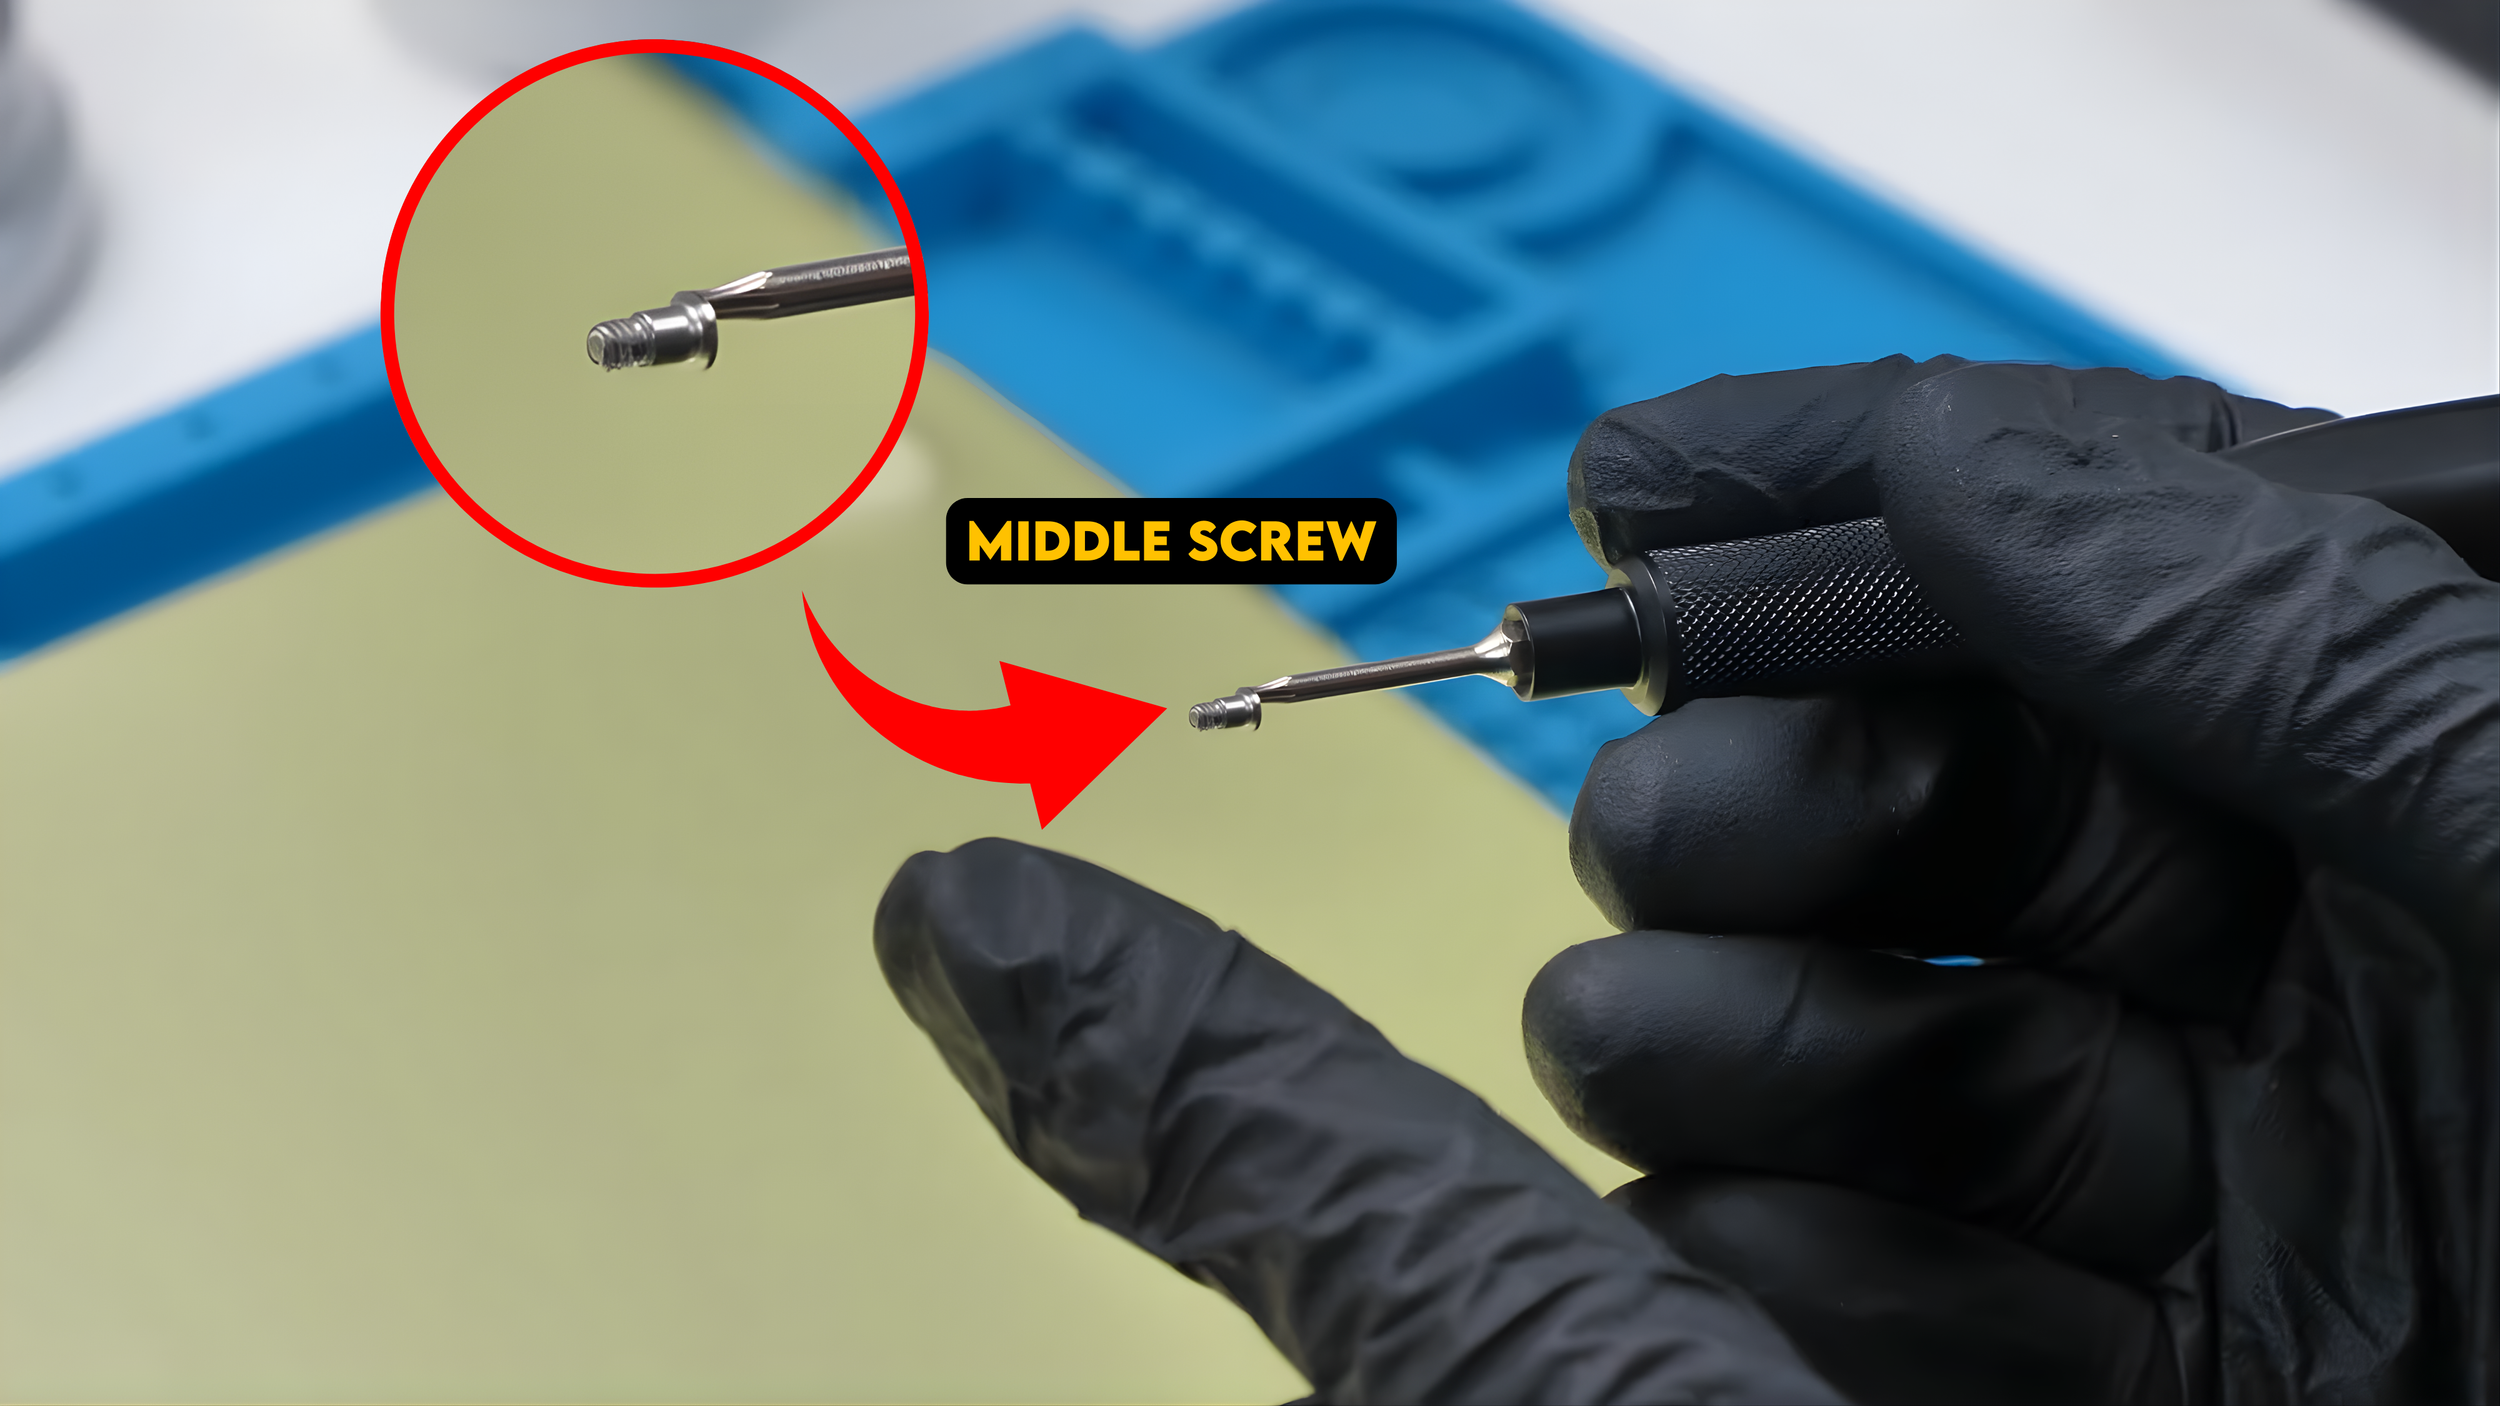
One interesting thing appears immediately. The middle screws include a small metal spacer while the side screws are standard threaded screws. That is something worth remembering when reassembling the laptop.
Once the screws are removed, the bottom cover pops off with a little bit of prying. And just like that, we get our first look inside the MacBook Neo.
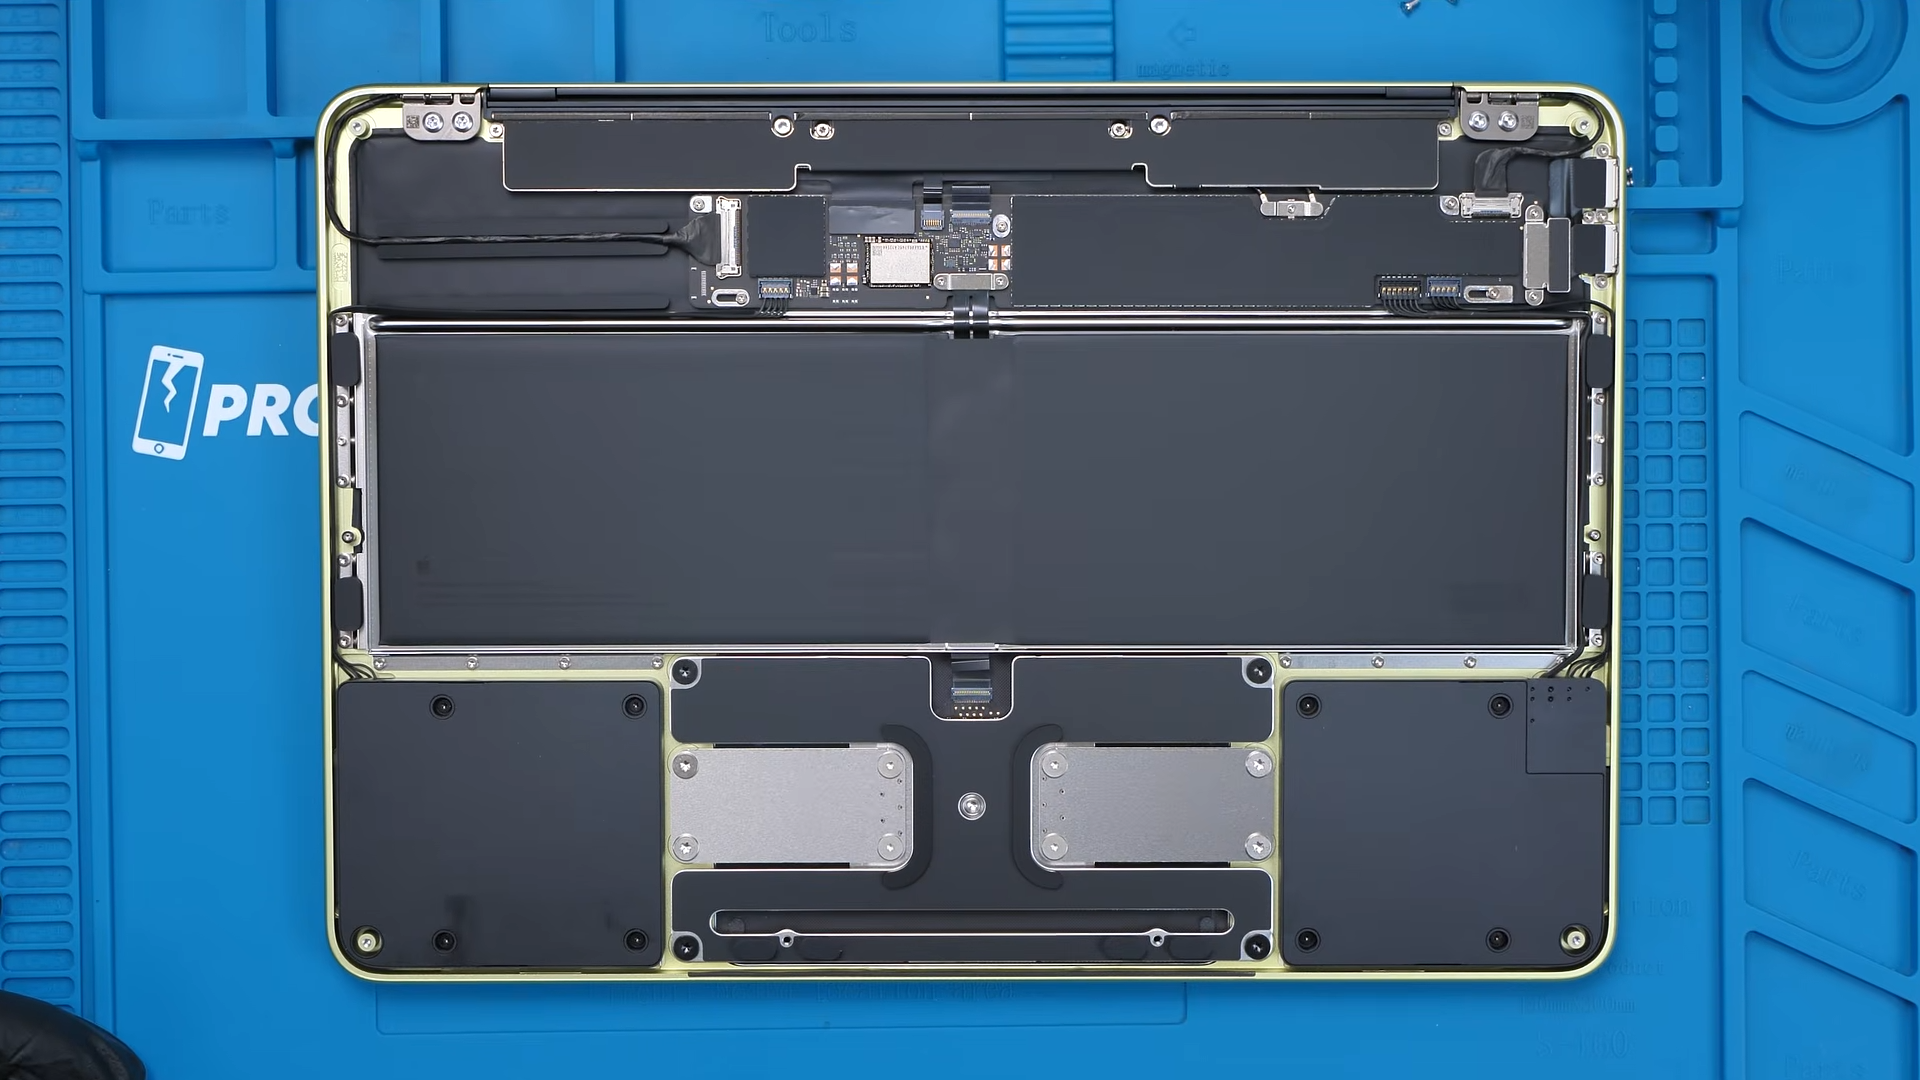
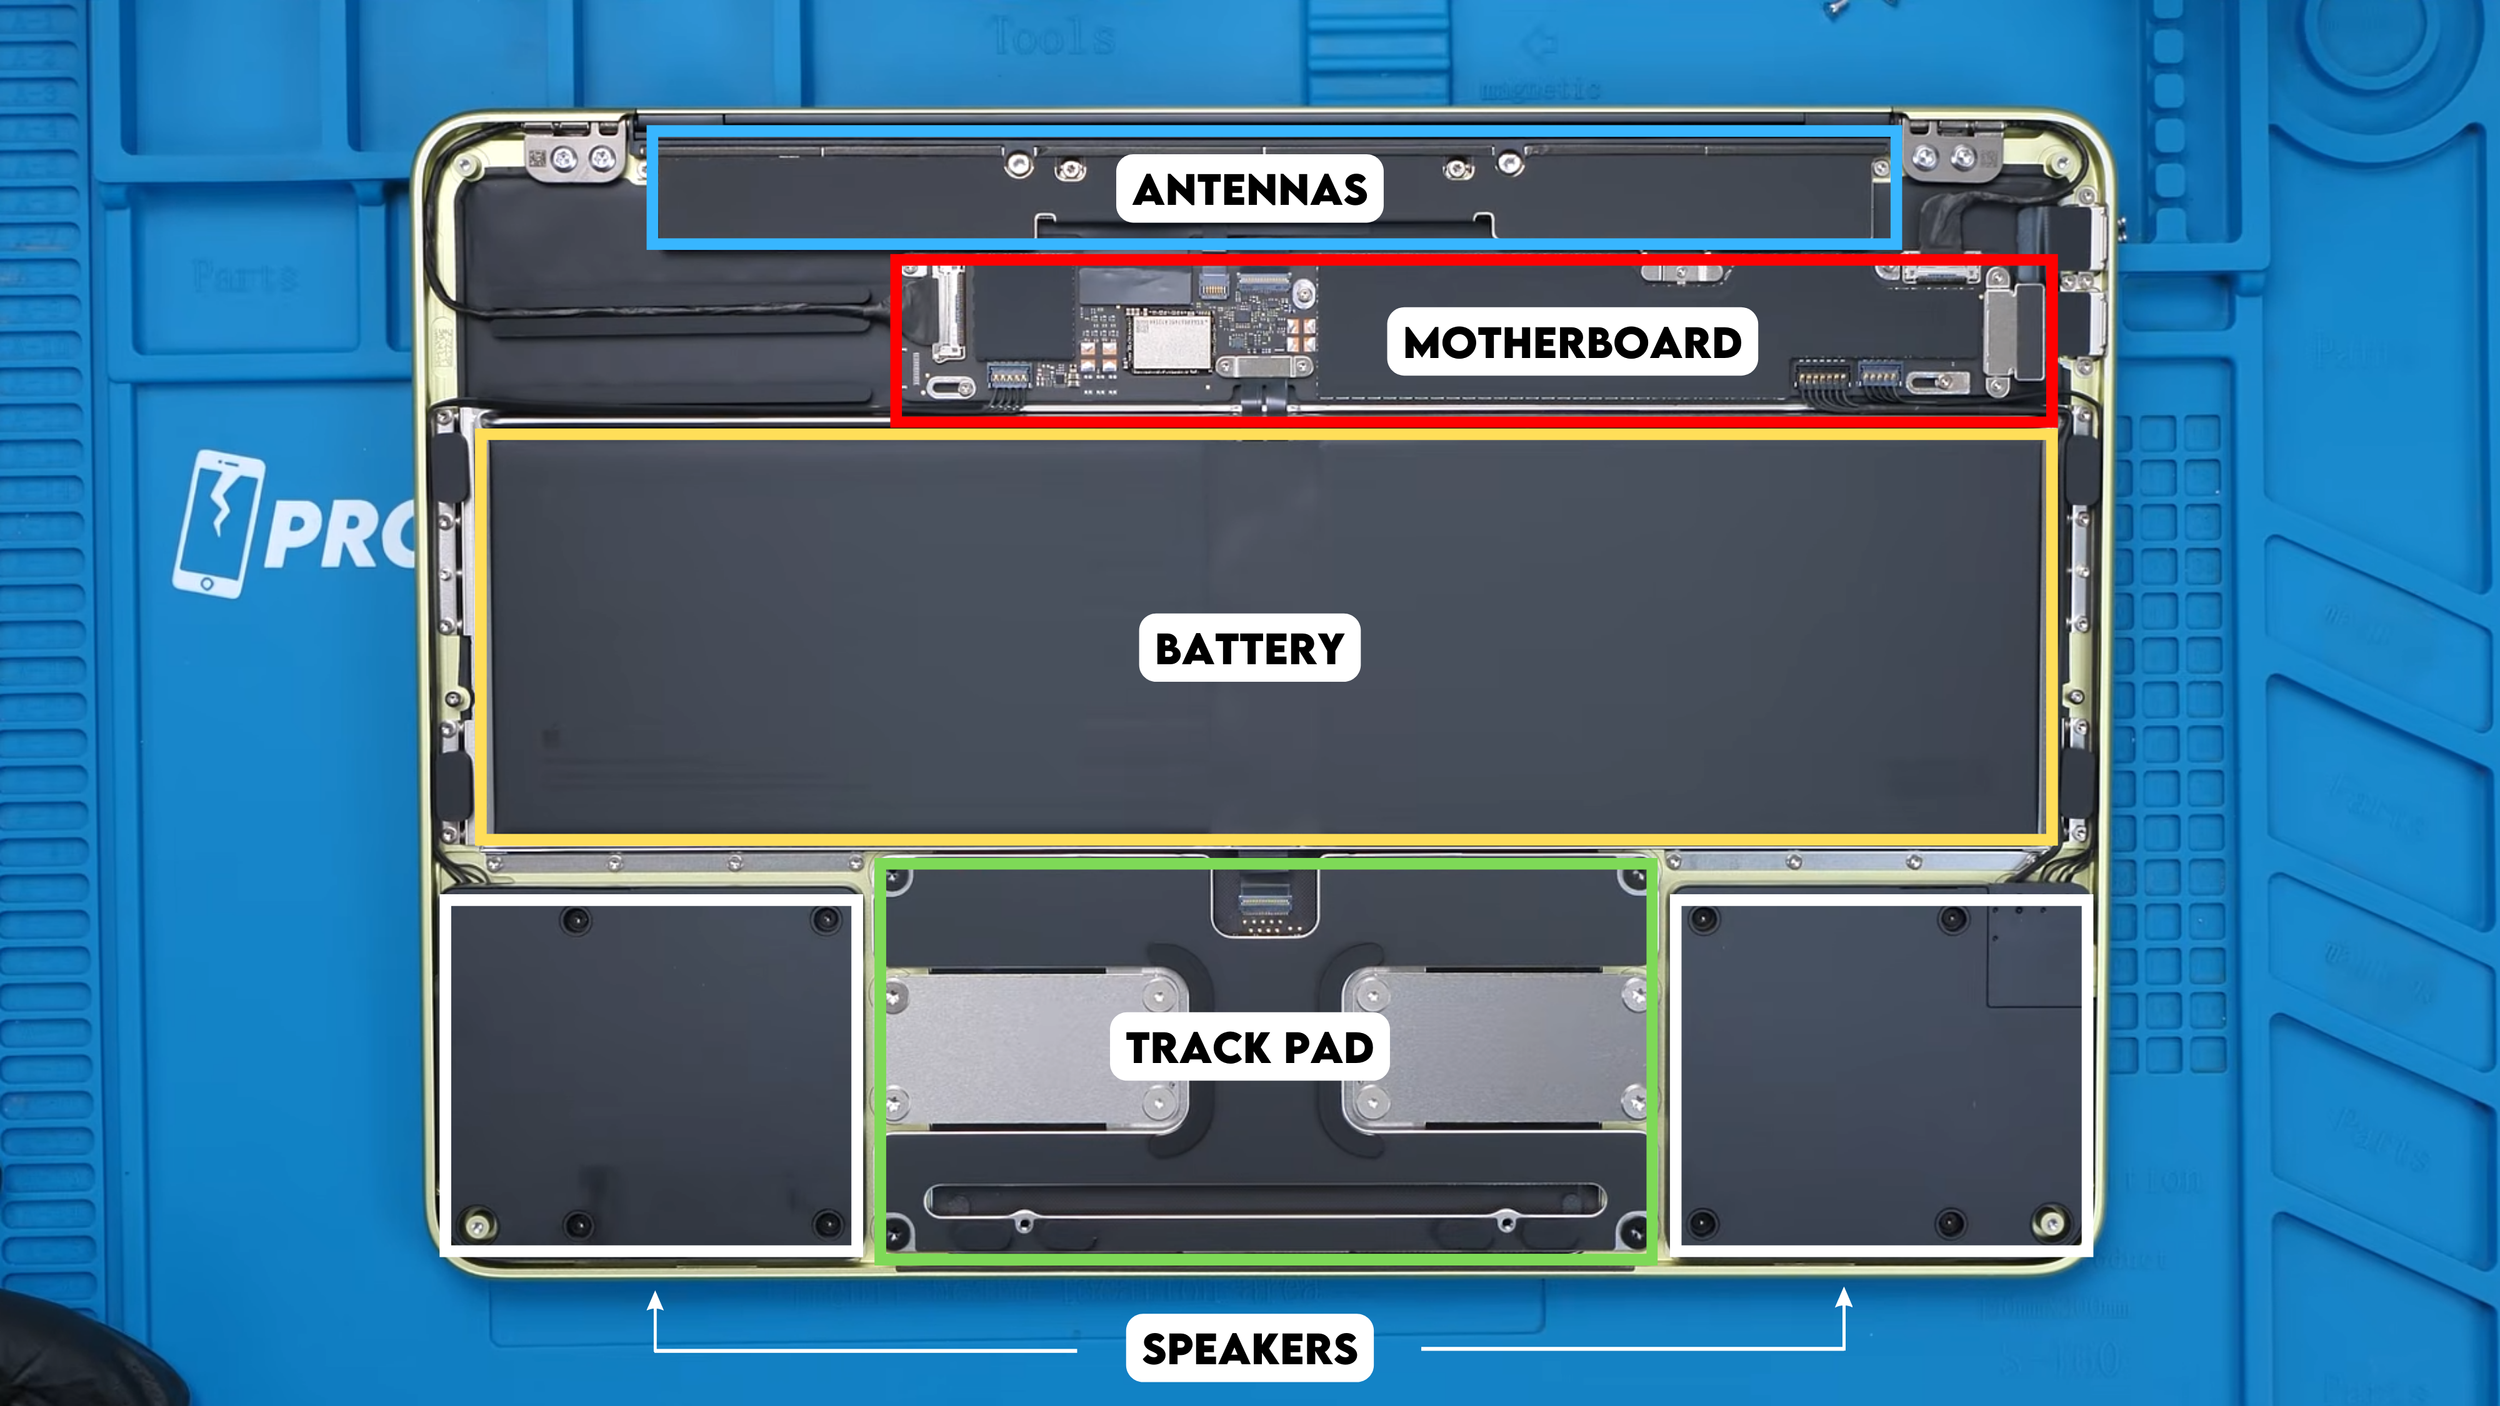
The layout is simple and clean. At the top sits the motherboard, the battery occupies the center, and the side-firing speakers are located at the bottom next to the trackpad.
It actually looks pretty good for a budget laptop.
Removing the Speakers and Headphone Jack
We start the teardown with the speakers.
Each speaker is held in place by four T4 screws. Despite taking up a large amount of space inside the laptop, early impressions say the speakers themselves are not amazing. Still, it is a budget machine so that is somewhat expected.

Once the screws are removed, the left speaker lifts right out. No adhesive. No hidden clips, just four screws and a connector. That is almost suspiciously easy for an Apple device.
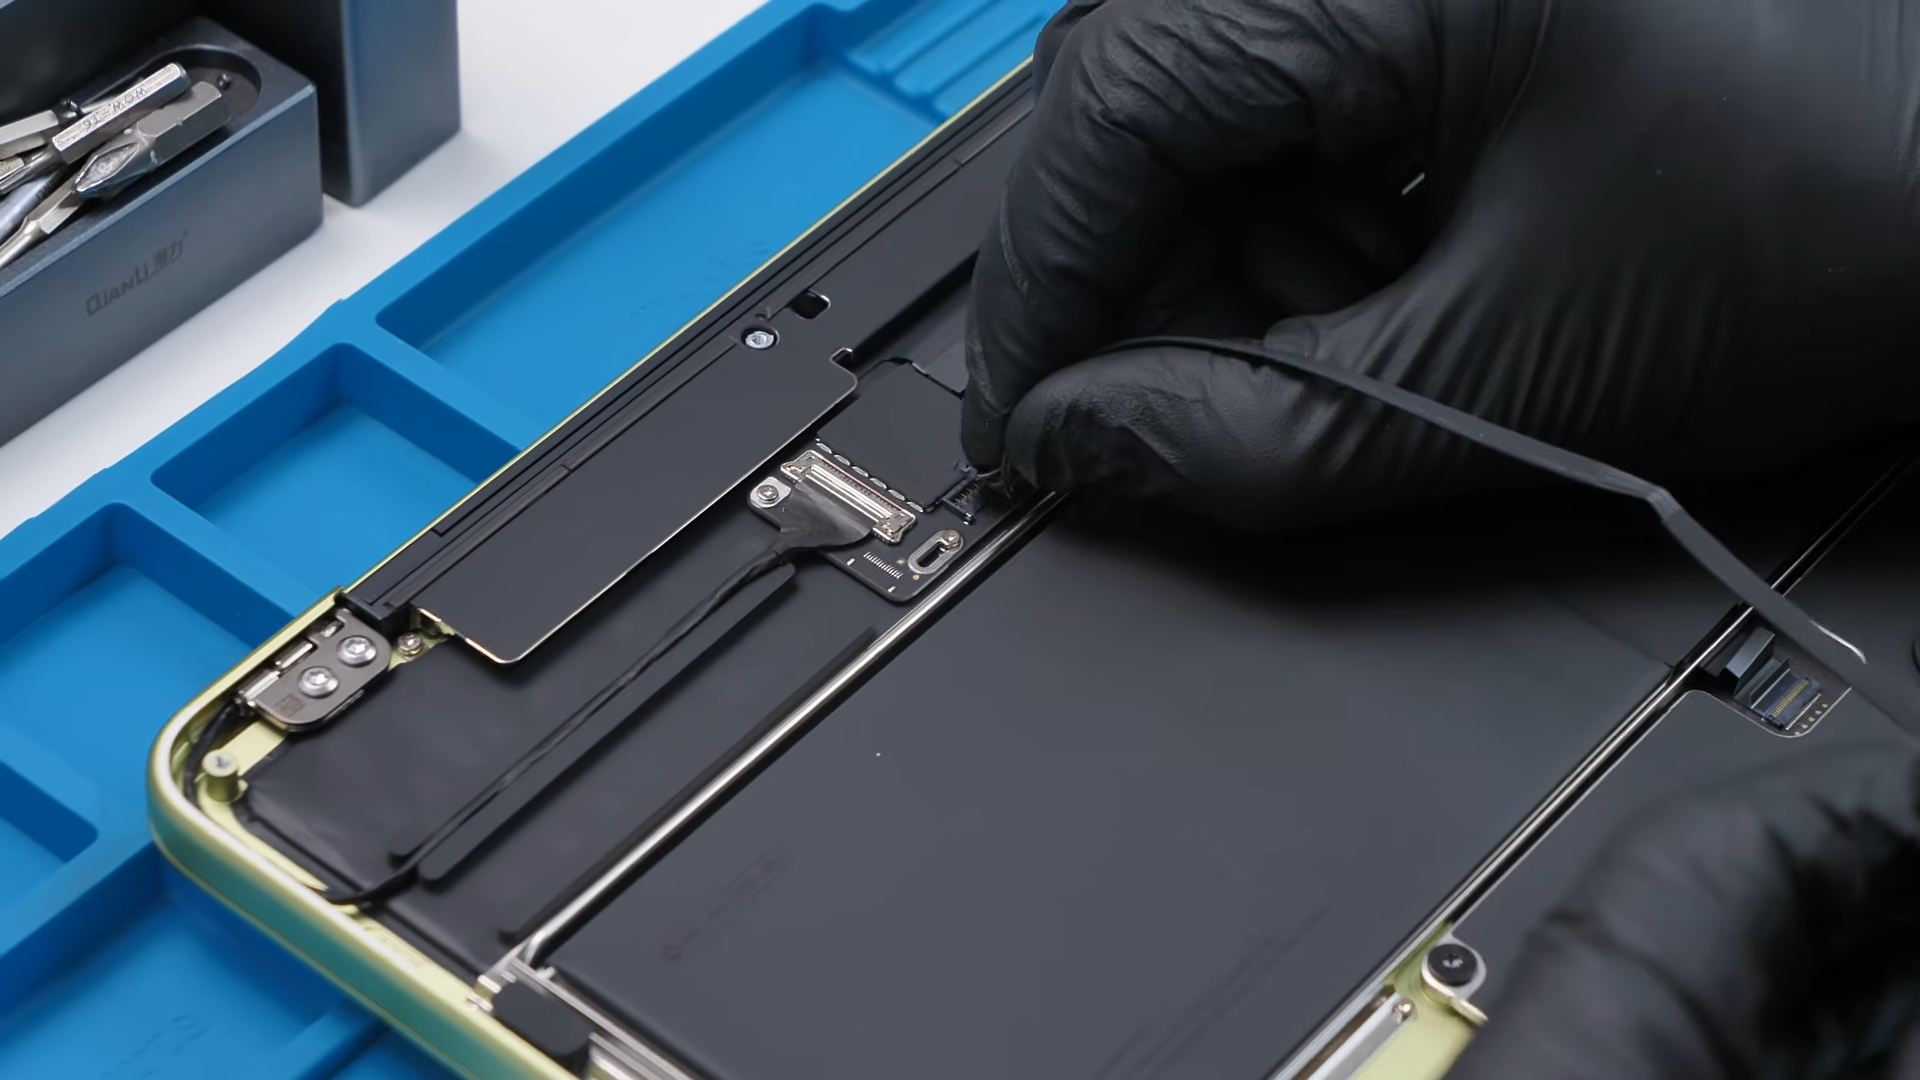
The right speaker comes out exactly the same way, and underneath it we find the headphone jack.
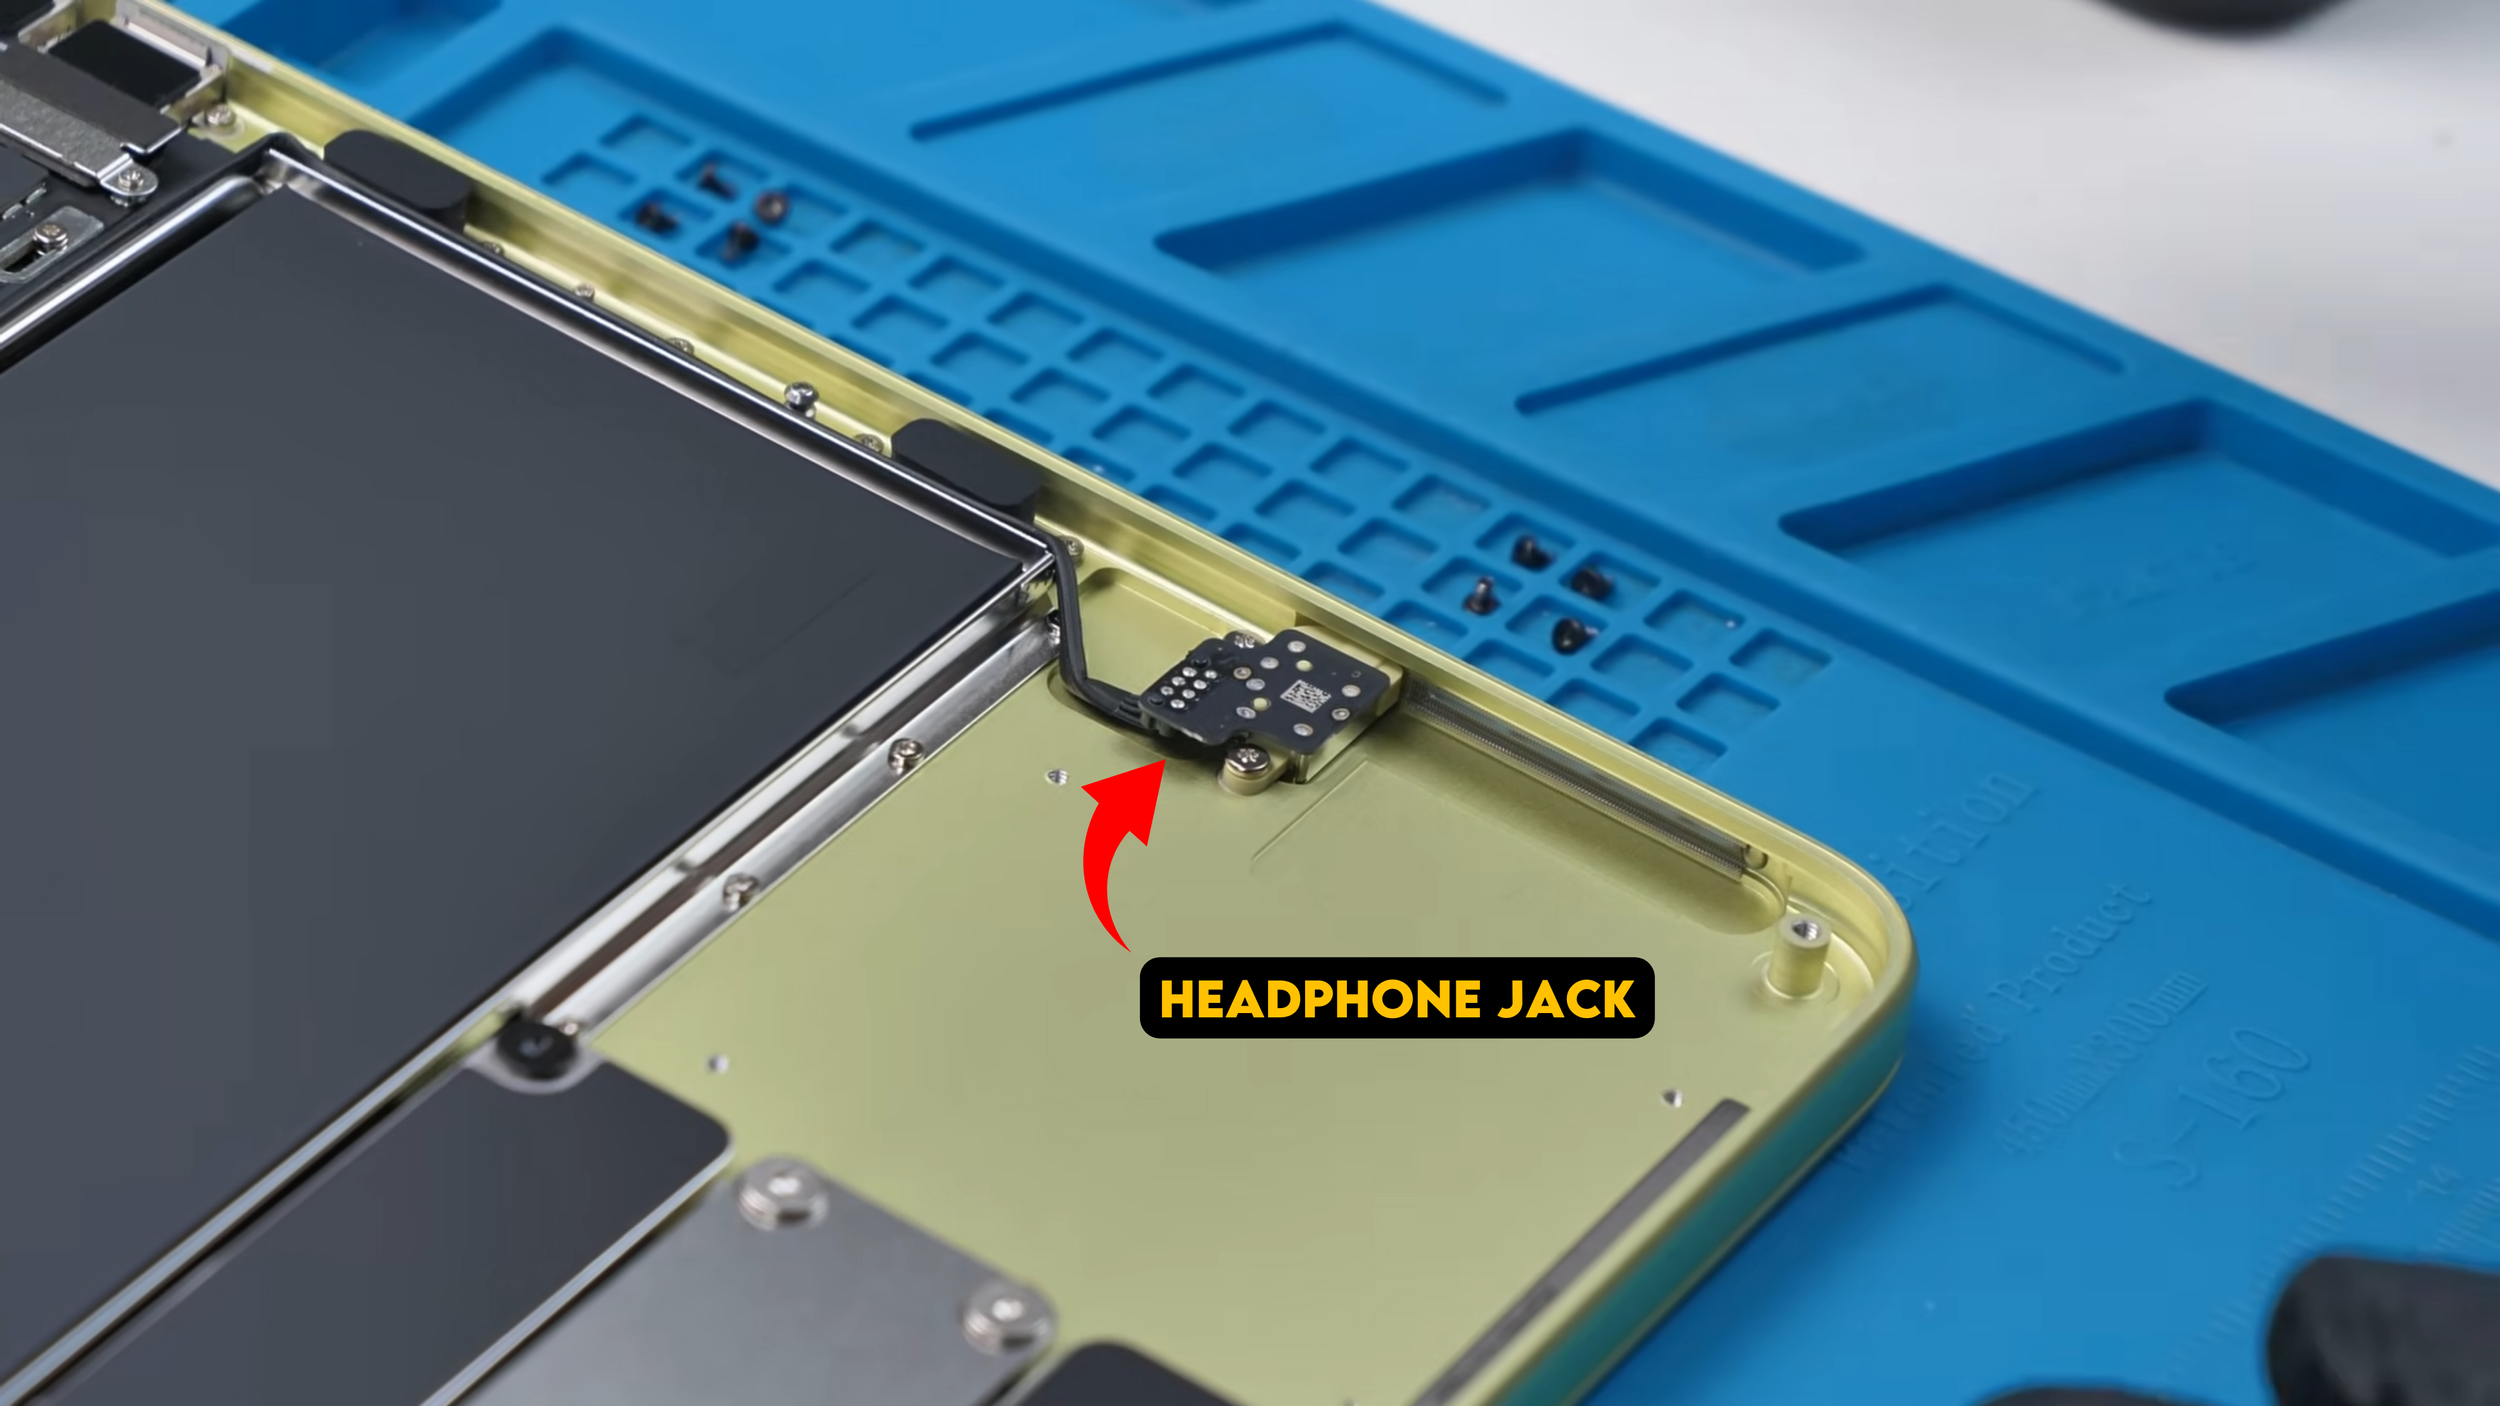
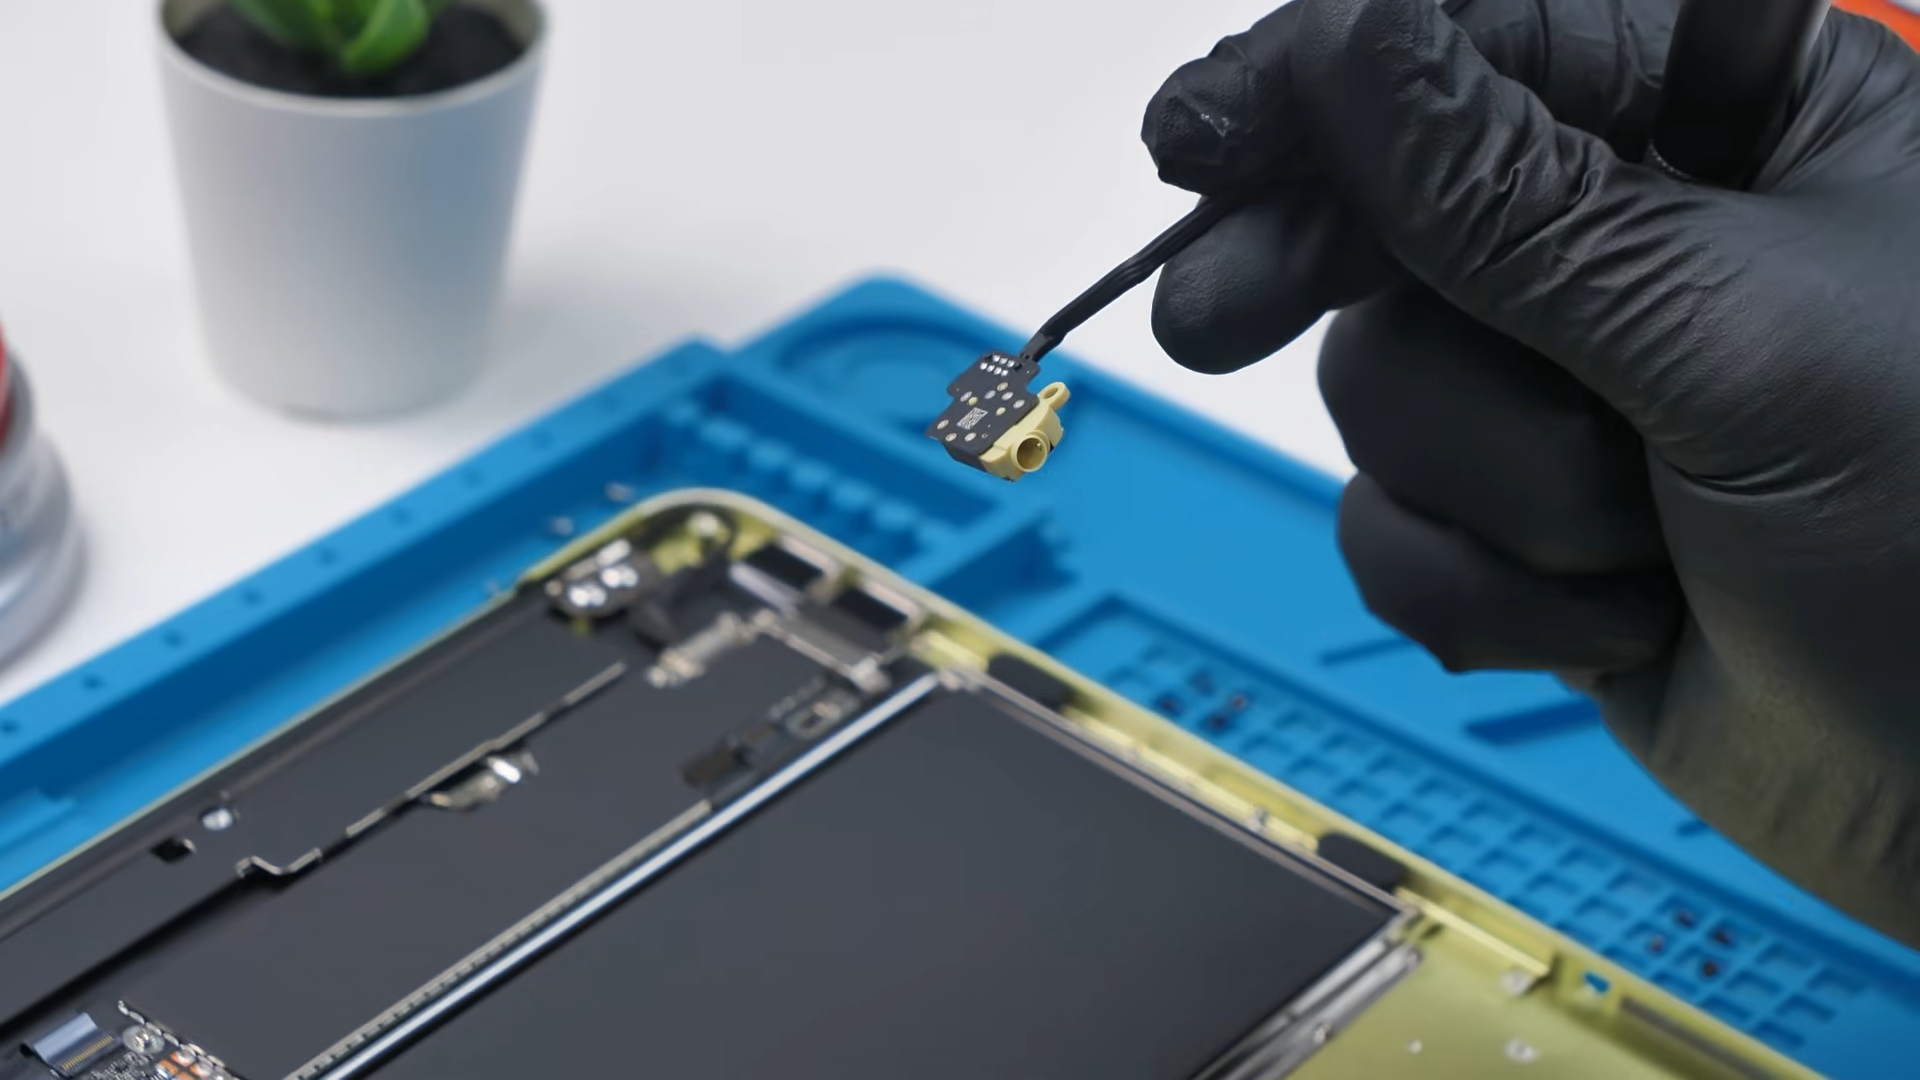
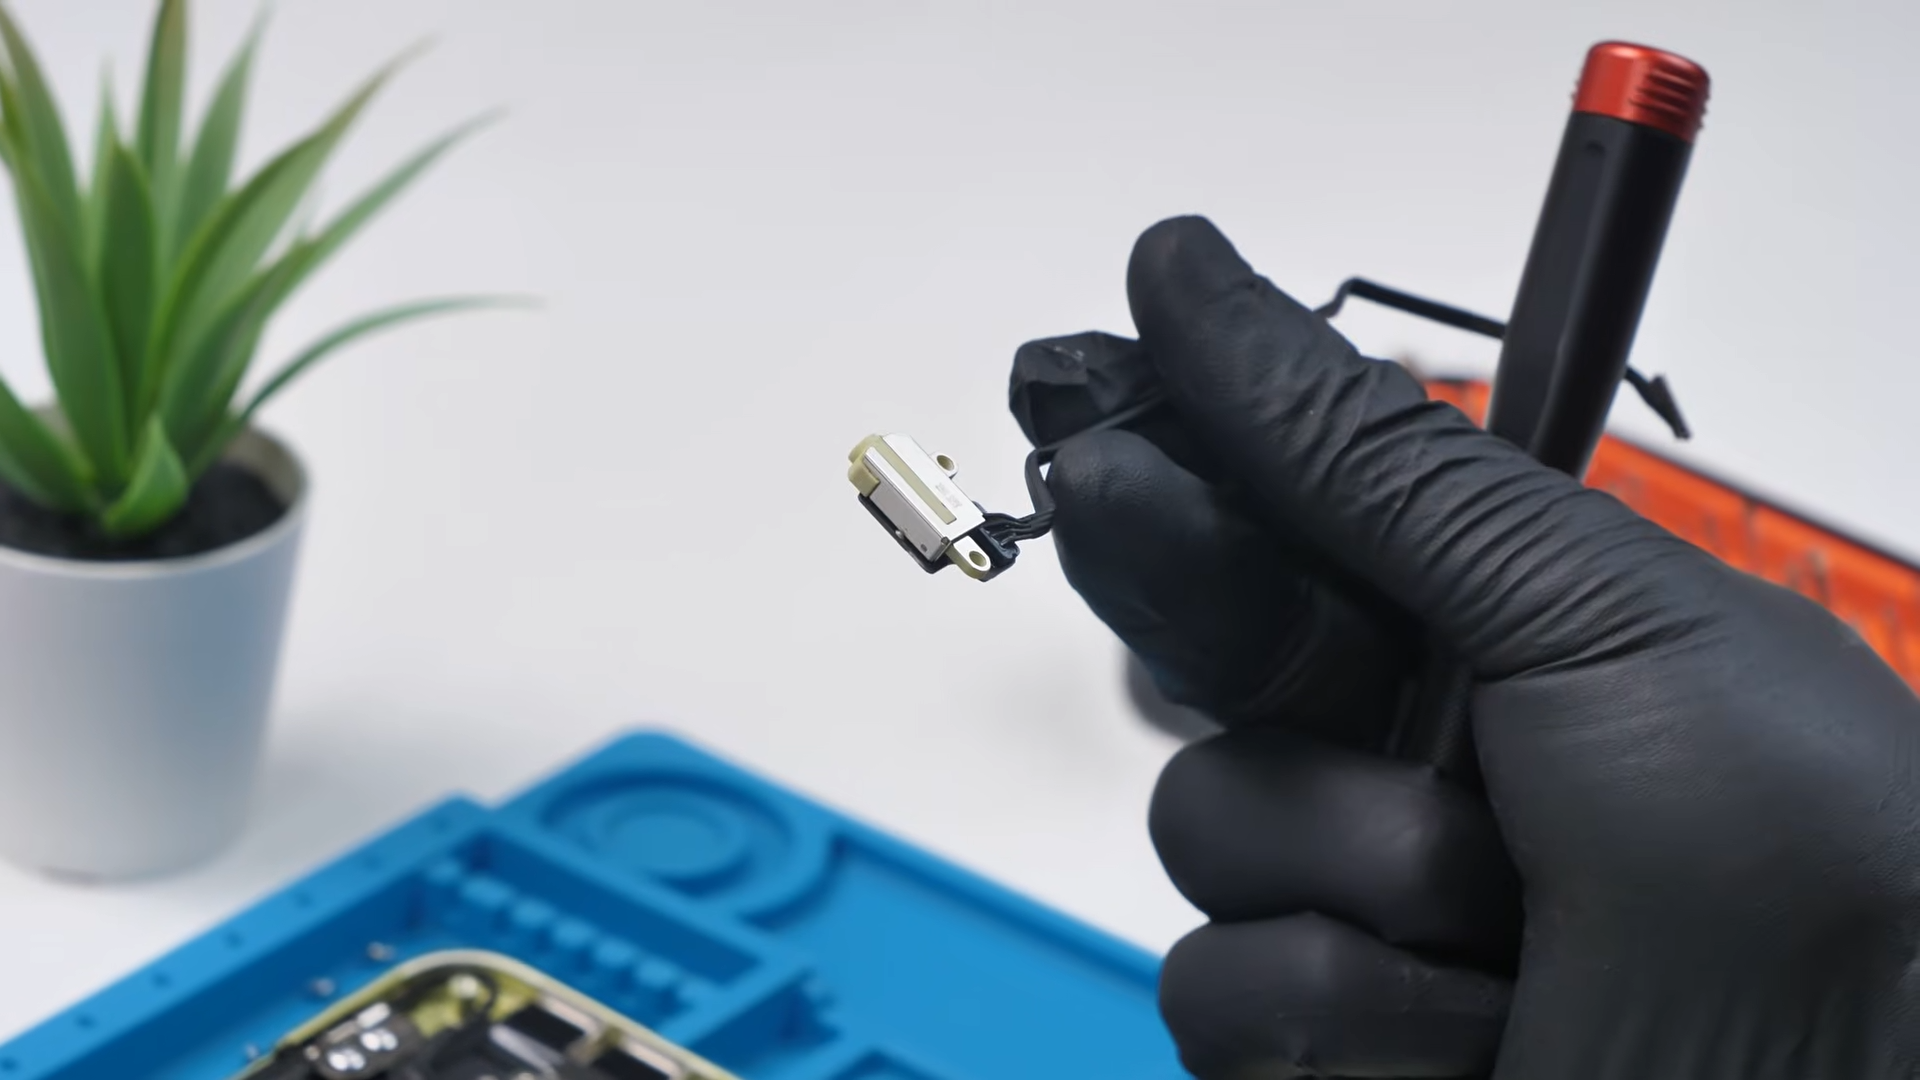
The headphone jack is also modular. No adhesive again. Just remove it from the connector and it pops right out. That is another surprisingly repair-friendly design choice.
The Mechanical Trackpad
Next up is the trackpad, and this is where Apple made one of the biggest design changes compared to most MacBooks. Unlike higher-end models that use haptic feedback, the MacBook Neo uses a physical mechanical button.
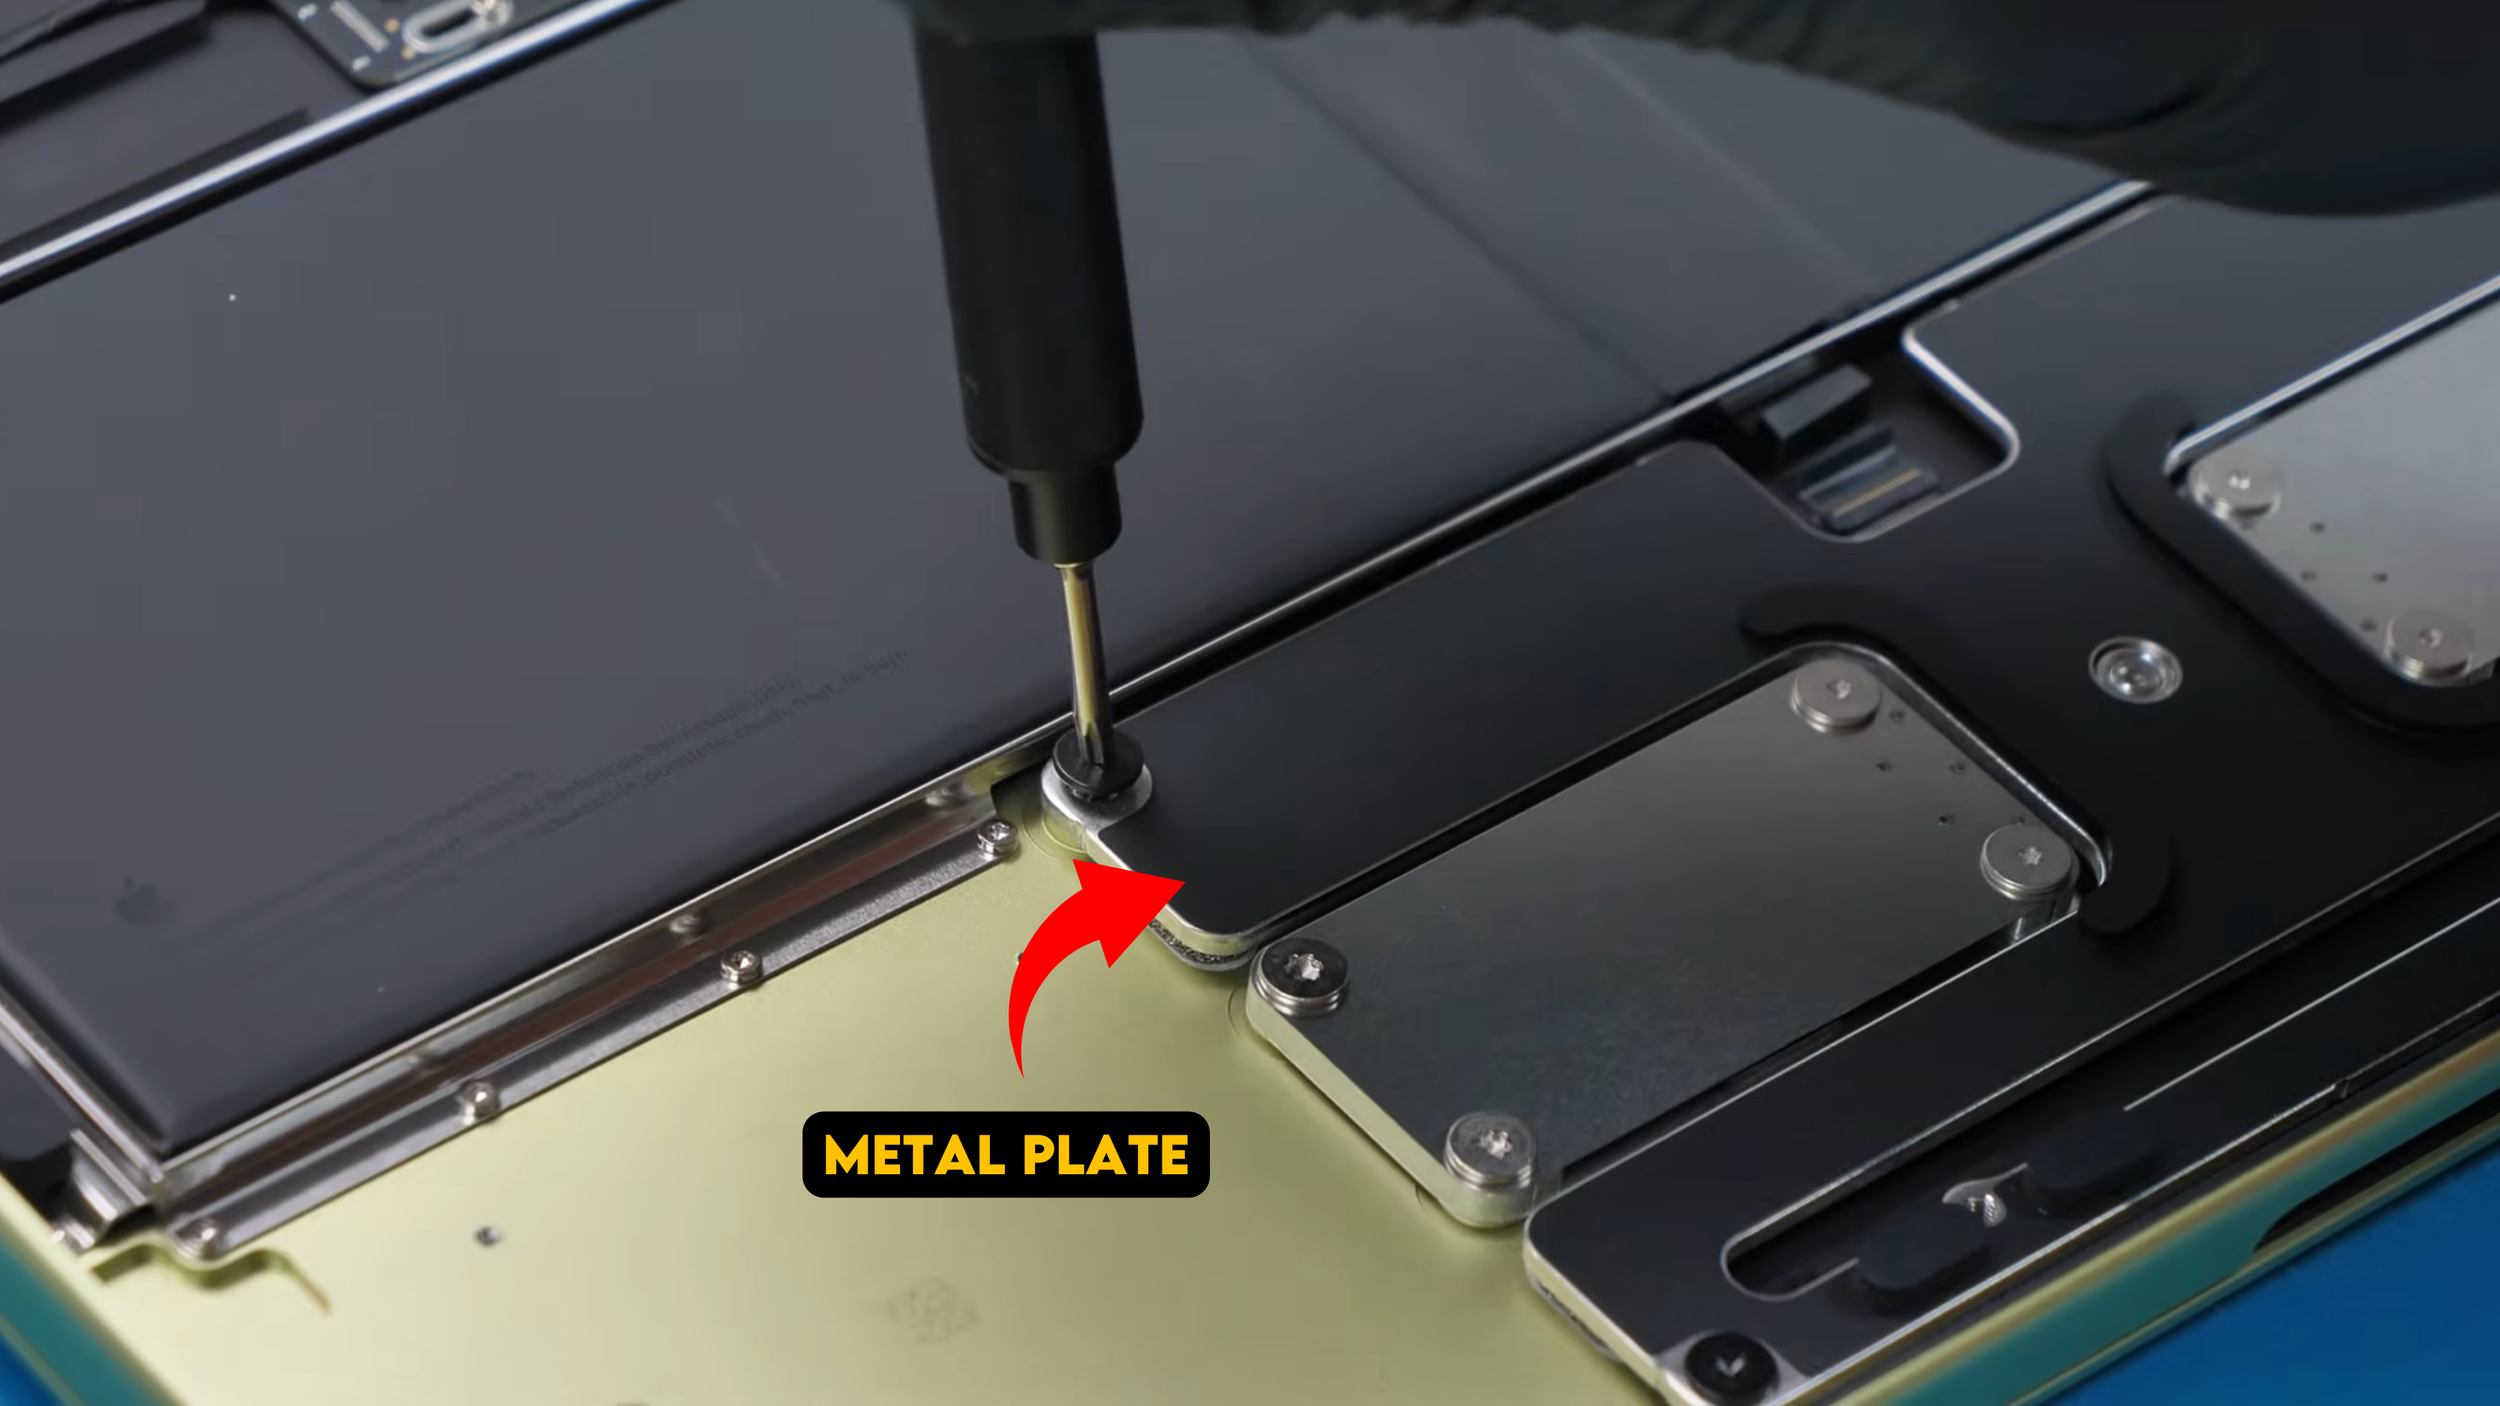
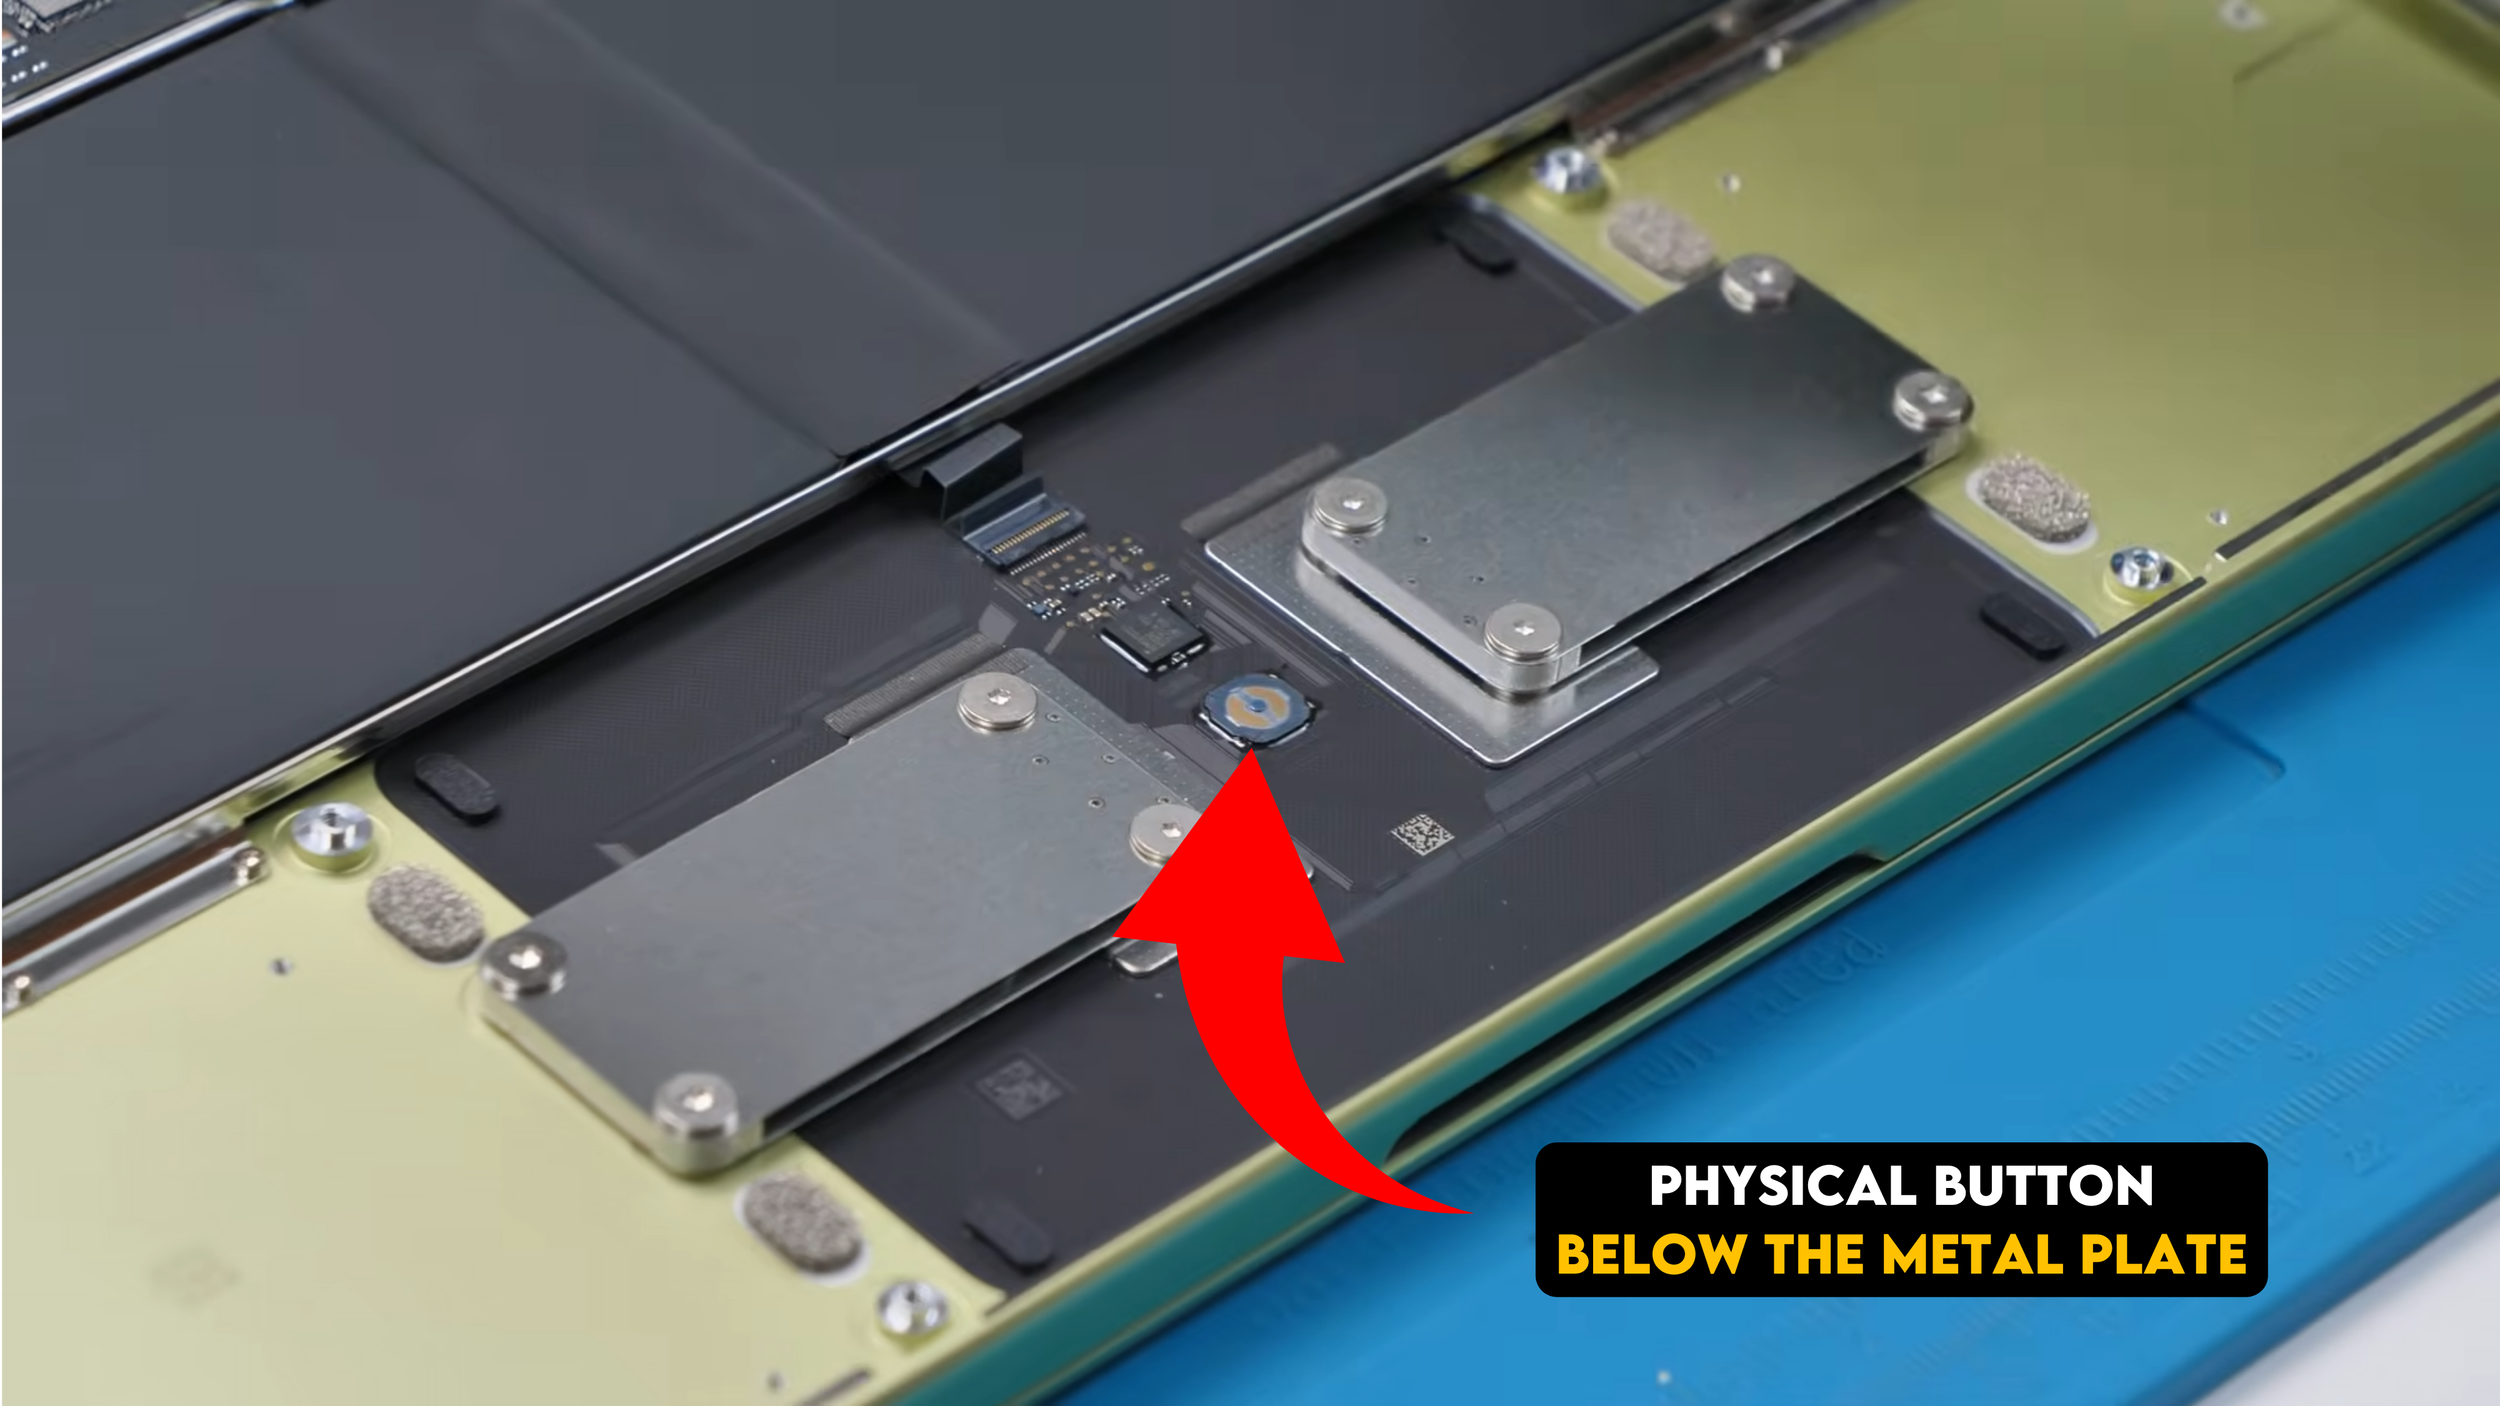
To remove it we switch to a Torx T8 screwdriver and take out several larger screws holding down a metal plate. Once that plate is removed, we can access the trackpad assembly. There are two additional screws, but interestingly you do not even need to remove them. Once the connector is released, the trackpad lifts right out.
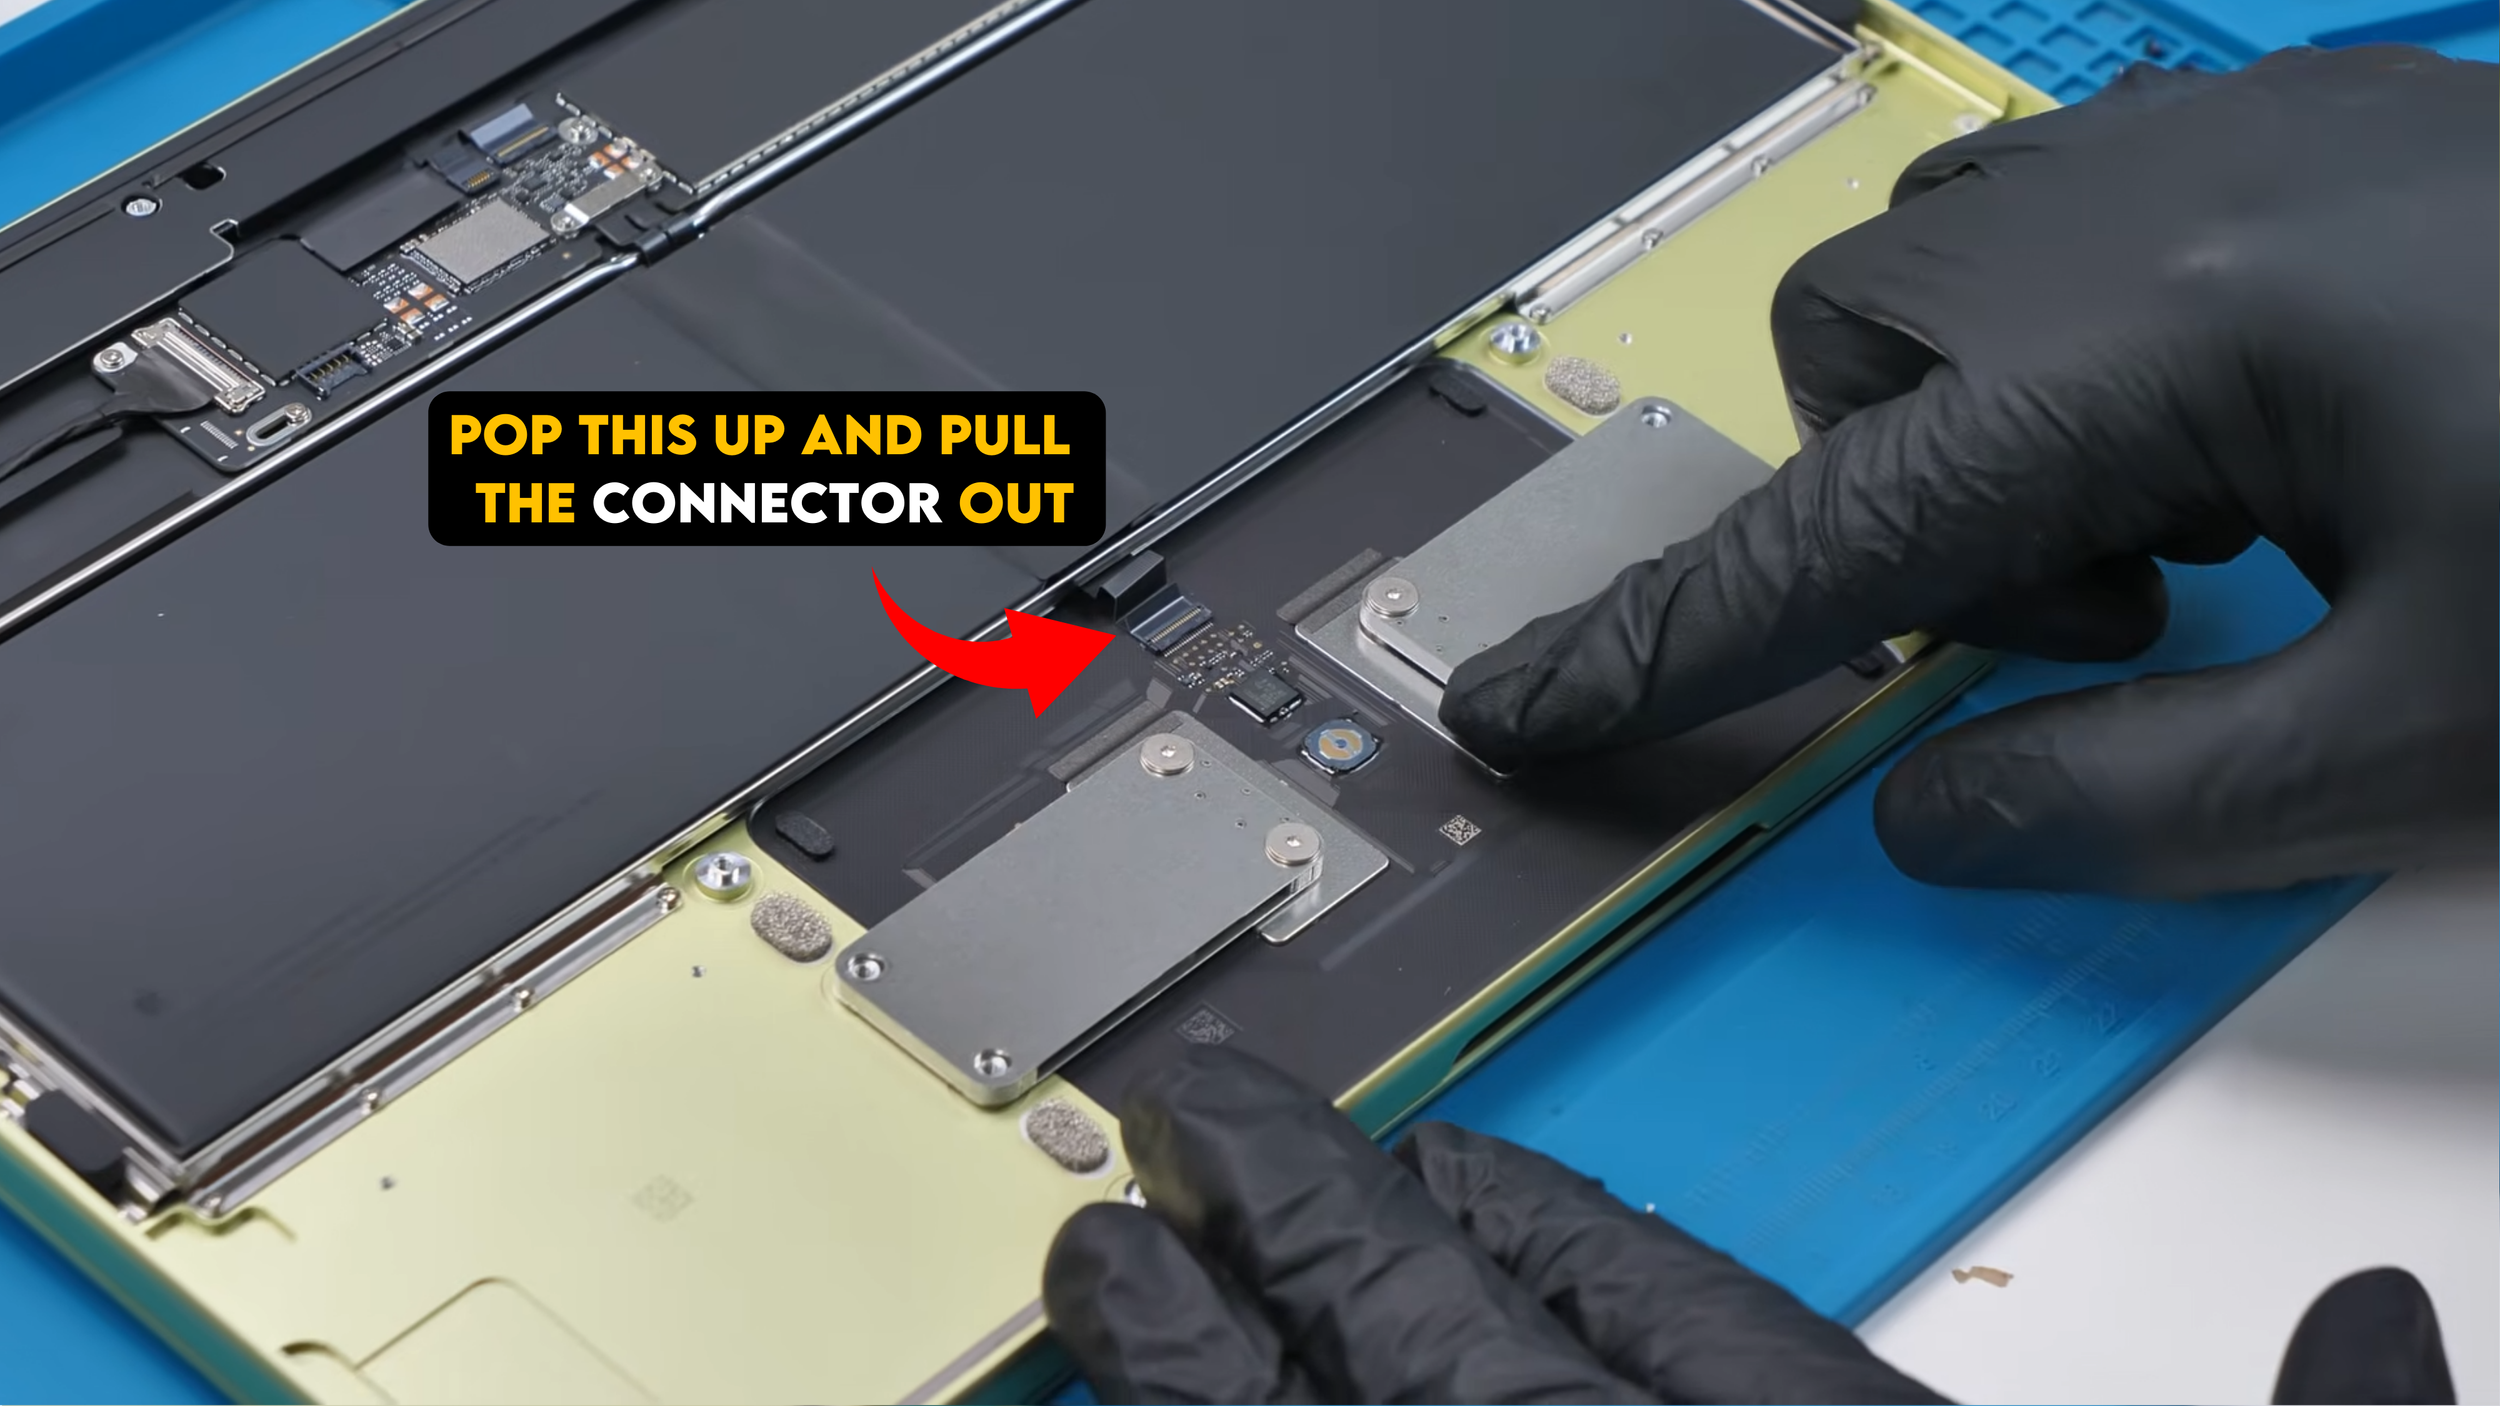
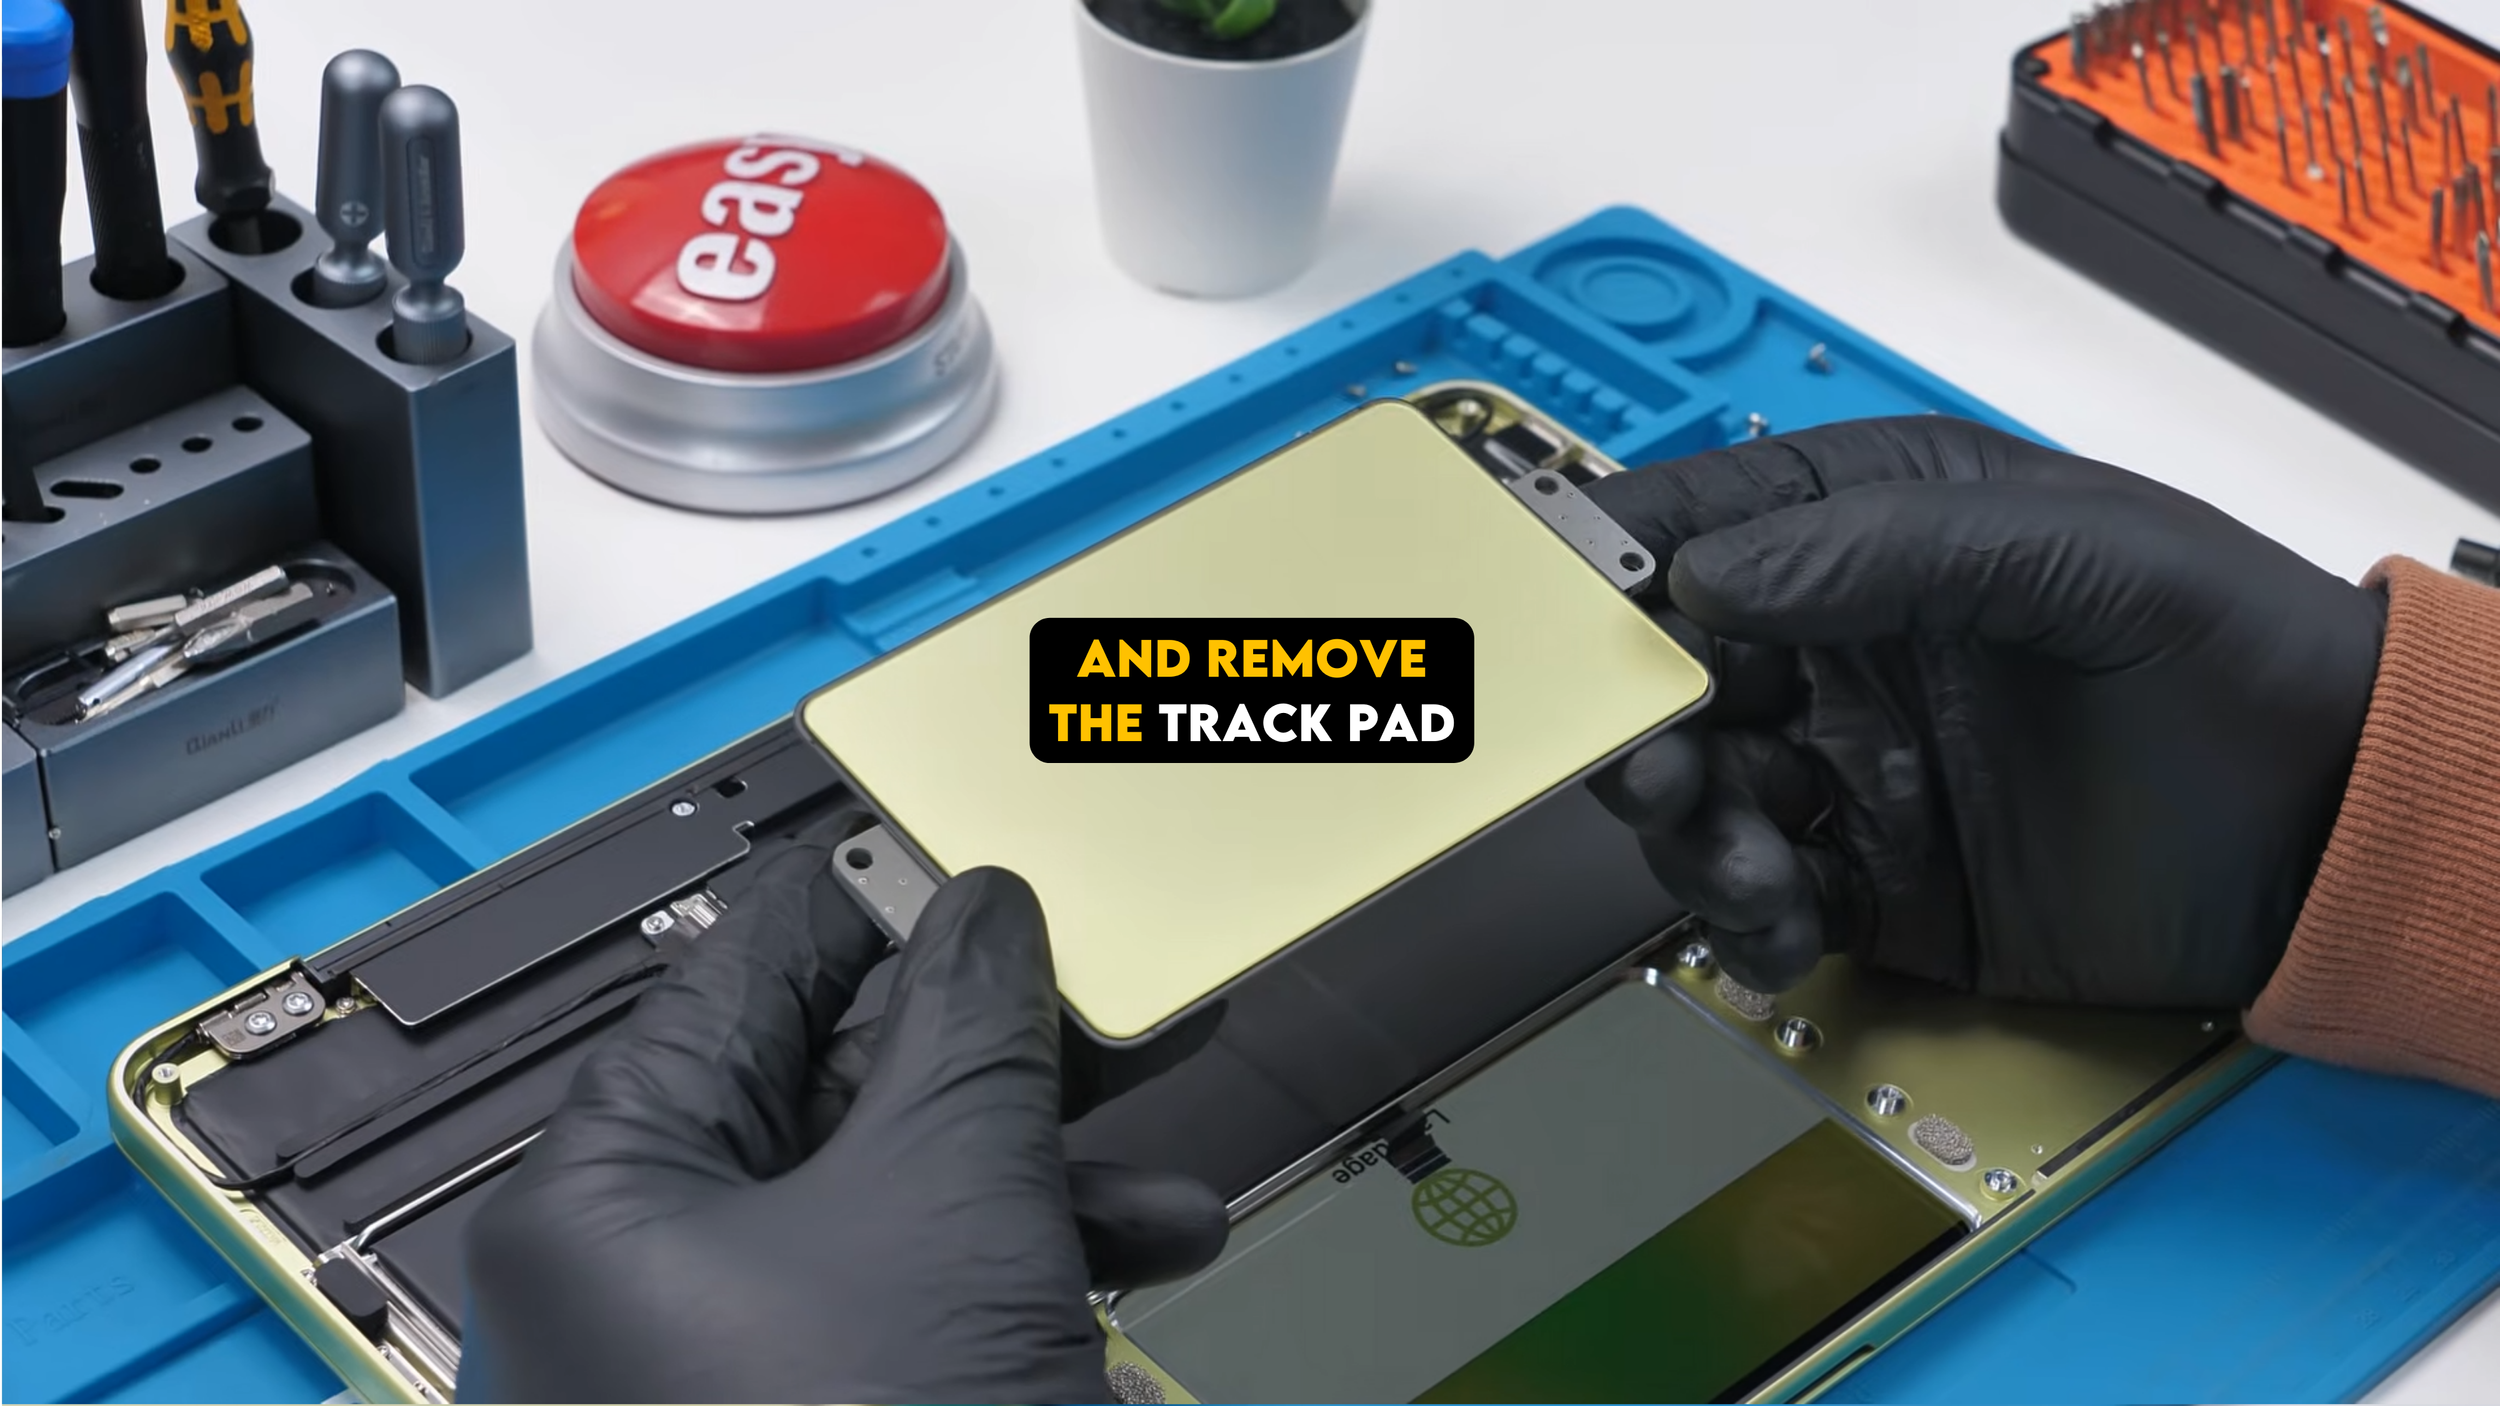
The process is extremely simple and reinstalling it later should be just as easy. And because this version uses a mechanical click instead of a haptic system, it is also likely to be less complicated to repair.
The Battery
Next comes the battery.
Apple lists it as a 36.5Wh battery, which is noticeably smaller than the one inside the MacBook Air. The A18 Pro chip helps make up for that though, since its efficiency allows the laptop to run for close to 16 hours in real world use.

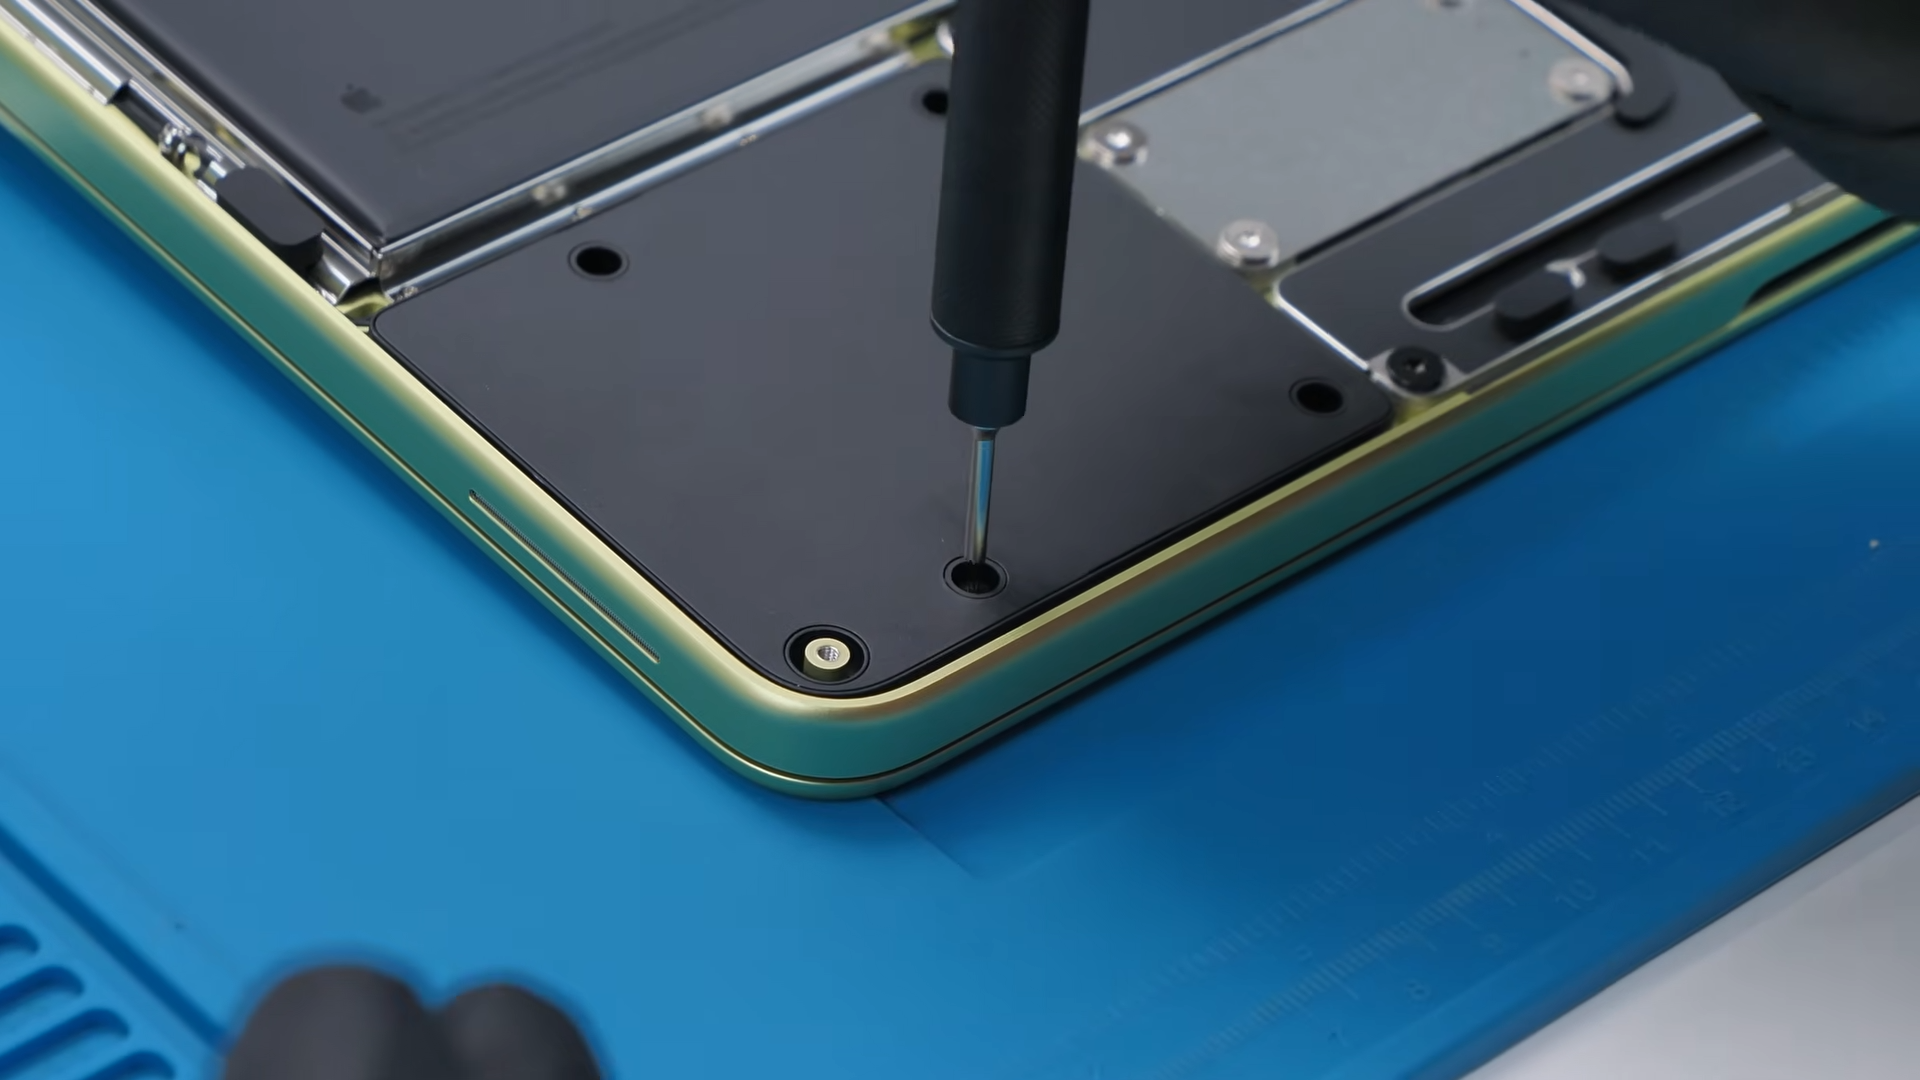
Removing the battery requires several screws using T4 and T5 bits. There are quite a lot of screws, but honestly that is completely fine if it means avoiding adhesive.
After disconnecting the battery connector and removing the final screws, the entire battery lifts right out.
No glue. No adhesive strips. It just comes out. The battery itself is rated at around 9,573 mAh, and replacing it on this machine will be incredibly easy compared to most modern laptops and that is a huge win.
USB-C Ports and Connectivity
Next we remove the USB-C ports.
A small bracket held by two screws covers the connector, and the ports themselves are secured with four screws. Once those are removed, the entire assembly pops out.
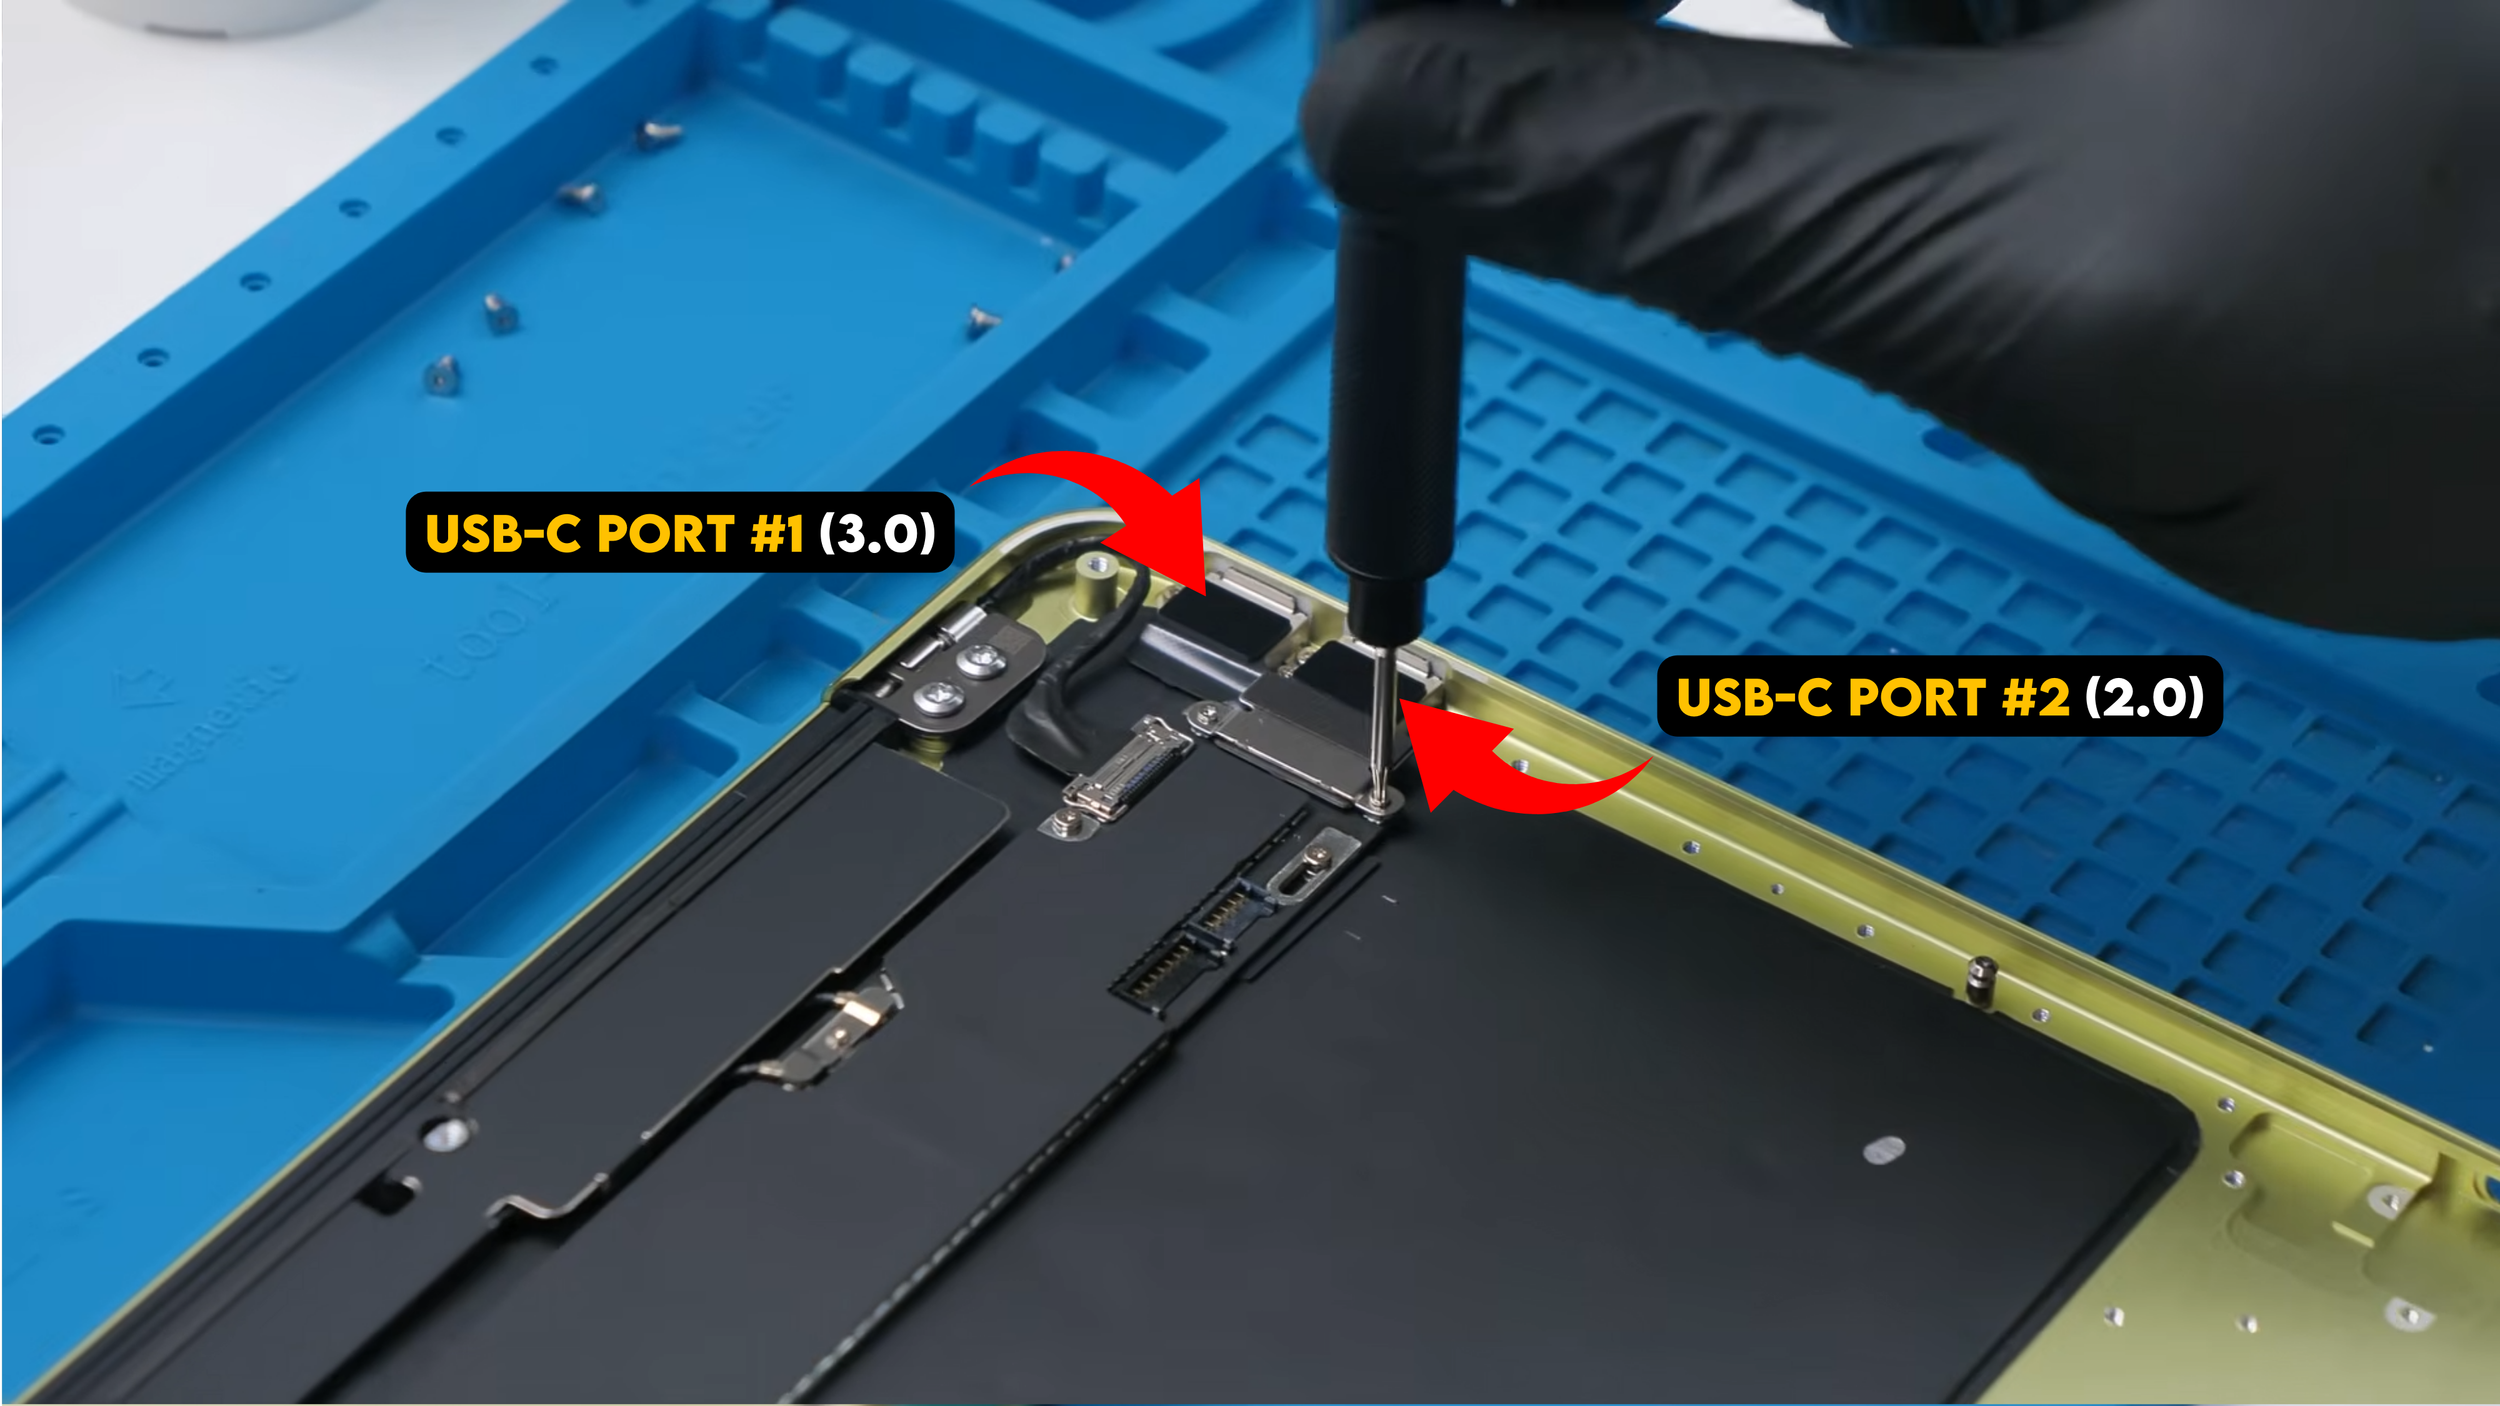
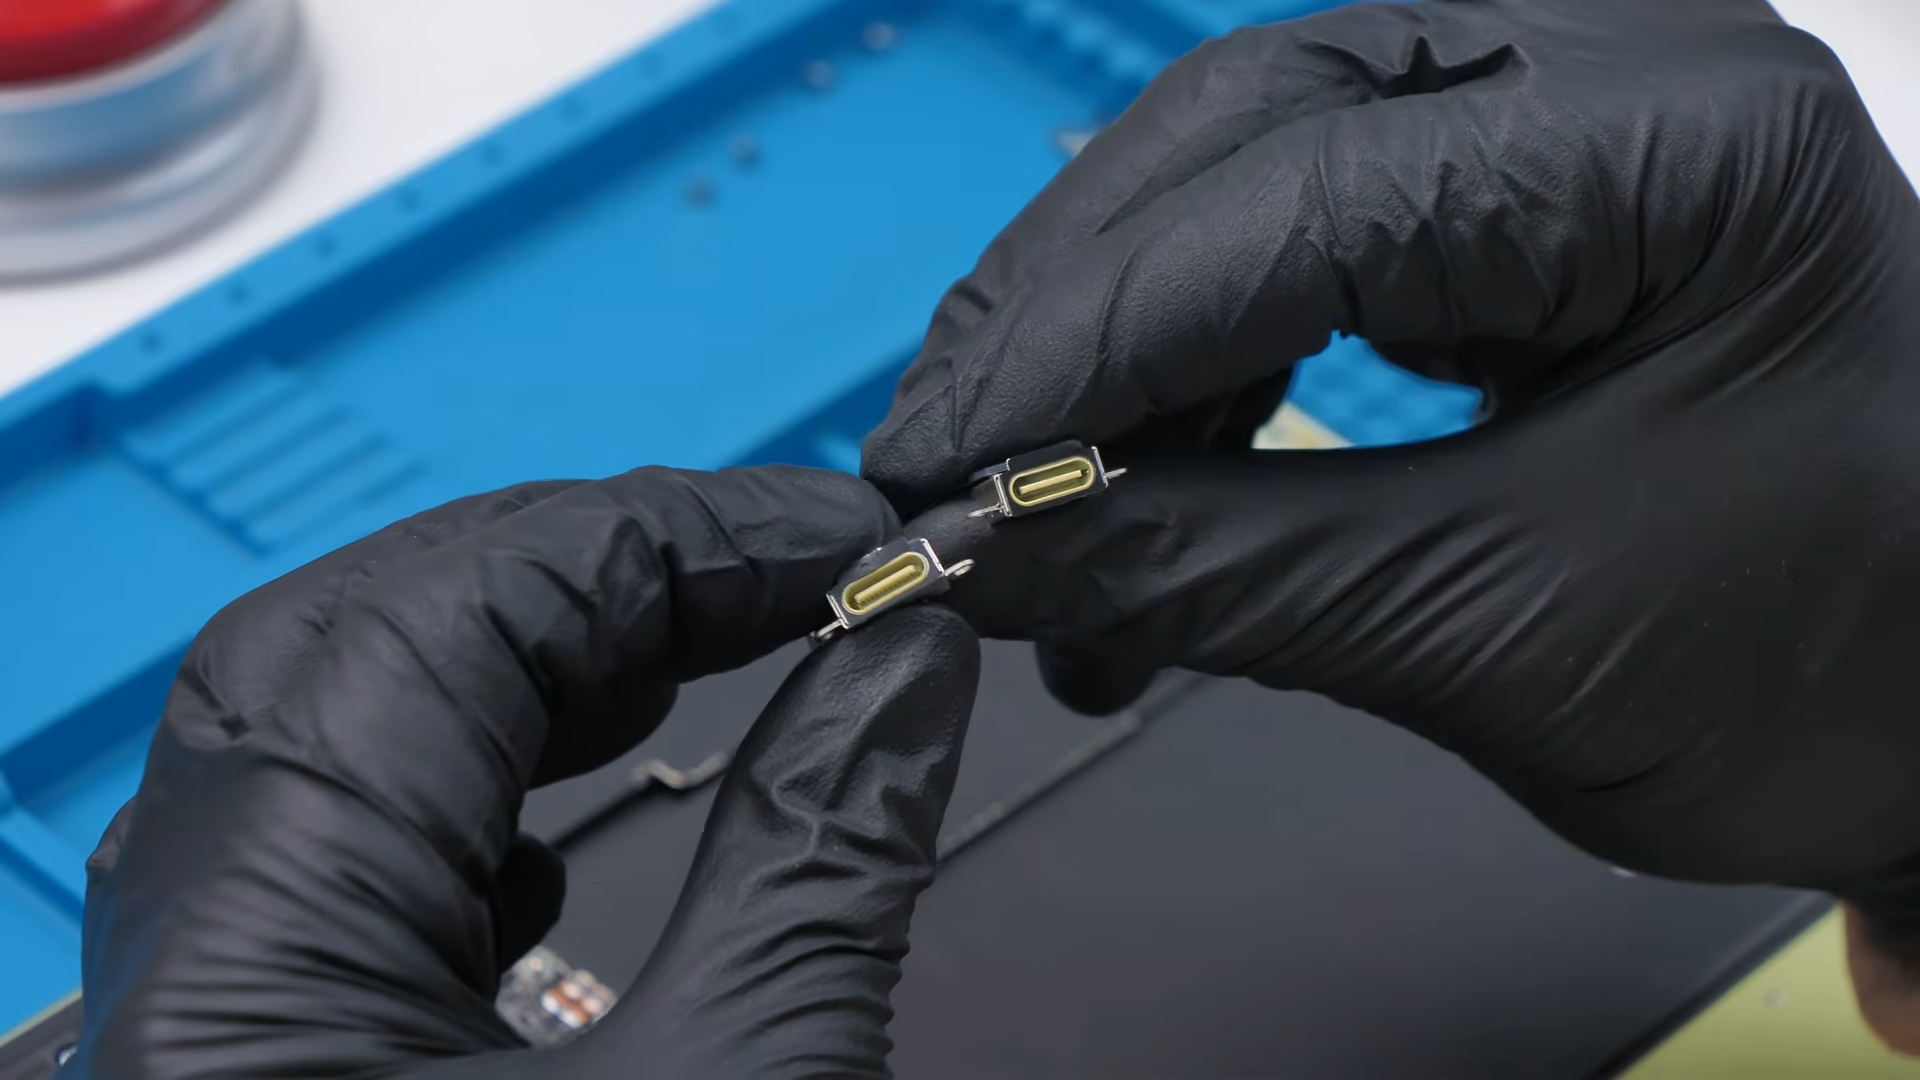
The MacBook Neo includes two USB-C ports, but they are not identical. One supports USB 3.0, which allows faster data transfer and can drive a single external display at 4K resolution at 60Hz. The other port is only USB 2.0, which is significantly slower and not particularly useful for demanding tasks.
This limitation also explains why the MacBook Neo can only drive one external display, unlike higher-end MacBooks.
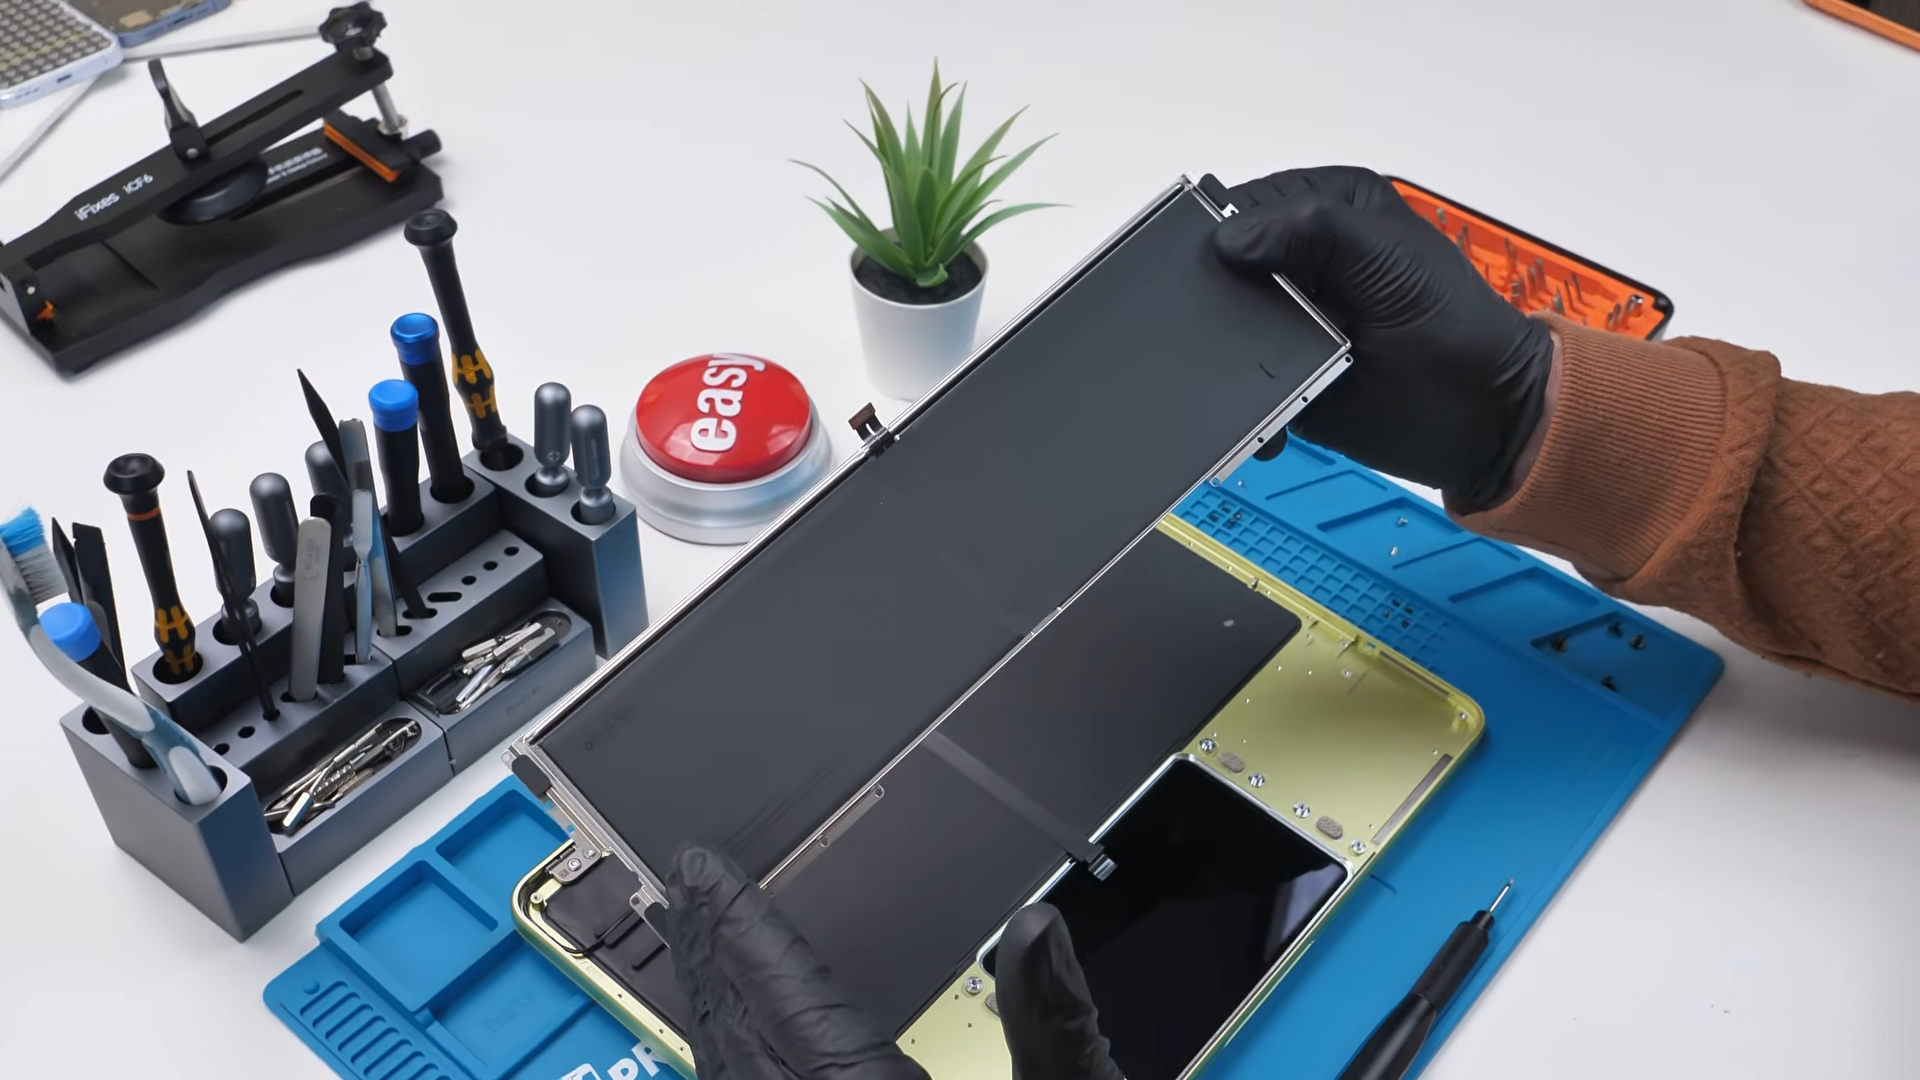
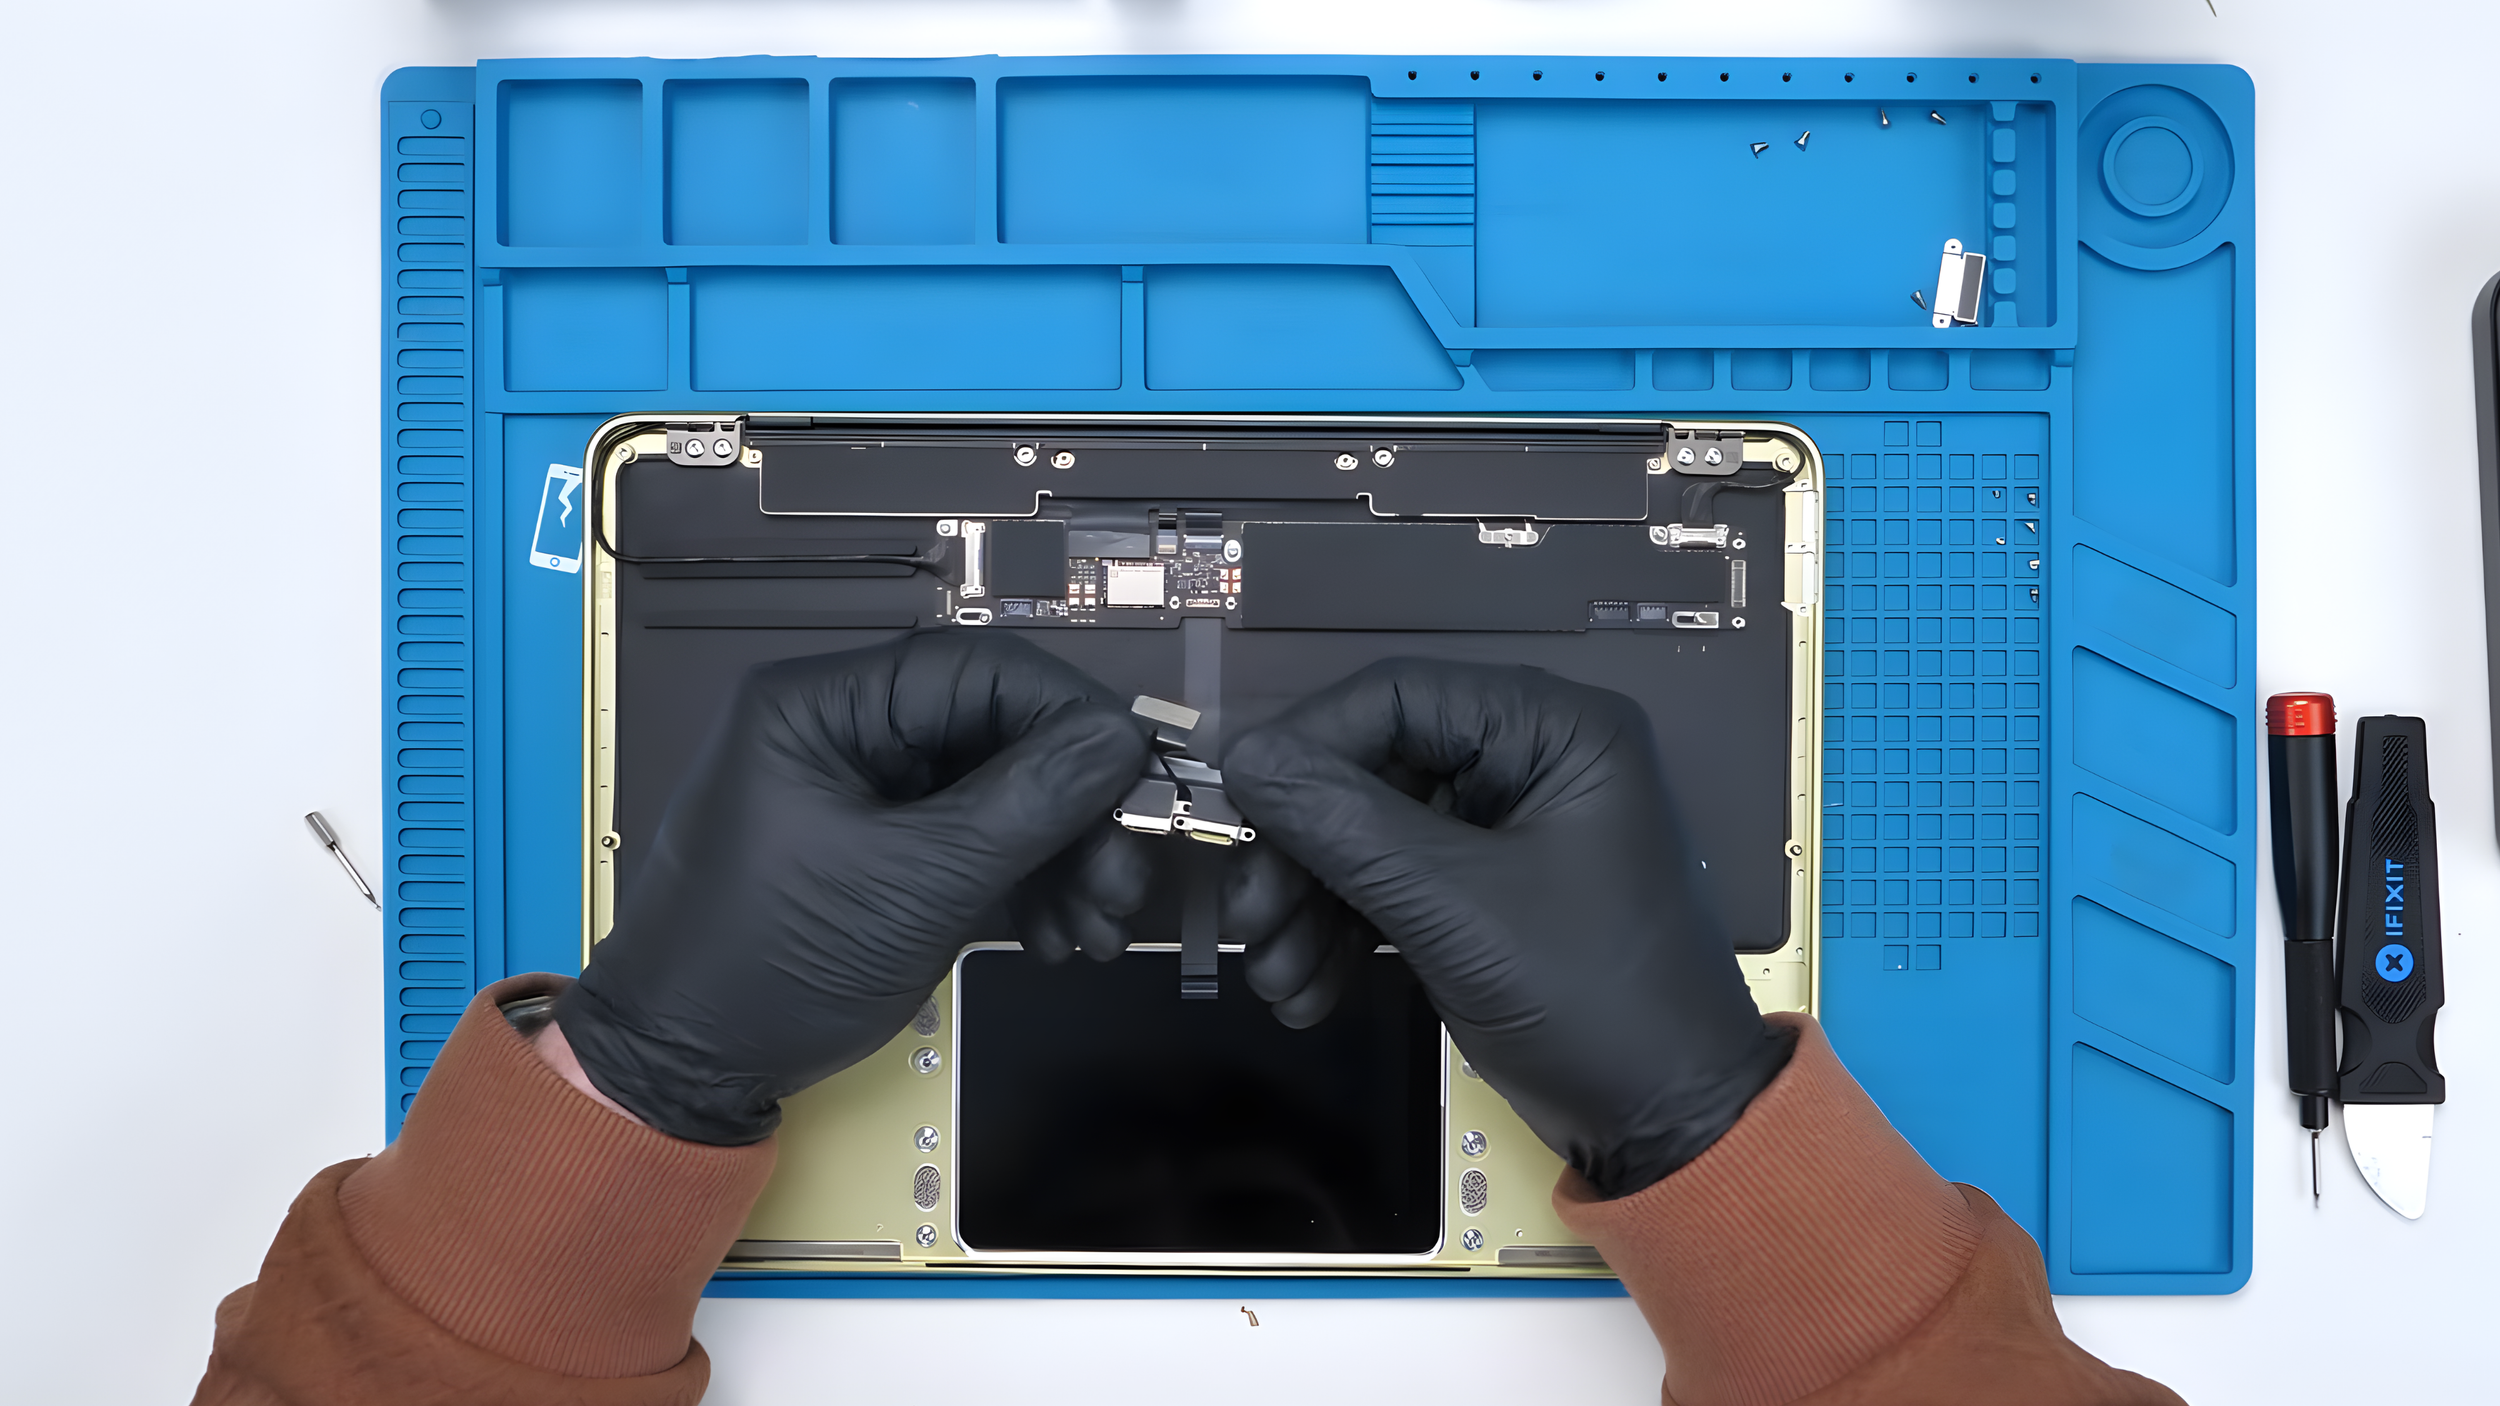
Removing the Display
Next we check how difficult it would be to replace the display if it ever breaks.
Disconnecting it requires removing two ribbon connectors which are held down with small flip locks. Once those are released, the cables slide out easily.
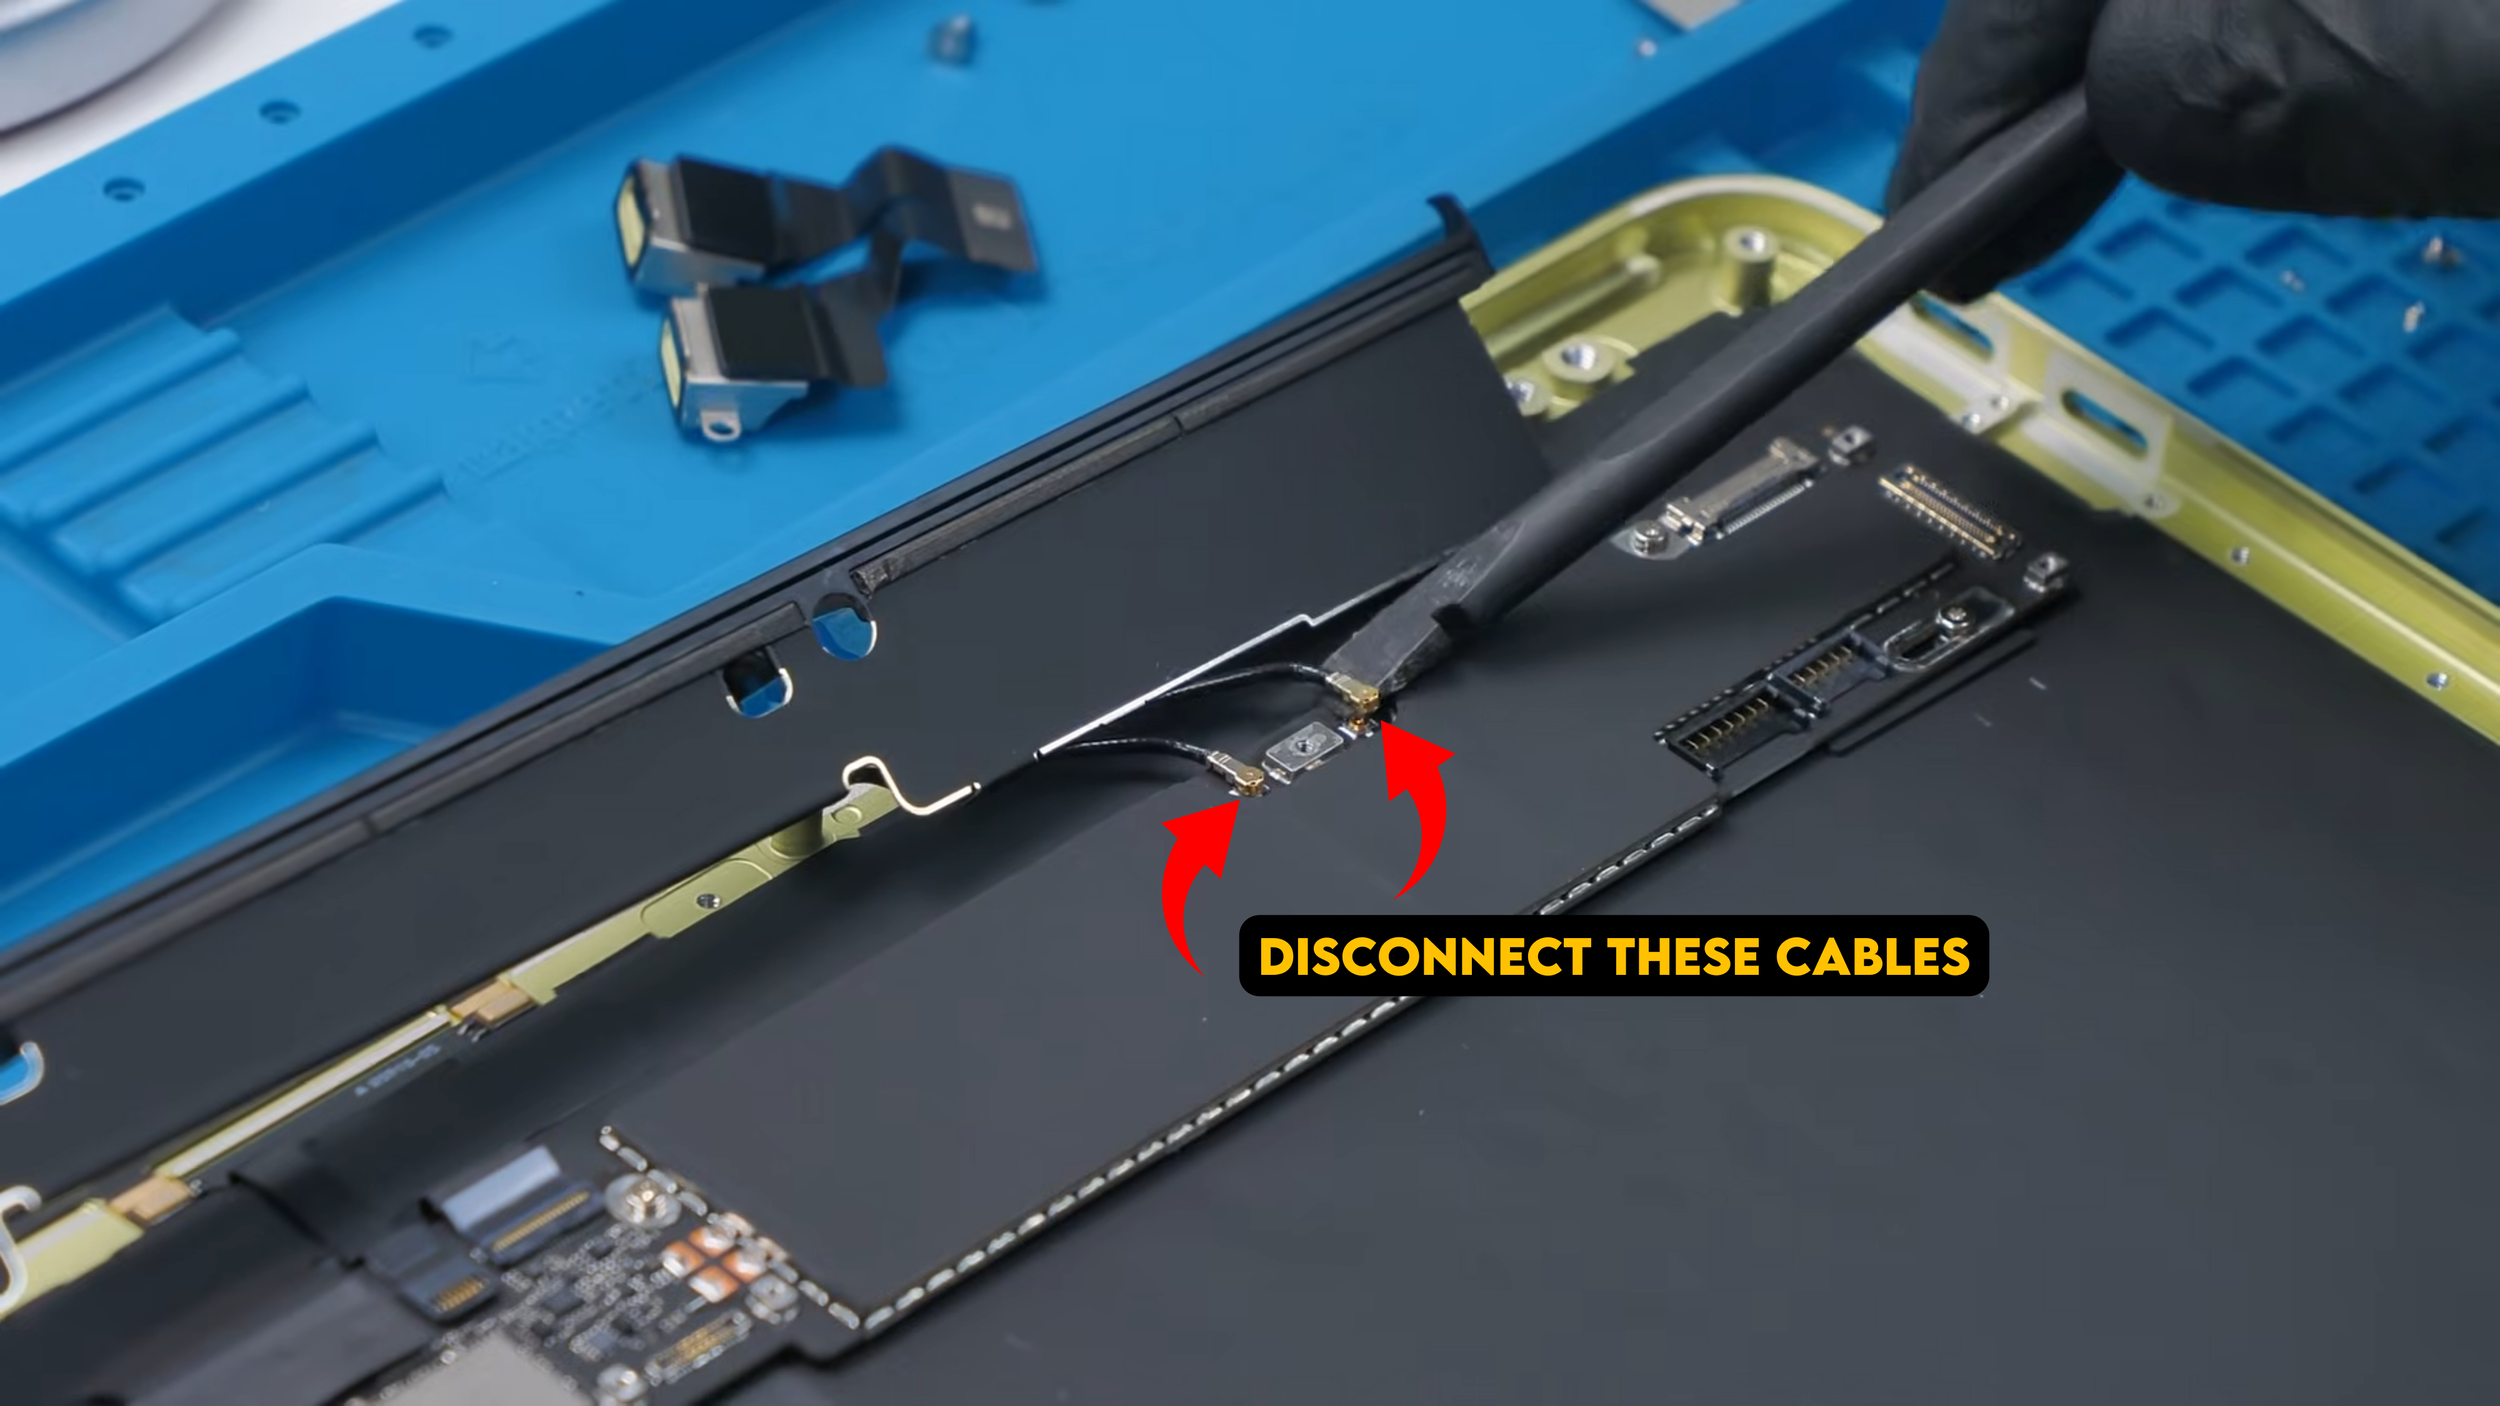
After removing two screws from each hinge and disconnecting the antenna cables, the entire display assembly separates from the laptop.
The display itself has a 2408 by 1506 resolution with sRGB color support and peak brightness of about 500 nits. However, it lacks True Tone likely because the laptop does not appear to include an ambient light sensor.
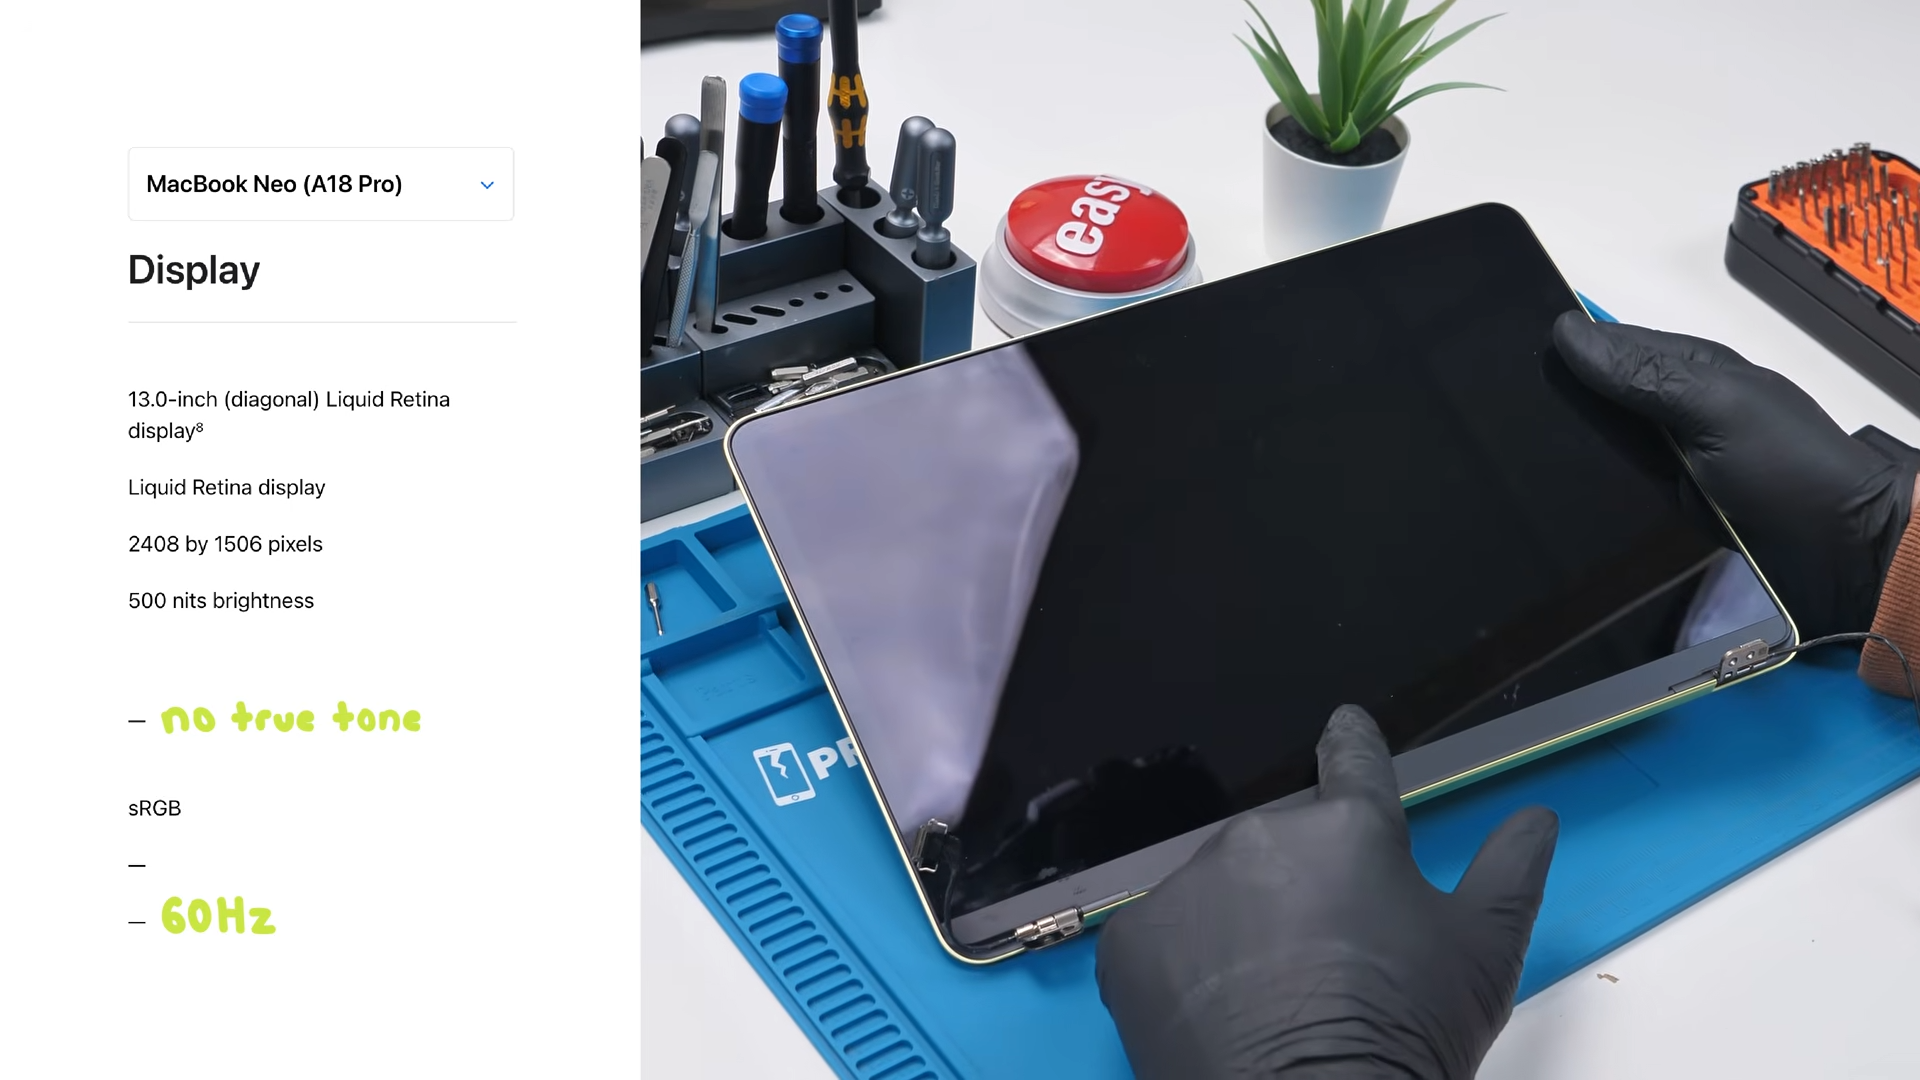
It also runs at 60Hz and the bezels are relatively thick compared to premium MacBooks. The webcam is a standard 1080p camera, though it does not support features like Center Stage or Desk View. On the bright side, replacing the display itself is fairly straightforward.
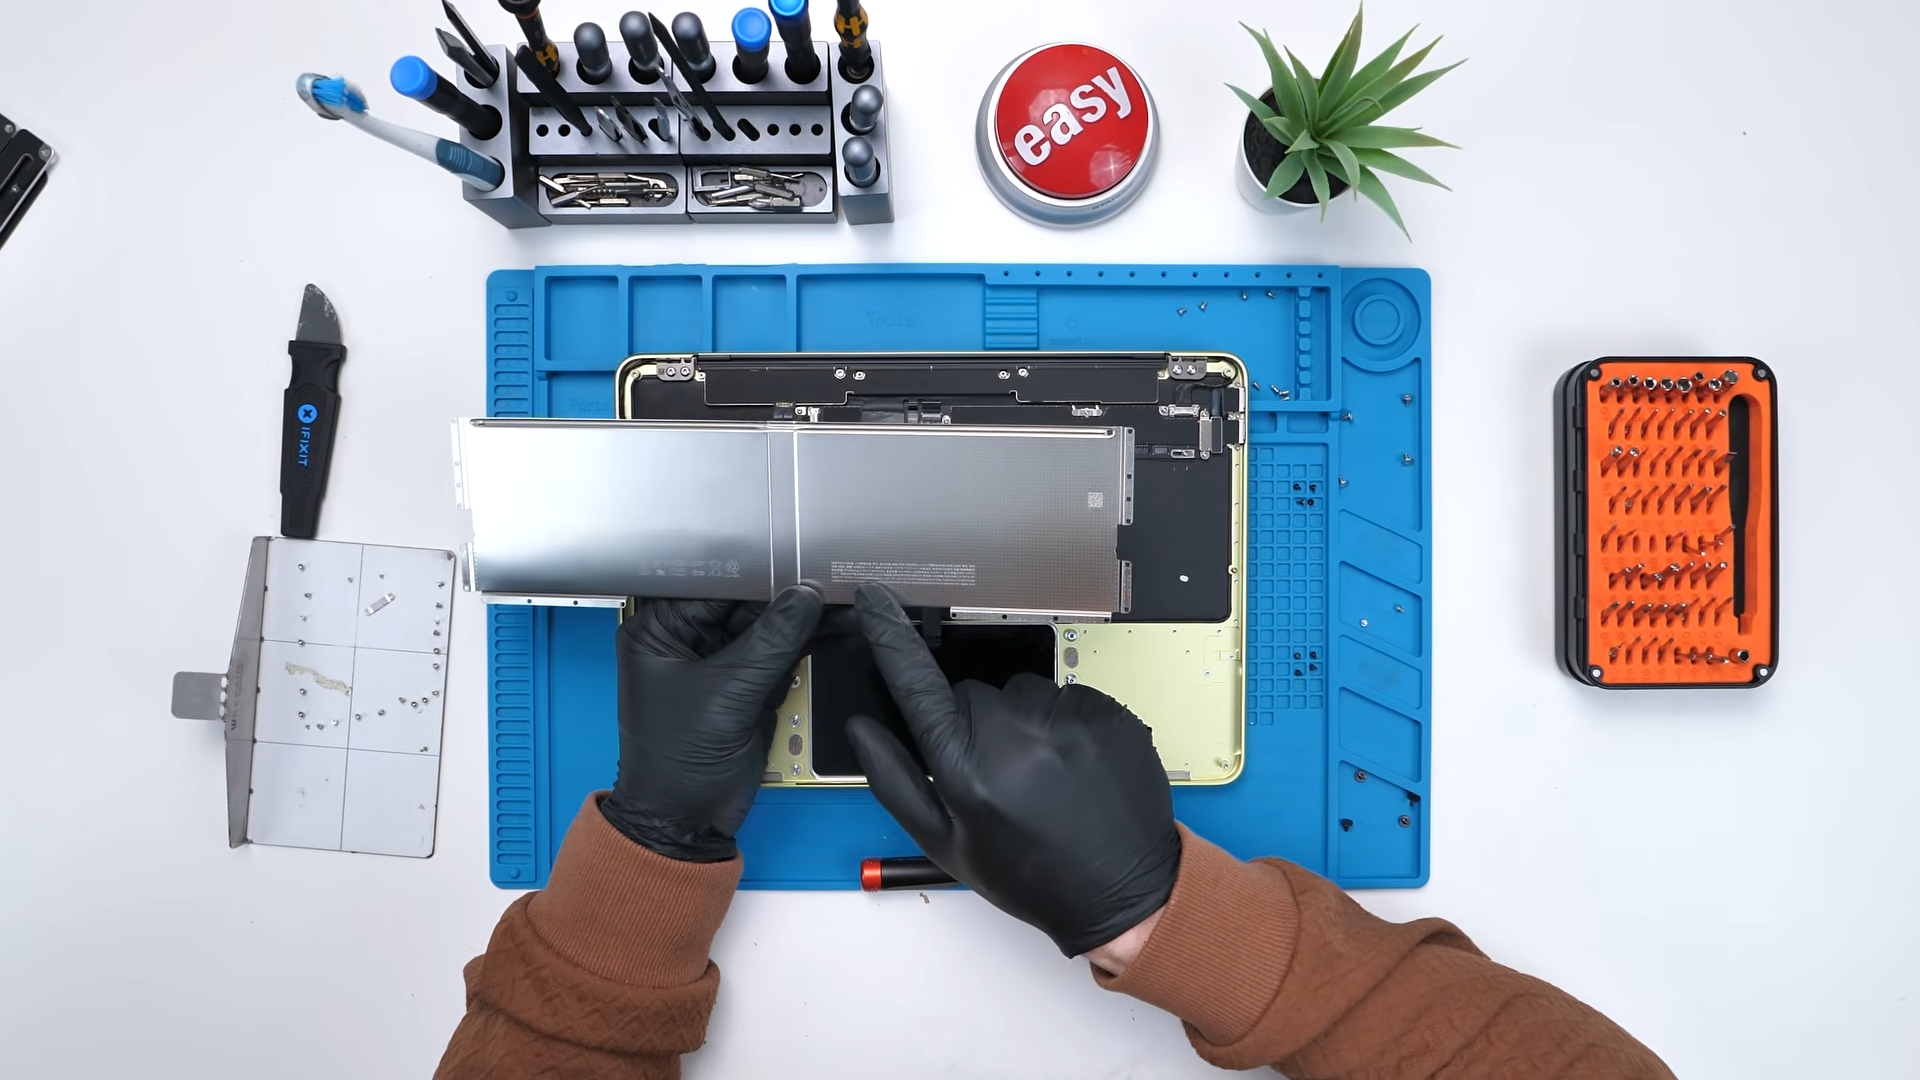
With the display removed, the final step is removing the motherboard.
Inside the Motherboard
Before we can finally remove the motherboard, there is one more screw and cable that needs to come out. Once that screw is removed, the last connector can be unplugged from the board.
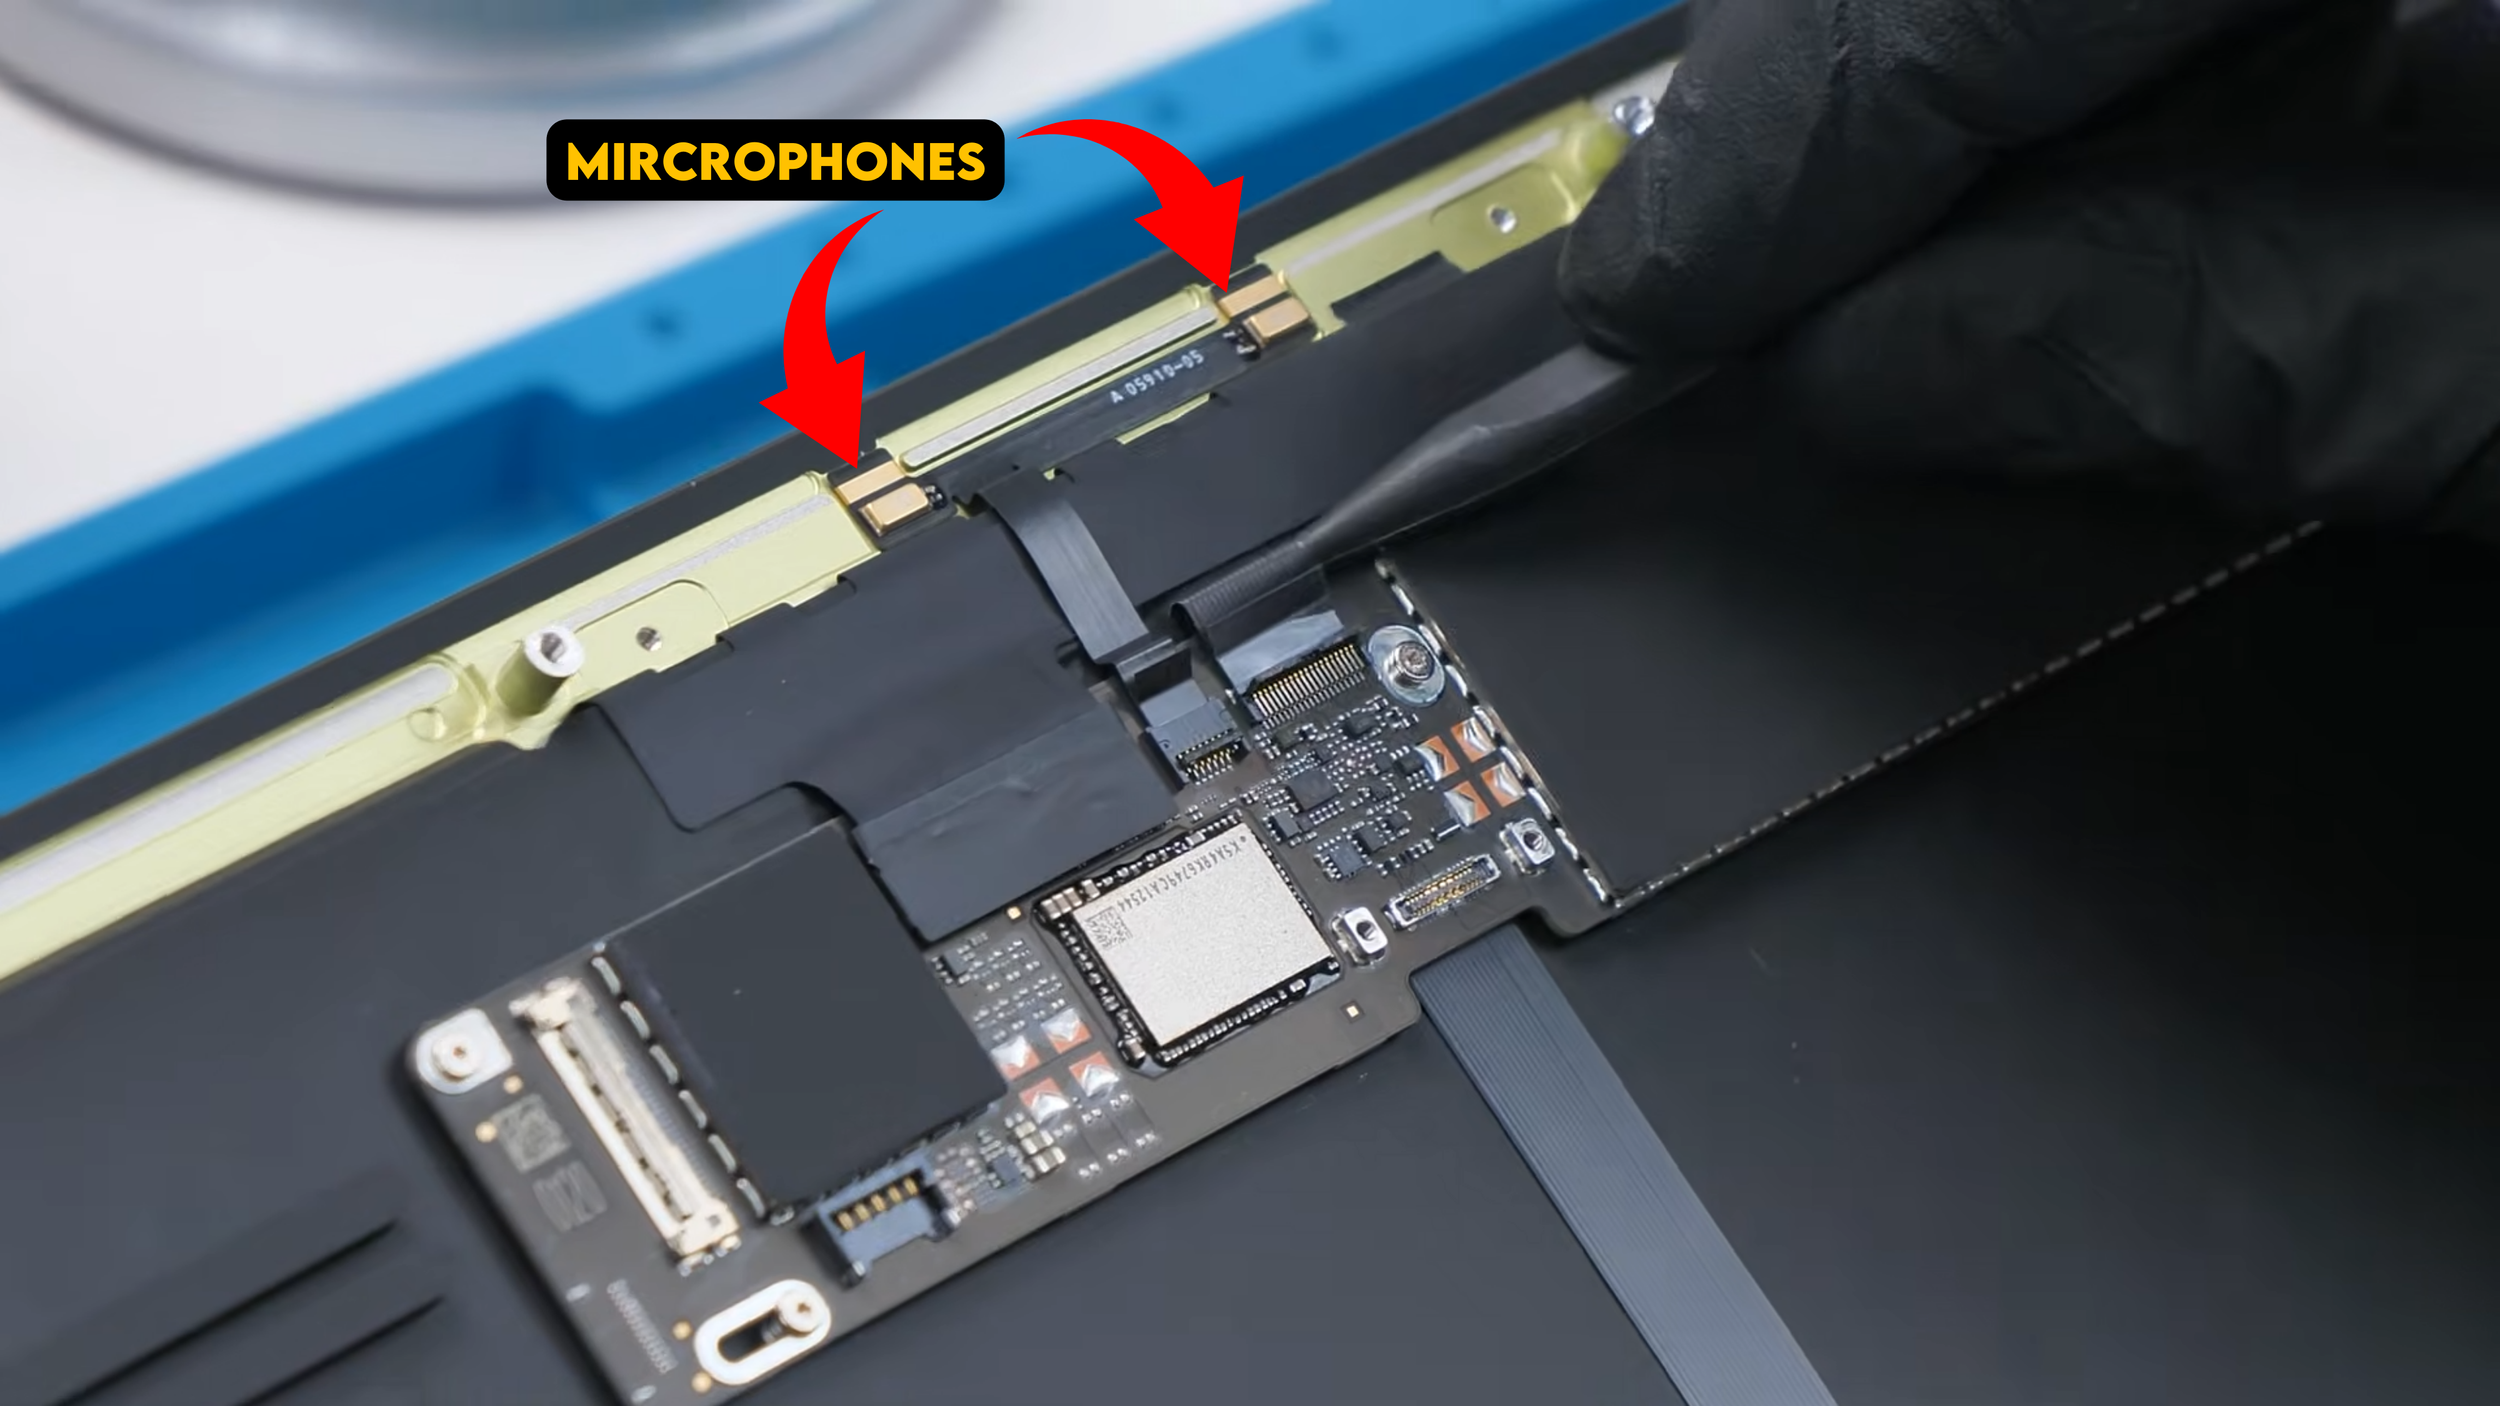
Lifting that cable reveals something interesting underneath. Tucked in are the two microphones used by the MacBook Neo, positioned right near the motherboard area to capture voice clearly during calls or recordings.
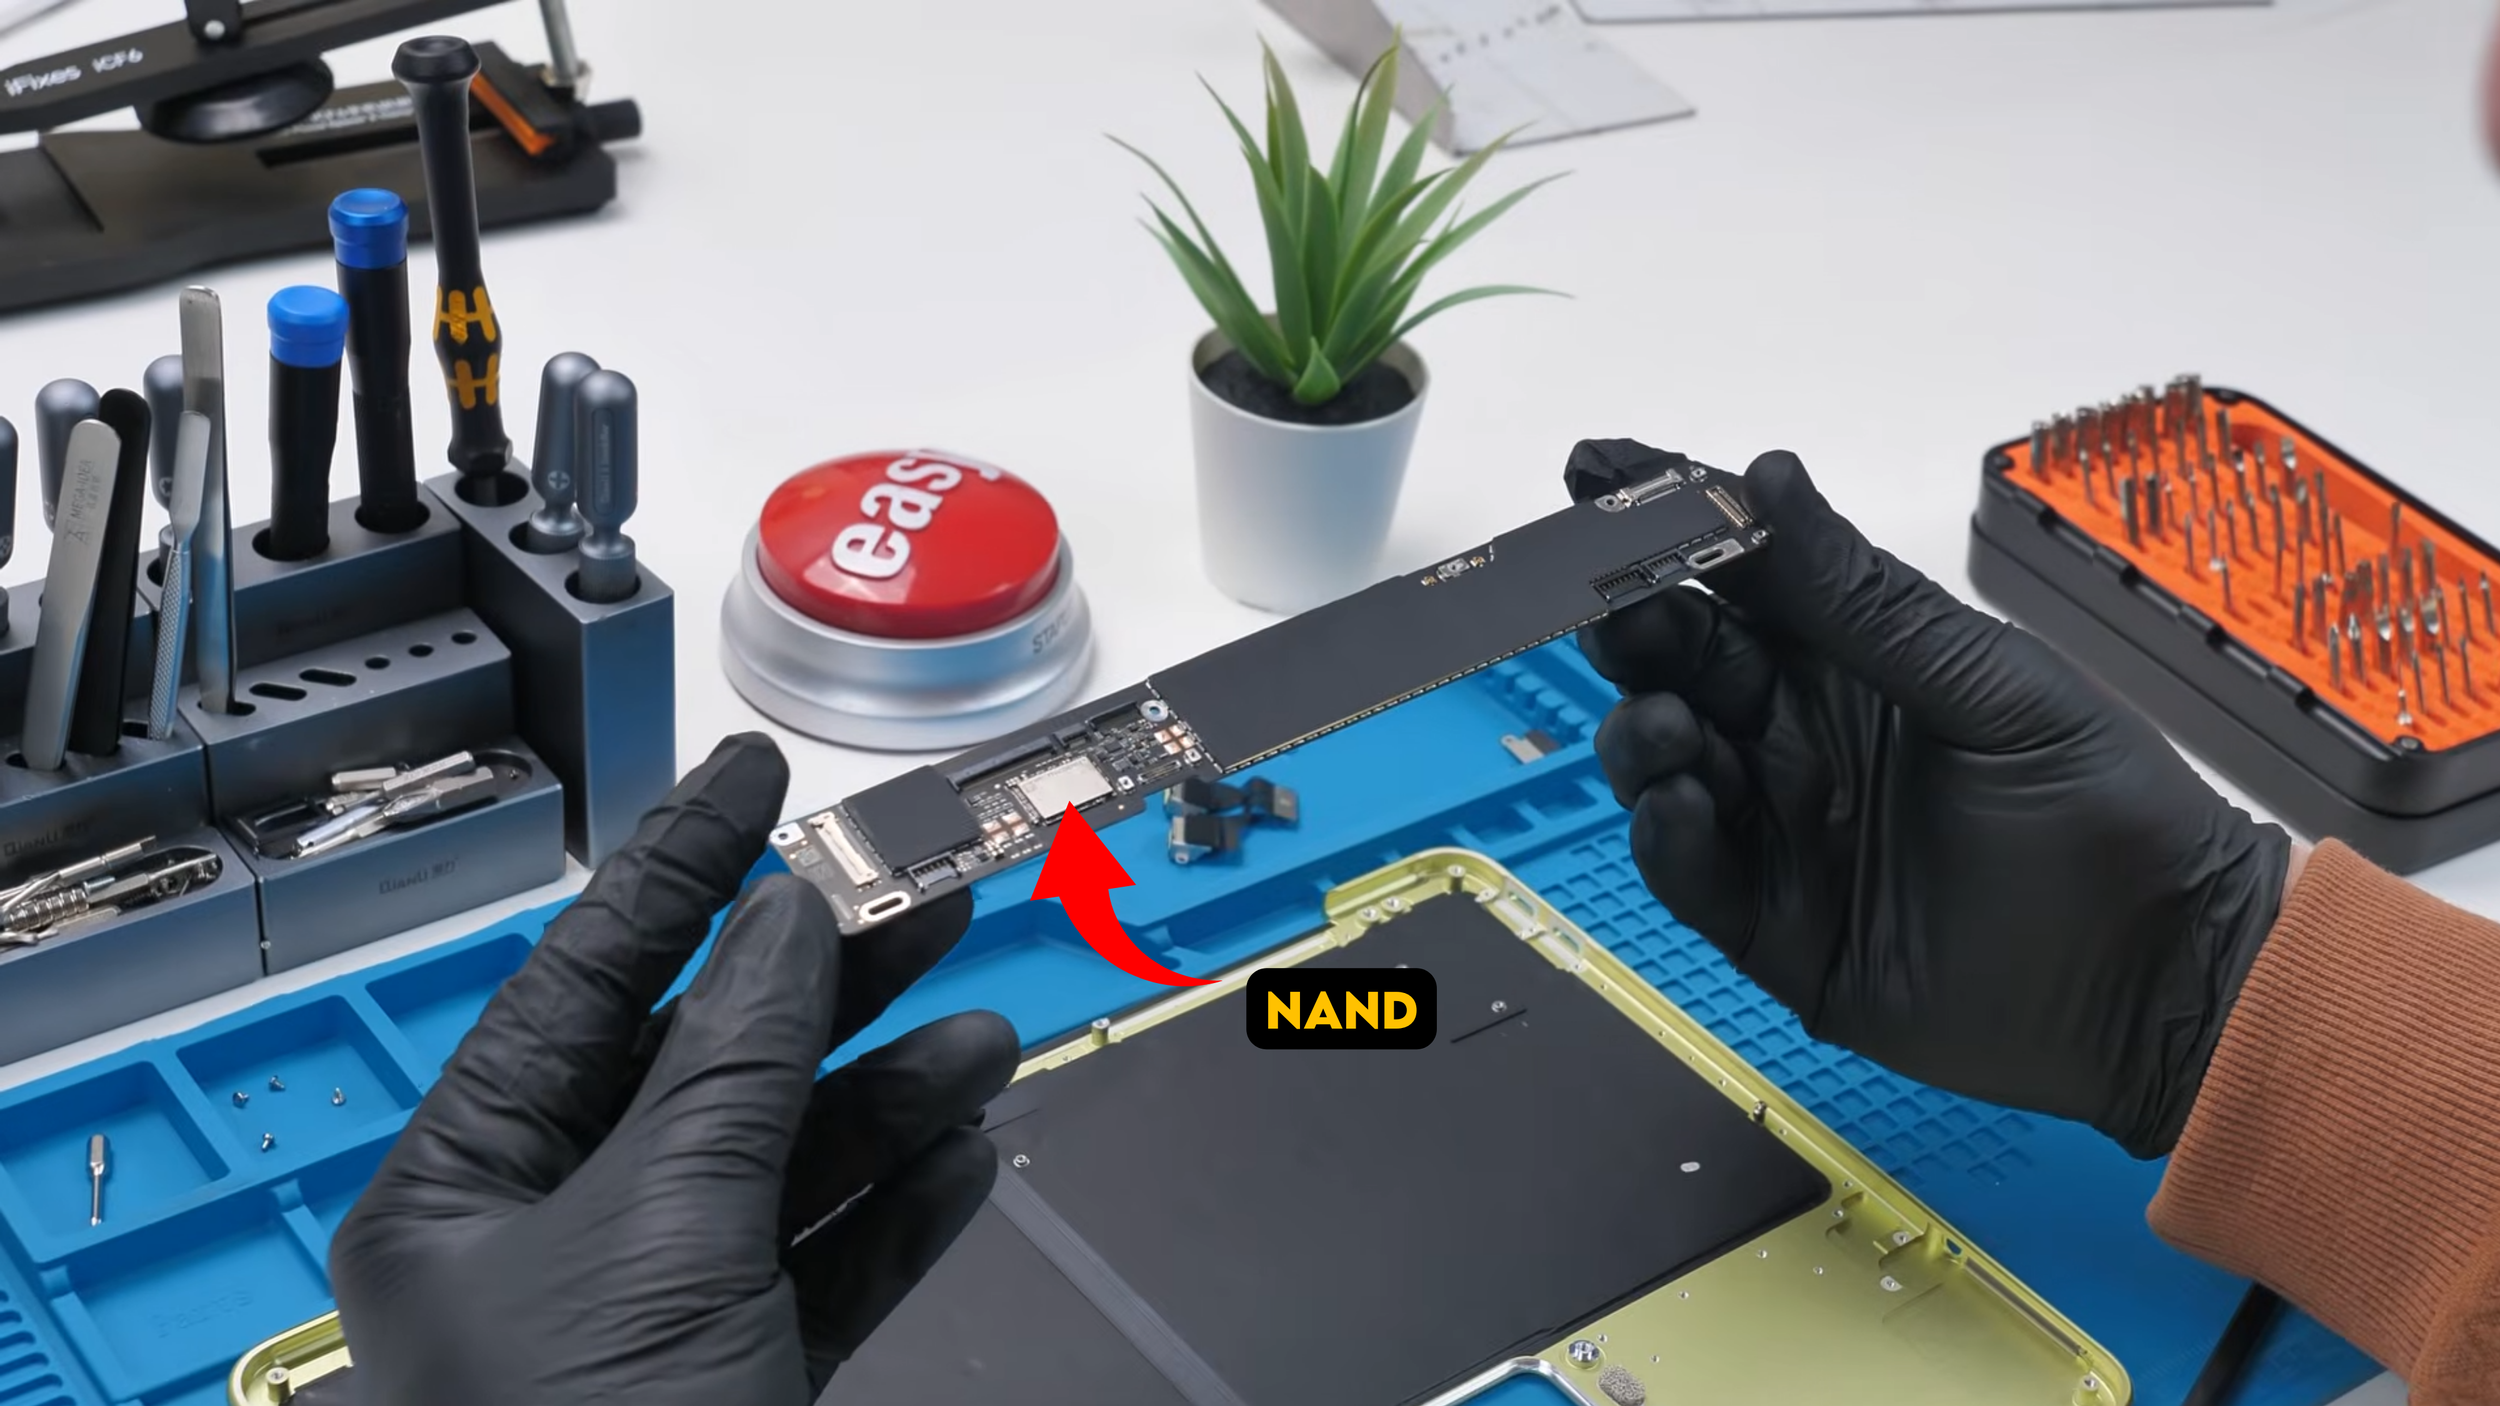
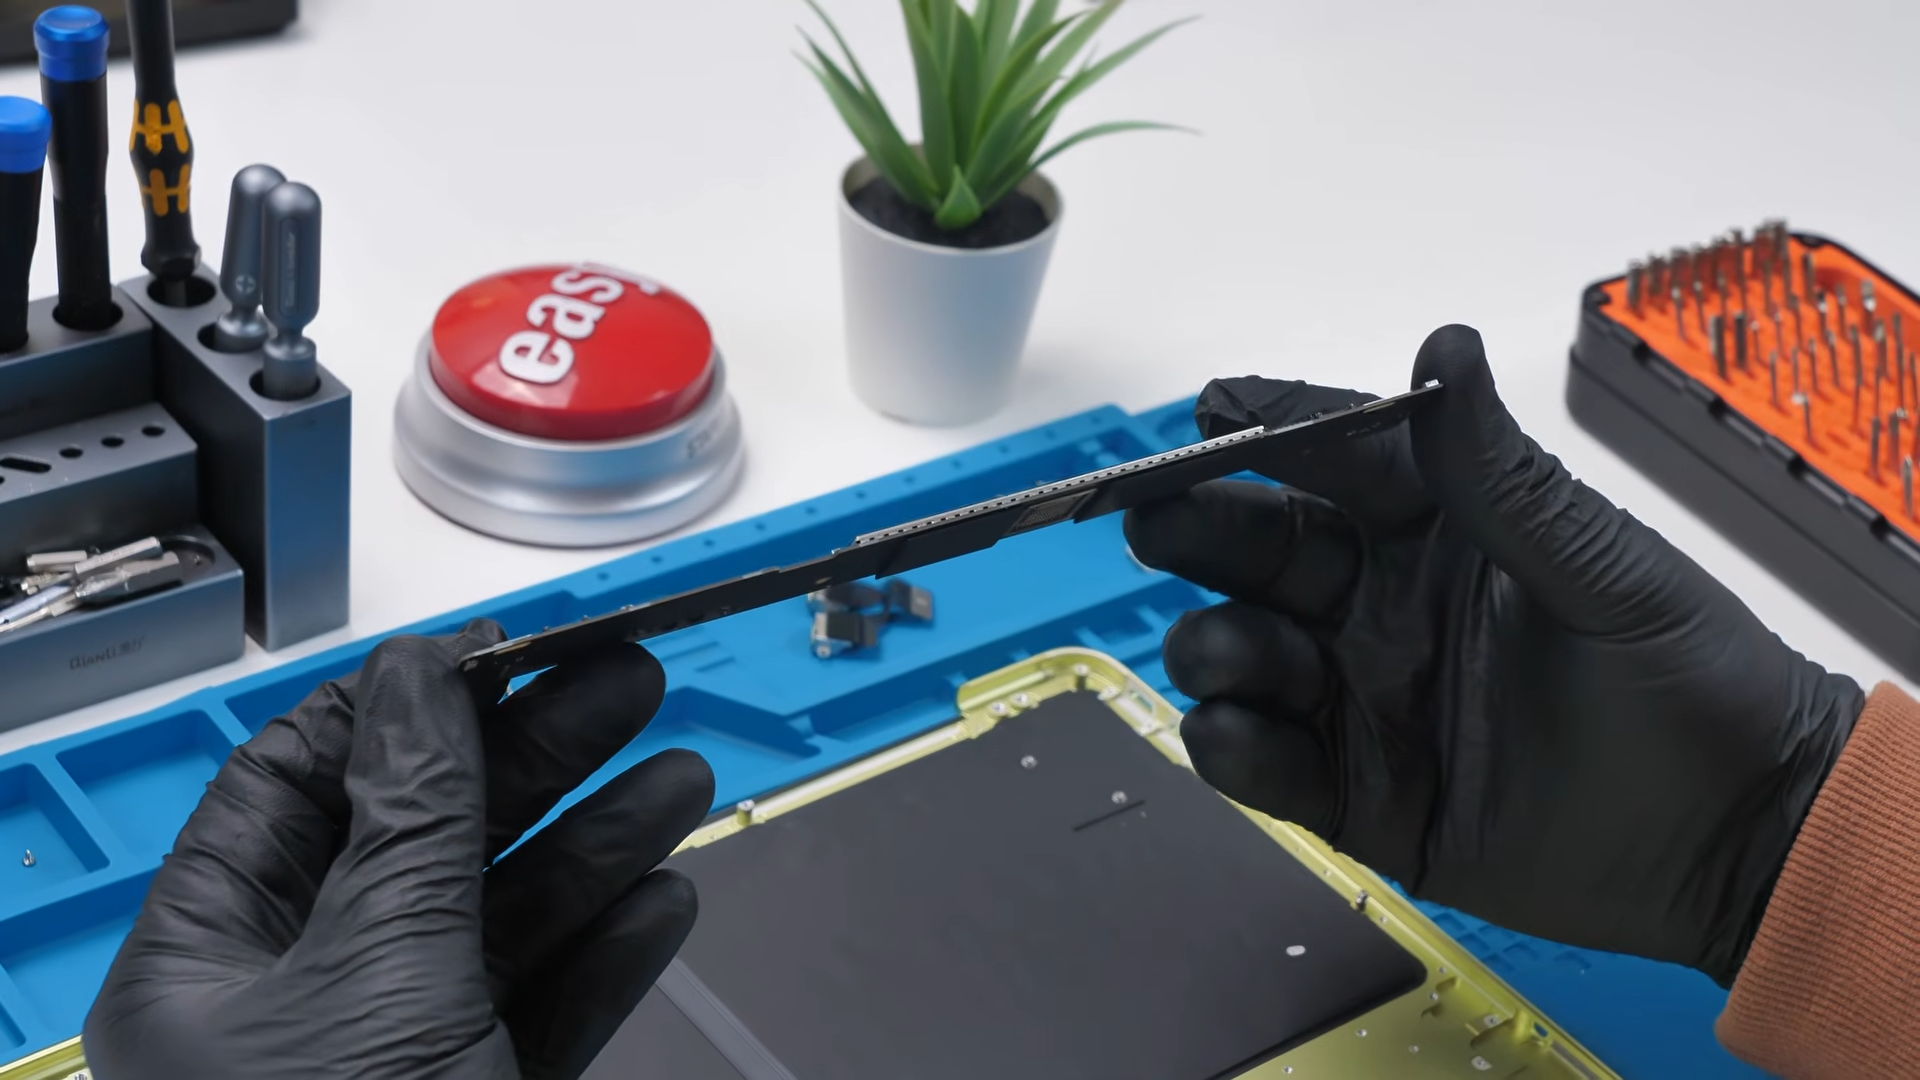
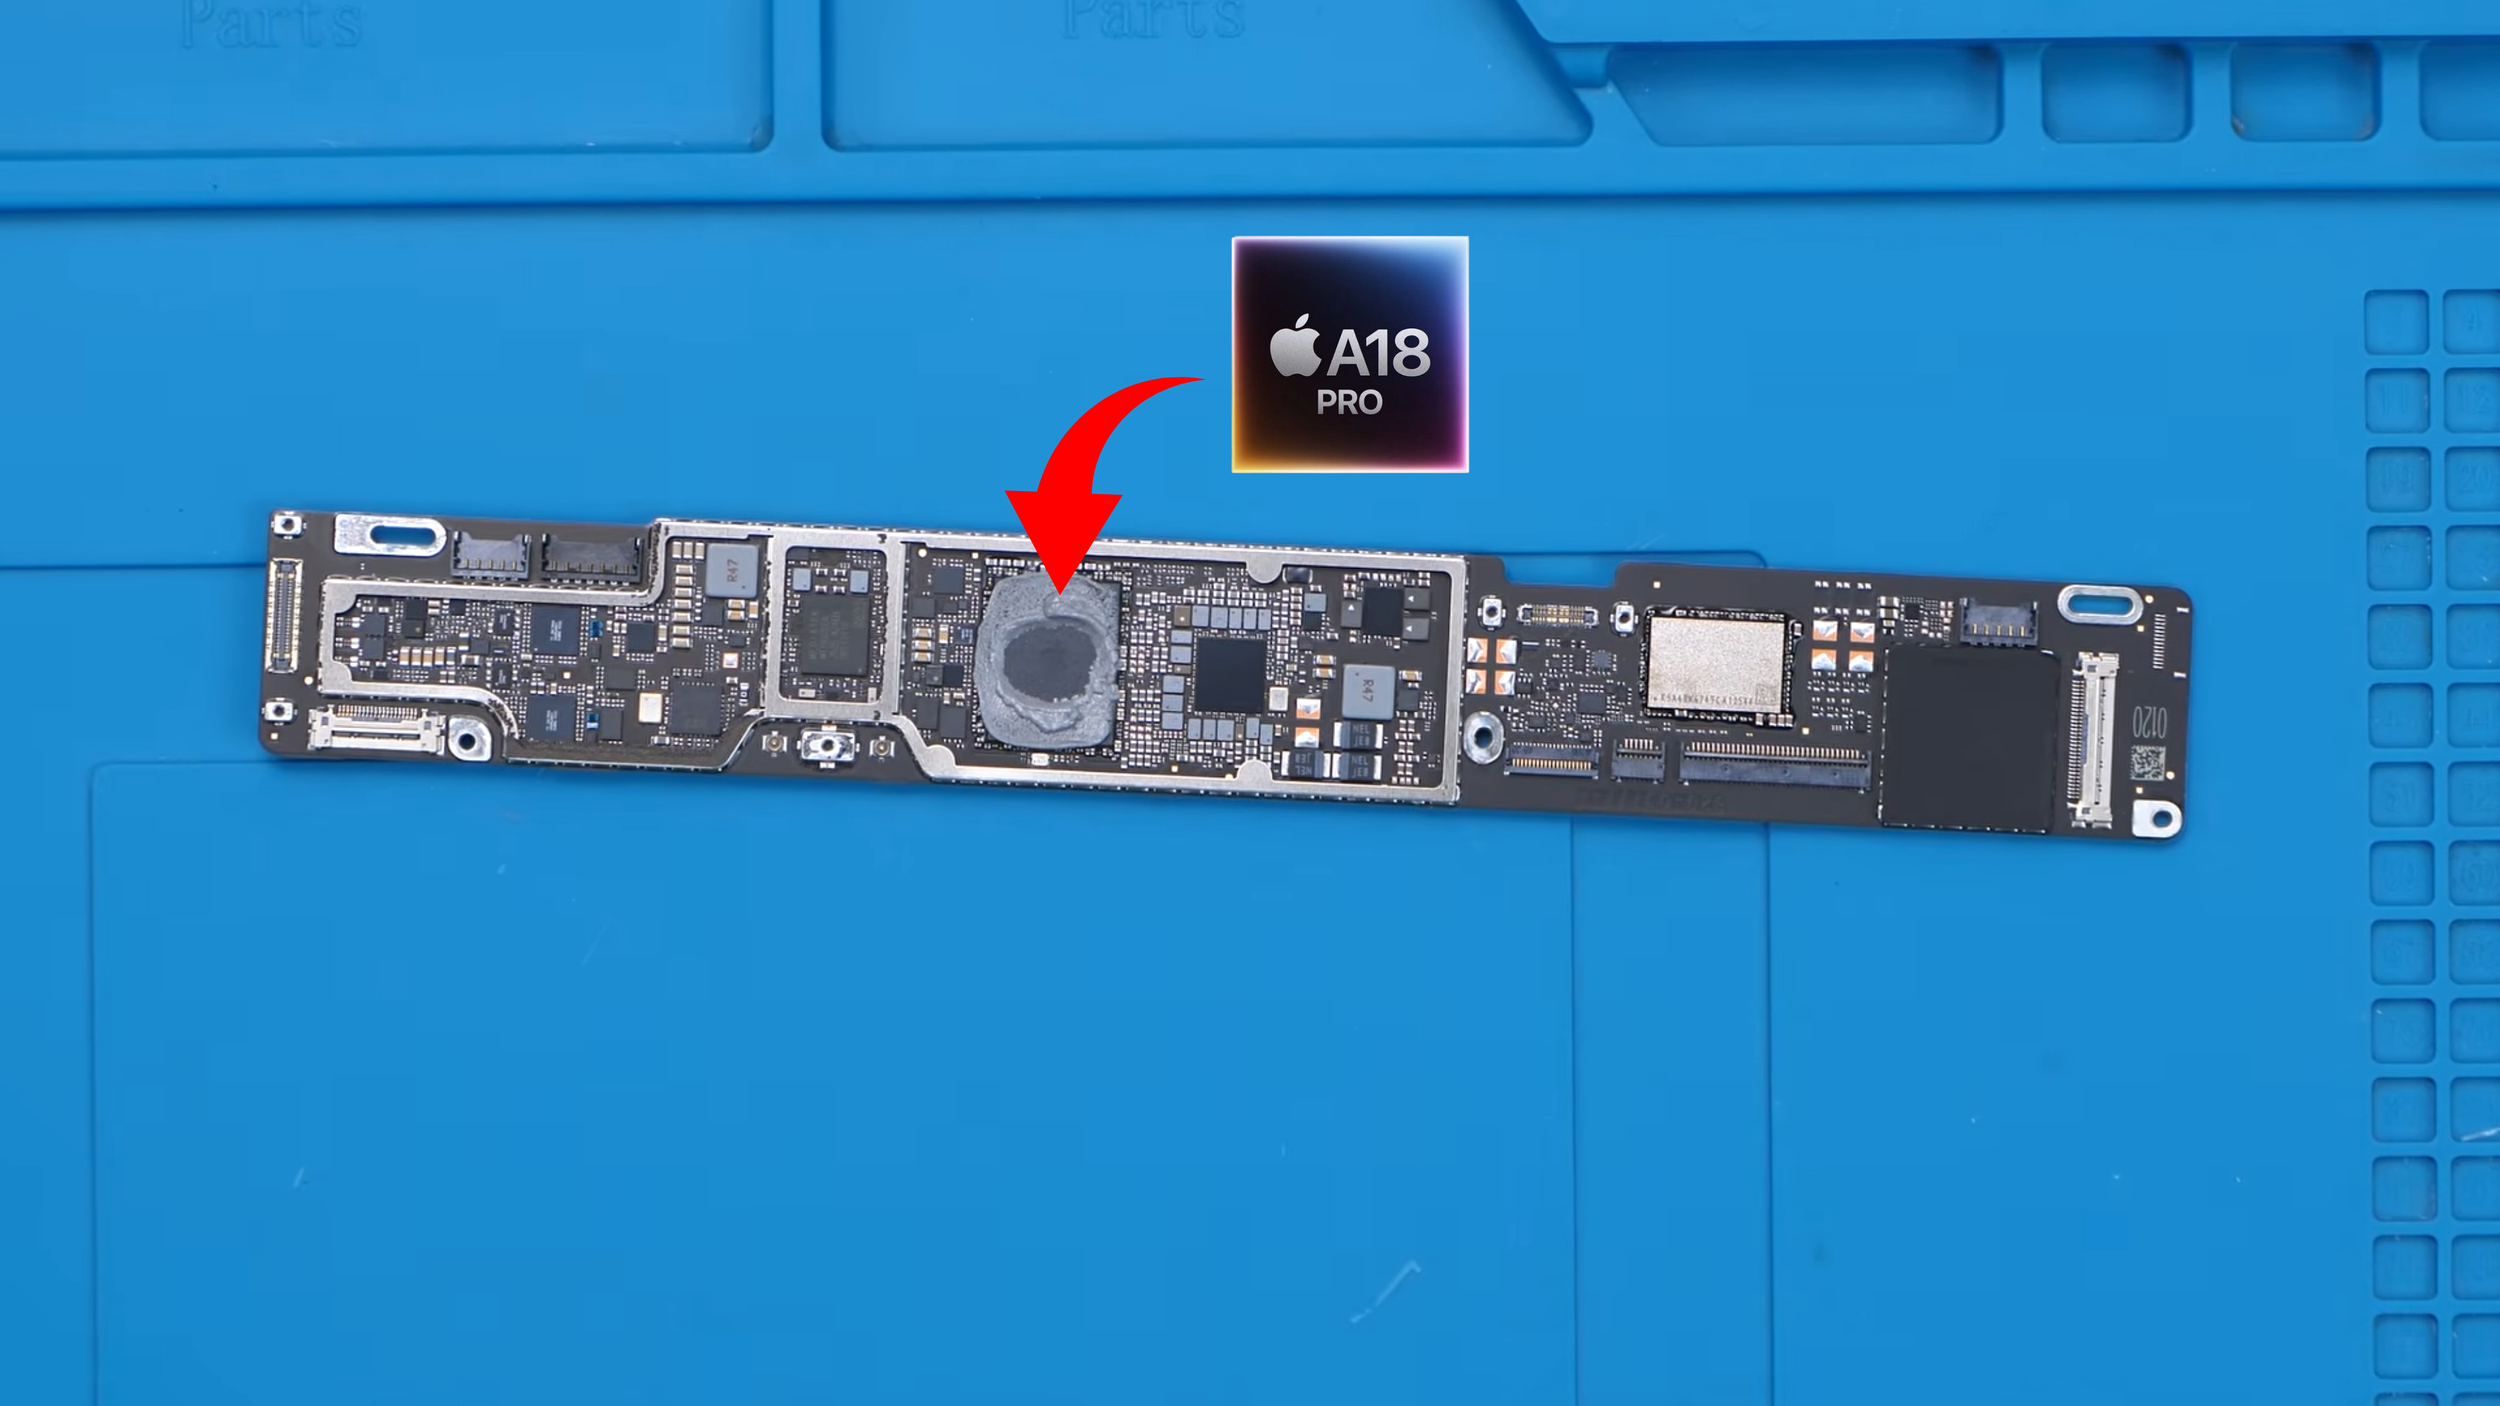
After disconnecting the remaining cables and removing the final screws, the board lifts out. It is incredibly small and thin, which is honestly impressive considering this is an entire laptop motherboard. We can easily spot the NAND storage chip, but the most important part is hidden under a graphite cooling pad.
Using a heat gun, we peel back the graphite layer. And there it is.
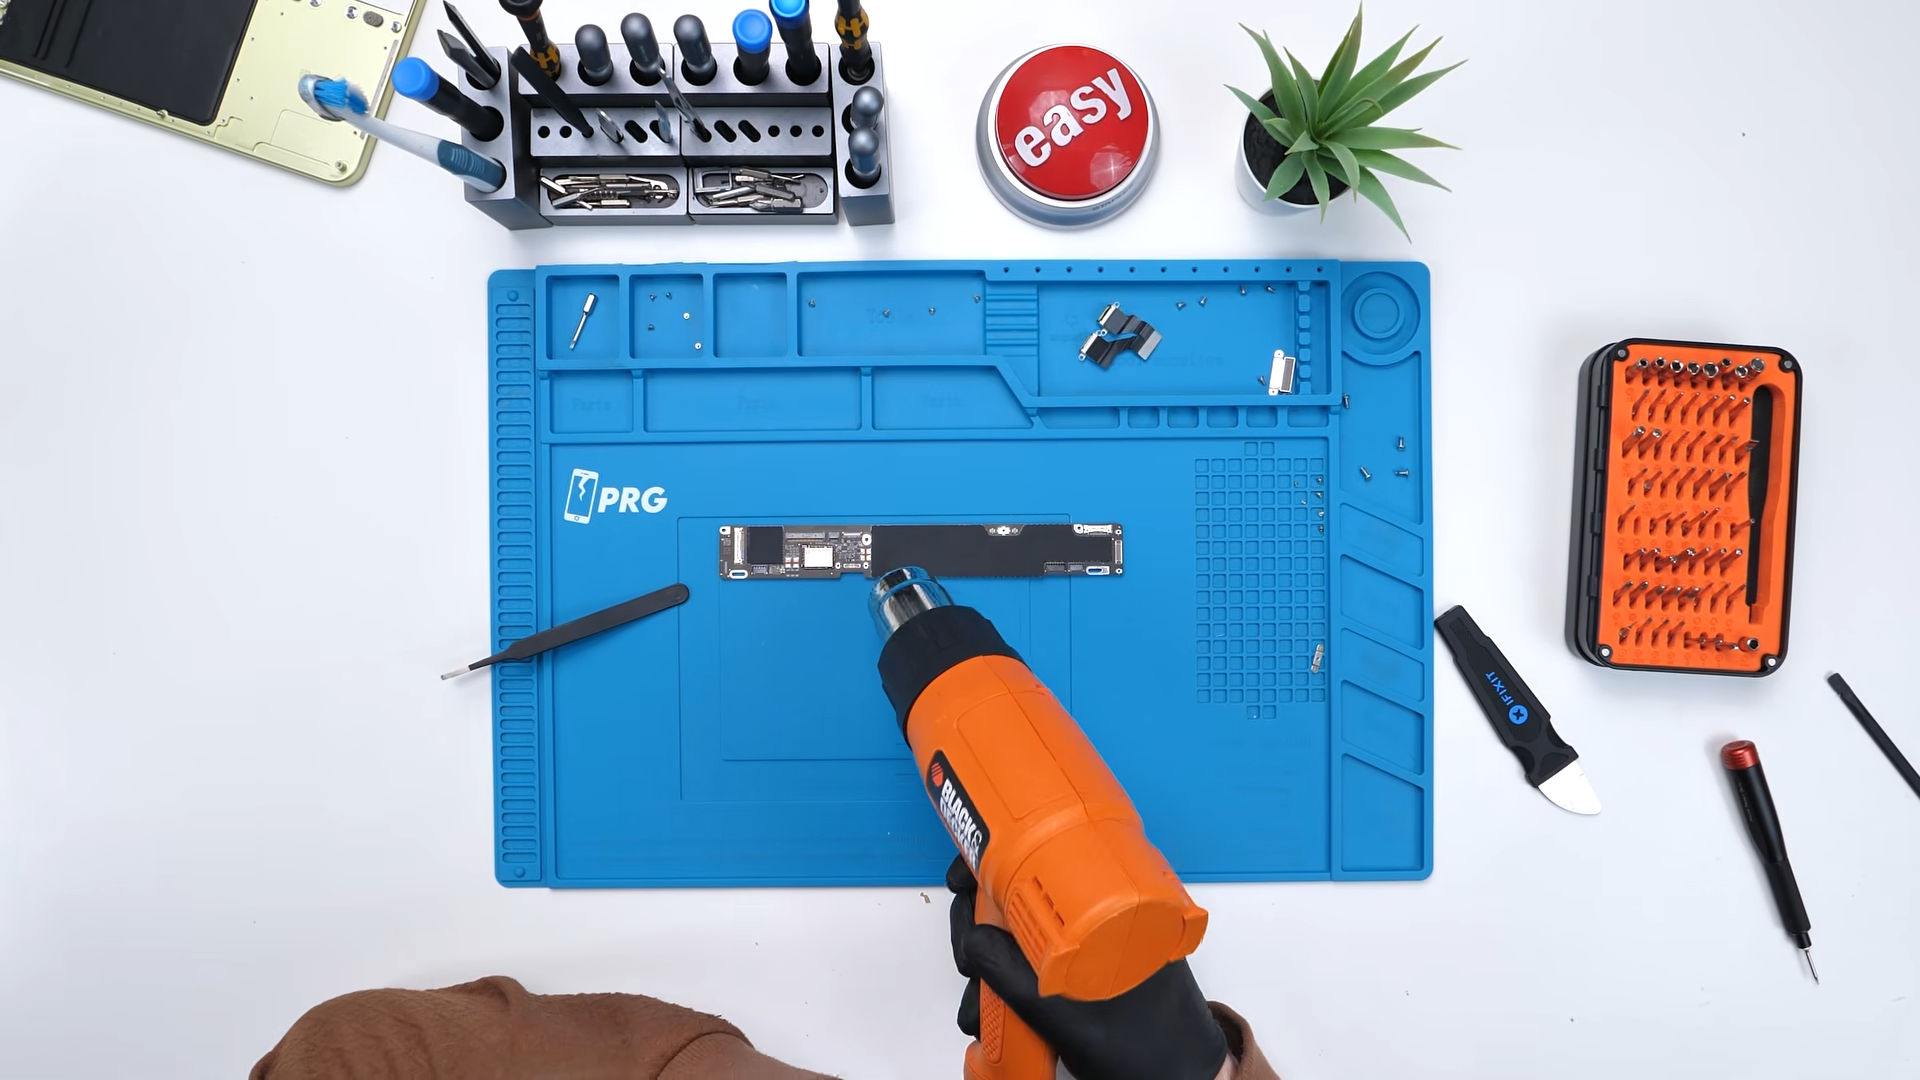
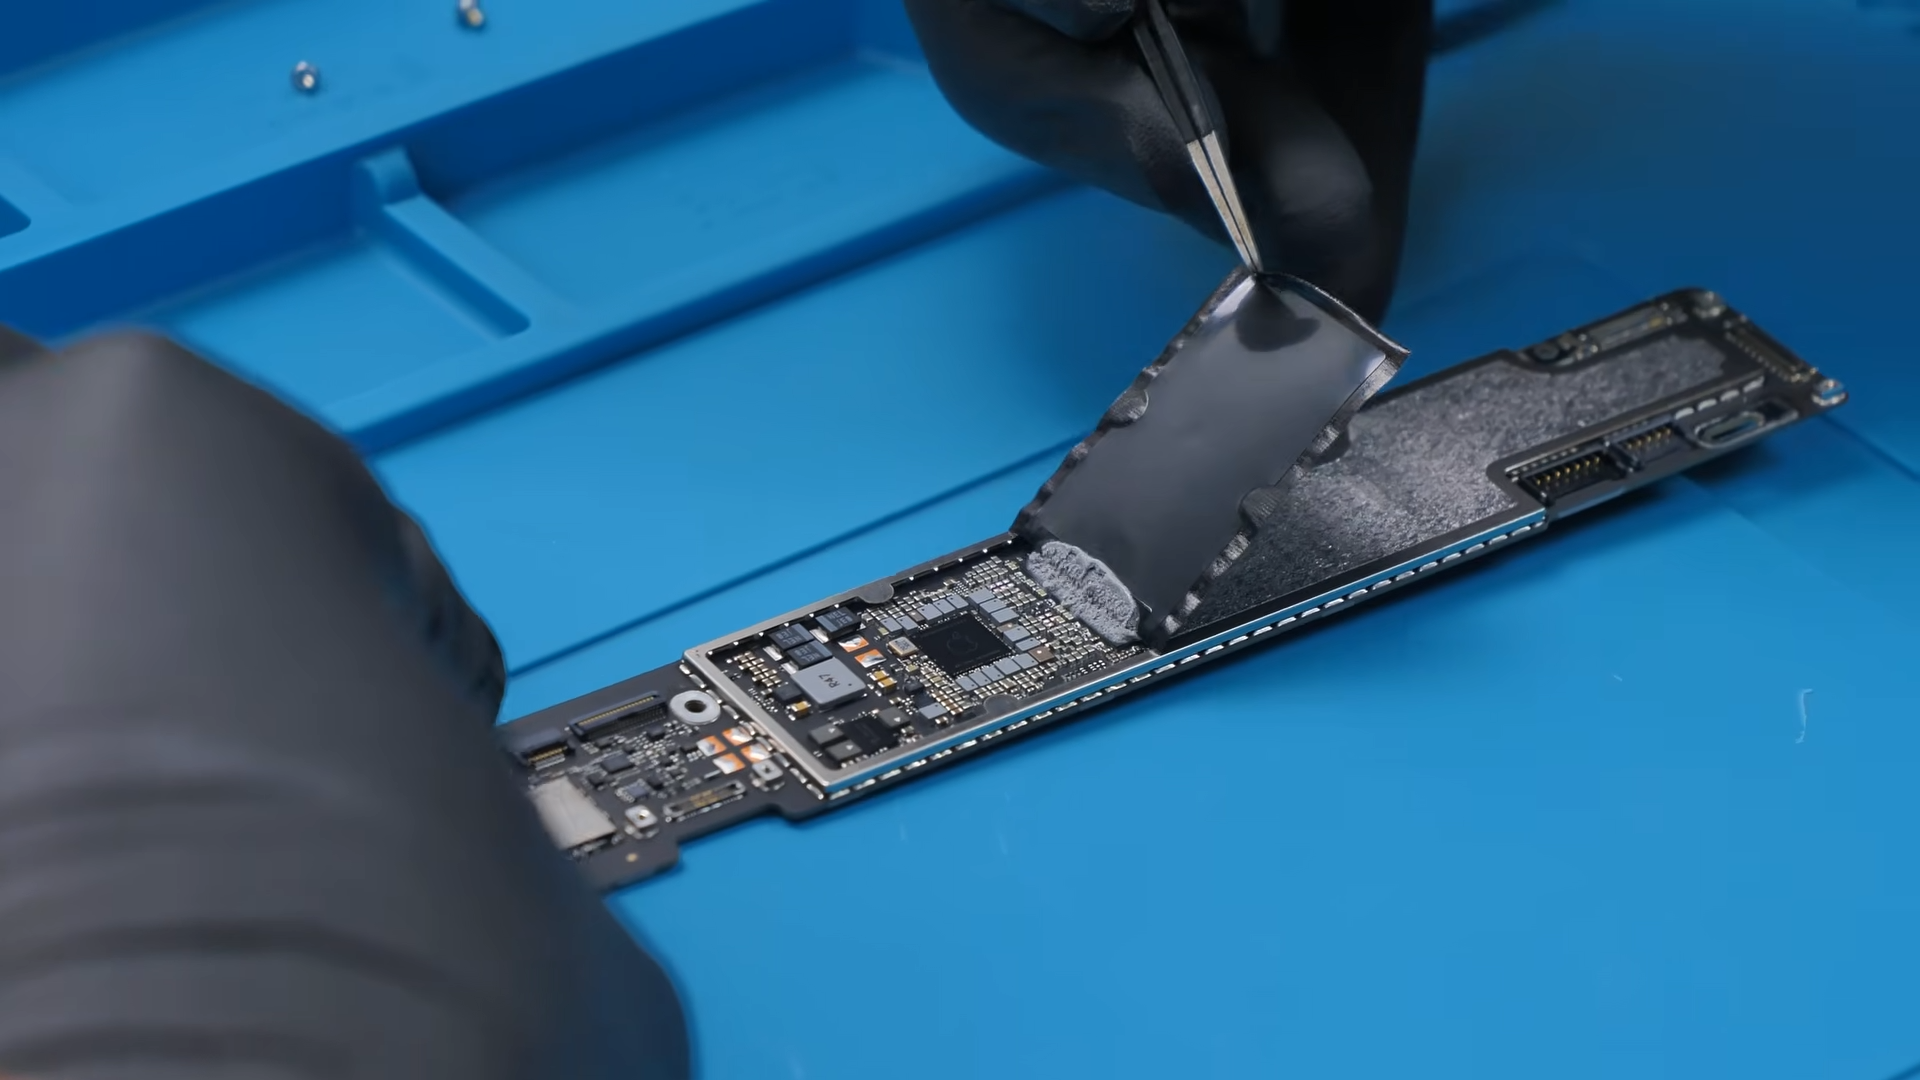
The A18 Pro chip. Yes, the same chip used in iPhones is now powering a MacBook. Reviews show that performance is surprisingly good for everyday tasks, although the chip does eventually throttle since the laptop does not include an active cooling fan.
From a repair standpoint though, motherboard problems will almost certainly mean replacing the entire board instead of repairing it at the component level.
At this price point, board-level repair probably would not be worth it anyway.
Testing a Full Board Swap
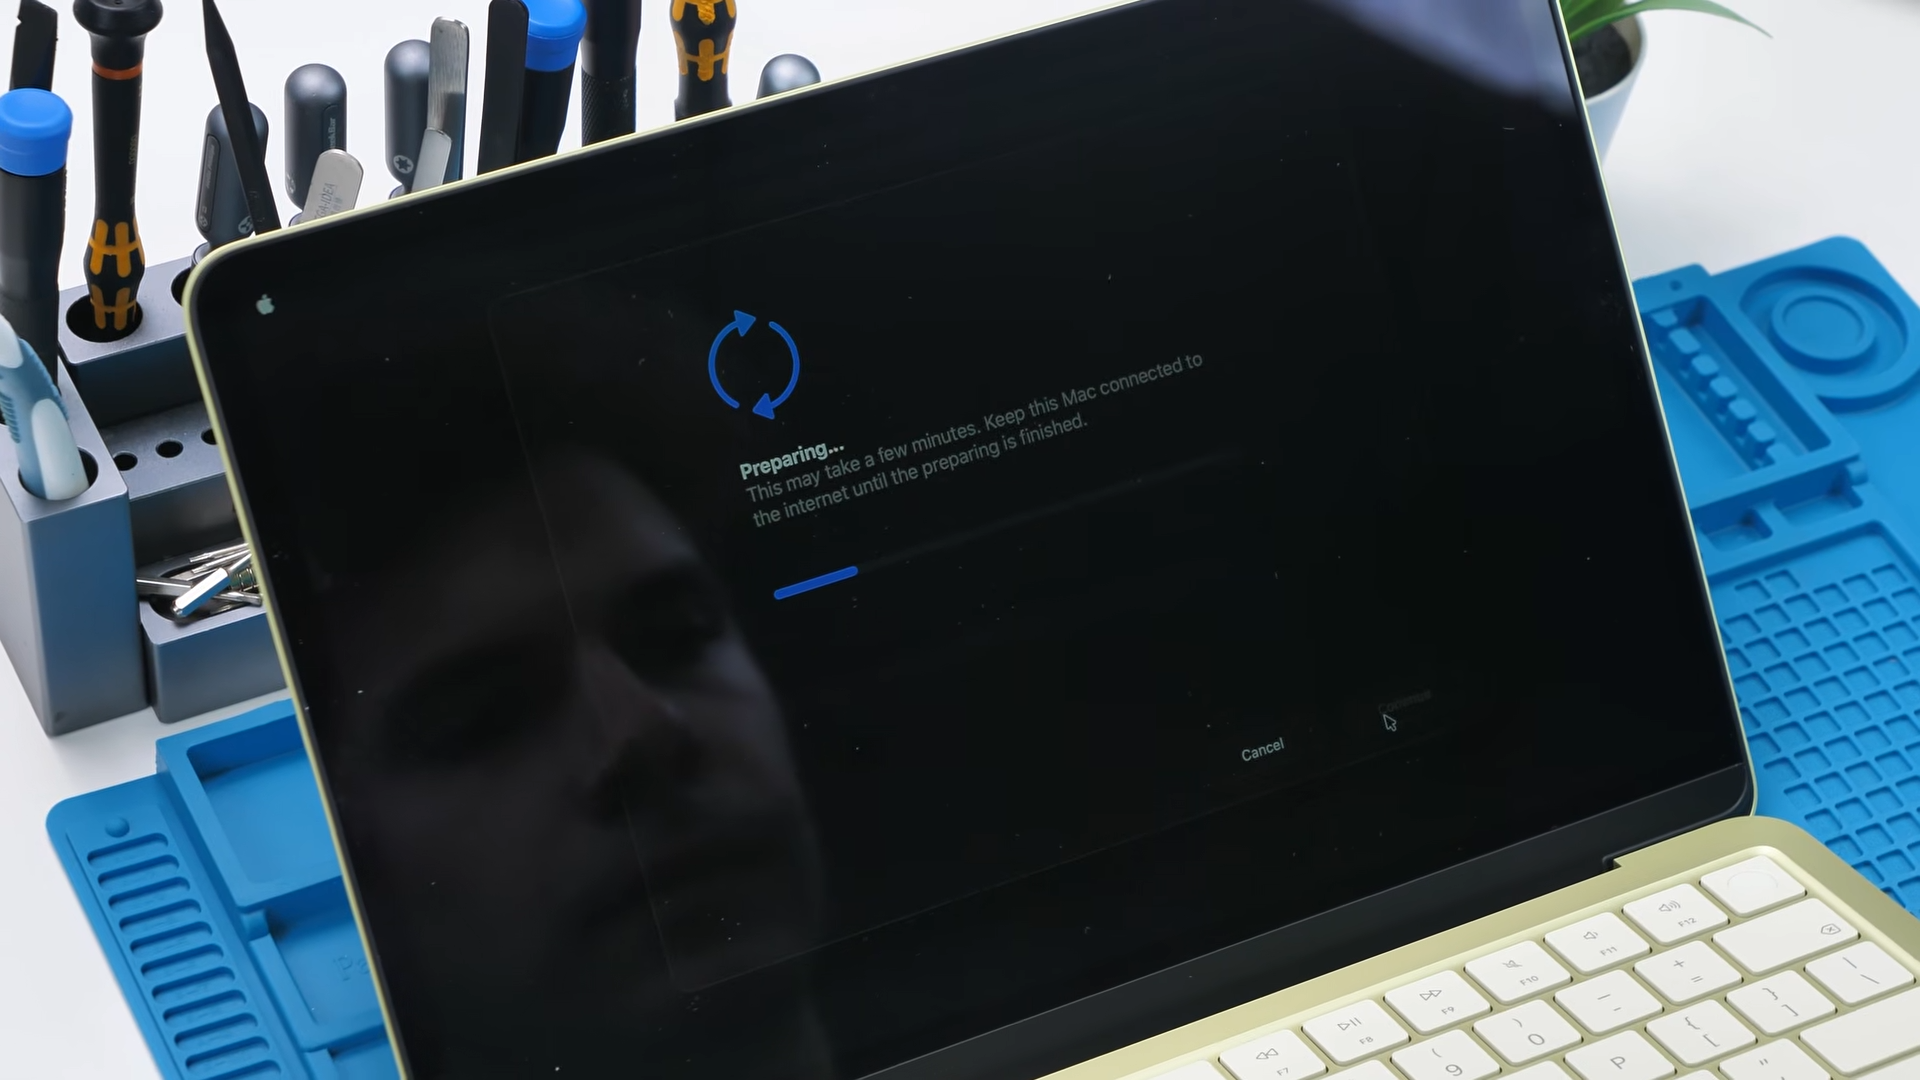
To push things even further, we swapped the motherboard with the one from the 512GB version that includes Touch ID. This essentially simulates replacing almost every component in the laptop. After booting the system and logging in, everything worked normally. Apple even includes a new section in System Settings called “Parts and Service” where the system detects replaced components.
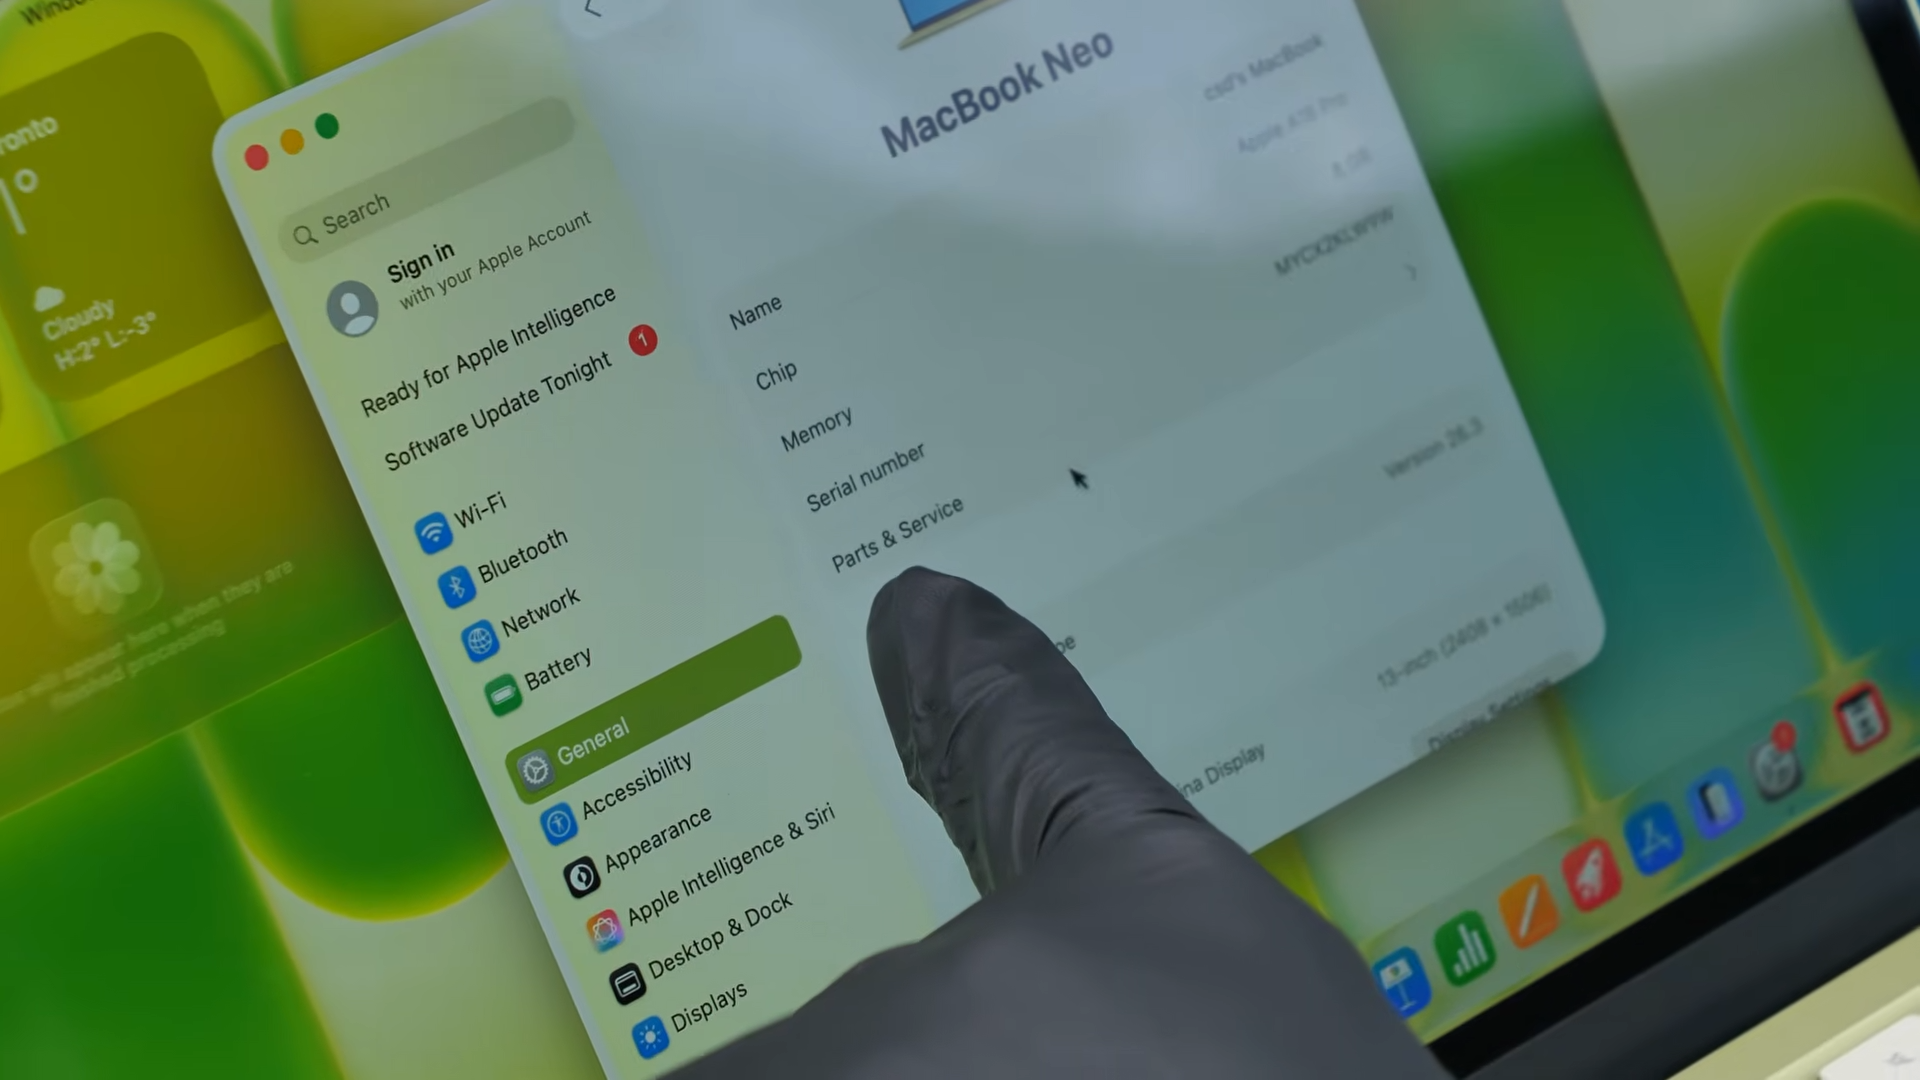
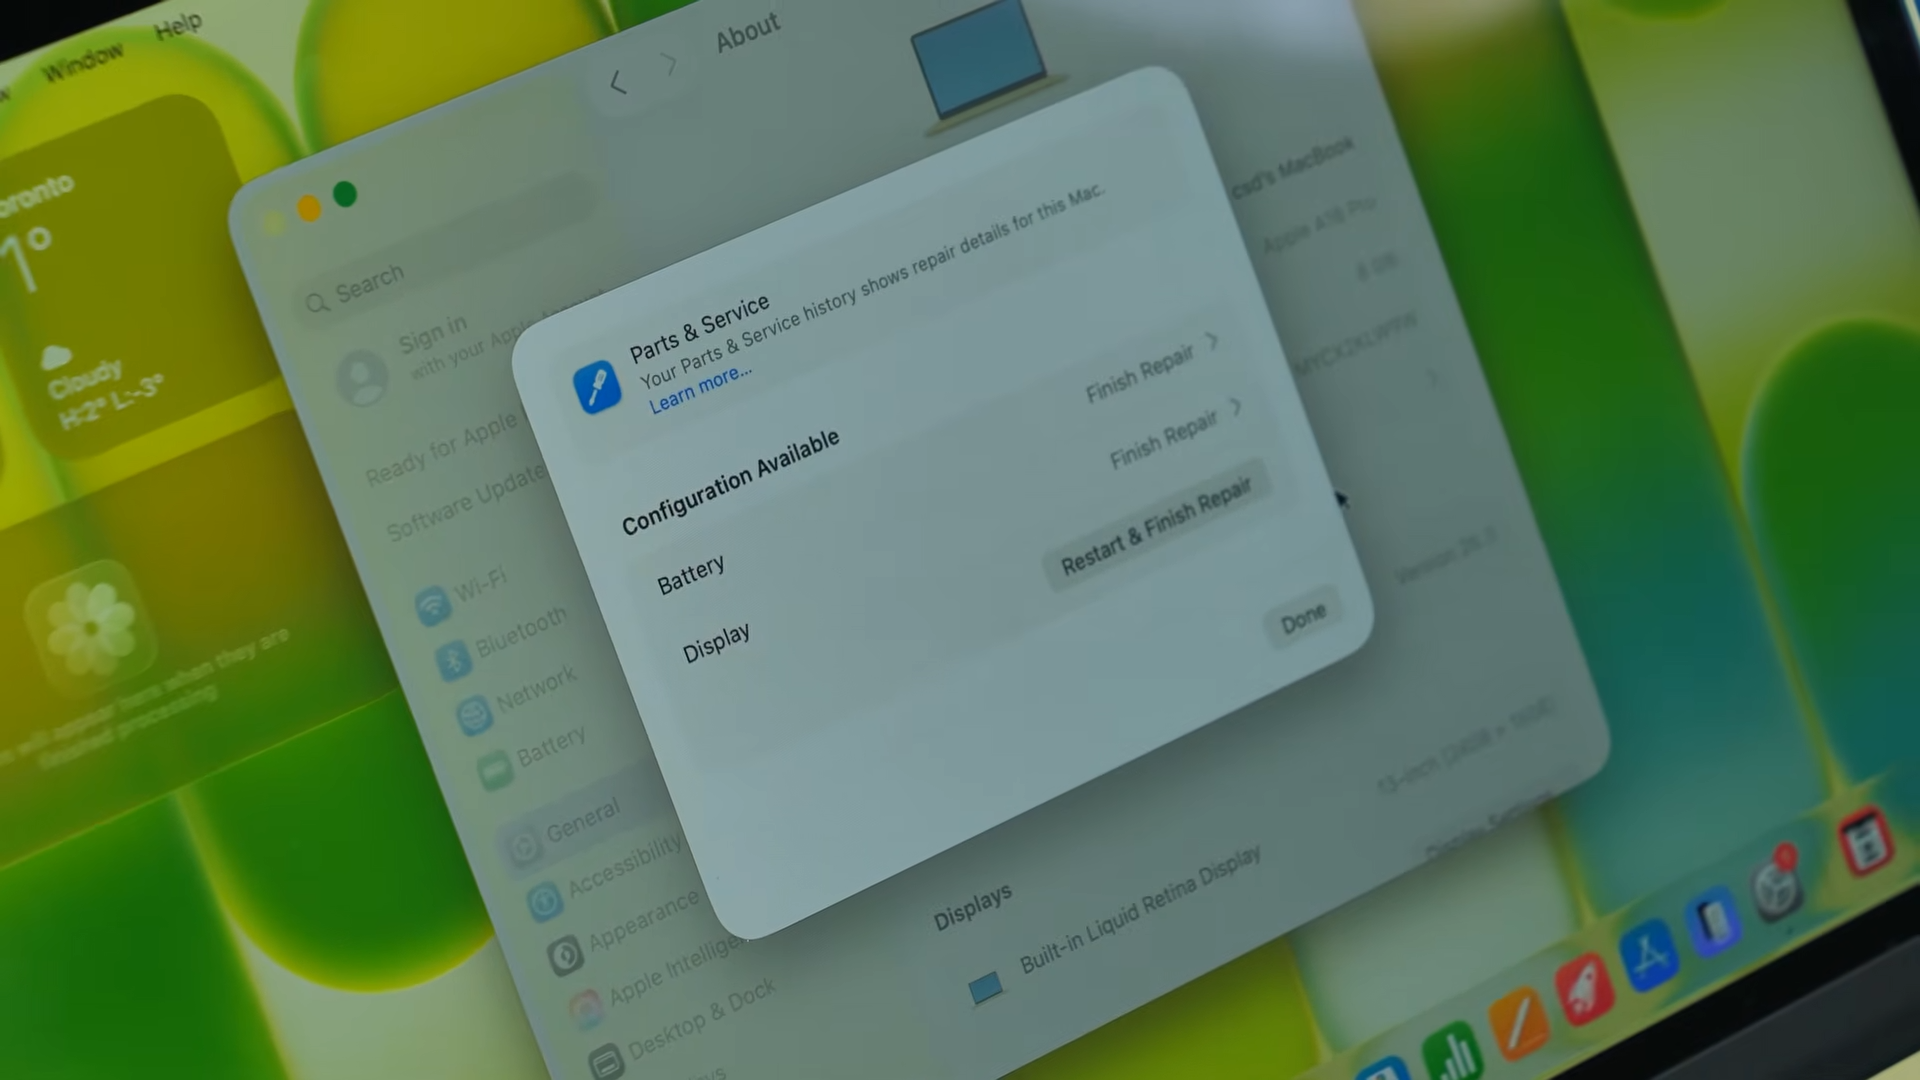
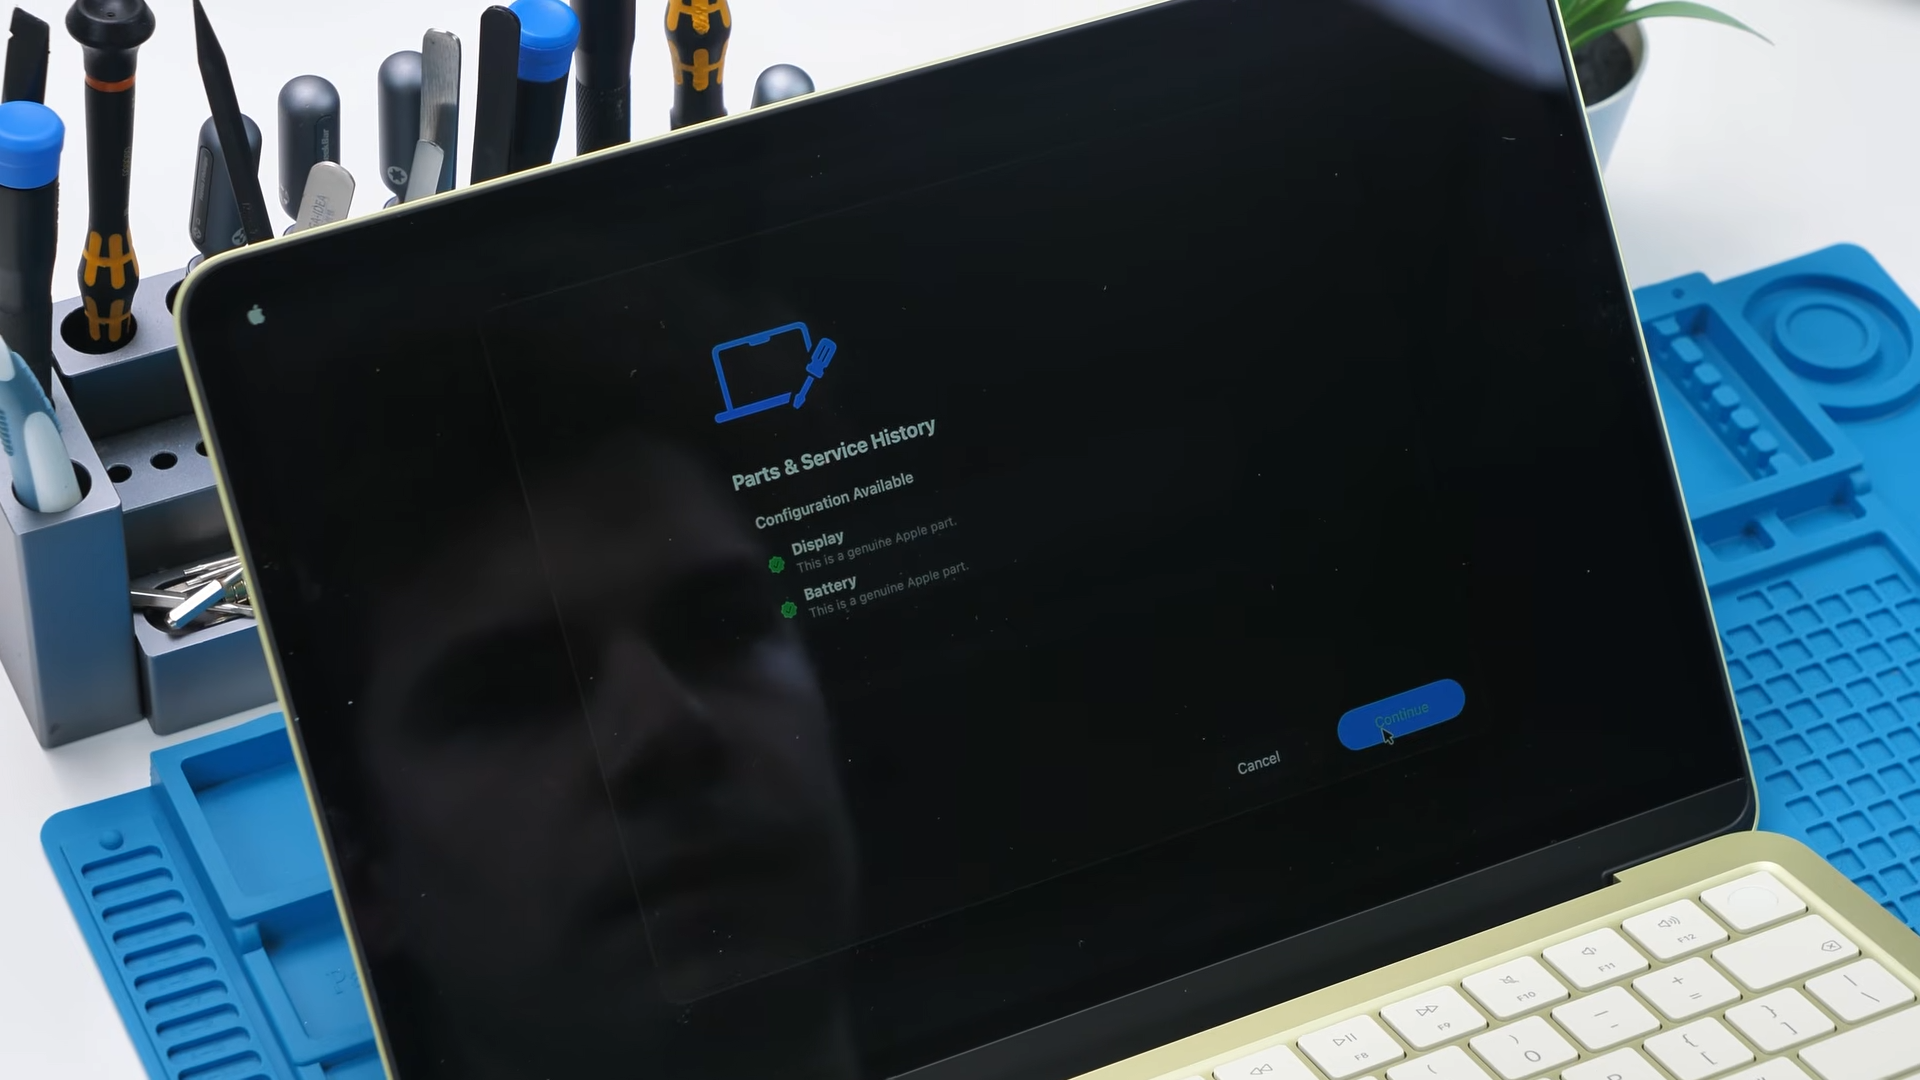
The laptop prompted us to configure the battery and display, confirming that both parts were genuine and allowing them to be properly calibrated. That is actually a very good sign for repairability.
But when it came to Touch ID, things did not go smoothly.
The base 256GB version does not include the necessary connector for the Touch ID module. Even though the motherboard supports it, the hardware simply is not present on the cheaper model. The power button itself also does not function as a Touch ID sensor.
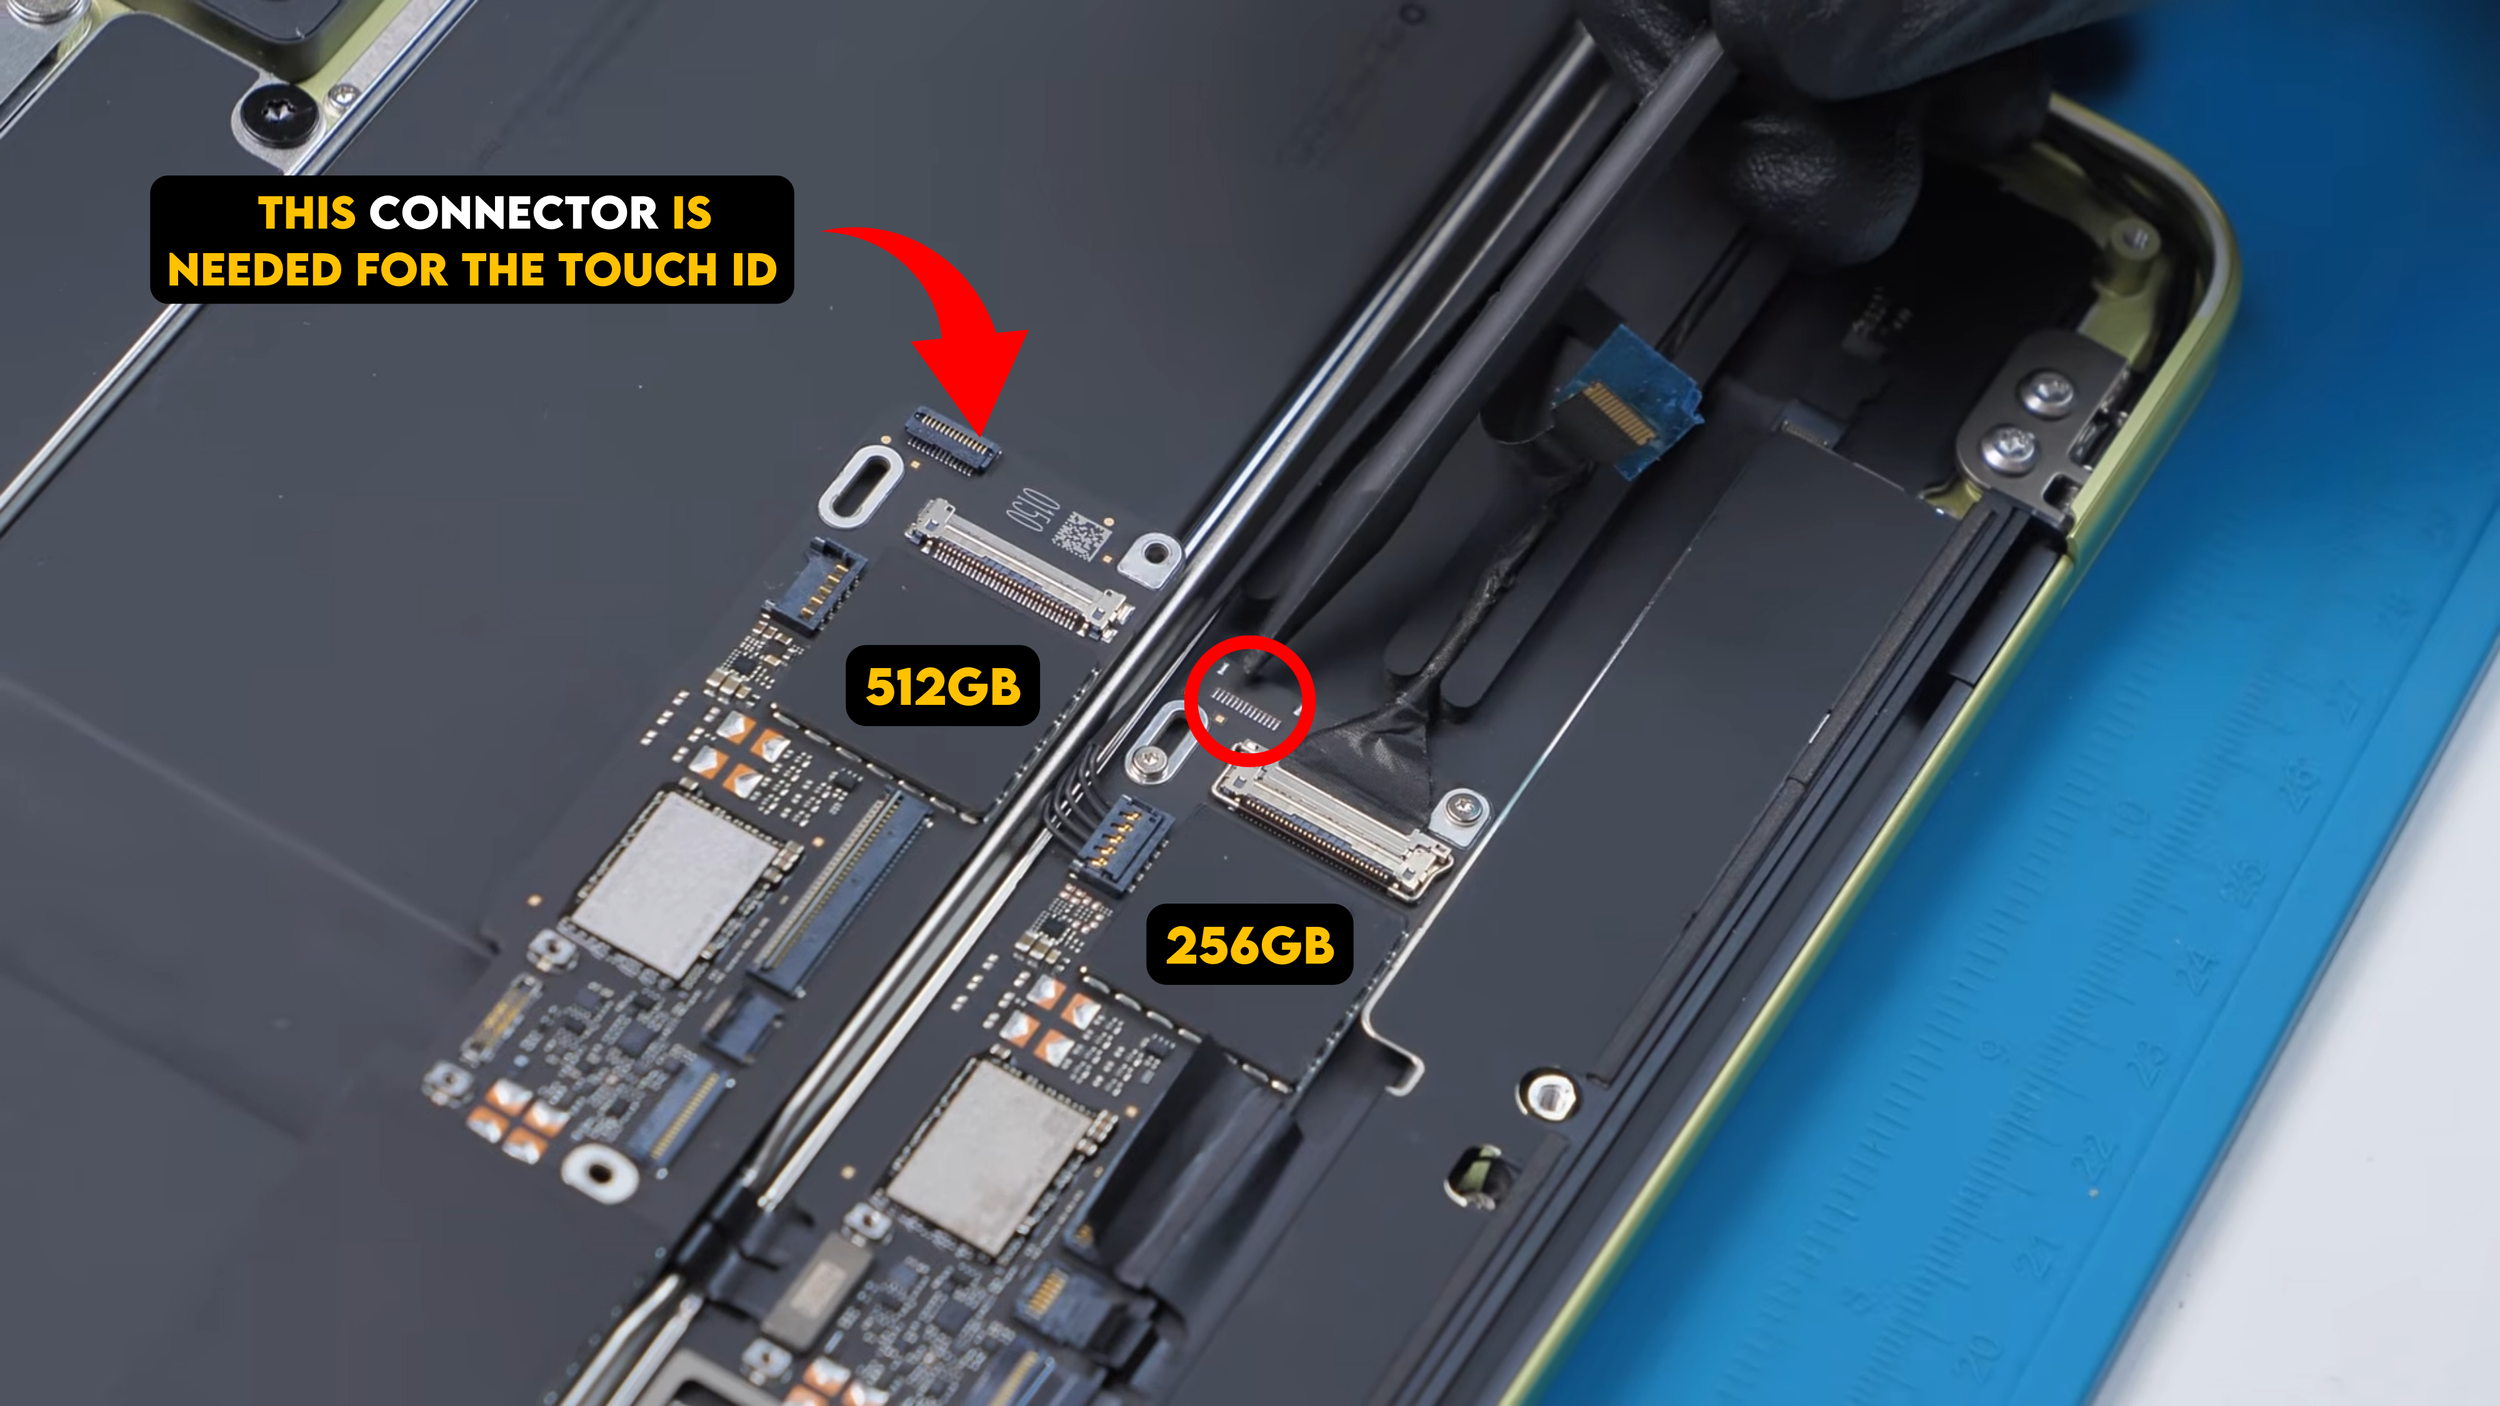
So unfortunately, upgrading the 256GB MacBook Neo to include Touch ID is not possible.
But Wait… It Goes Even Deeper
In teardown videos there is always a race to get the first look at a device online, which means the focus is usually on practical questions like whether parts can be replaced or upgraded easily. But a repair technician in China decided to take the MacBook Neo experiment further. During a livestreamed modification, they examined the motherboard and discovered a small 10-ohm identification resistor that signals whether the system should support Touch ID.
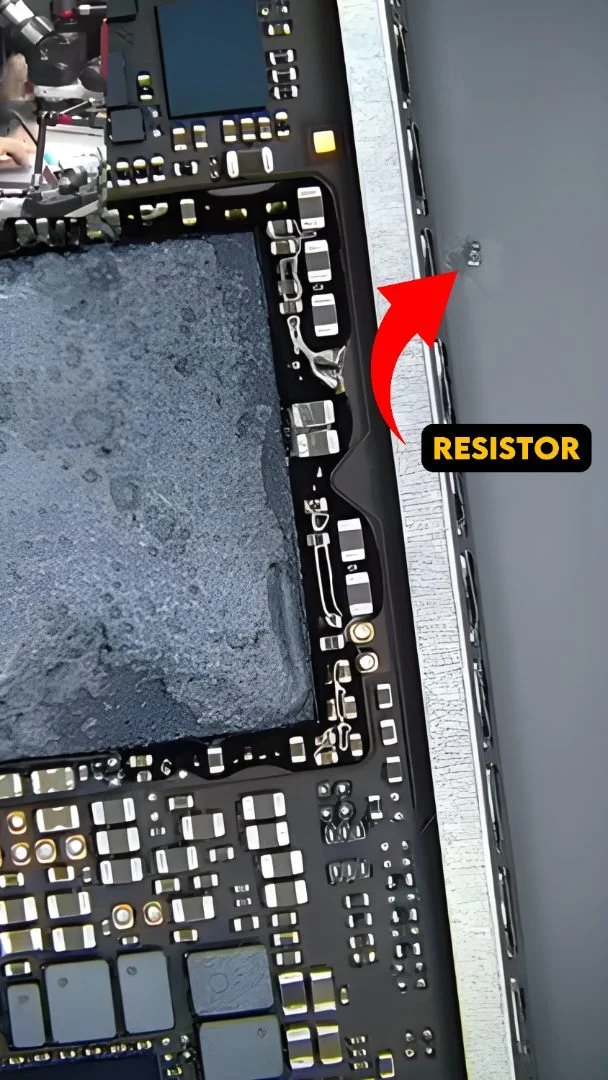
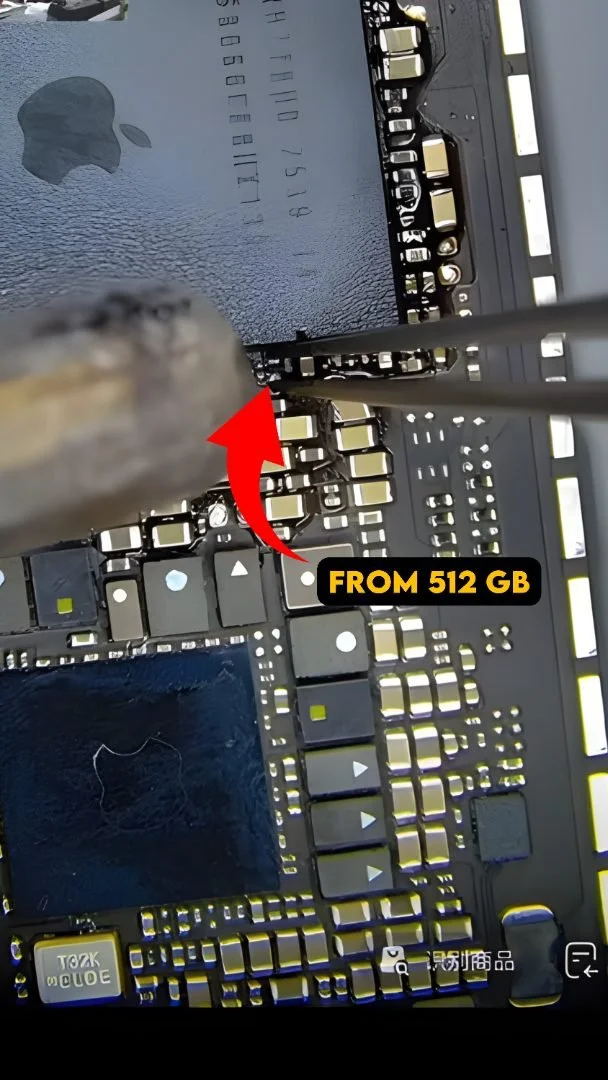
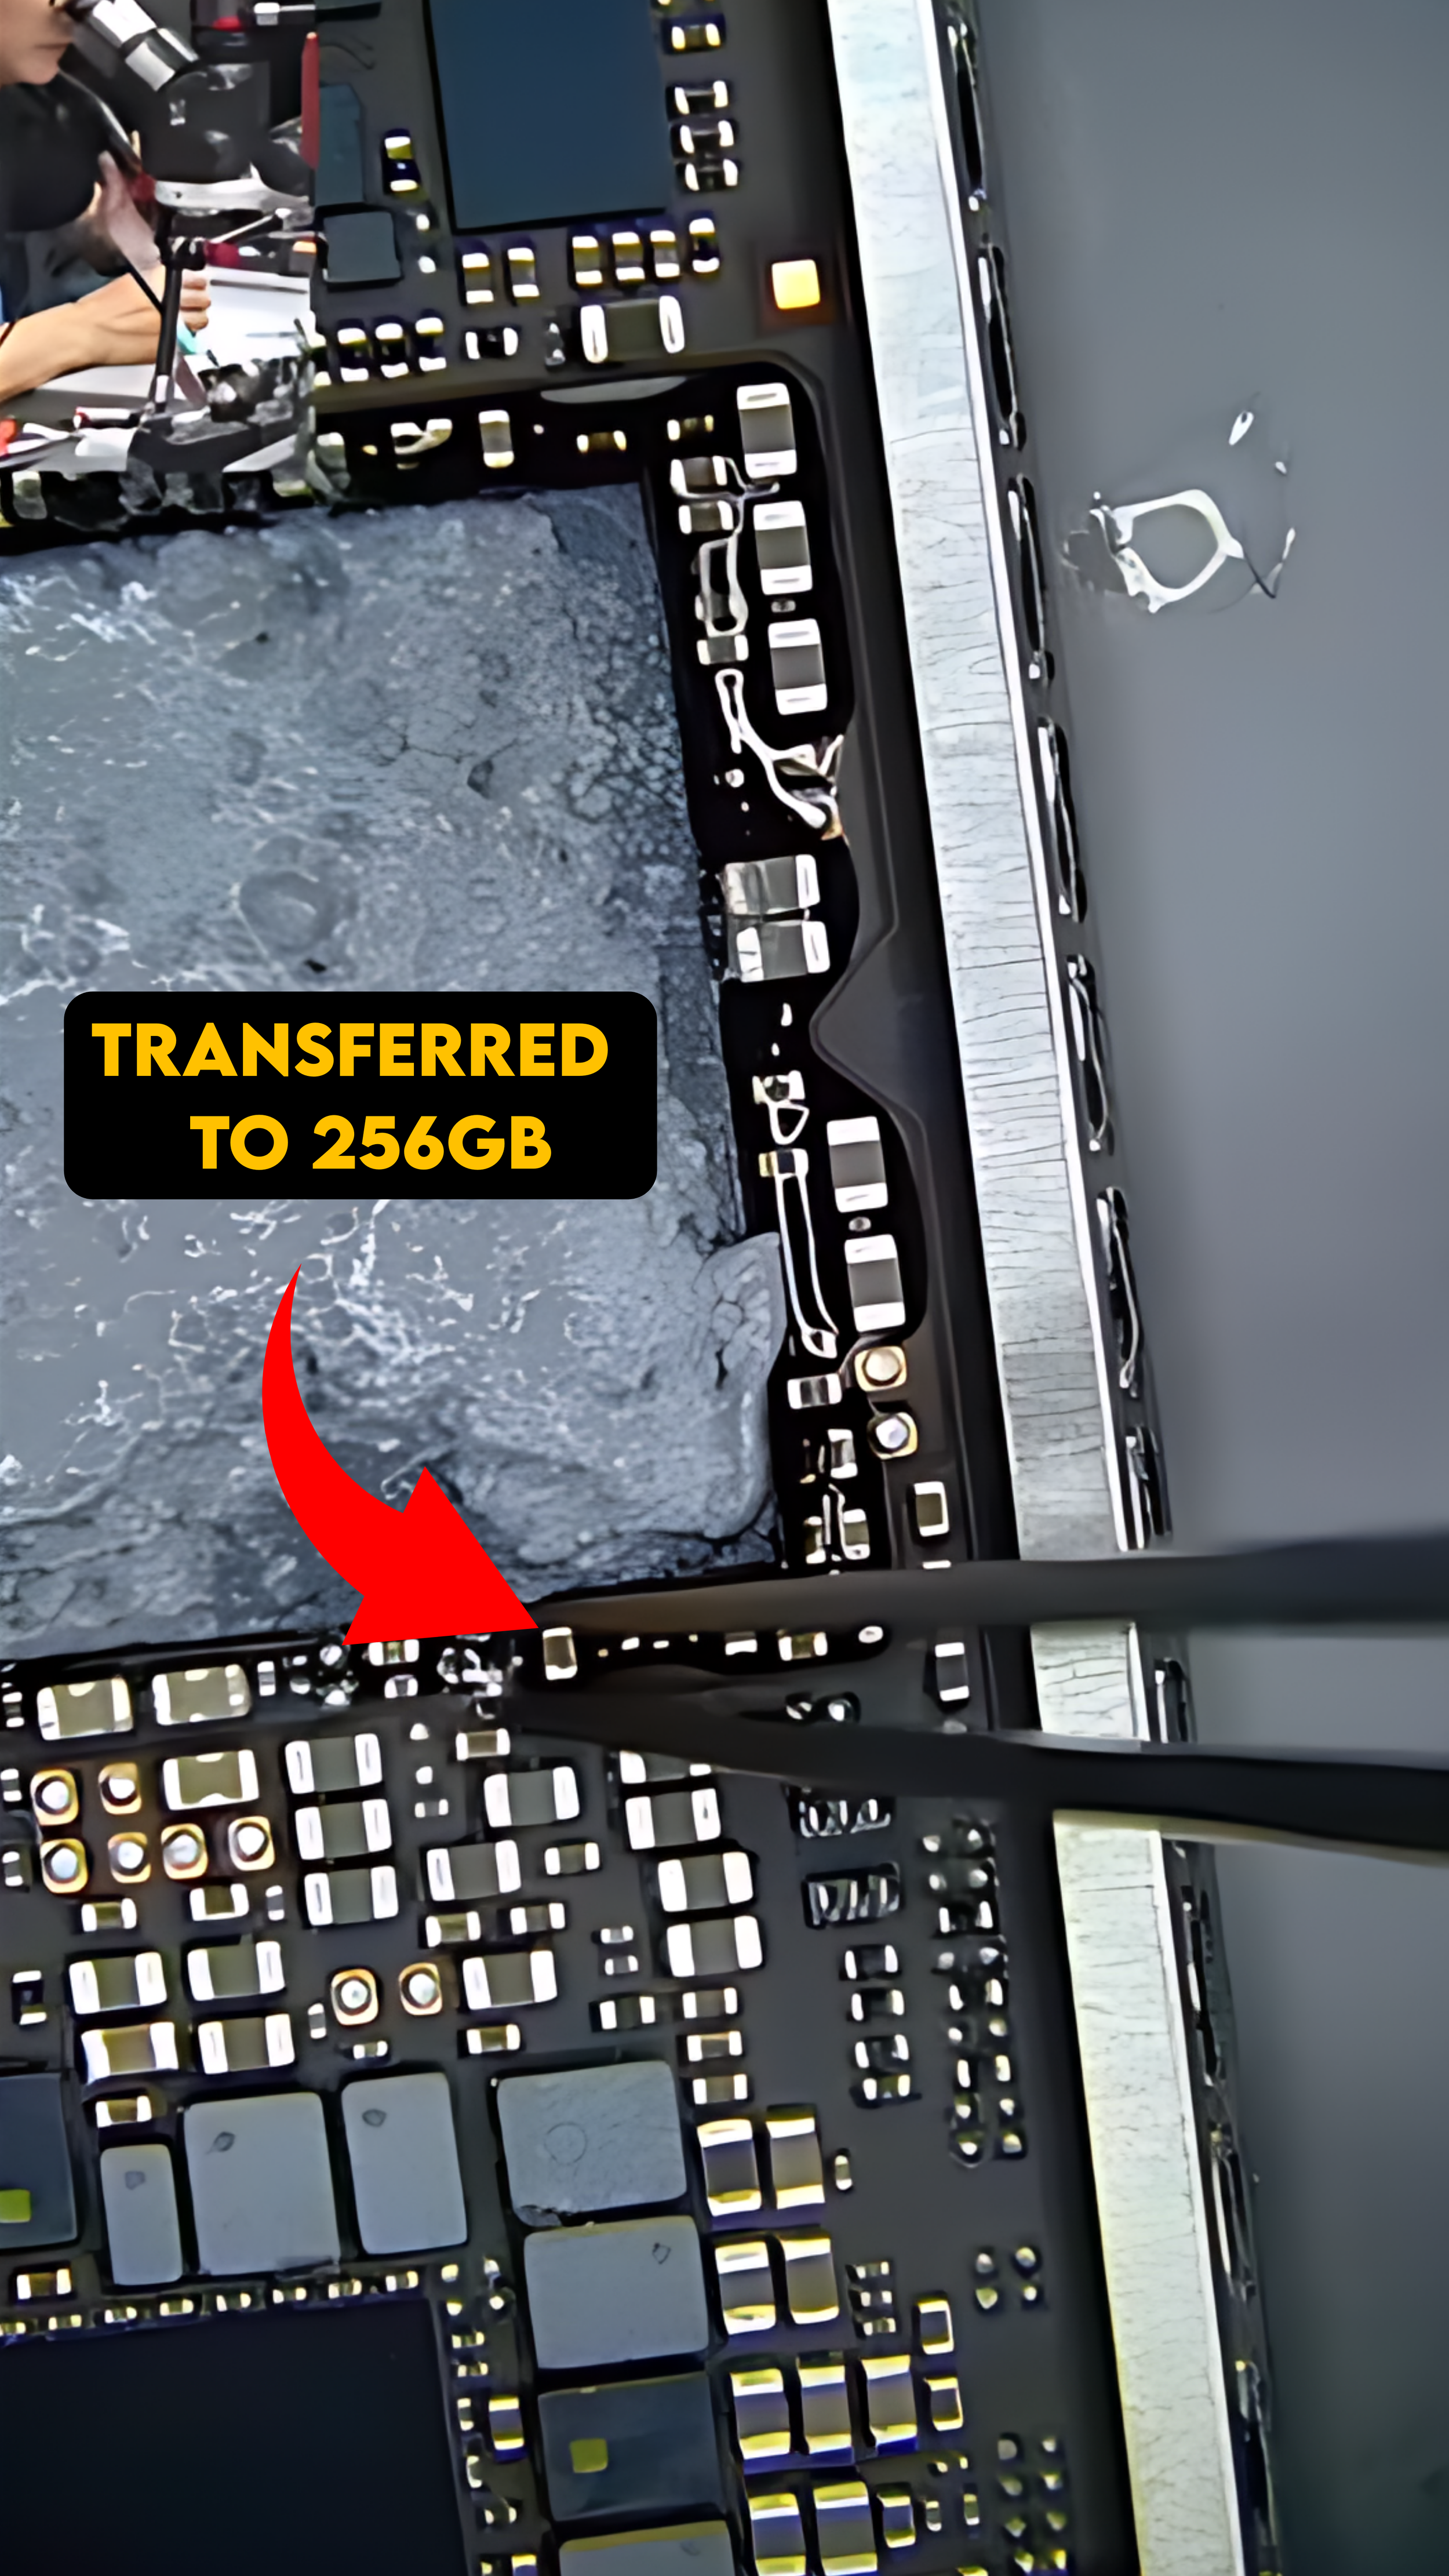
After relocating that resistor, macOS suddenly displayed the “Add Fingerprint” option in System Settings. This revealed that macOS does not remove the Touch ID feature from the base model at all. Instead, the system checks a hardware flag on the motherboard to decide whether the option should appear. After reinstalling macOS so the system could detect the change, the Touch ID menu appeared exactly as expected.
However, fingerprint enrollment still failed. The sensor must be cryptographically paired with the Secure Enclave inside the processor during Apple’s factory calibration, and without that pairing the system refuses to register fingerprints even if the hardware is present. So despite installing the sensor, modifying the resistor, and reinstalling macOS, Touch ID still could not be activated, showing that Apple relies on both hardware flags and Secure Enclave pairing to control which features are actually enabled.
Final Thoughts
The MacBook Neo is a surprisingly repair-friendly laptop. The speakers, headphone jack, battery, USB-C ports, and even the display are modular and held in place with screws instead of adhesive. The mechanical trackpad is also simpler than the haptic versions used in more expensive models. The motherboard is still a replacement-only situation if something goes wrong, but that is fairly typical for modern laptops.
Overall, for a budget MacBook, this is one of the more repairable designs Apple has released in years. And if this thing really does end up in classrooms everywhere, that is a very good thing.
If nothing else, at least the next generation of students might learn how to replace a battery instead of throwing away a perfectly good laptop.
See you in the next article!