
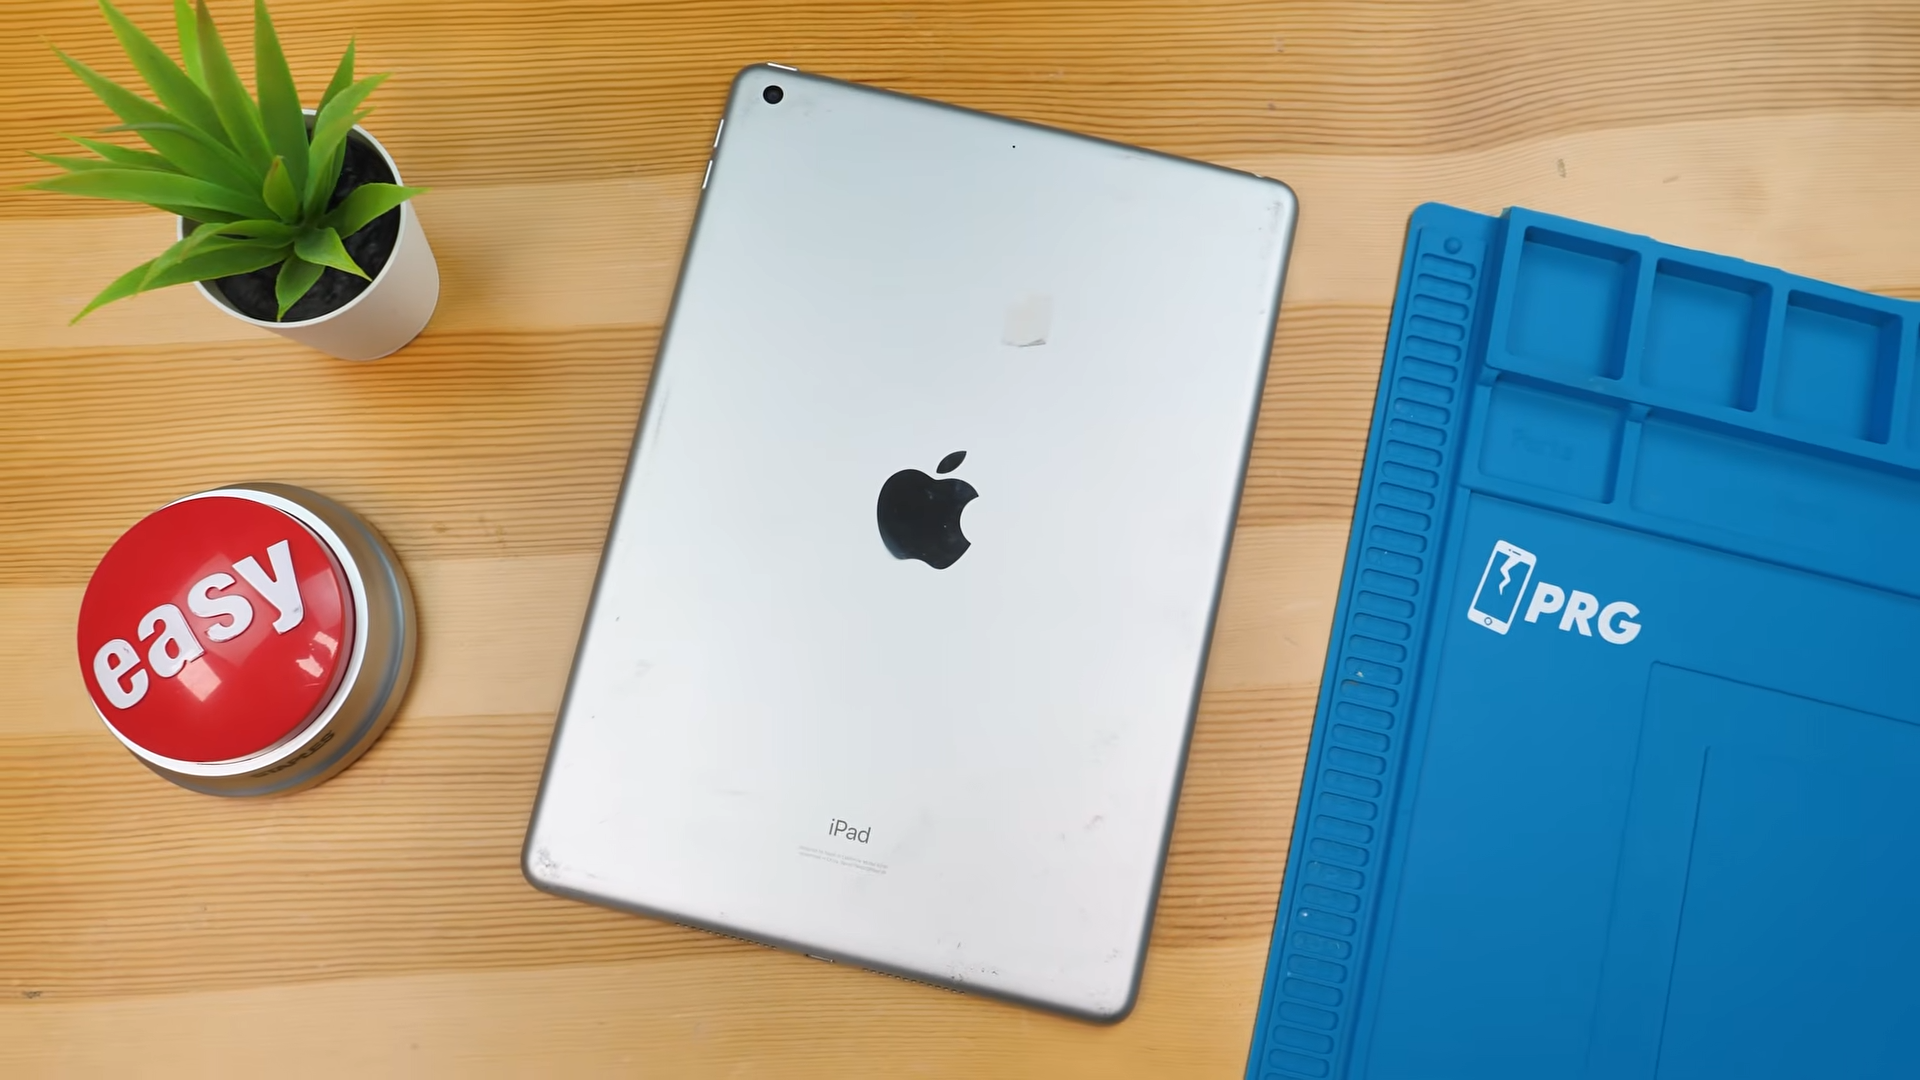
I Built an iPad Using Parts From AliExpress…
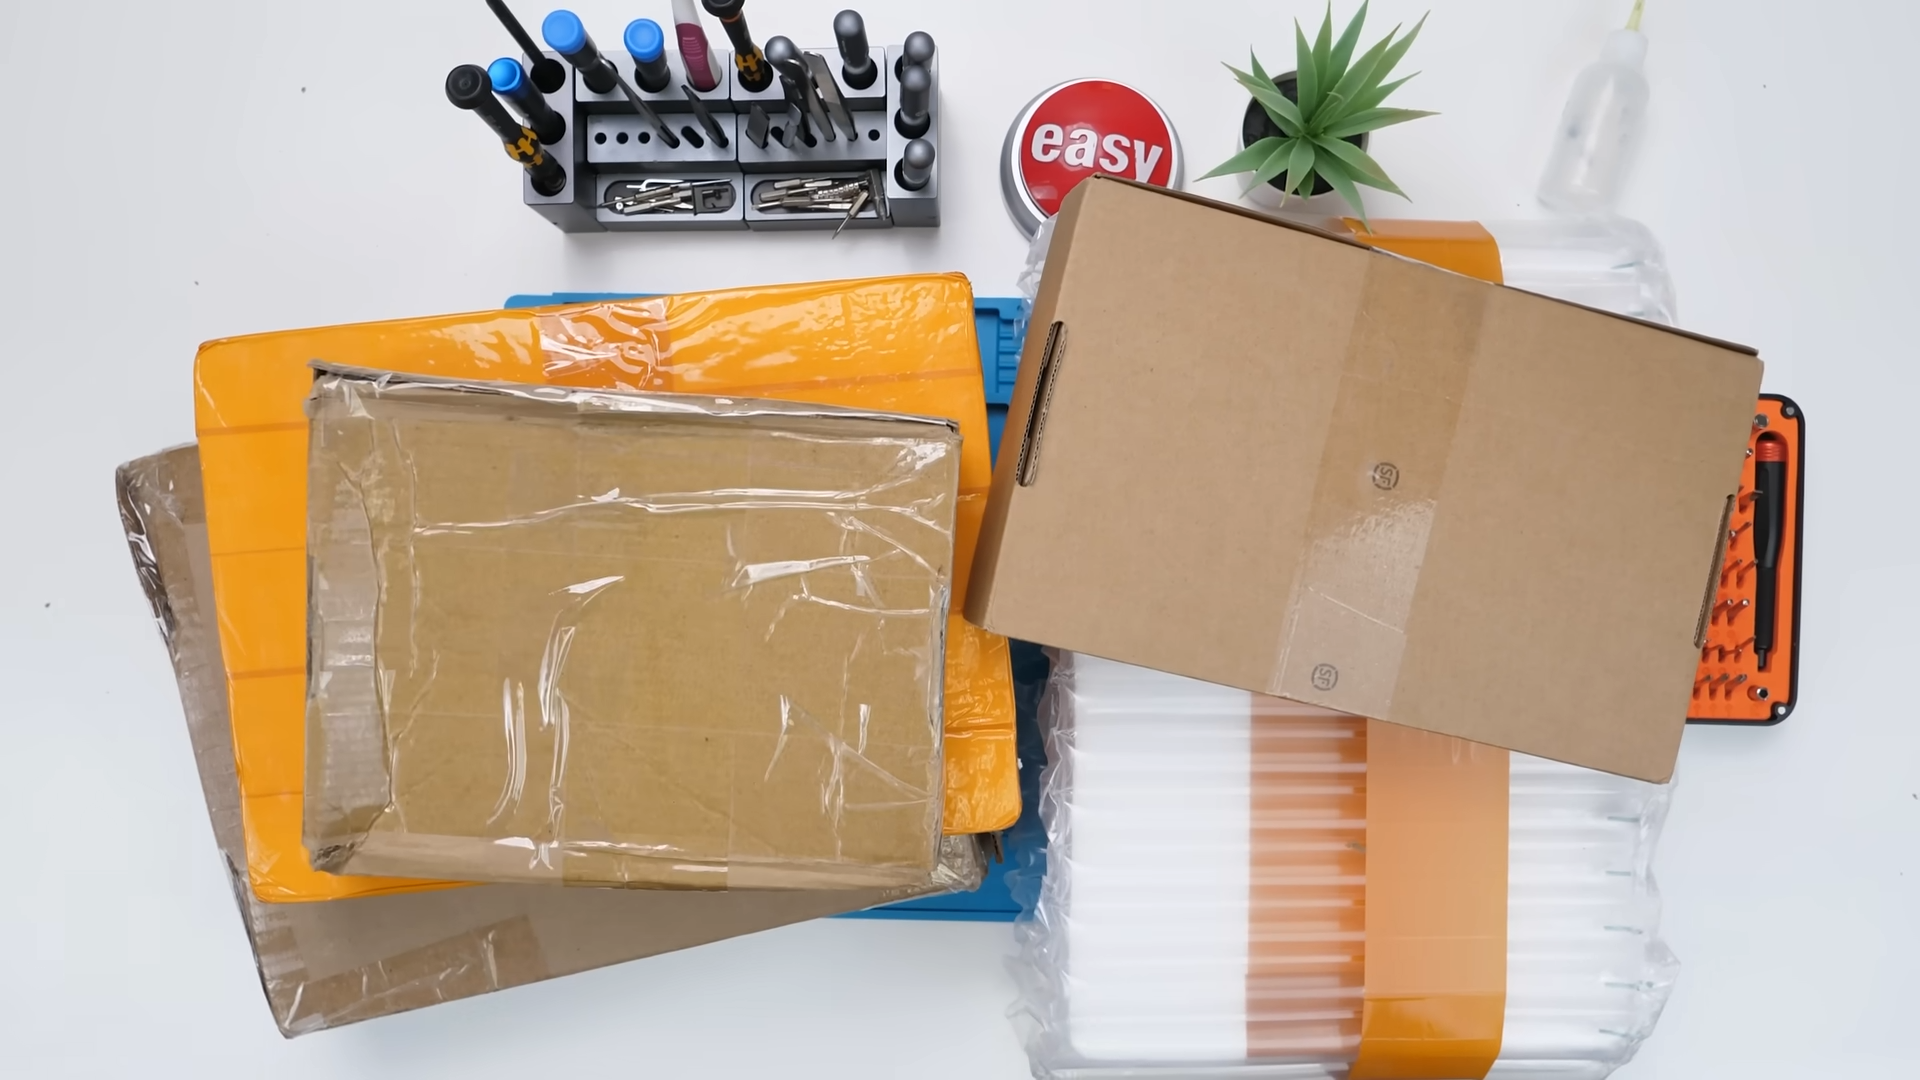
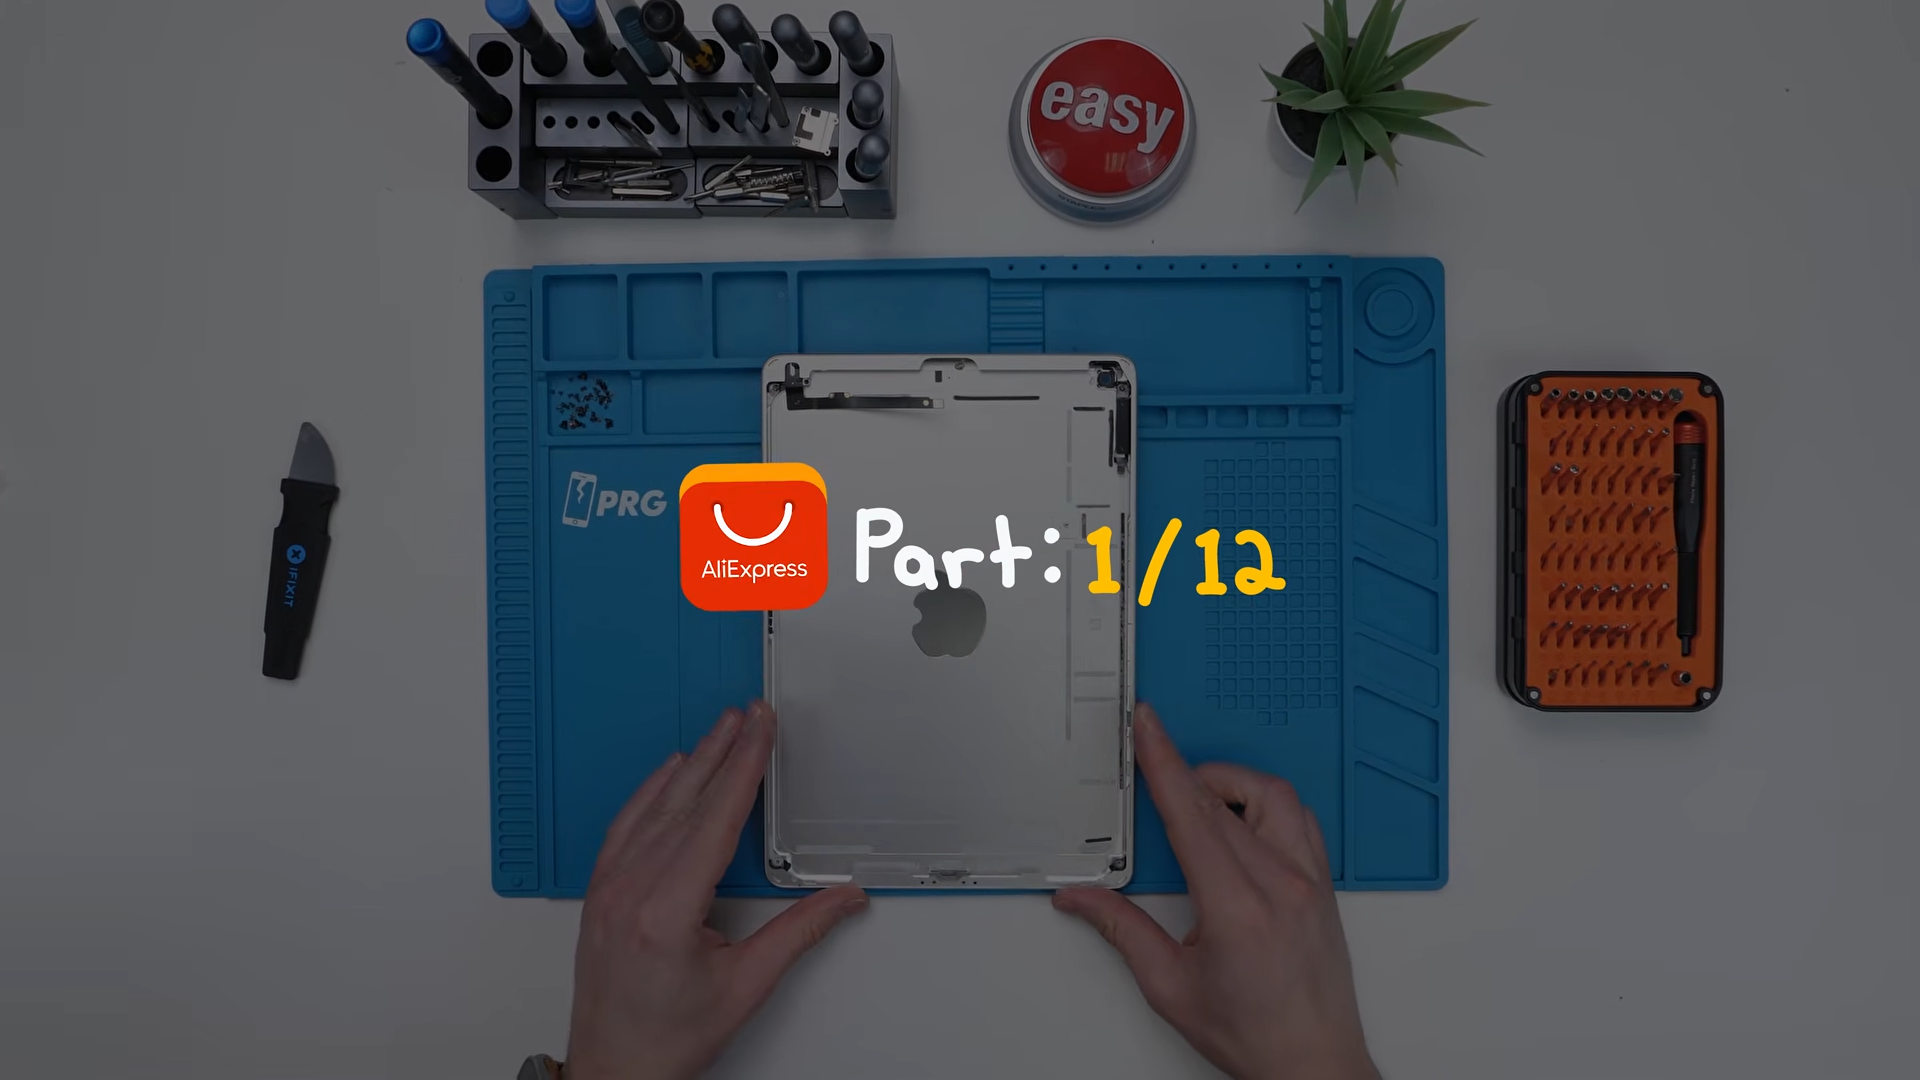
It’s time to find out if you can build an iPad using parts from AliExpress, and if it ends up cheaper than just buying a refurbished iPad. Inside this pile of packages are all the parts we need to build the 7th Generation iPad, assuming this is even possible in the first place.
The plan is simple: buy the highest quality parts for as cheaply as possible, then try to assemble a full iPad from scratch and see what happens.
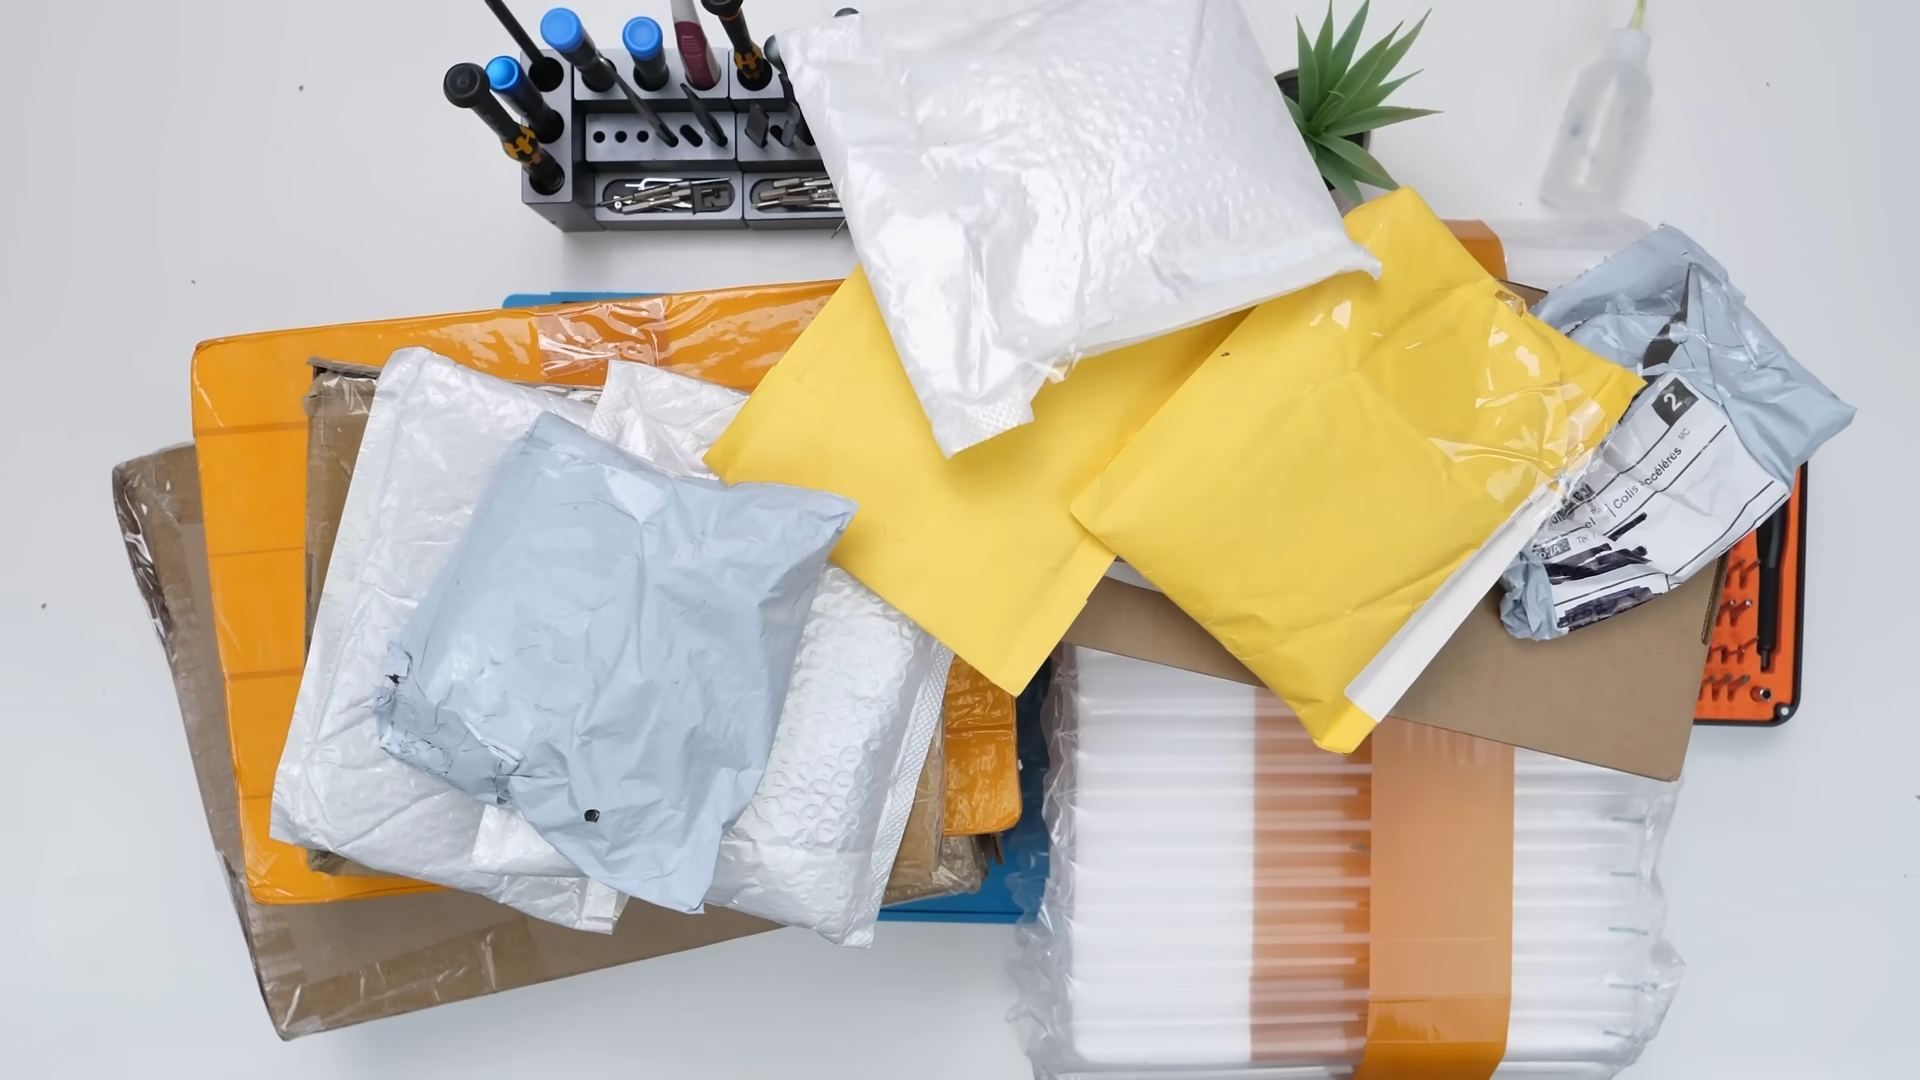
There were a lot of packages to open, so we had to move fast. Hopefully everything goes smoothly.
Unboxing the Small Parts
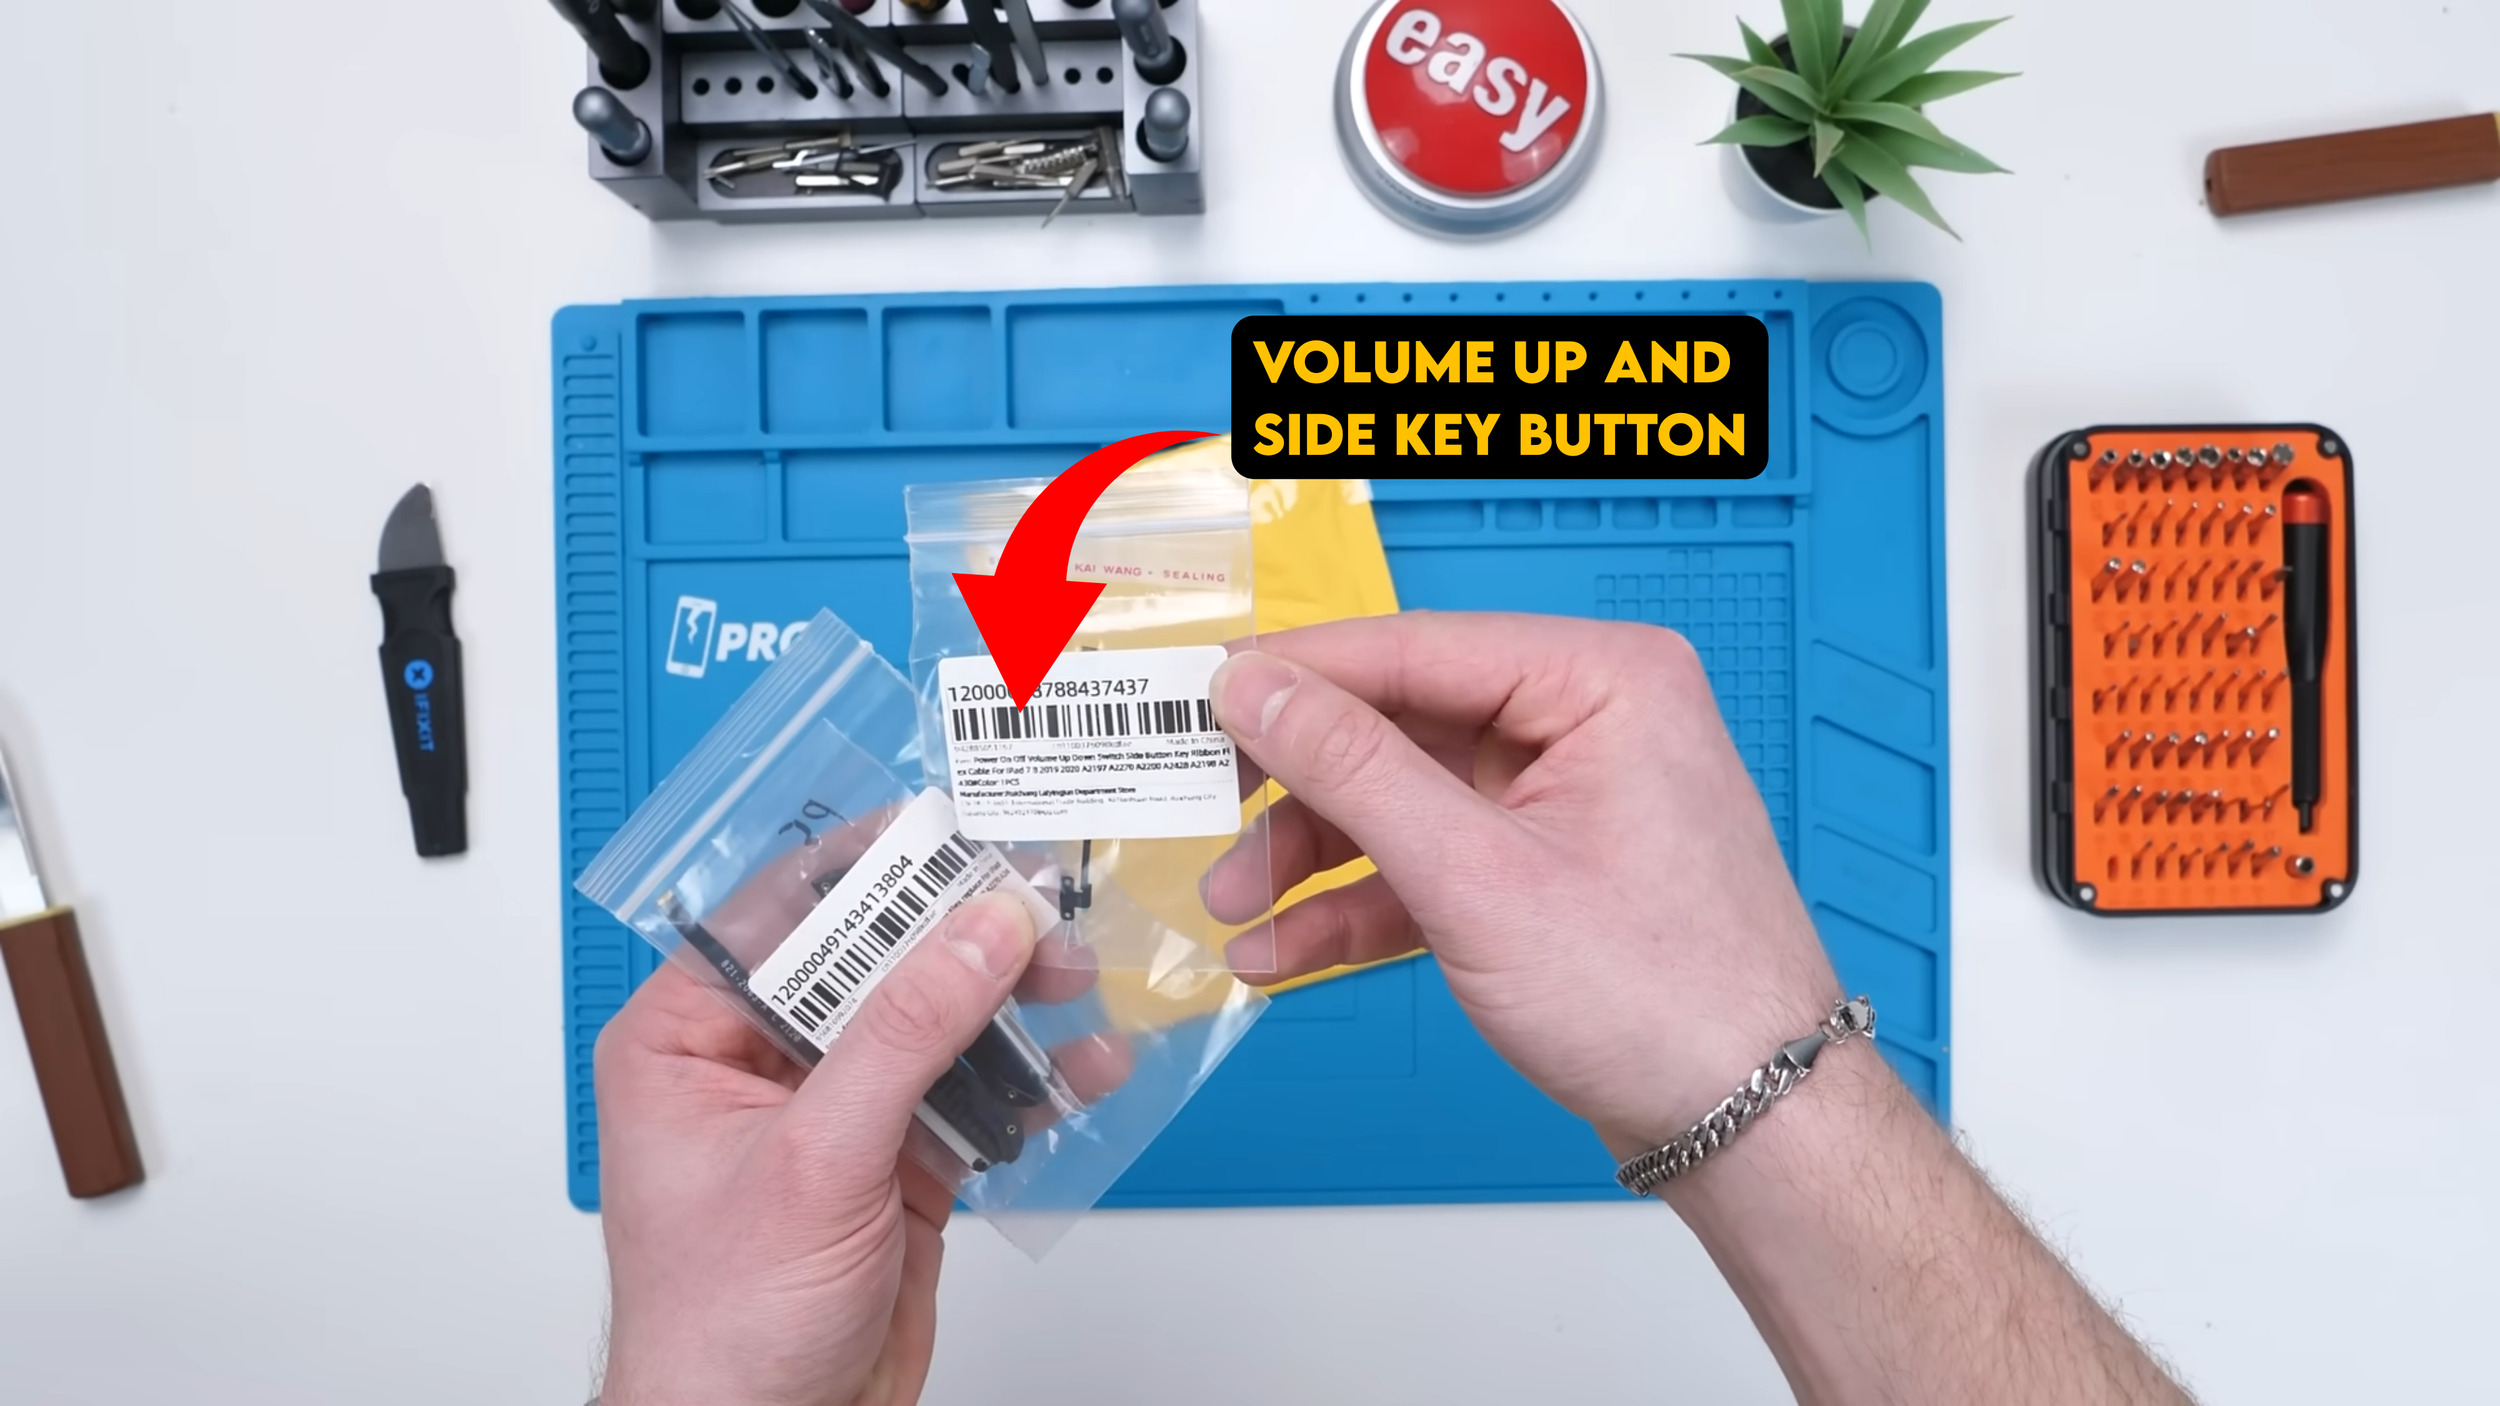
The first package is one of those mystery bags where you stare at it and think, I genuinely have no idea what this is until I open it.
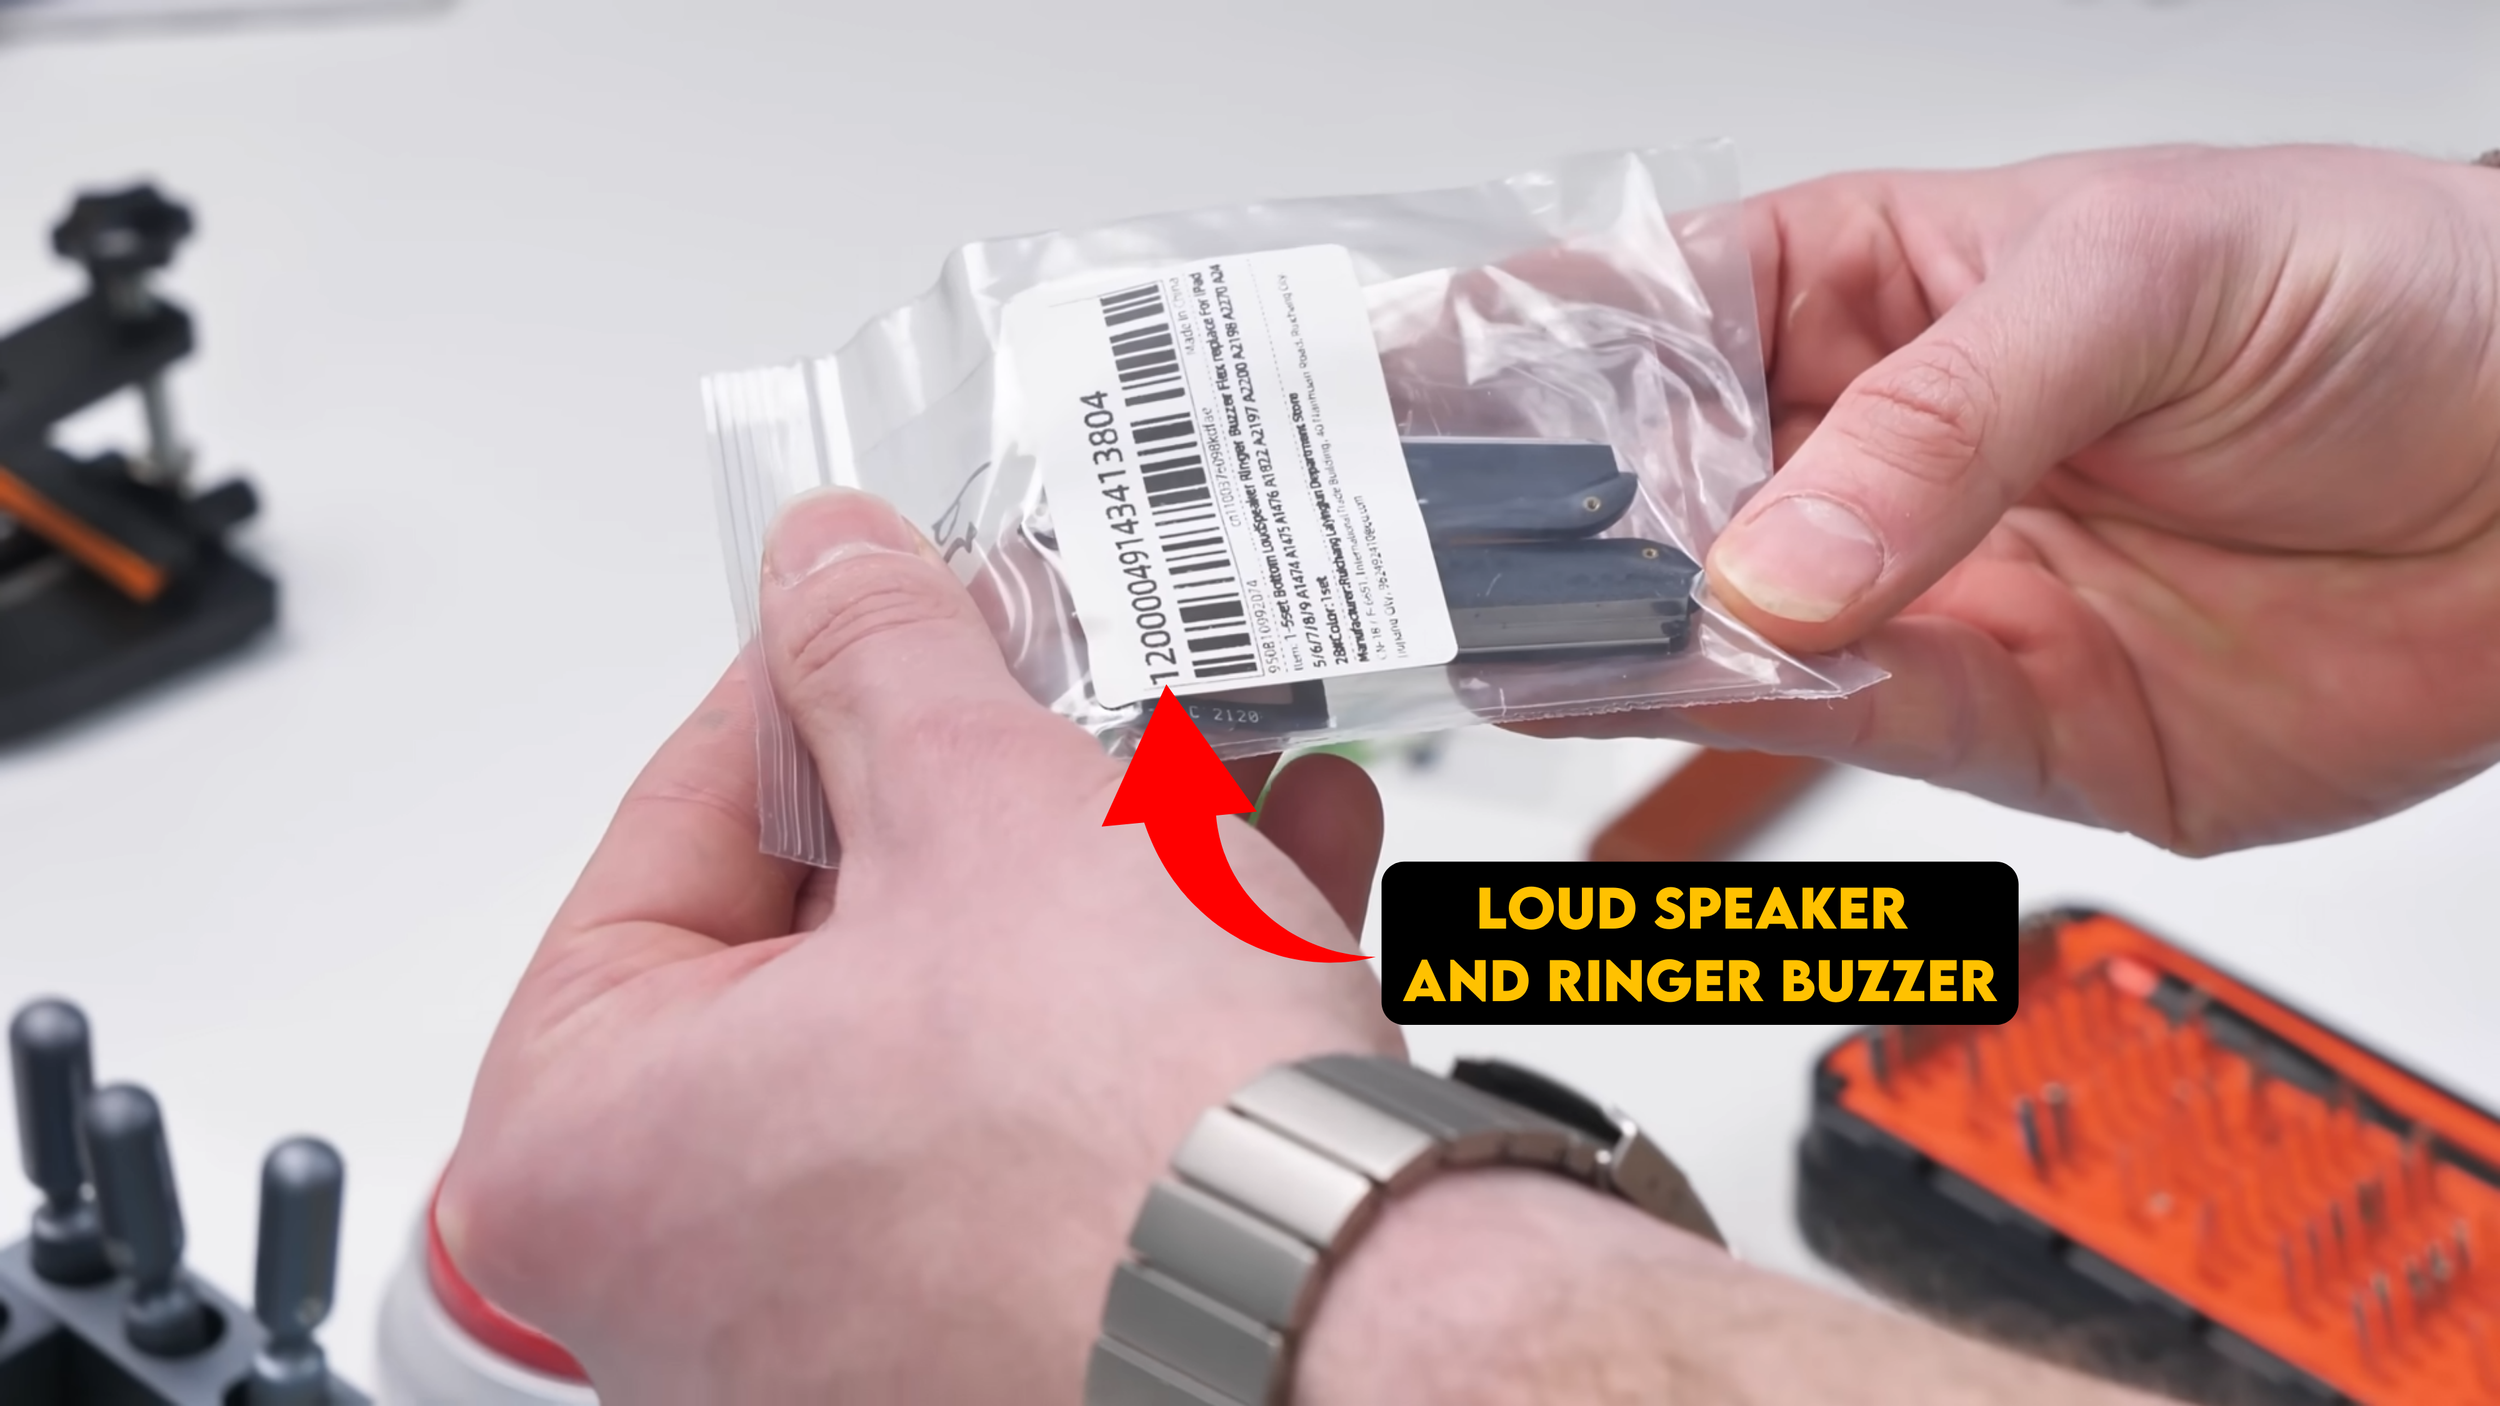
Inside were the volume up and side key buttons, along with the loudspeaker and ringer buzzer. These are very important components of the iPad. Without them, you lose basic functionality like volume control and system audio.
They might not be the most exciting parts in the build, but they’re essential, and surprisingly, they were also some of the cheapest pieces to source.
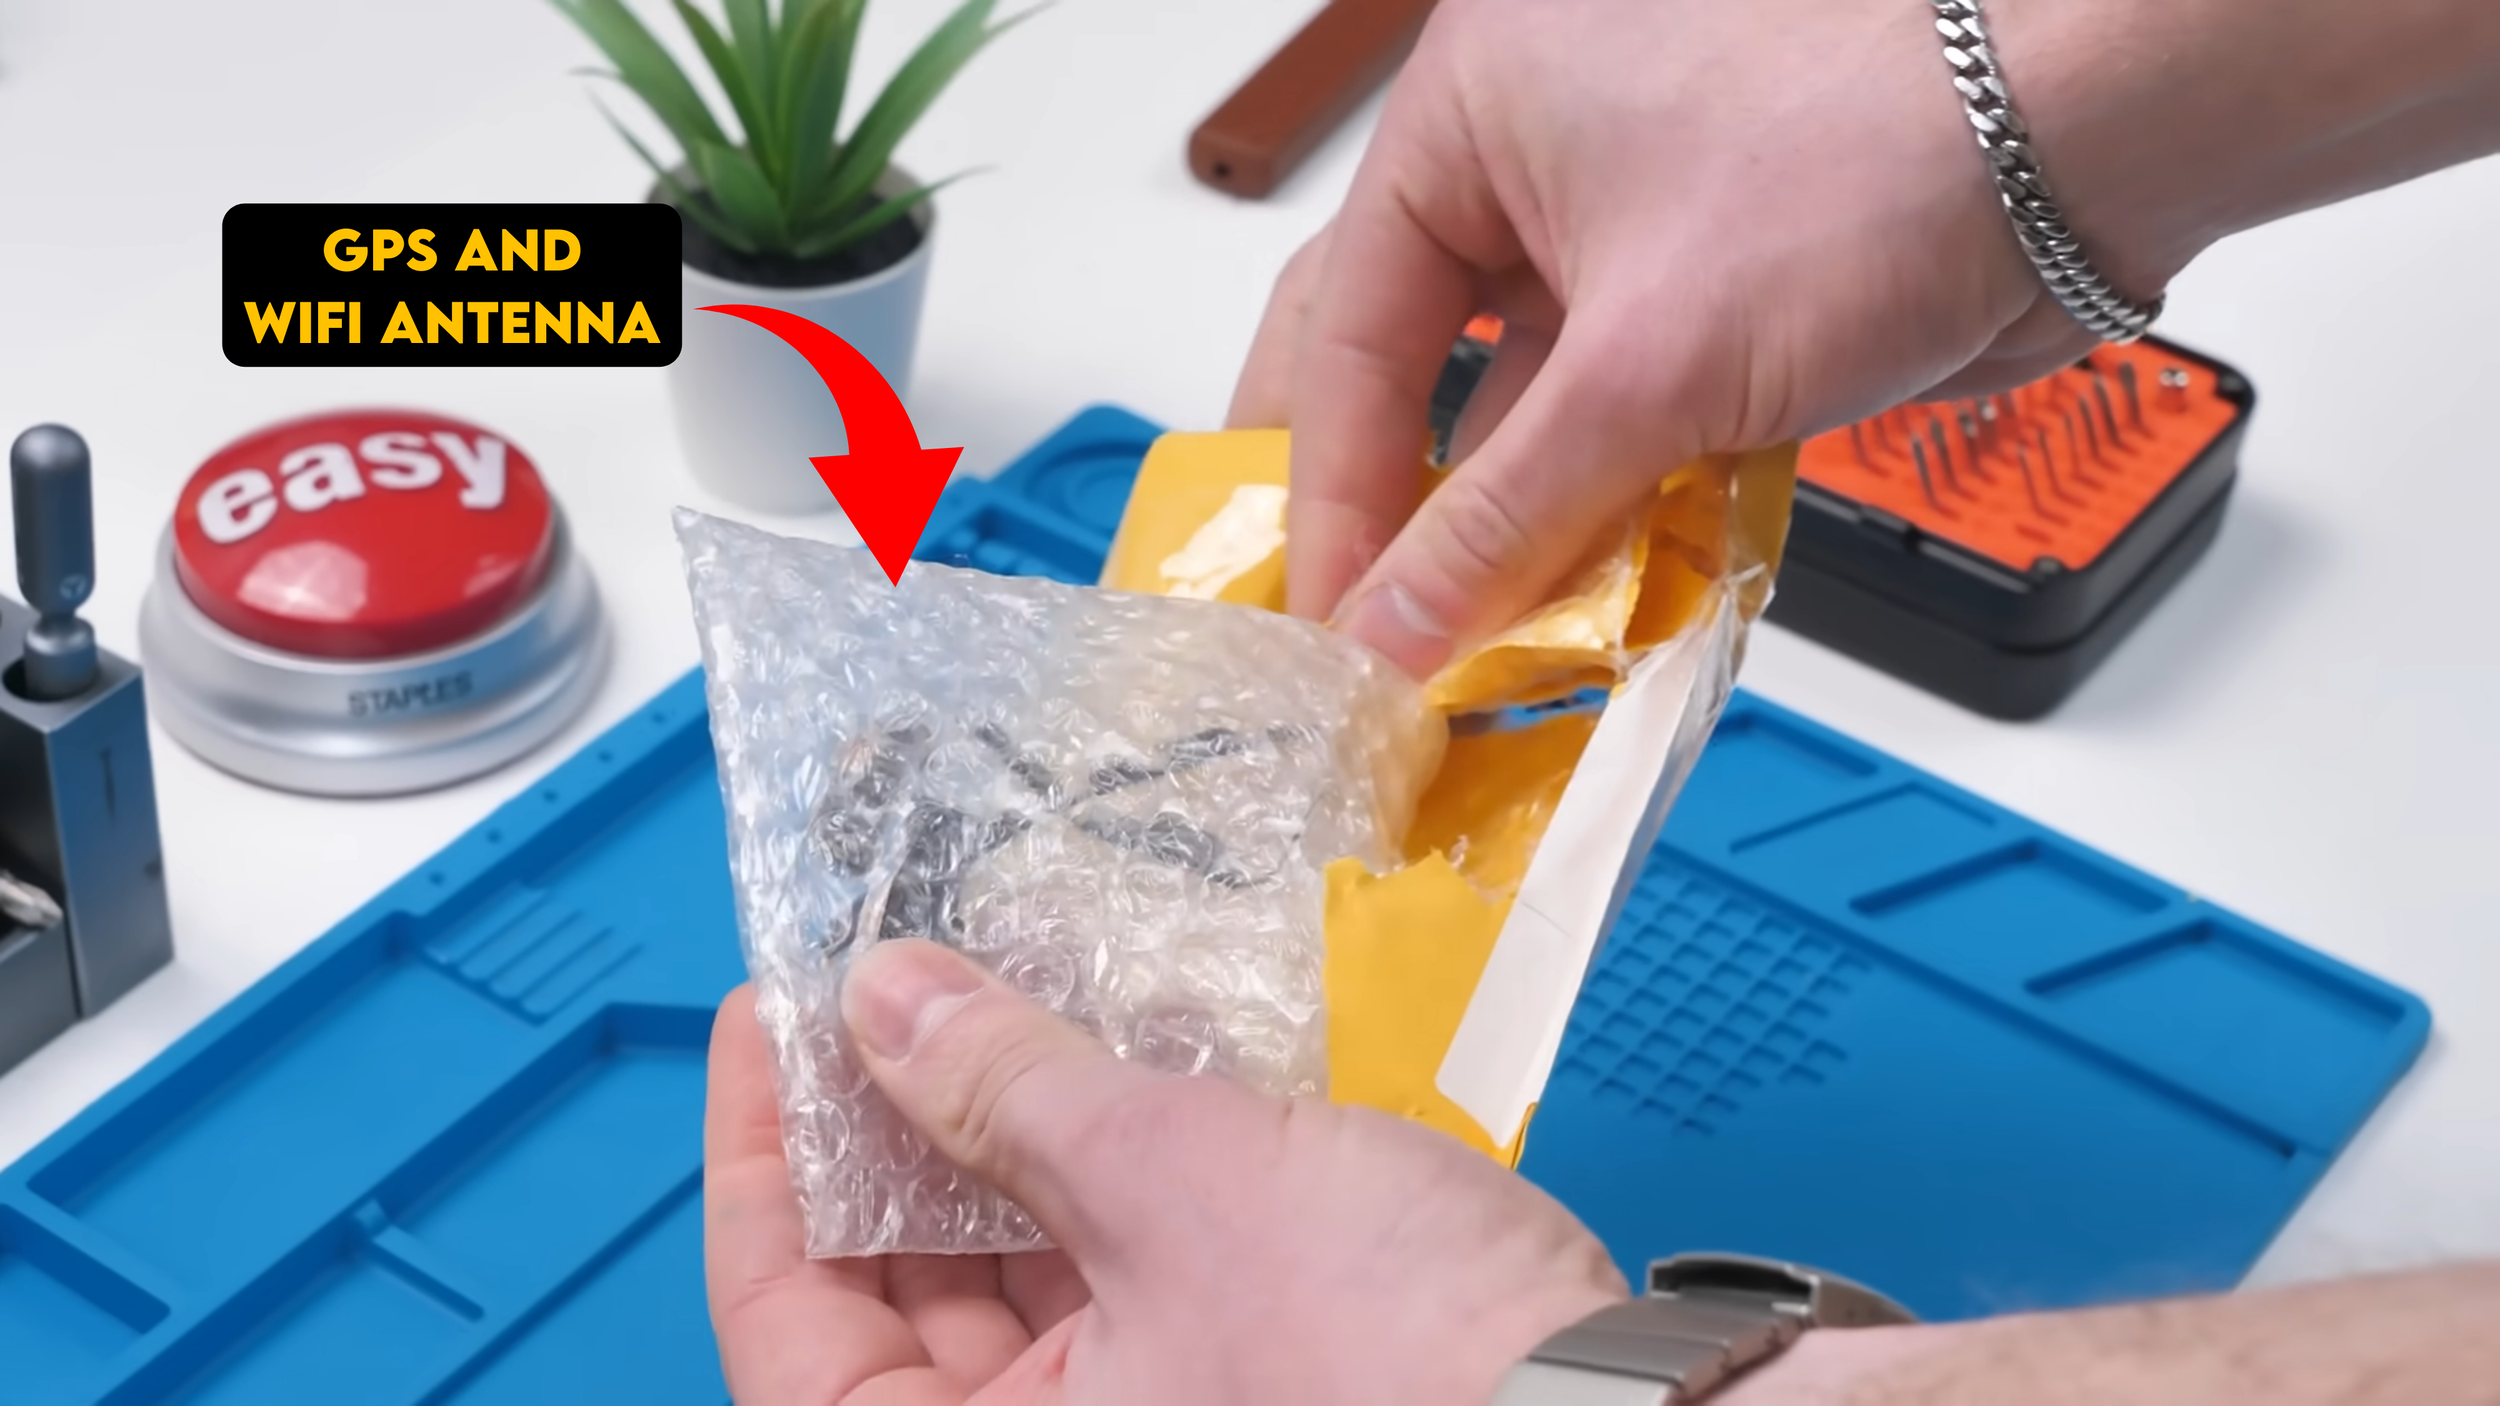
Next up: the GPS antenna and the Wi Fi antenna. Without these, the iPad might power on and look fine, but your connection and GPS performance would be questionable at best. These are also the kind of parts people accidentally destroy when opening iPads, then later wonder why their Wi Fi range is awful or why GPS suddenly acts weird.
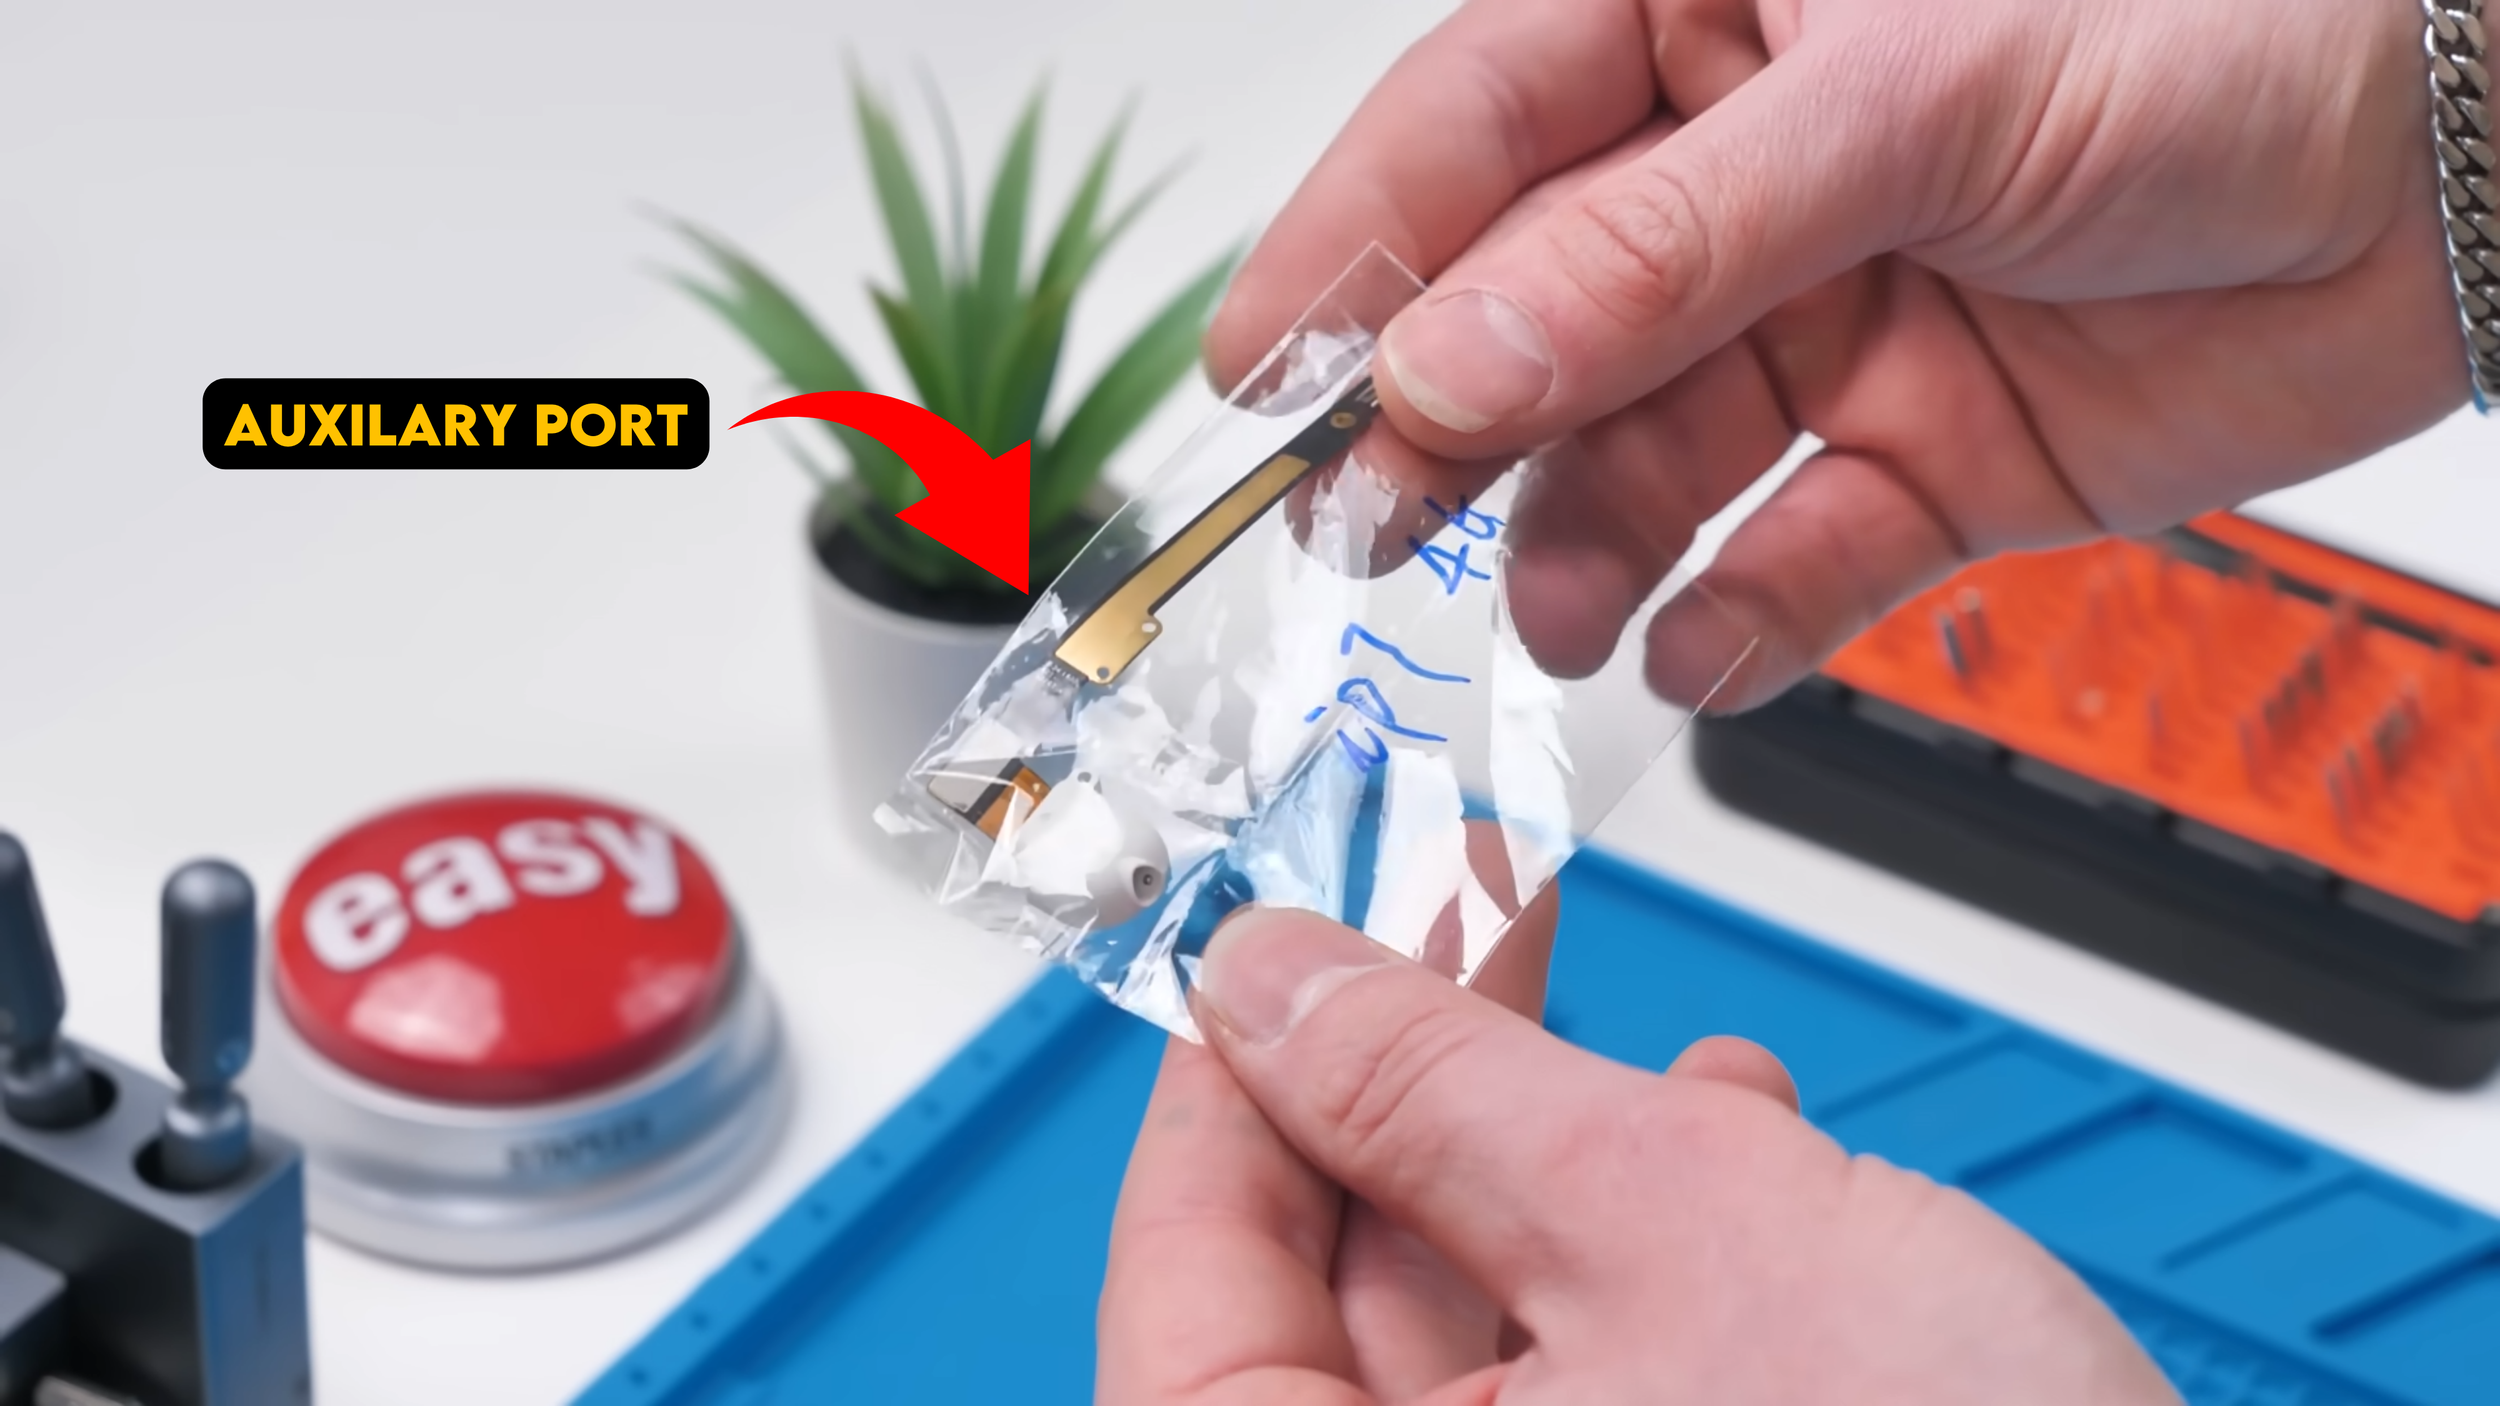
Another package had the auxiliary port, which is a big deal on this iPad model. It’s one of those parts you don’t think about until it’s missing or not working.
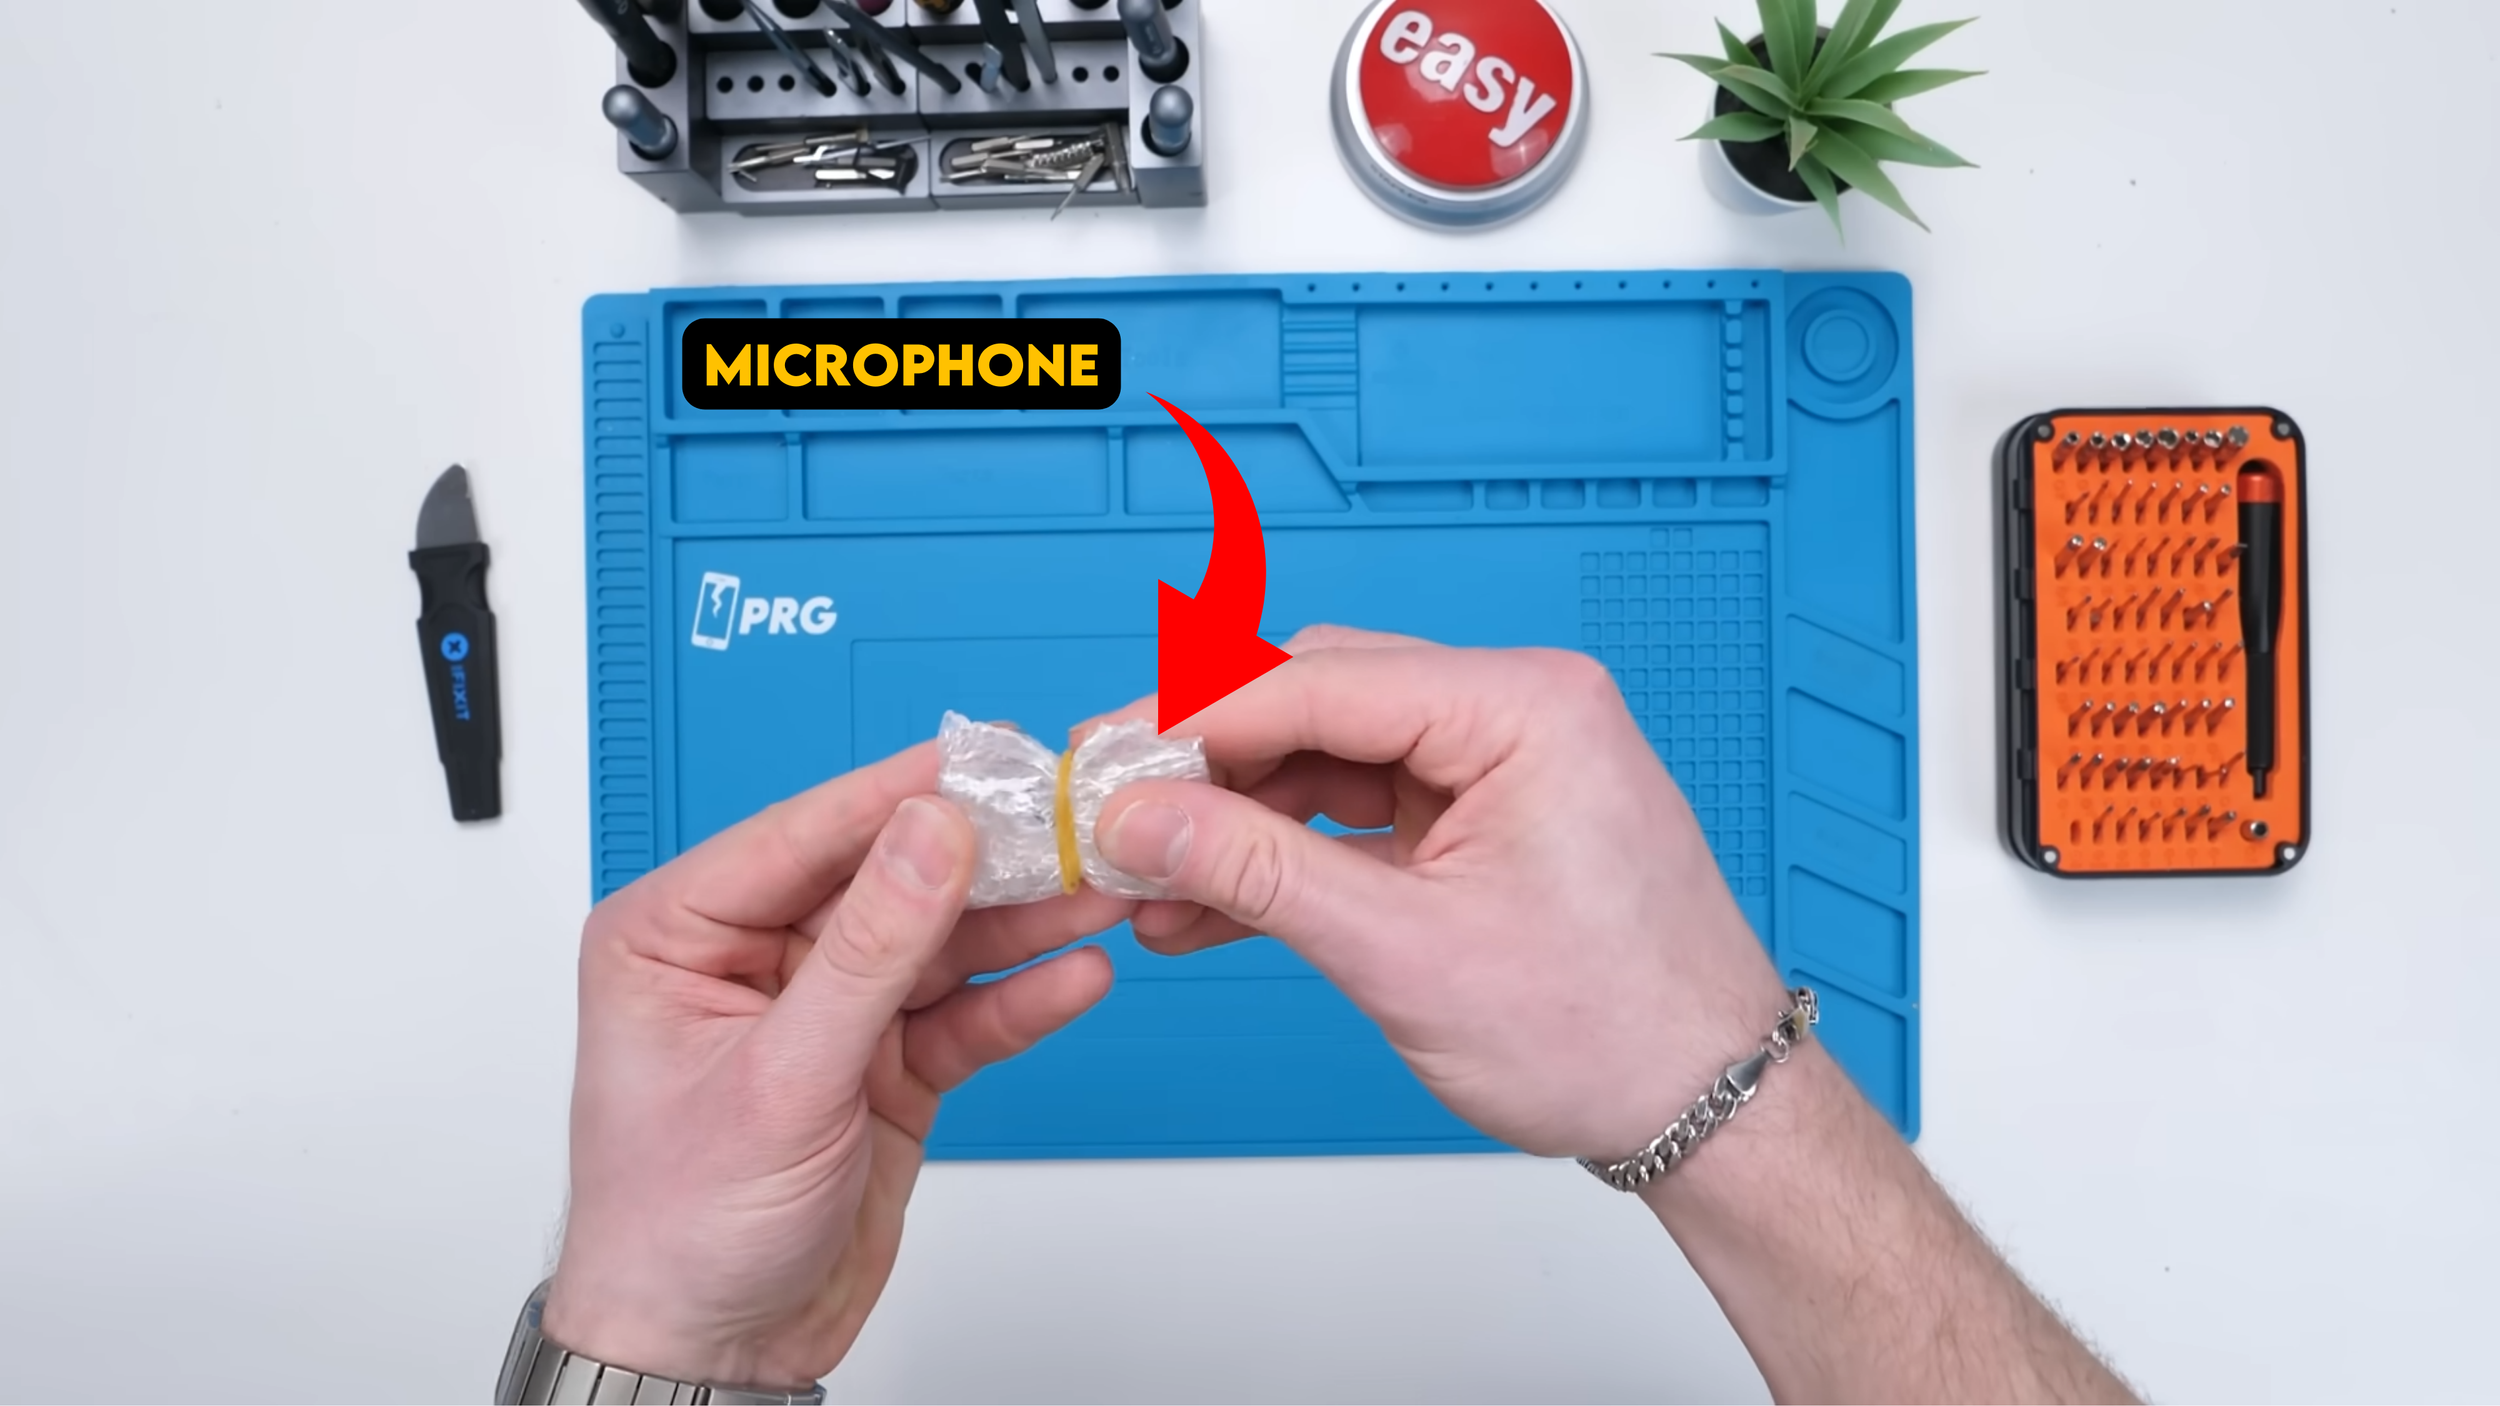
Then we hit another mystery item that looked like the microphone assembly, the one that lives near the top of the iPad. That’s when it really hit me how different this would be from the iPhone and Samsung builds we did before.
And if you’re wondering why some items looked like they had been repackaged or opened already, it’s because we had to check everything beforehand to make sure we actually had all the parts. We ran into issues during this build, and you’re about to see what I mean.
There are a lot of tiny components in an iPad, and most of them aren’t even screwed down. They just sit there with adhesive like they’re daring you to bump them out of place.
Next is the home button, and I had to be careful opening it because the flex cable is the easiest thing in the world to slice if you’re being careless. No home button means you’re not navigating properly, and it’s instantly a bad time.
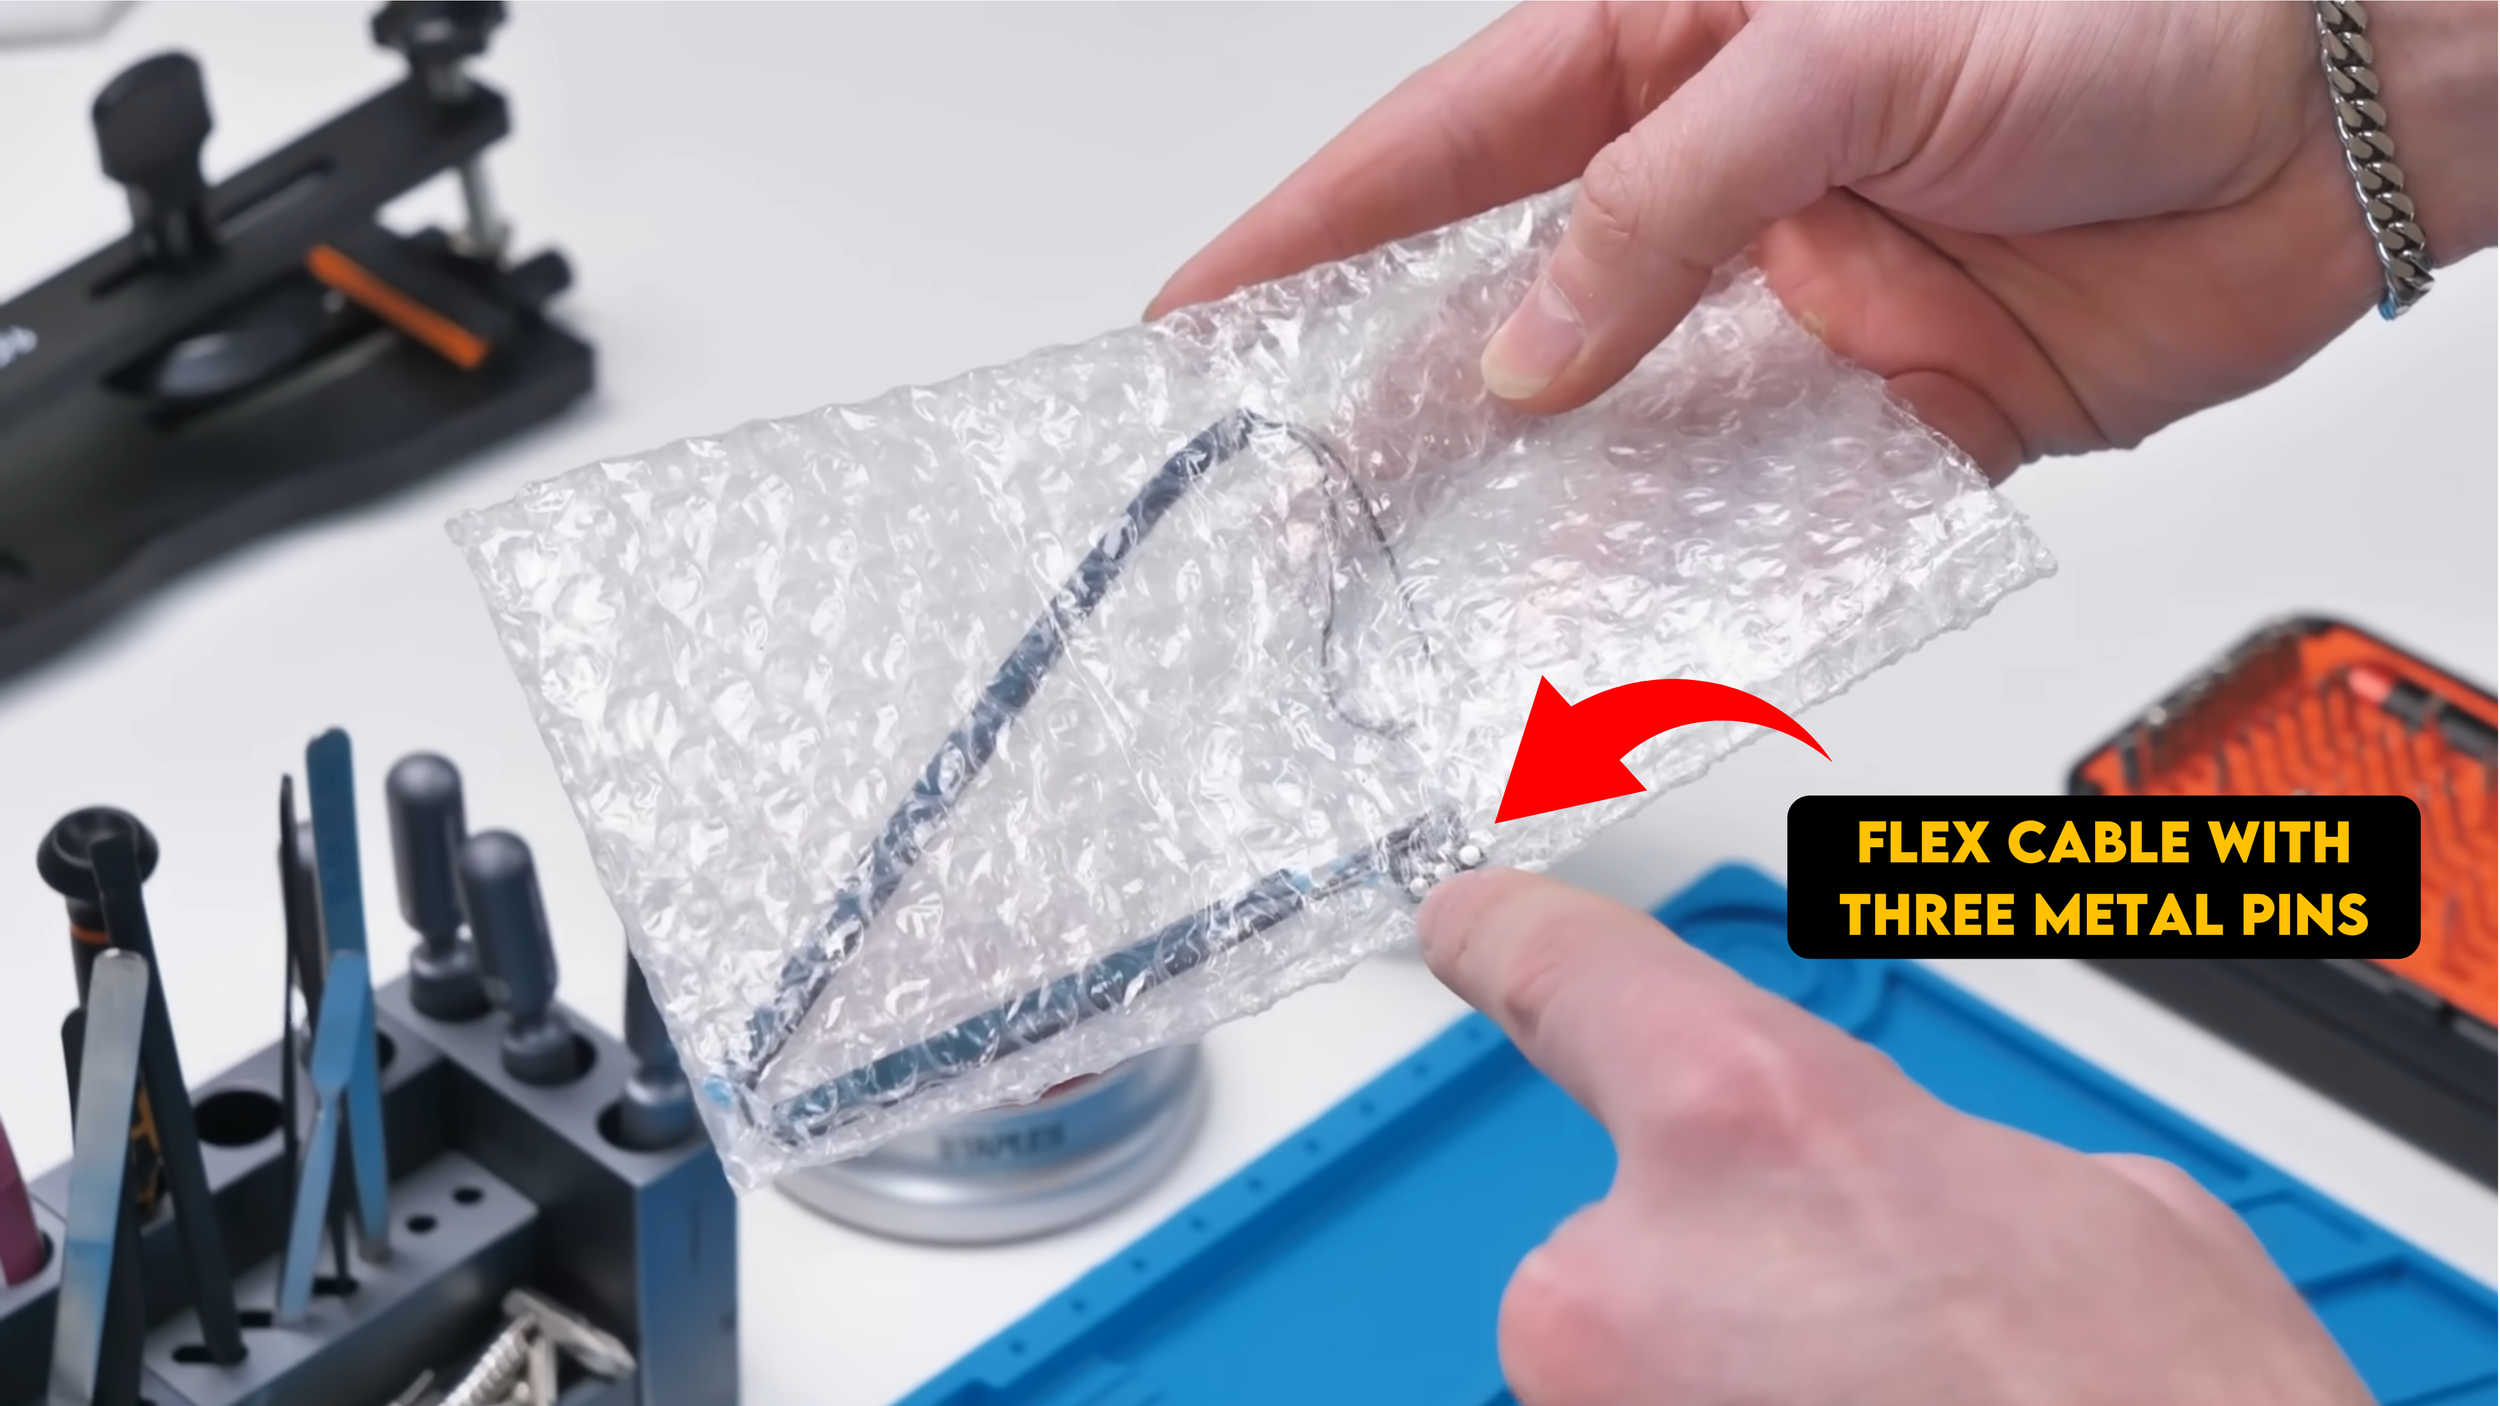
Then we had a flex cable with three metal pins, which are the contact points that let accessories connect to the iPad. Another one of those parts most people don’t even realize exists until they see it on the table.

And of course, we got the classic AliExpress bonus item: the crappy repair kit. These tool kits absolutely suck.
If something you buy comes with one of these, do yourself a favor and don’t use it. Get a proper kit, like an iFixit kit, or even an LTT kit. These freebies are basically included to give you false confidence.
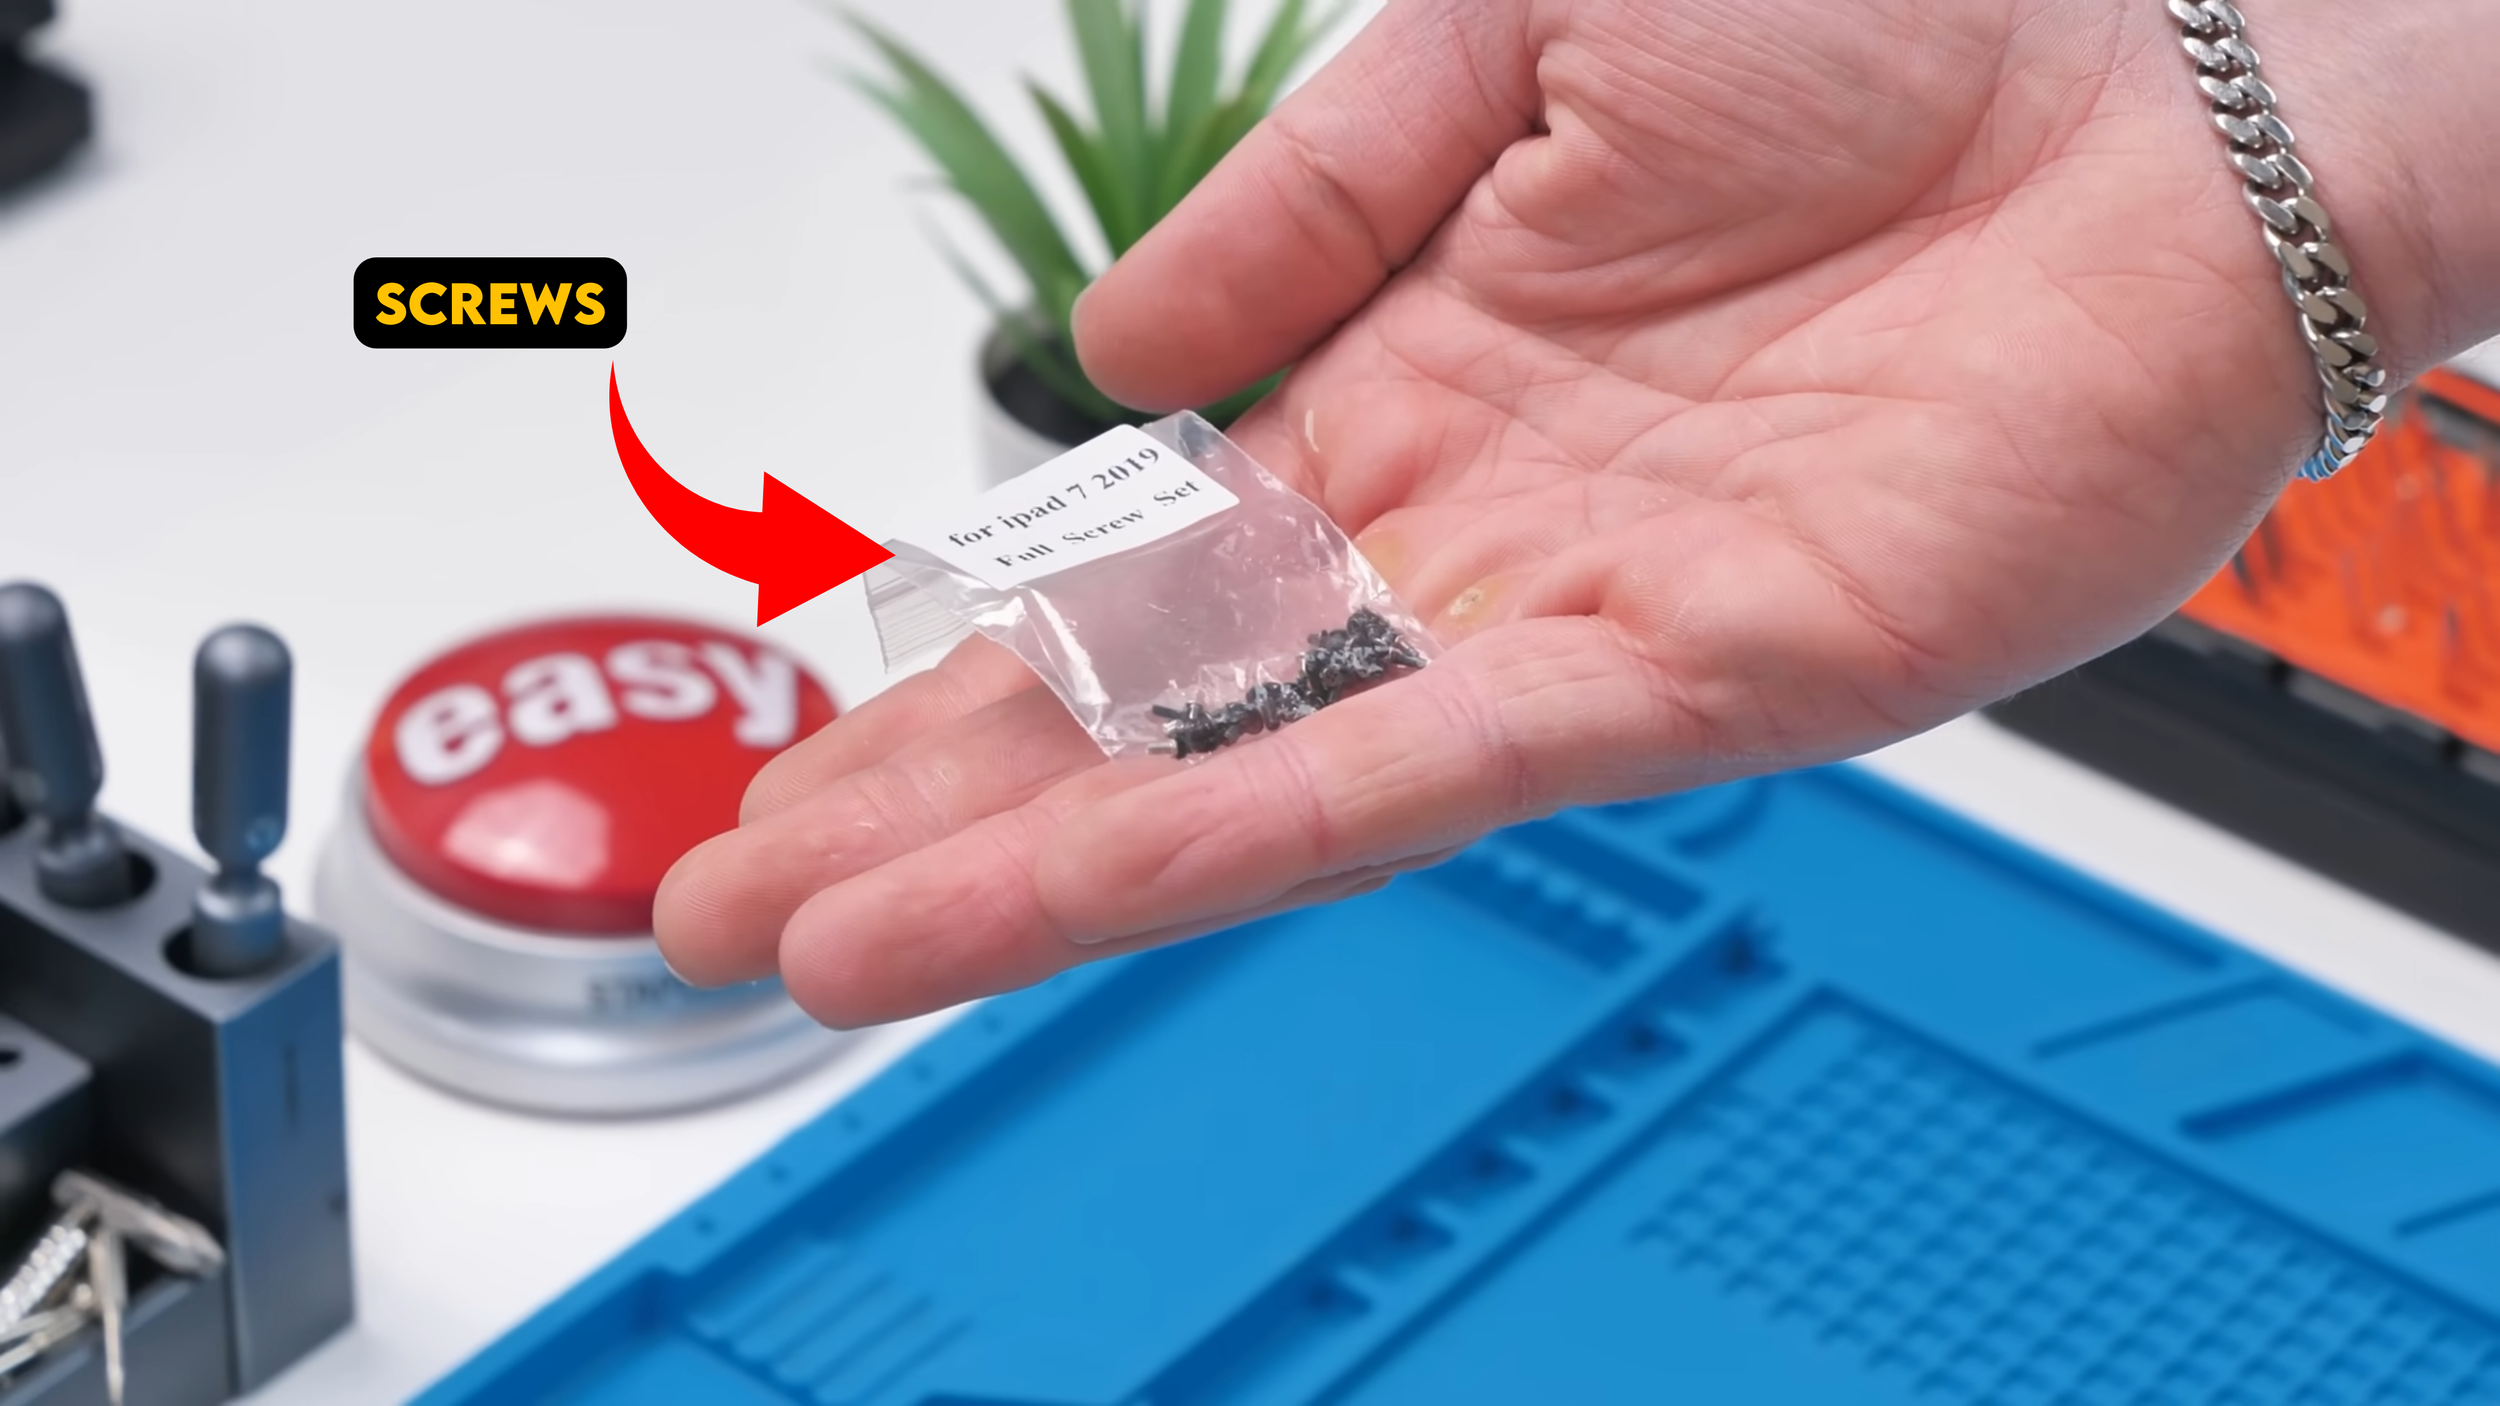
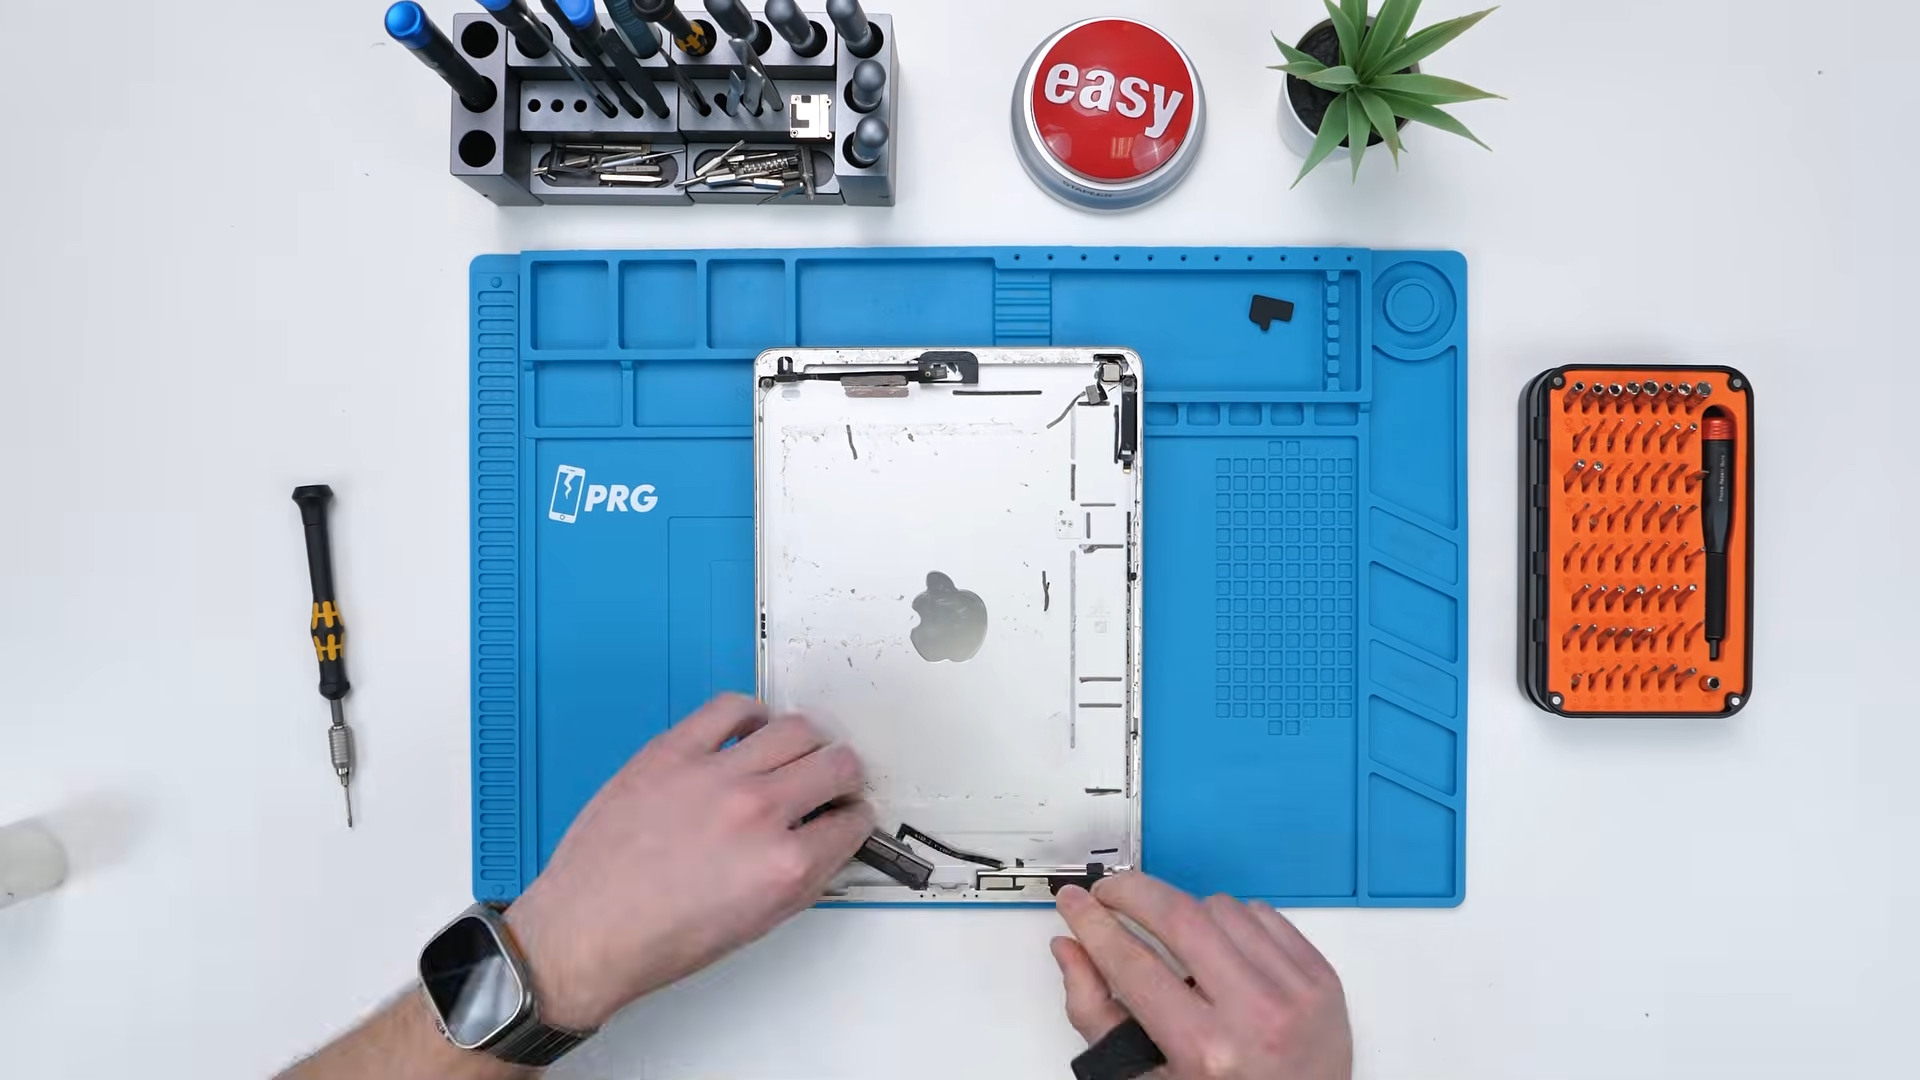
Then came an important bag: the screws. This part made me nervous because iPads use a mix of screw sizes, and AliExpress screw bundles are usually just chaos in a bag. There were so many different screws, and I wasn’t entirely sure where they went. So I’d be figuring it out in real time.
One more small package was left, and it included parts that matter, but not in a “the iPad will never work without this” way. The bigger packages were the real make or break pieces. If those were bad, we’re done.
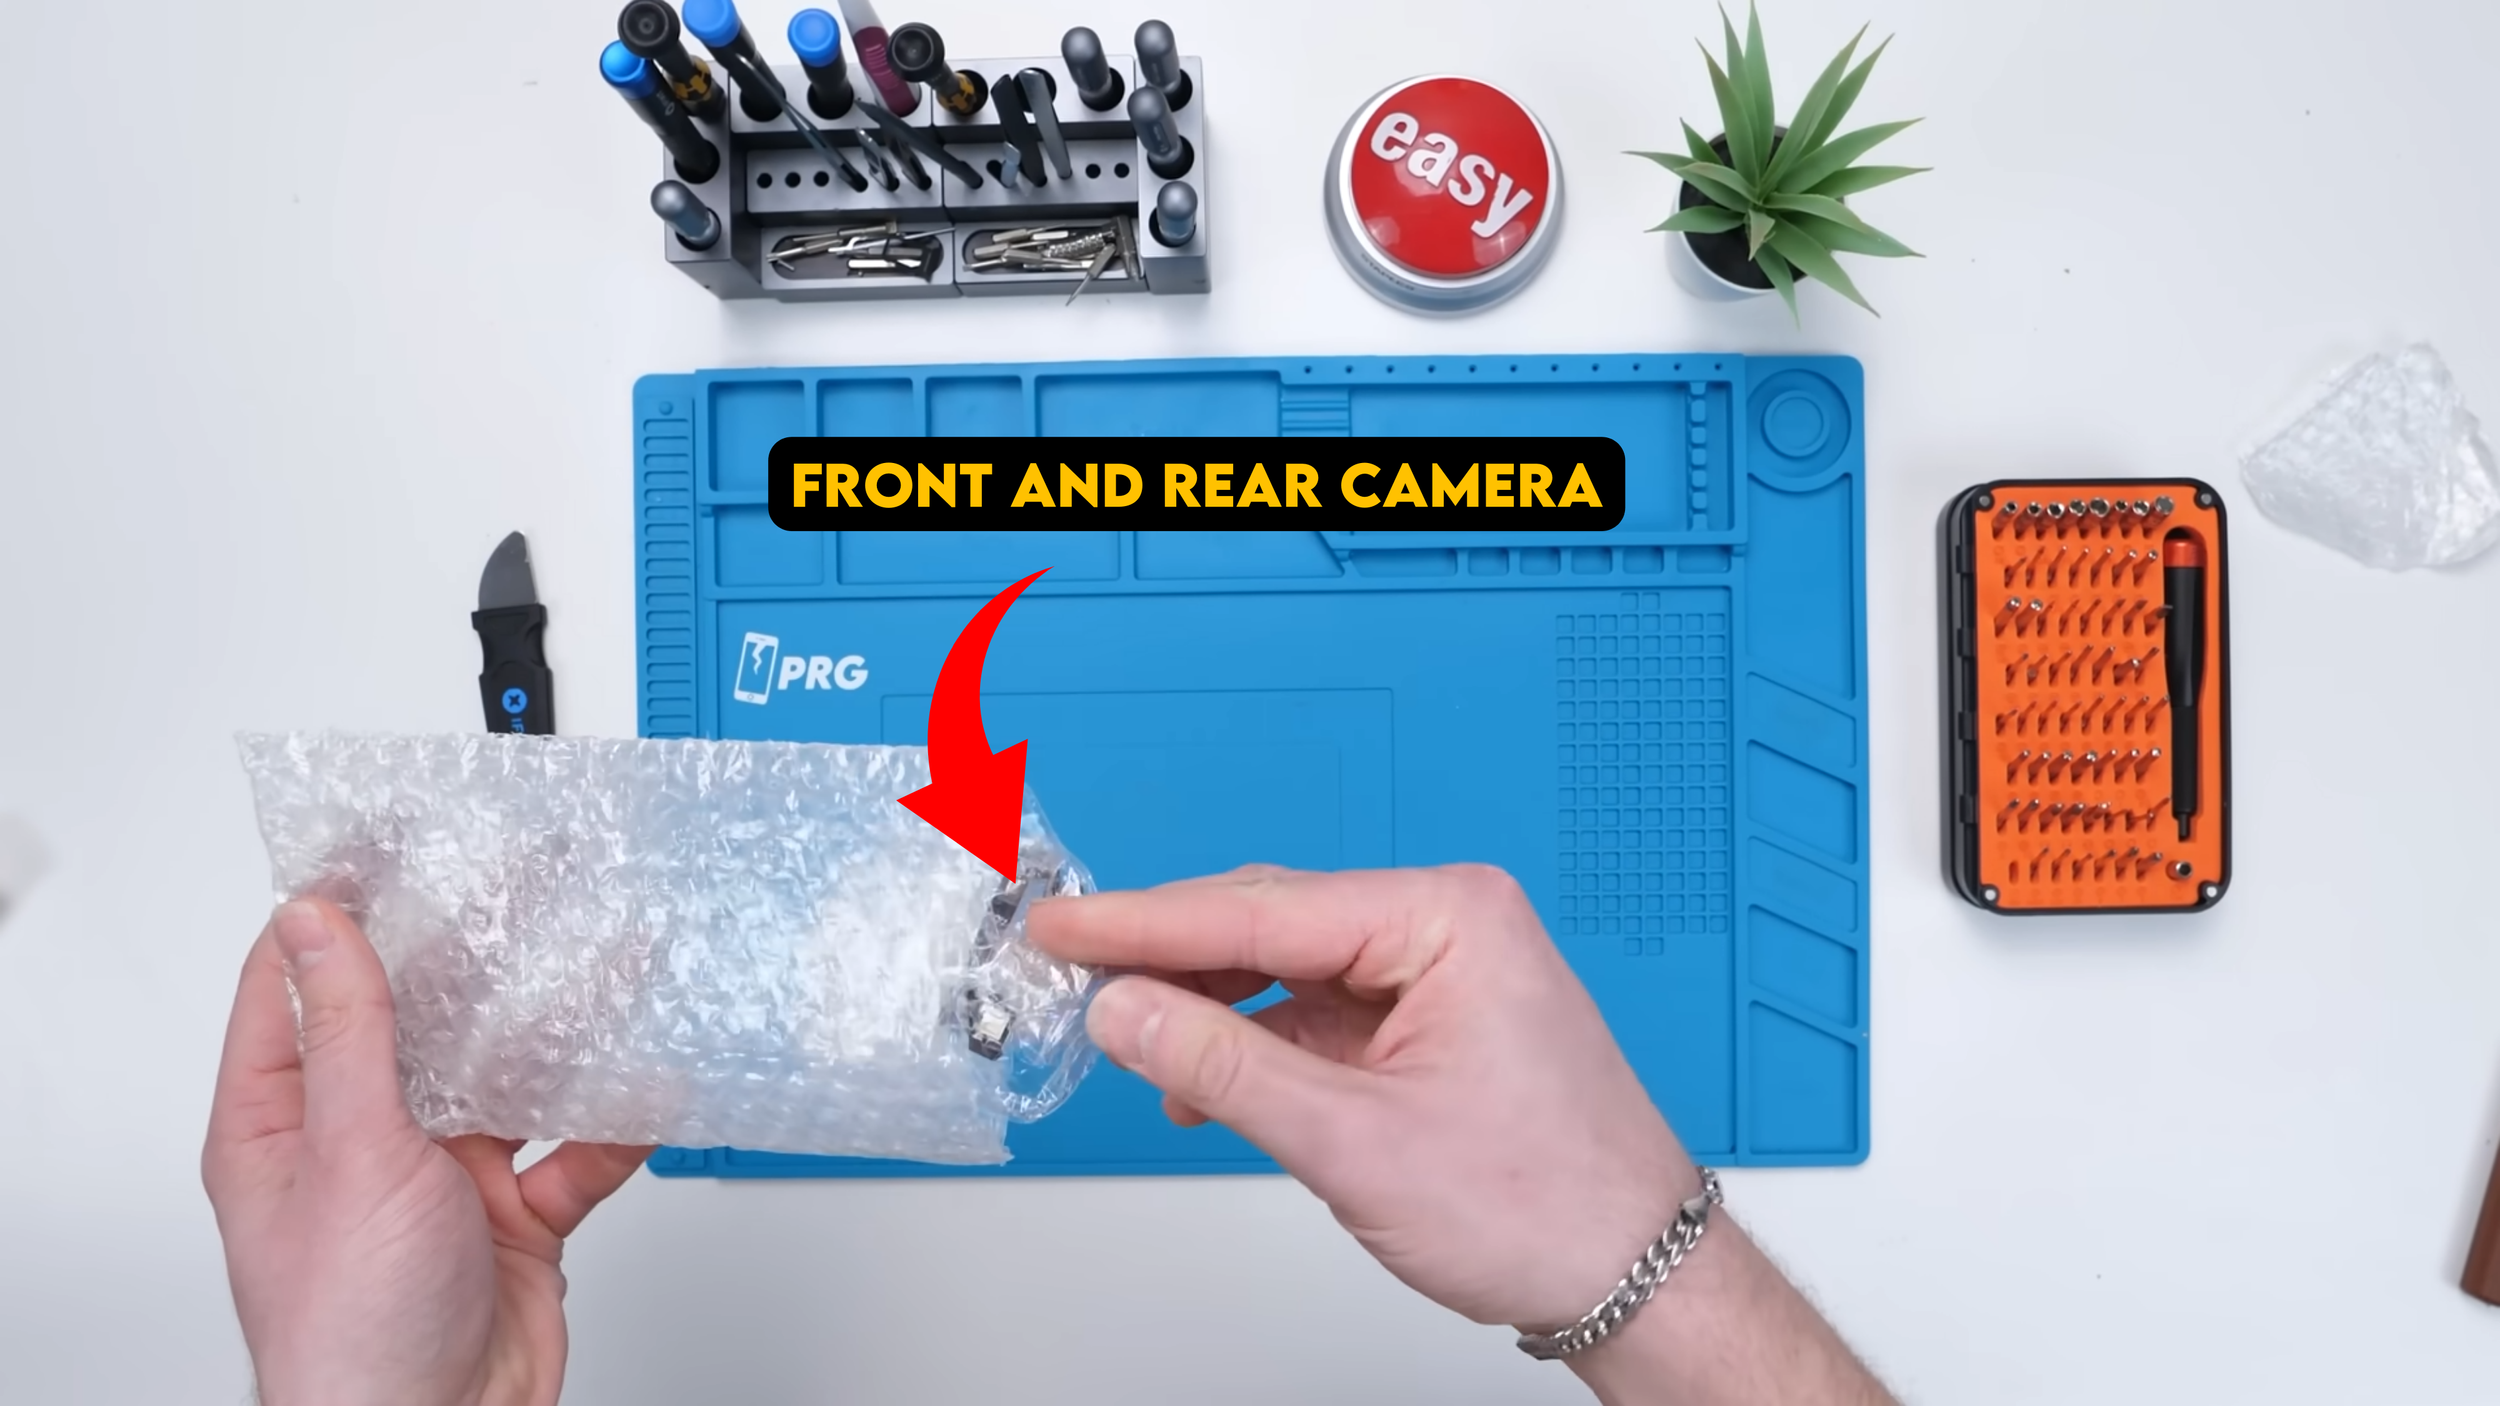
But before that, we found the cameras, both the front camera and the rear camera.
Now it was time to move on to the big stuff.
The Big Packages
I was genuinely nervous at this point because I hadn’t seen what was inside any of the major packages yet. If anything arrived damaged, low quality, or not compatible, building this iPad would become ten times harder.
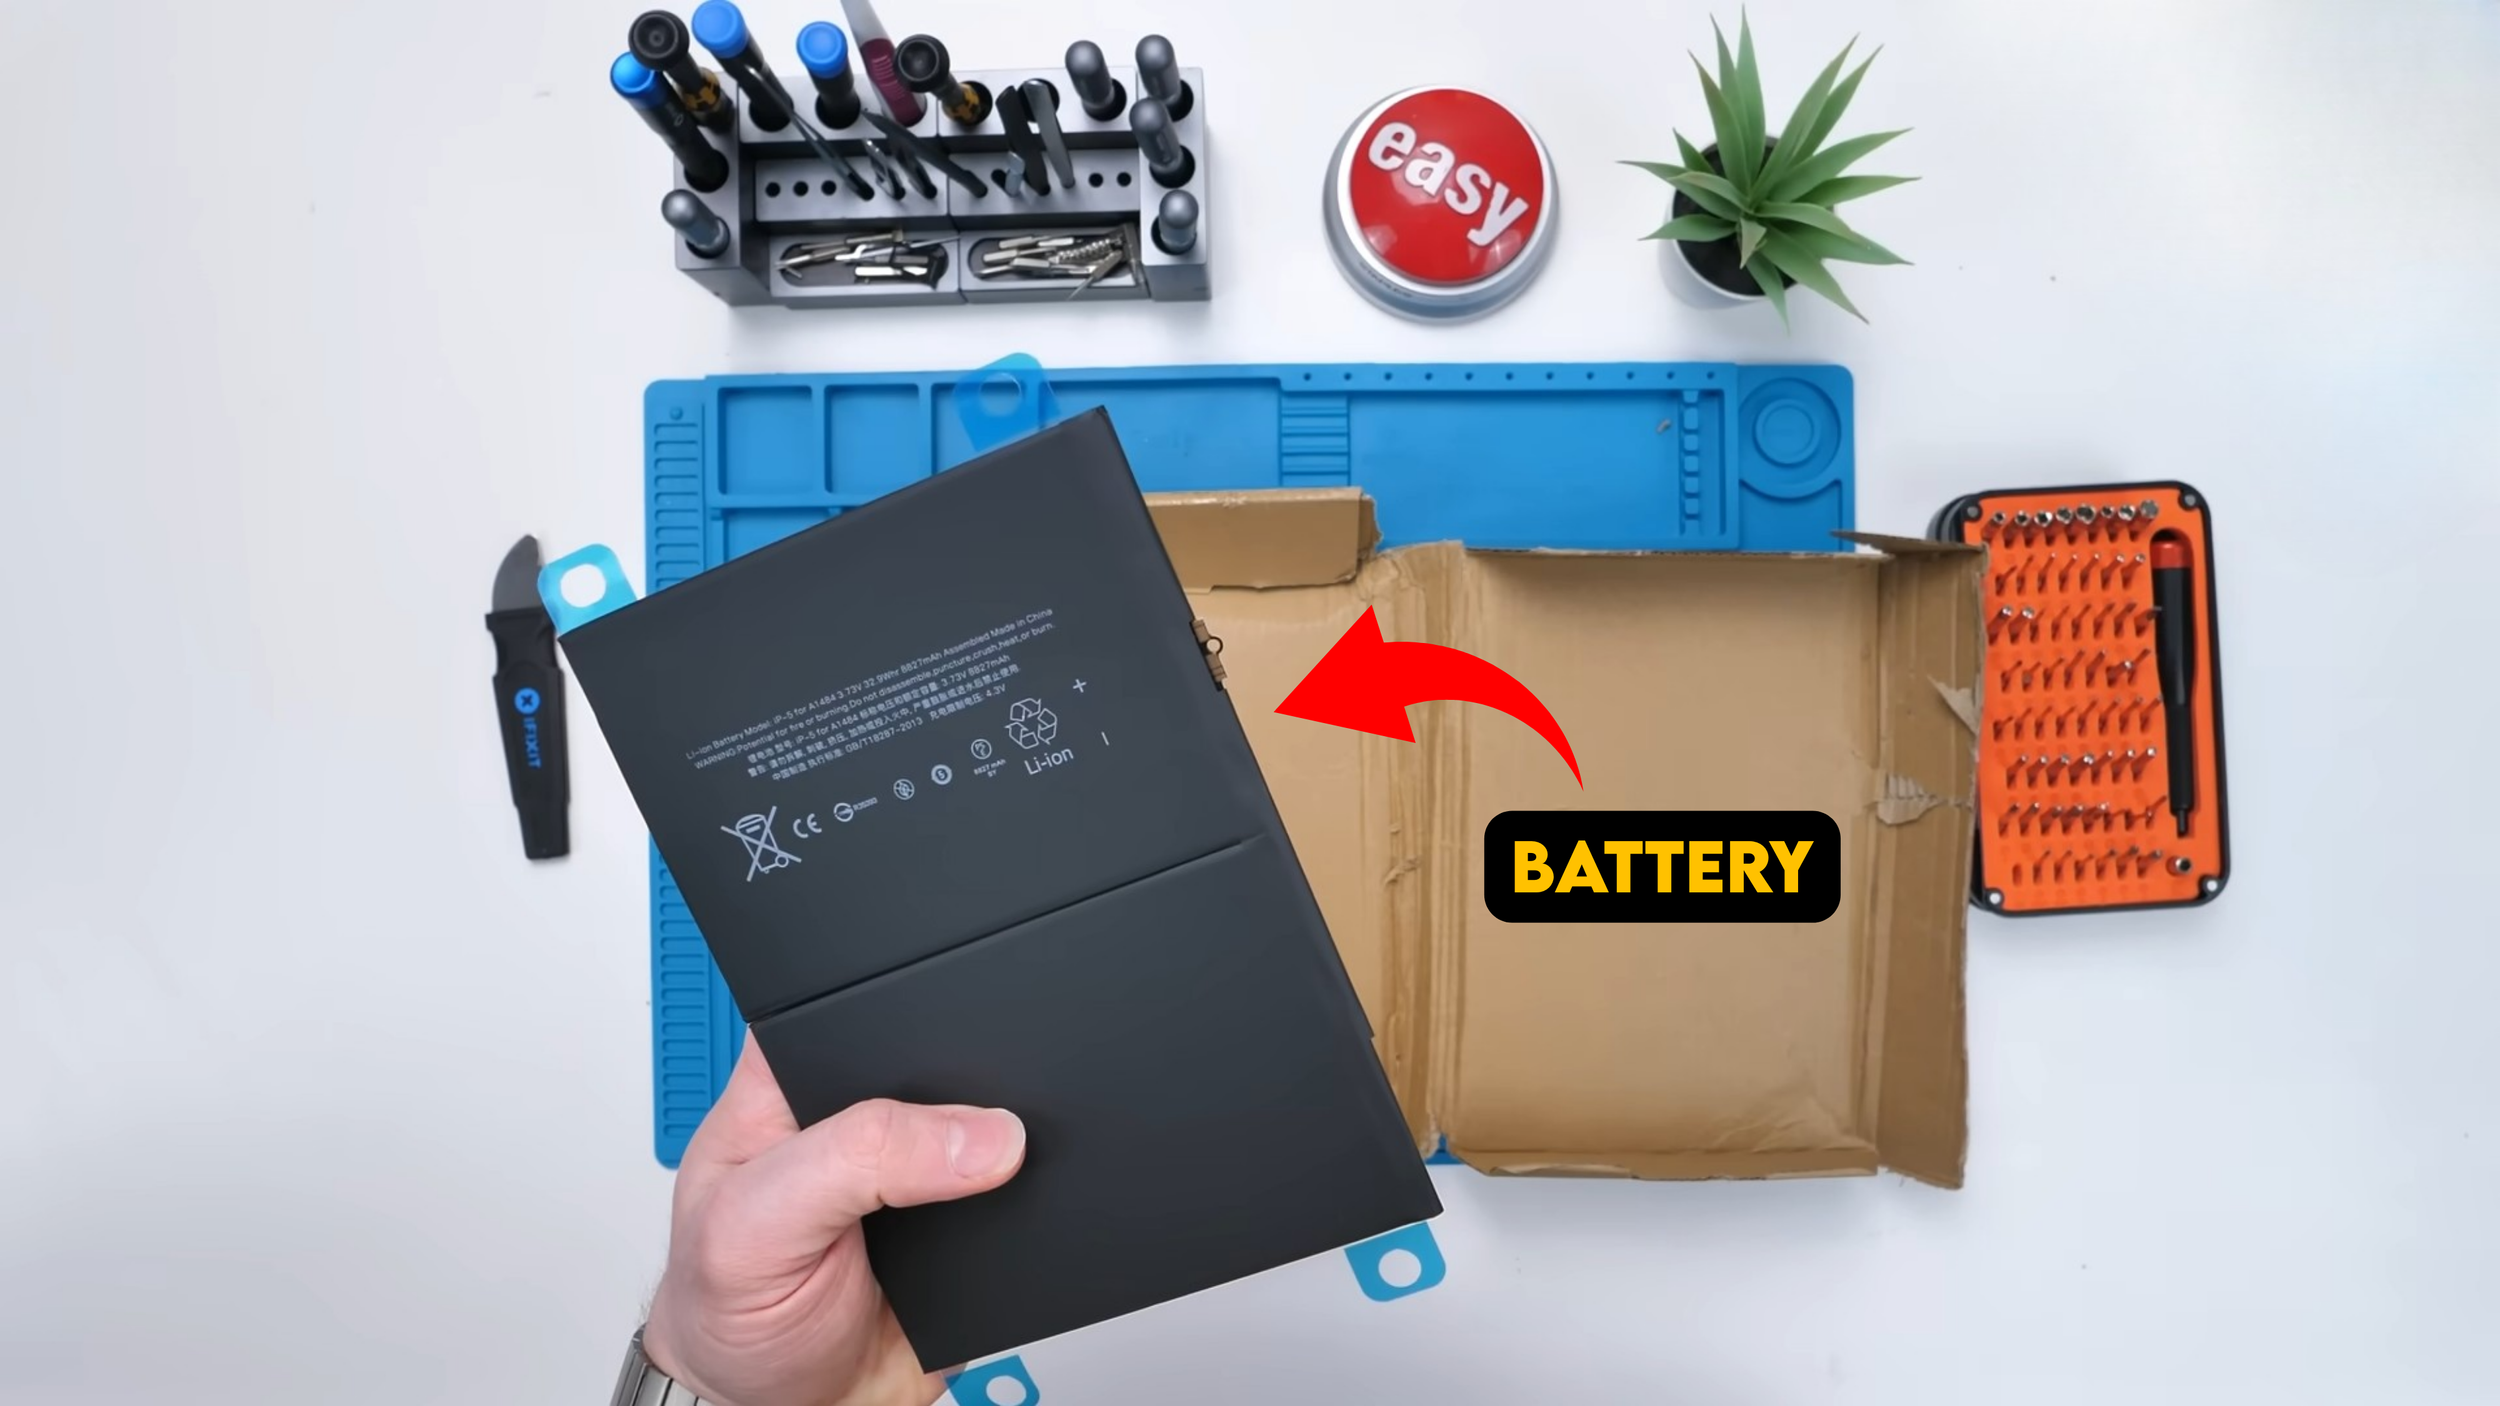
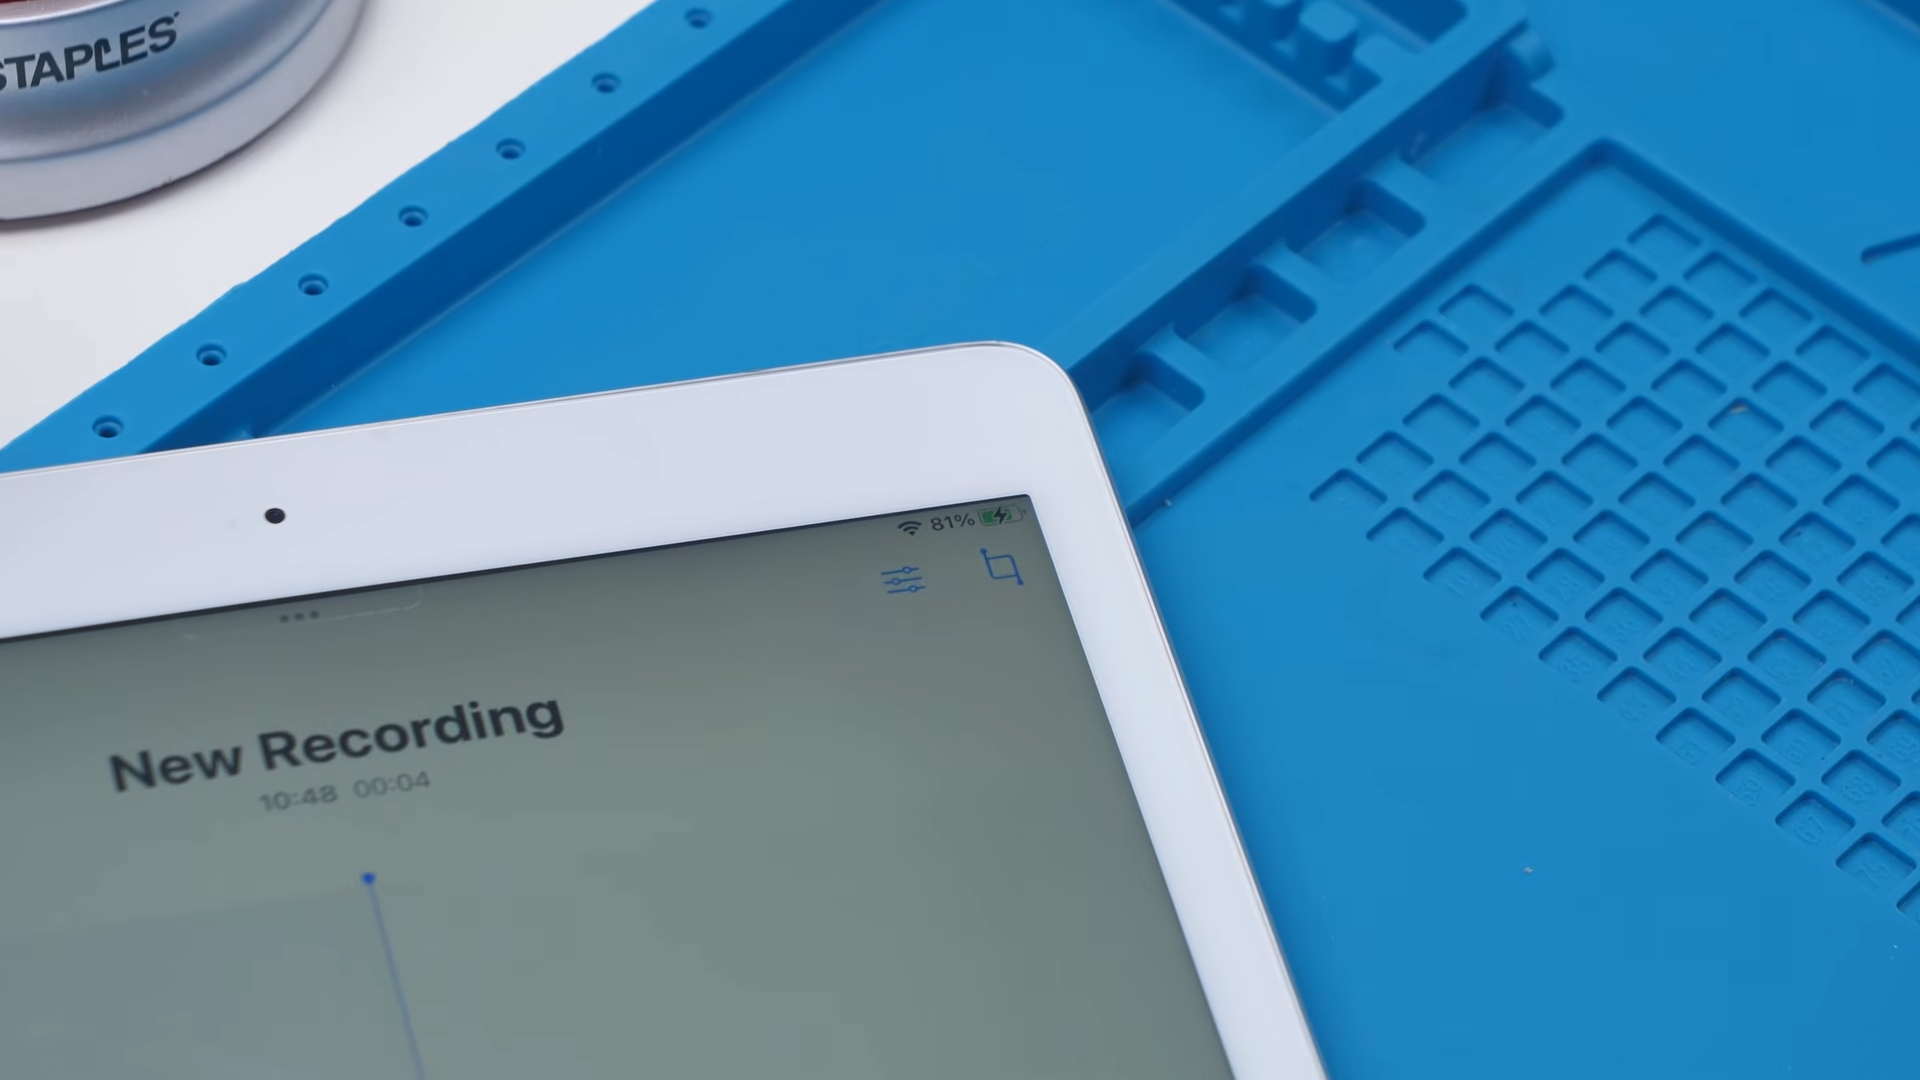
First big package, the battery. That’s all you can really say at first. The real test is whether it works and holds a charge later. If it powers the iPad, I’ll take the win.
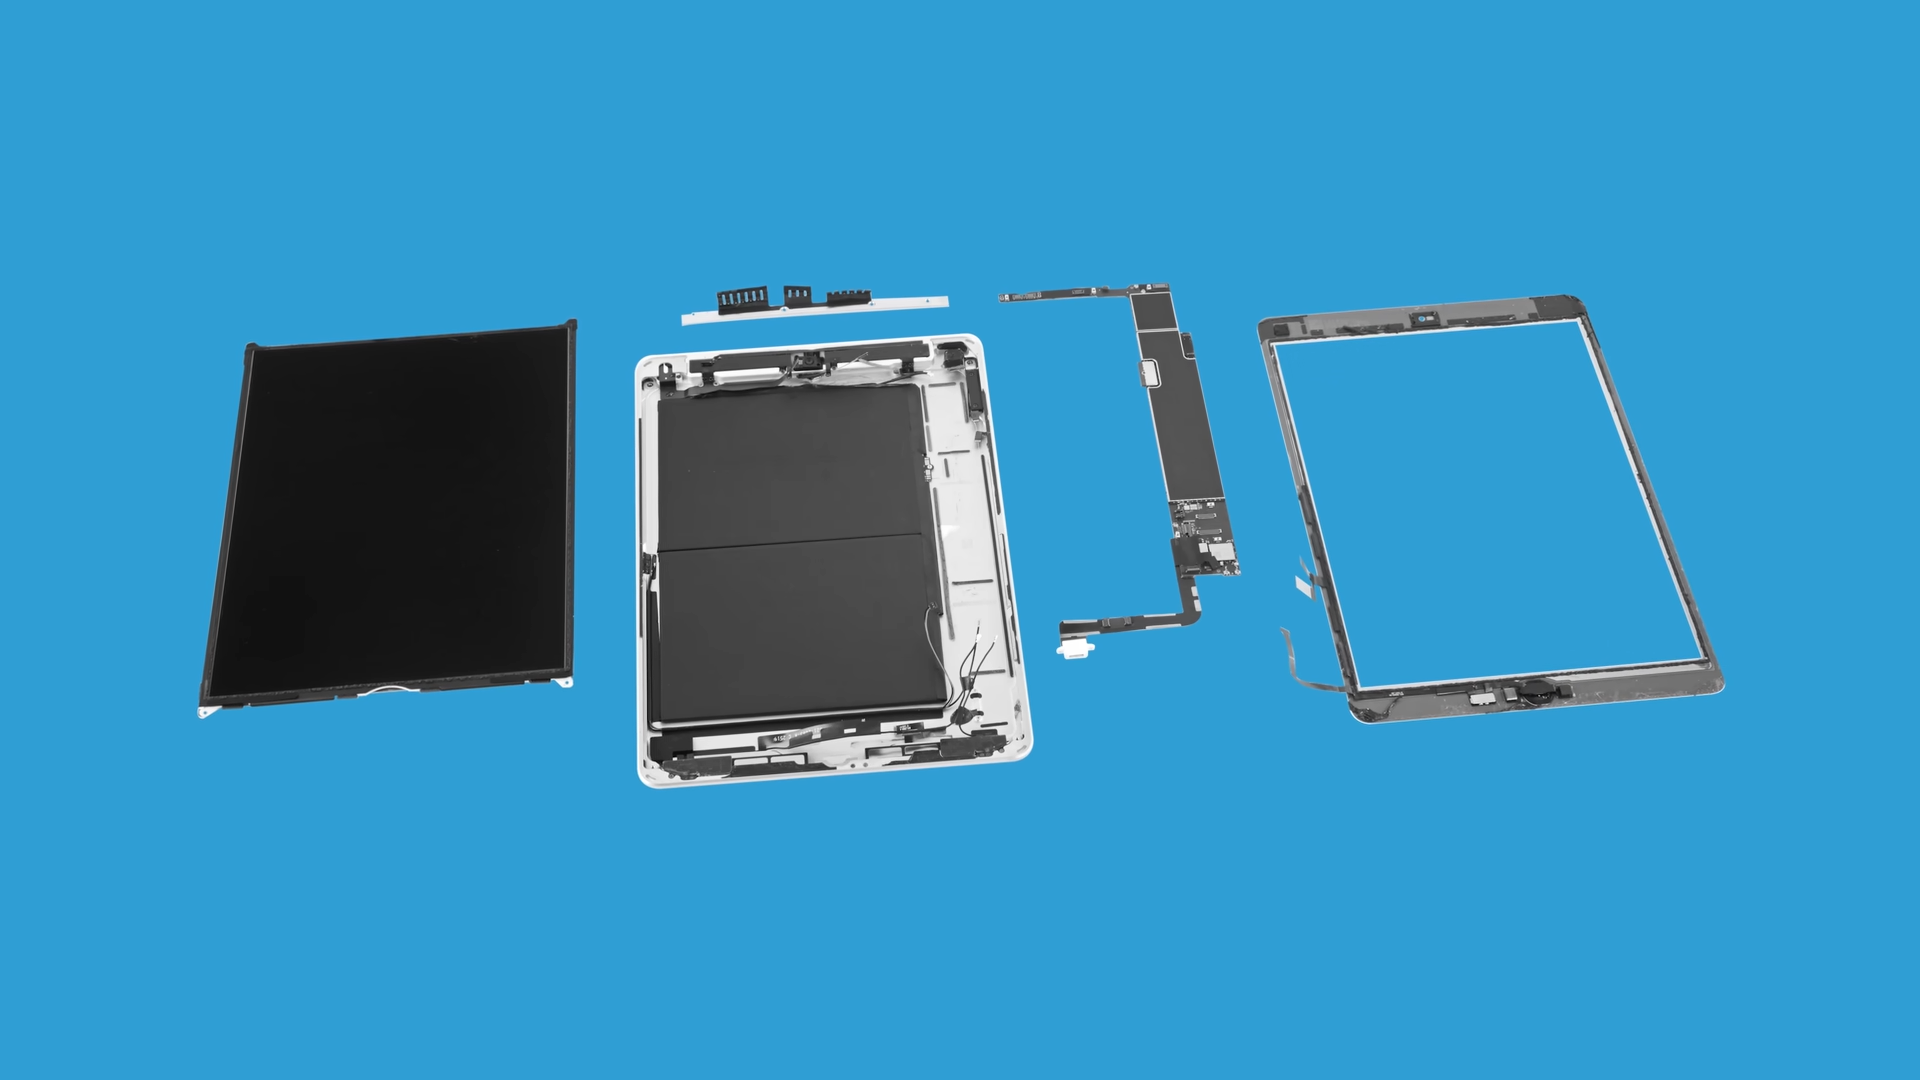
Then there was a styrofoam packed box that looked like it was protecting something extremely important. That got my attention immediately. Opened it up, and of course, there are the crappy tools again. Don’t use them. And then I realized it wasn’t the LCD but it was the LCD’s brother, a white digitizer.

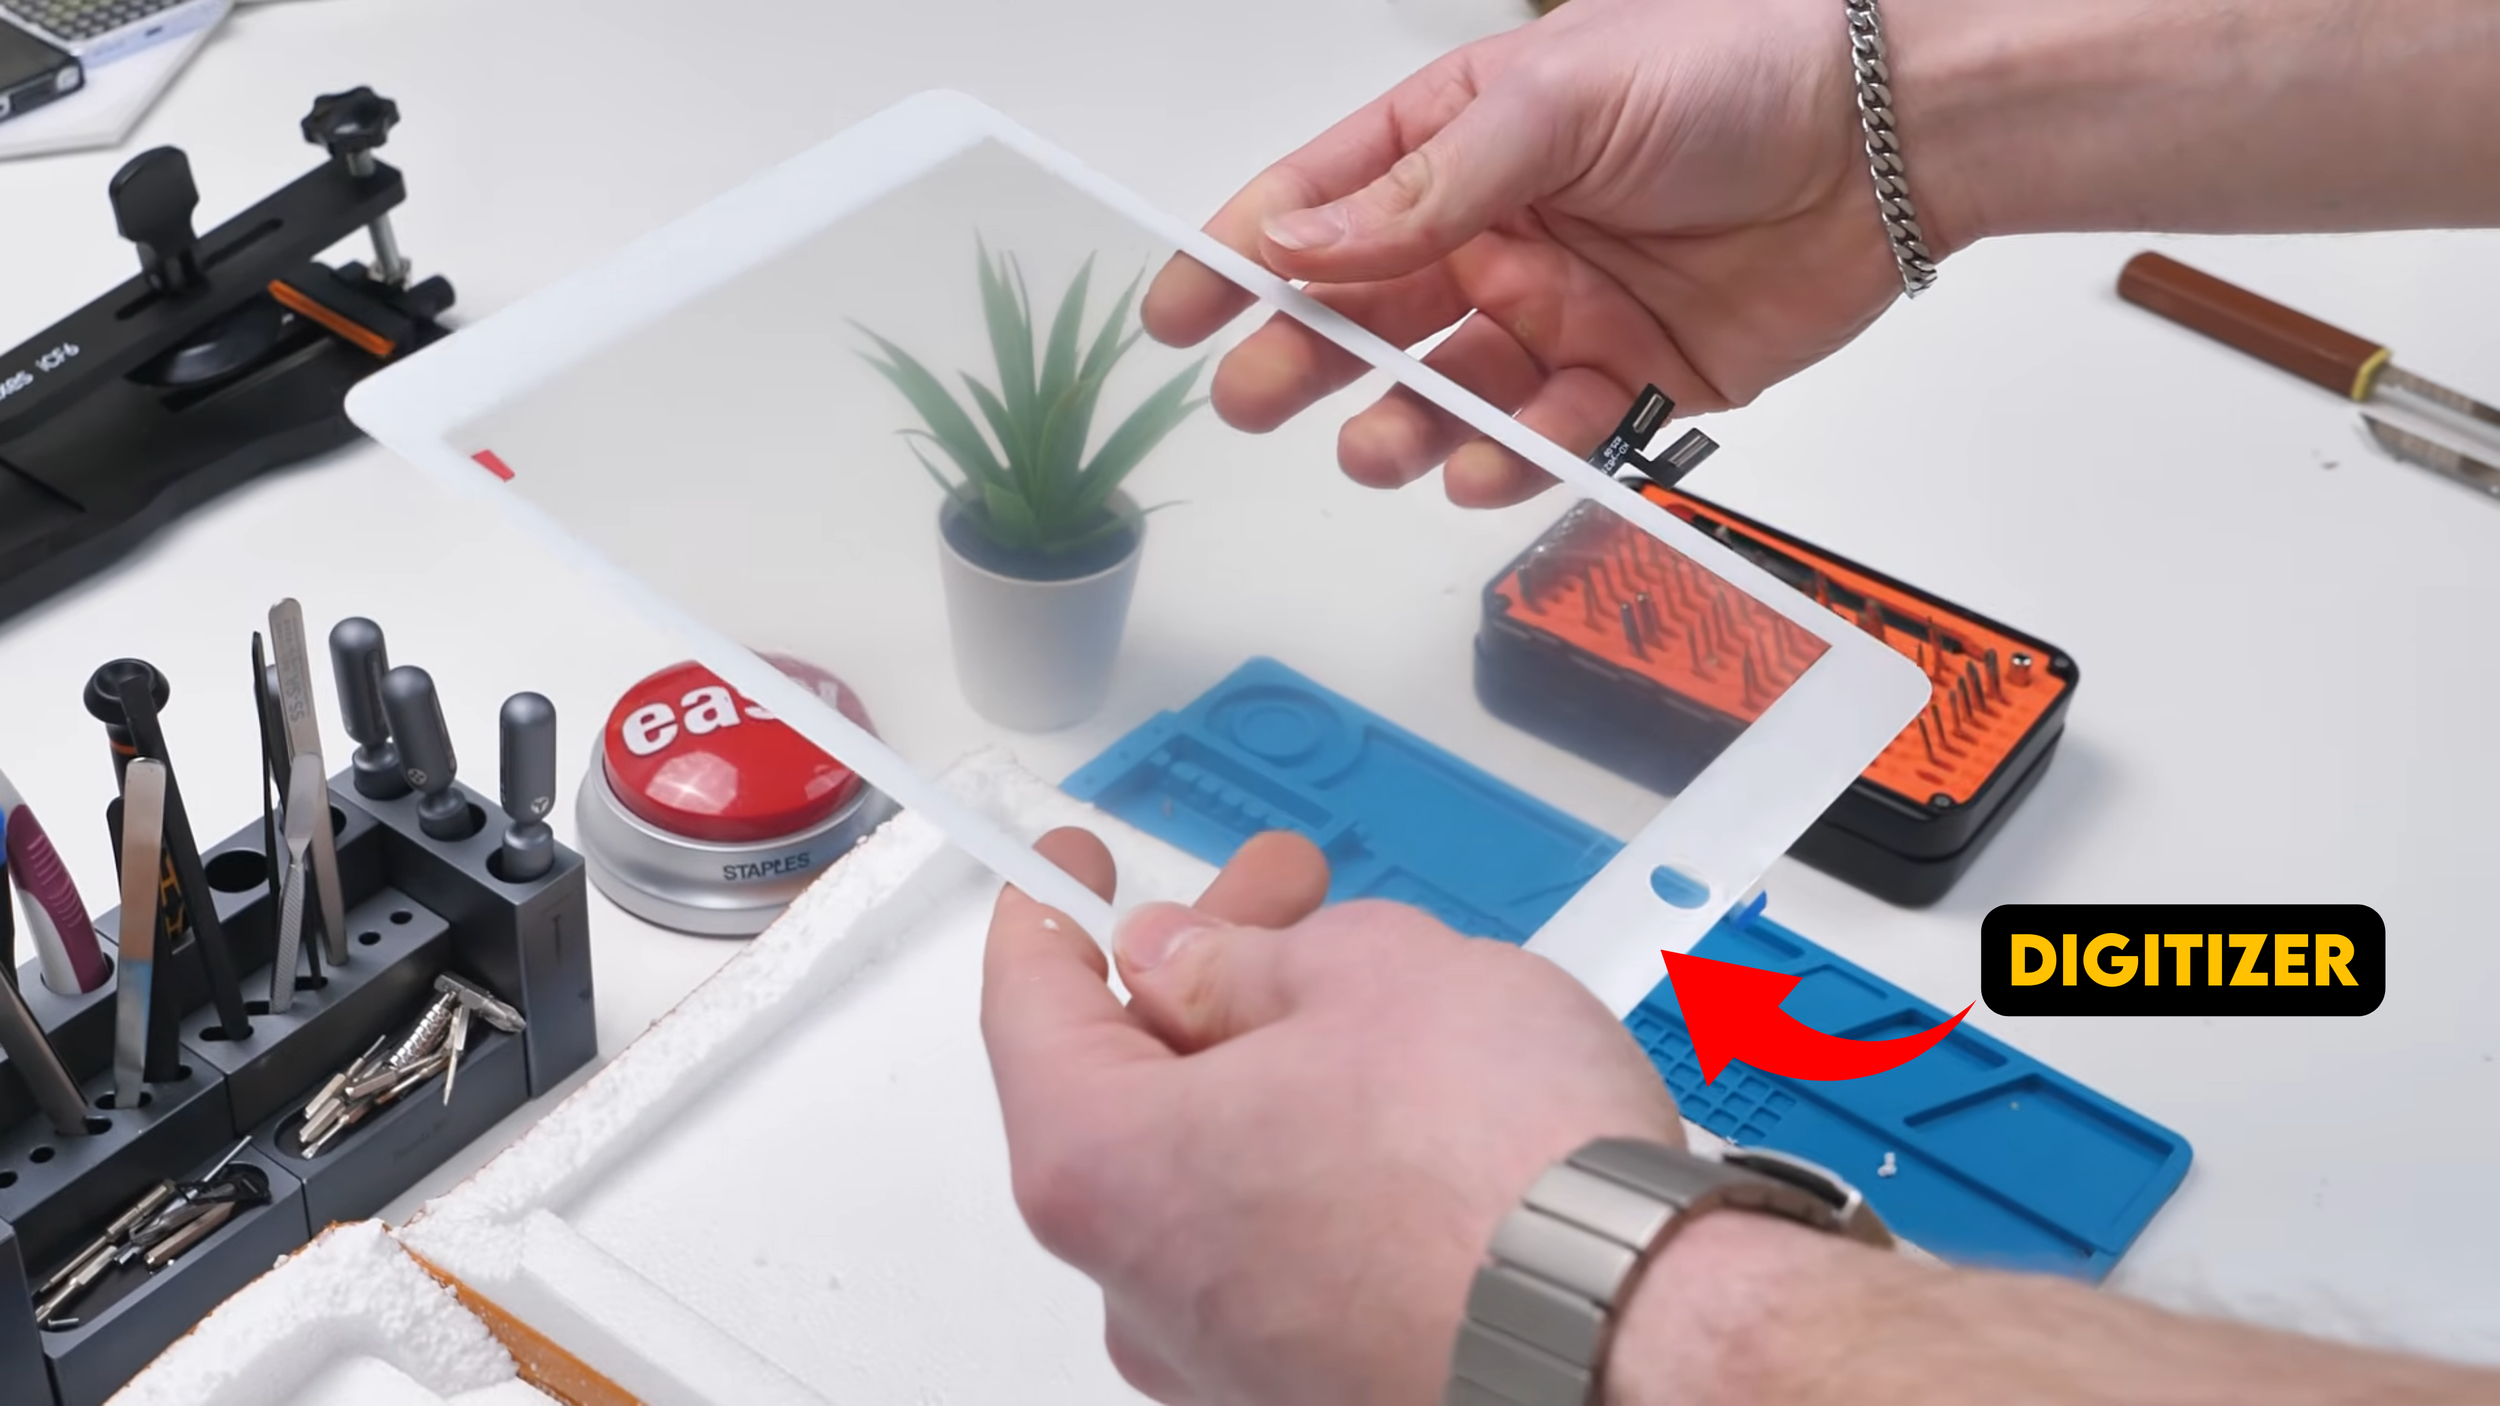
This is what responds to touch. It’s absolutely critical. And I’m not going to lie, it looked kind of cheap. The hope was that it would still function properly even if the build quality didn’t scream premium.
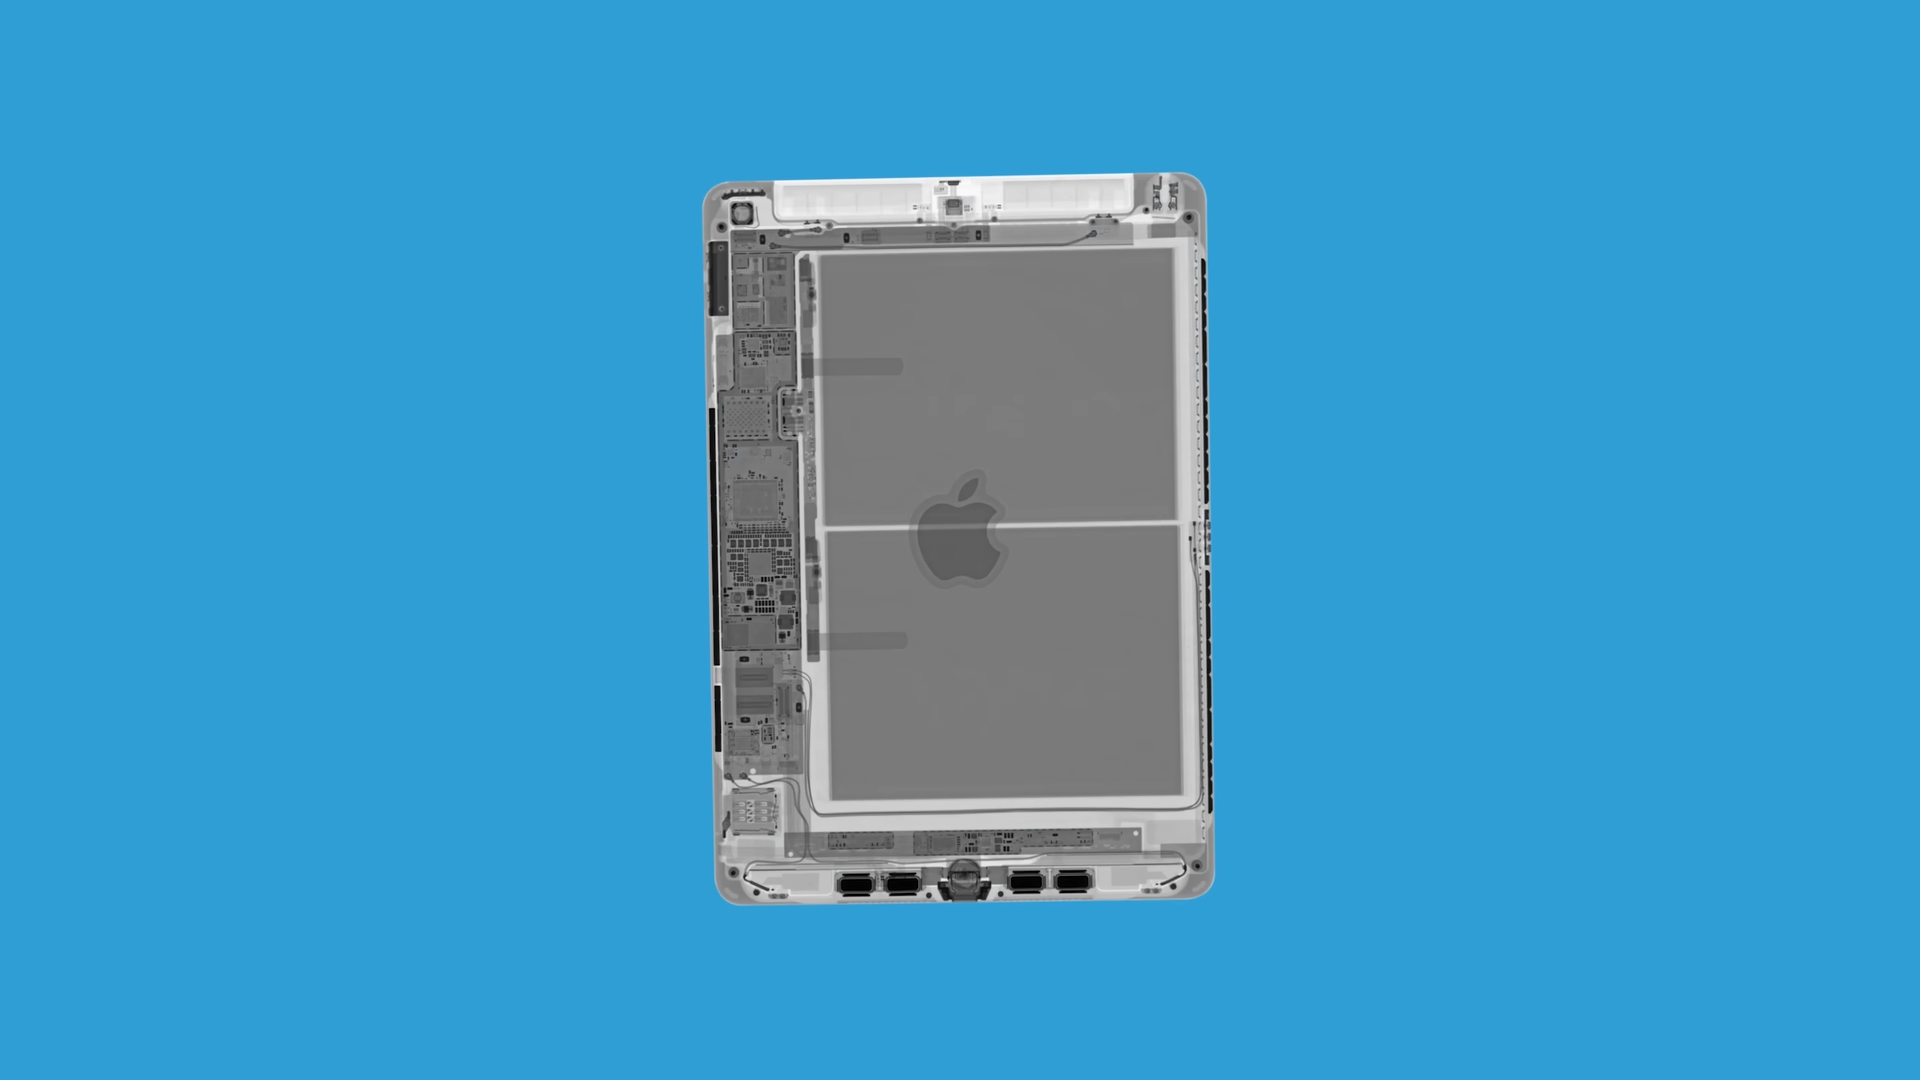
Then came the package that’s always the most interesting in these builds: the part that is always a hit or miss from AliExpress. The motherboard.

There it was, the brain of the iPad, and it looked like it was being tortured in the packaging. This was also the most expensive part of the entire build and it comes with a bonus. The charging port was already pre soldered on the board. I fully expected to have to solder something. But I didn’t have to.
Next is the LCD package, and you could tell it was packed more securely for a reason. It was heavy, and fragile, and the kind of part that ruins your day if it arrives cracked. LCD is one of the most fragile components in an iPad.

It even had the warning printed on it telling you to test before installation, and that the warranty is void after removing screen protector or tape. Basically, once you commit, you’re on your own.
Then we hit the last major item, and this is where the build got weird.
The Housing Problem
We run into an issue sourcing the housing. We can’t find it on AliExpress, so we have to get it from eBay, which was the only option. We still counted it in the final cost tally because it’s still part of what it takes to build the iPad.
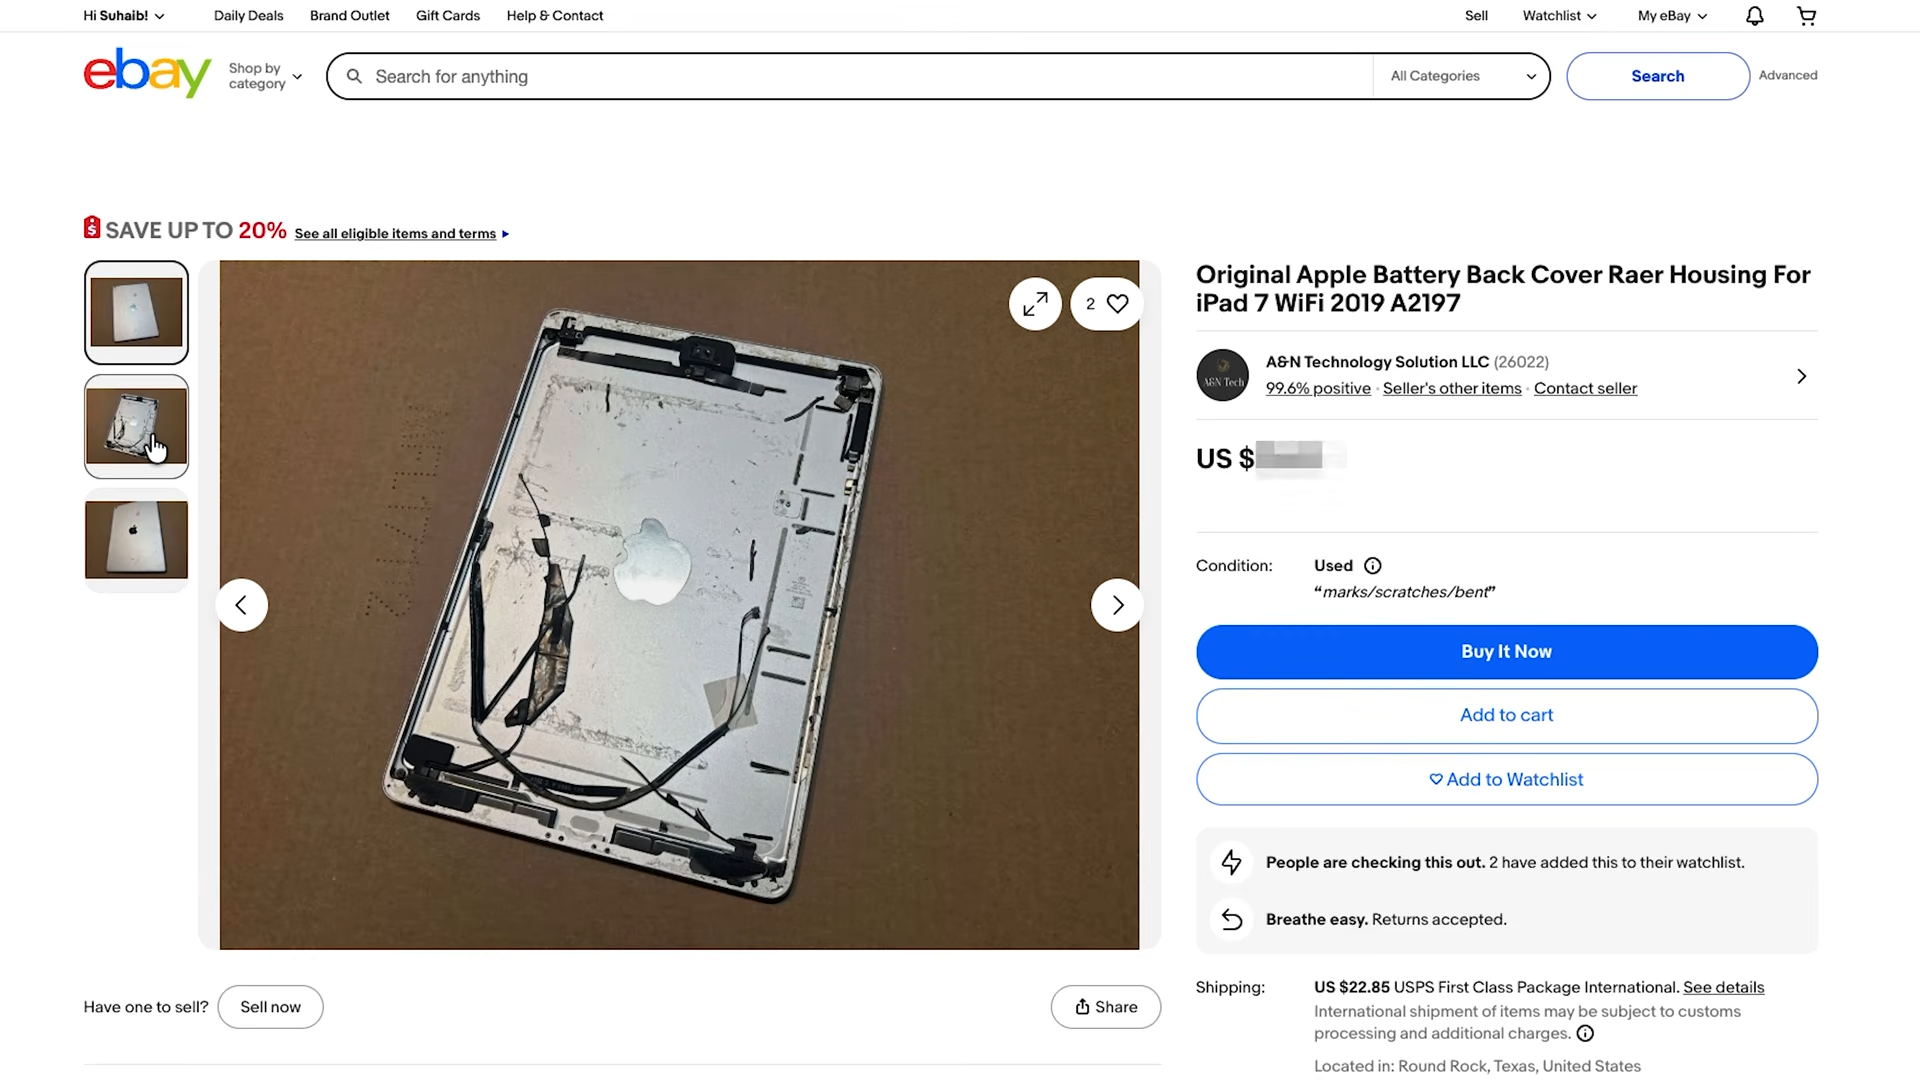
And honestly, the housing we found was not in good shape. It looked absolutely messed up, like it had been through hell and back. It came with a bunch of parts still installed, and I did not trust that any of them worked.
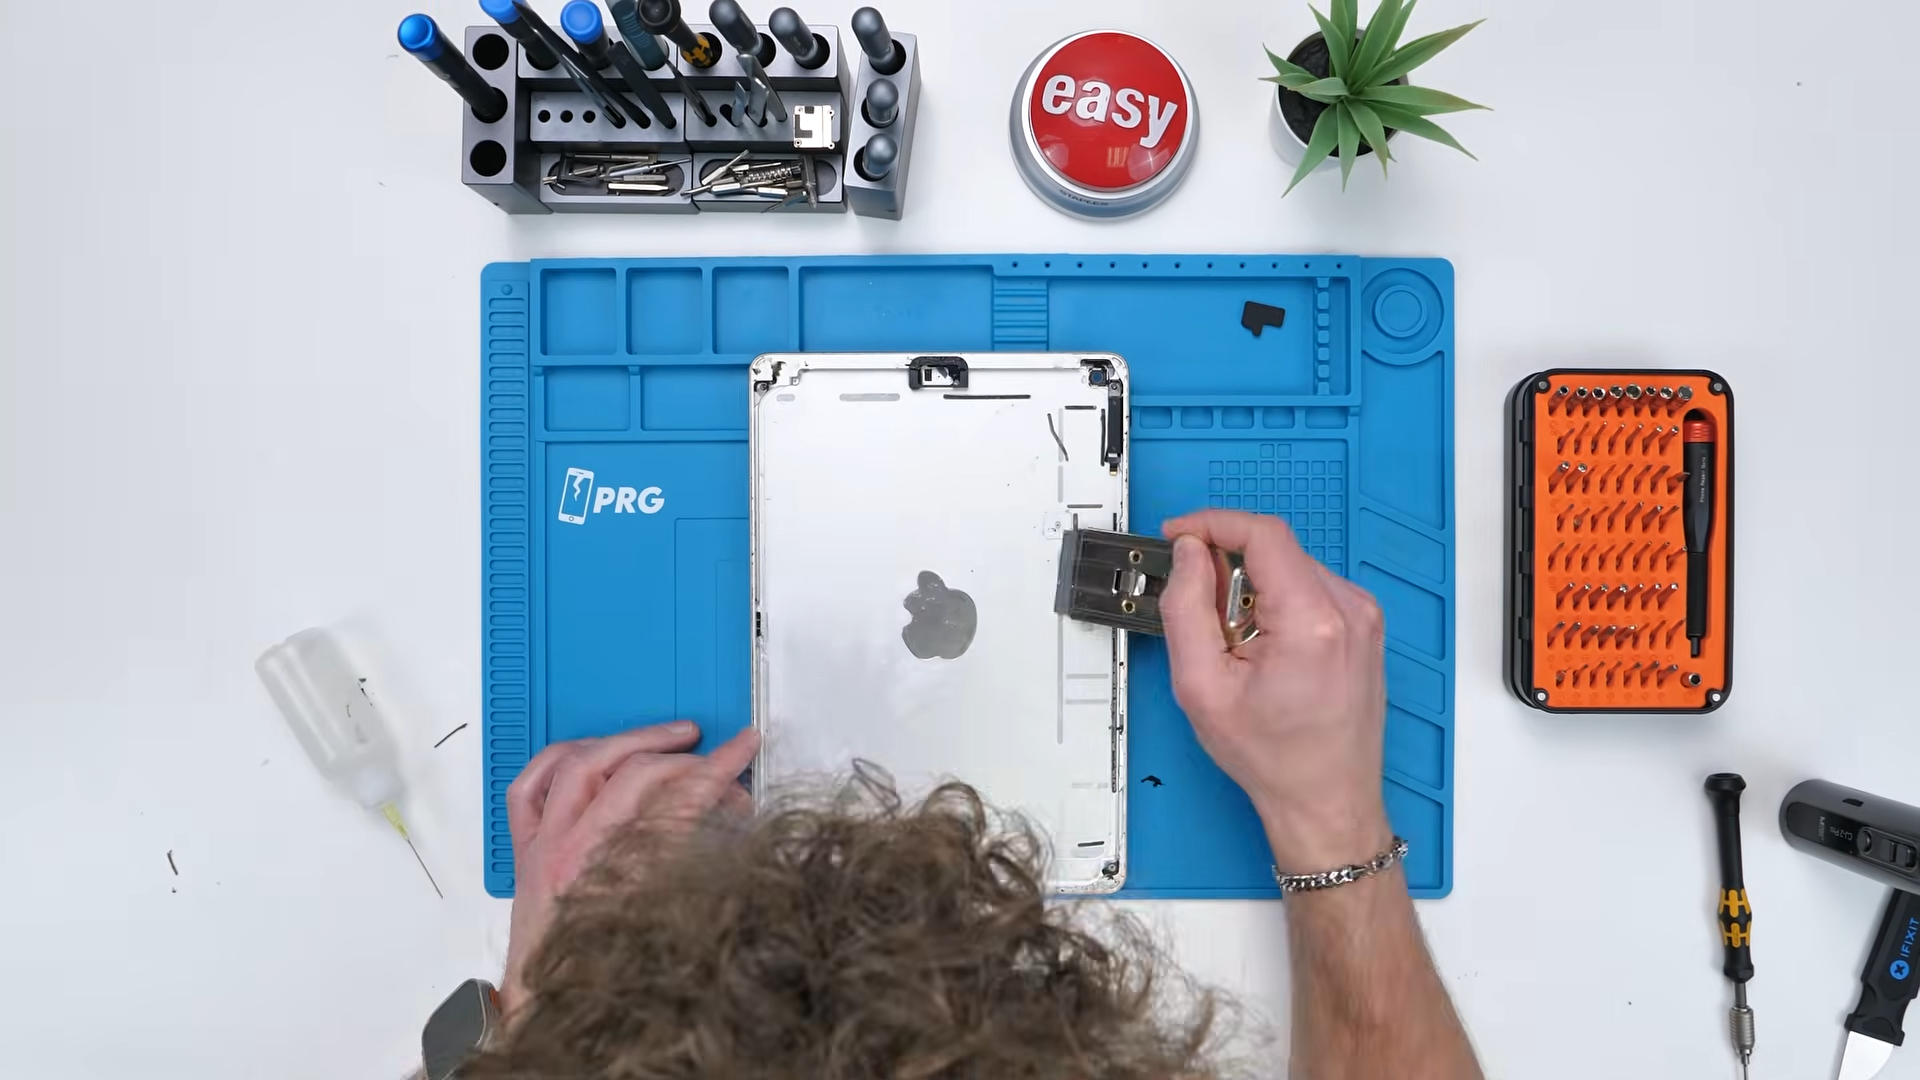
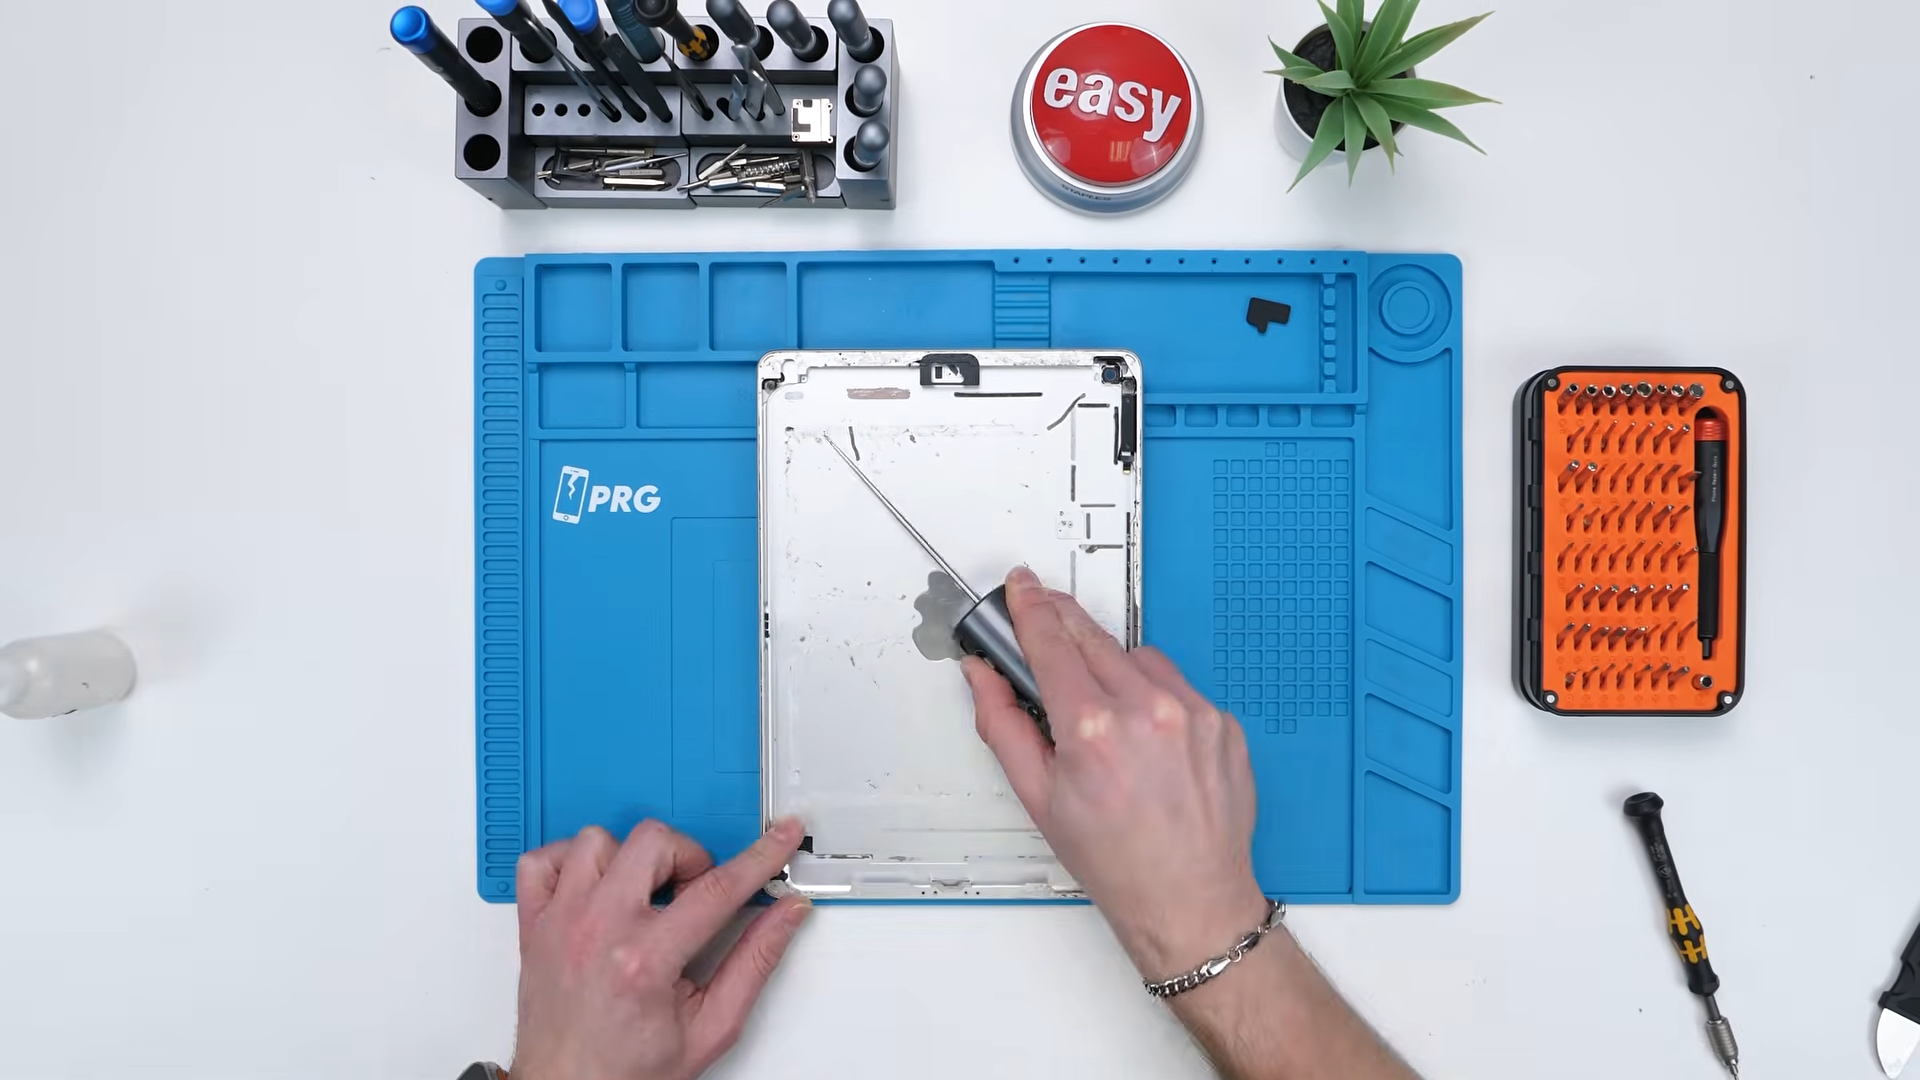
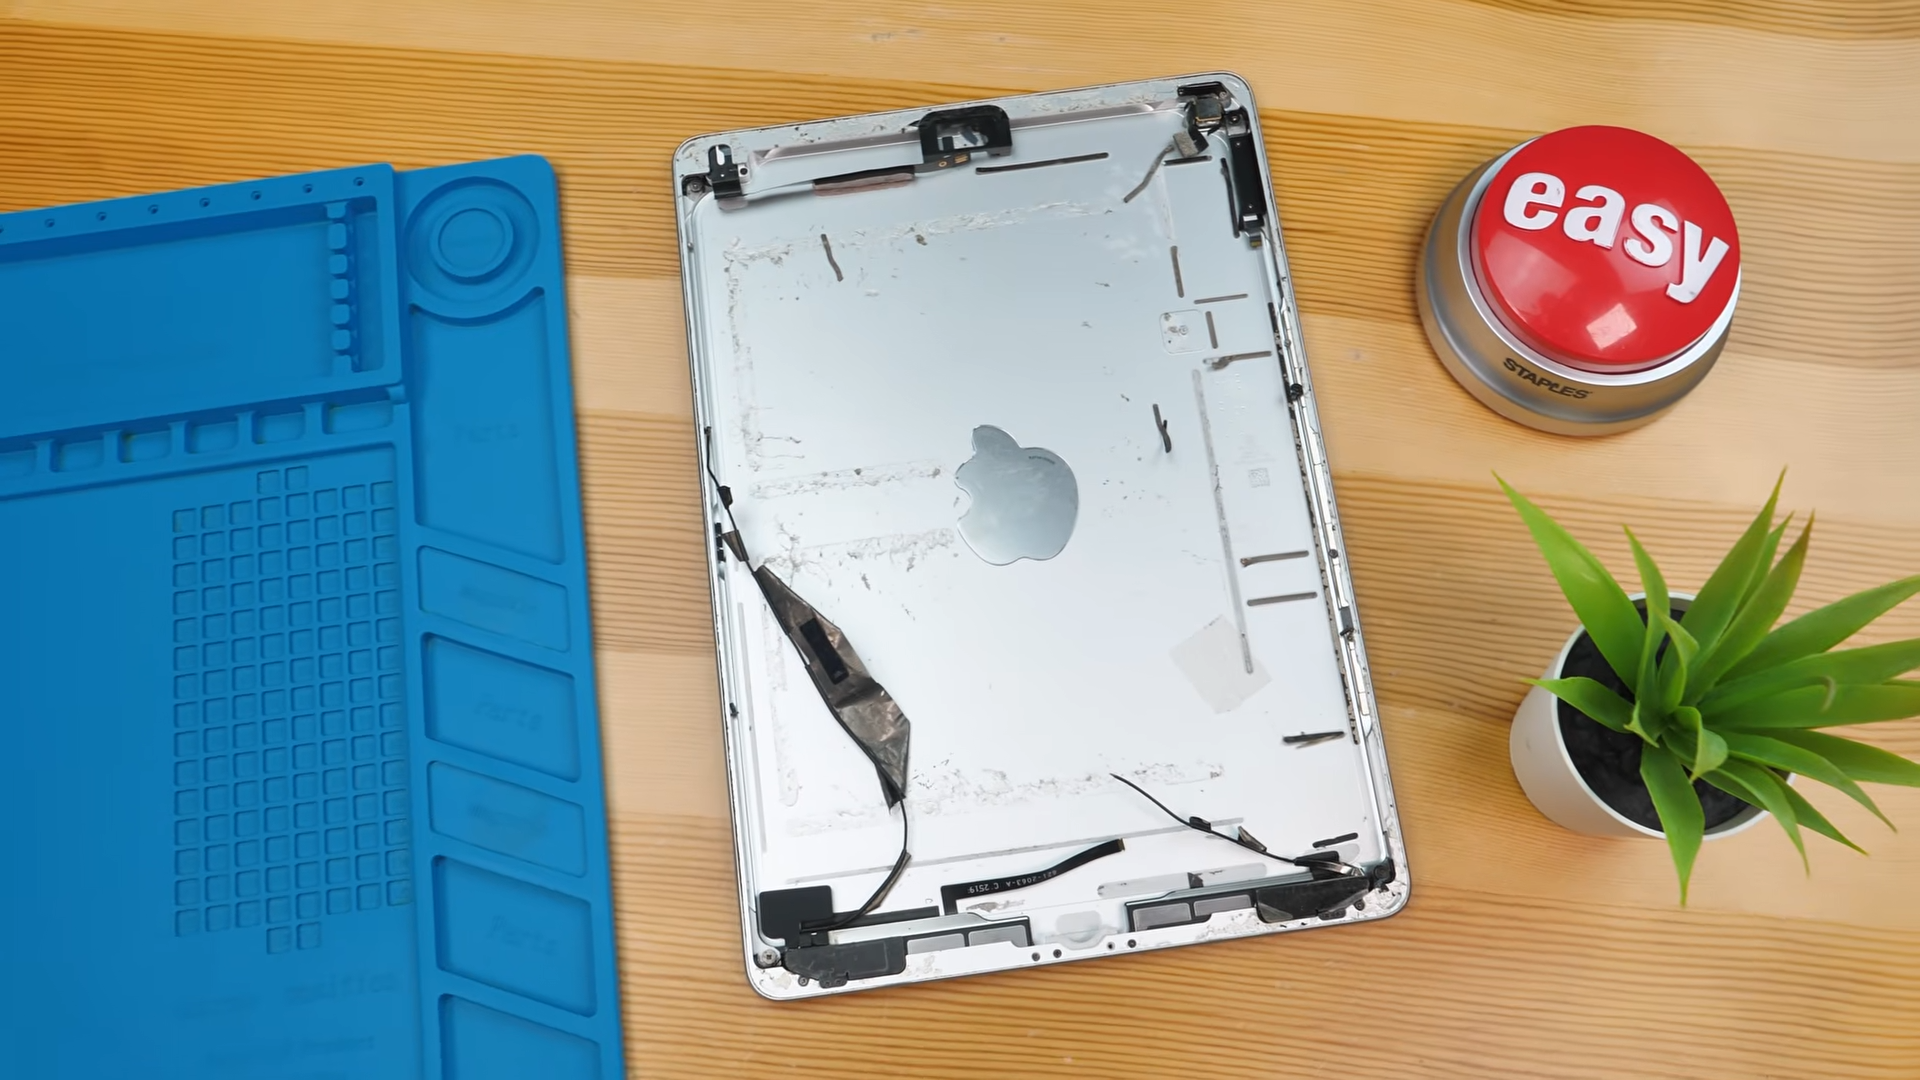
So the plan became simple, remove everything that came with the housing, clean it up, reinstall the AliExpress parts, and basically rebuild the thing properly inside a questionable shell.
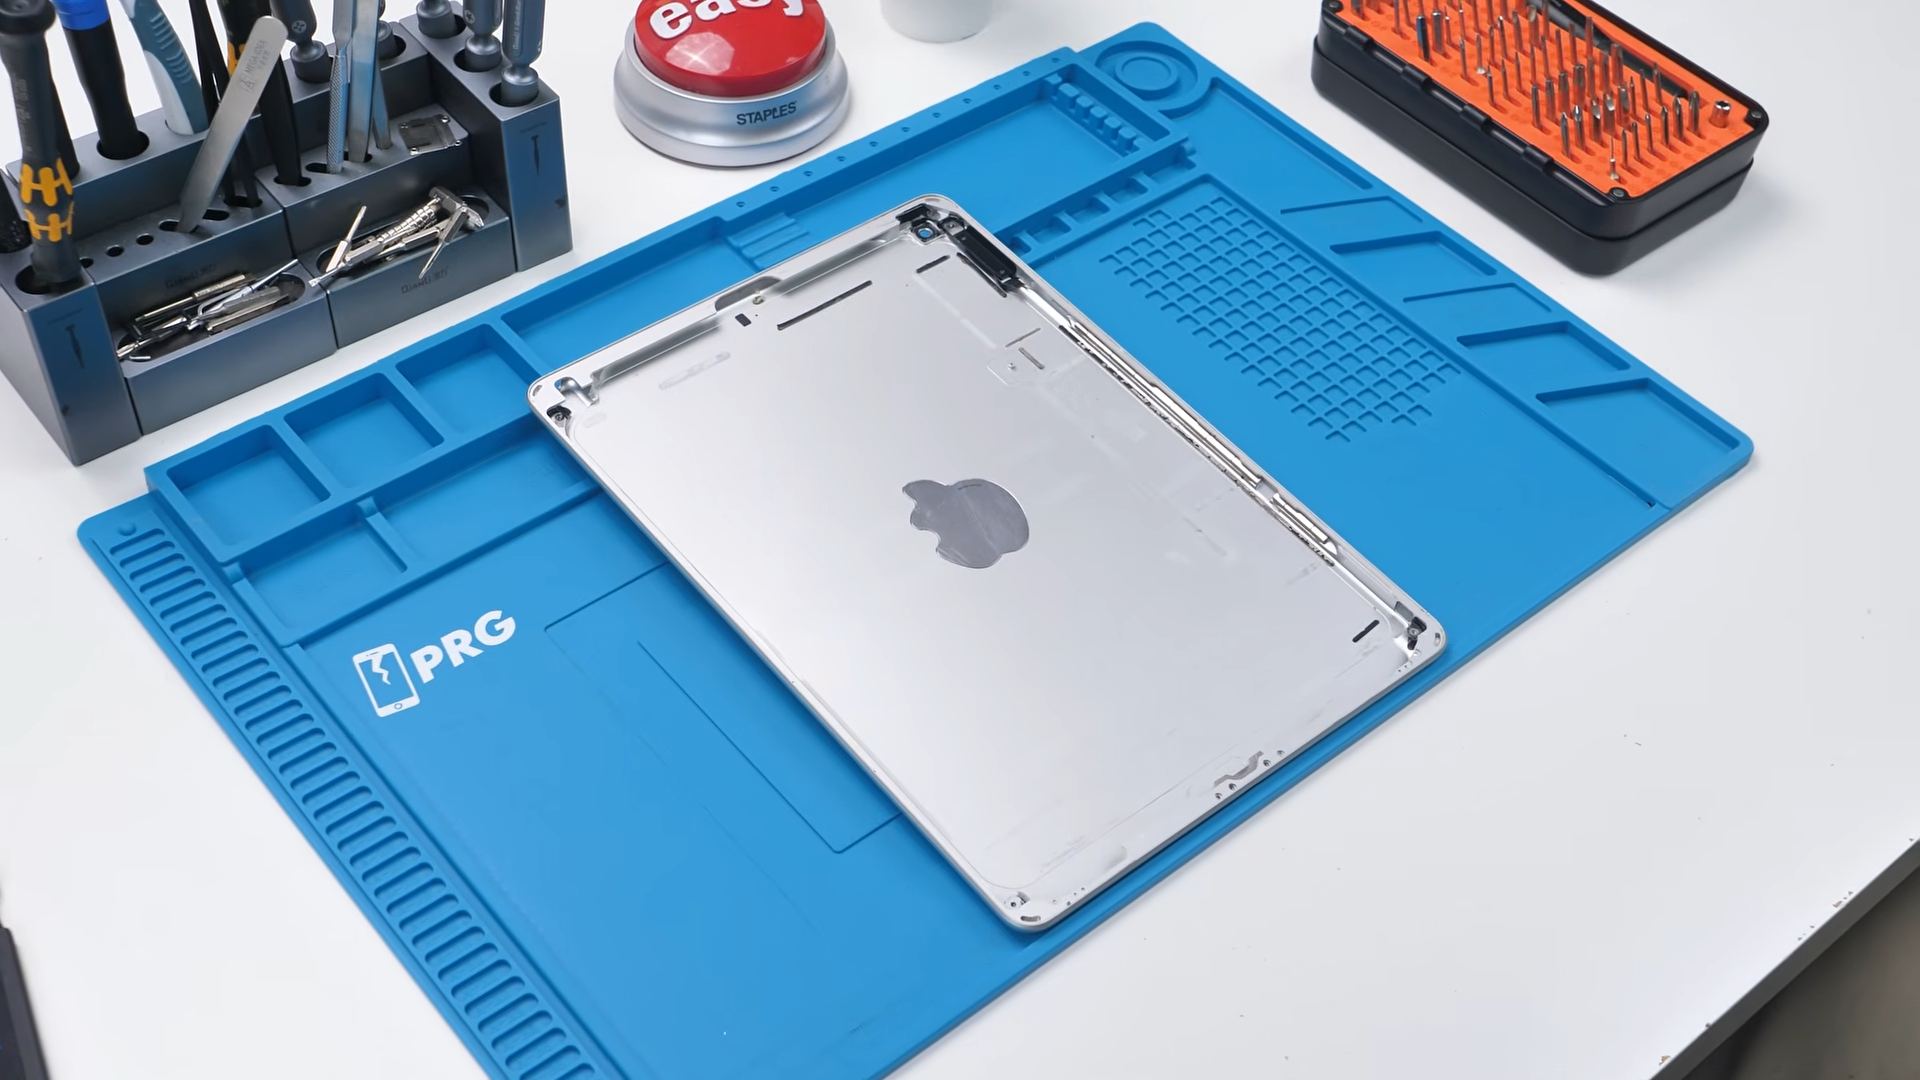
After cleaning it up, I was surprised how good it looked. It was ready, and now we could finally start building this iPad 7.
Let’s Put It All Together
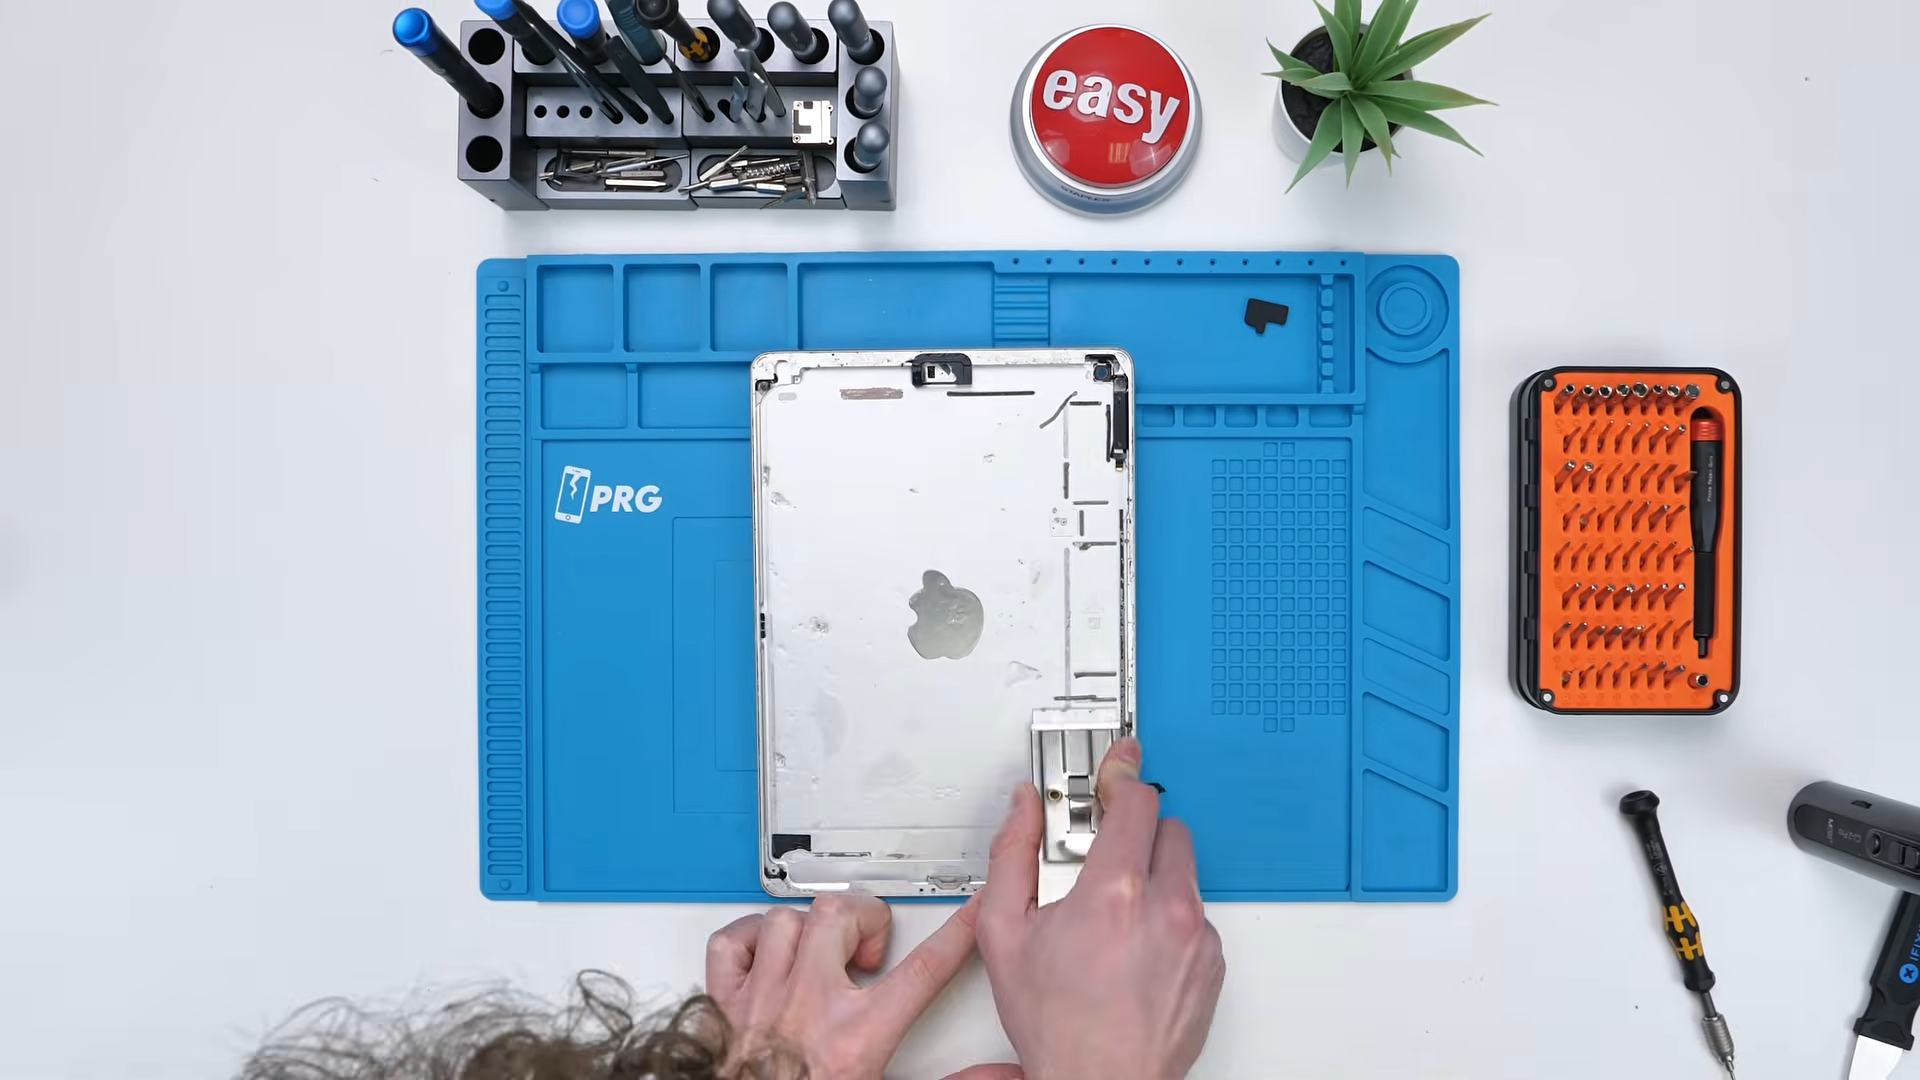
The first component to go in was the headphone jack since it’s one of the easier installs and it needs to sit underneath other components later on. It slid into place without any resistance, but securing it meant diving into the pile of mixed screws and figuring out which one actually belonged there.
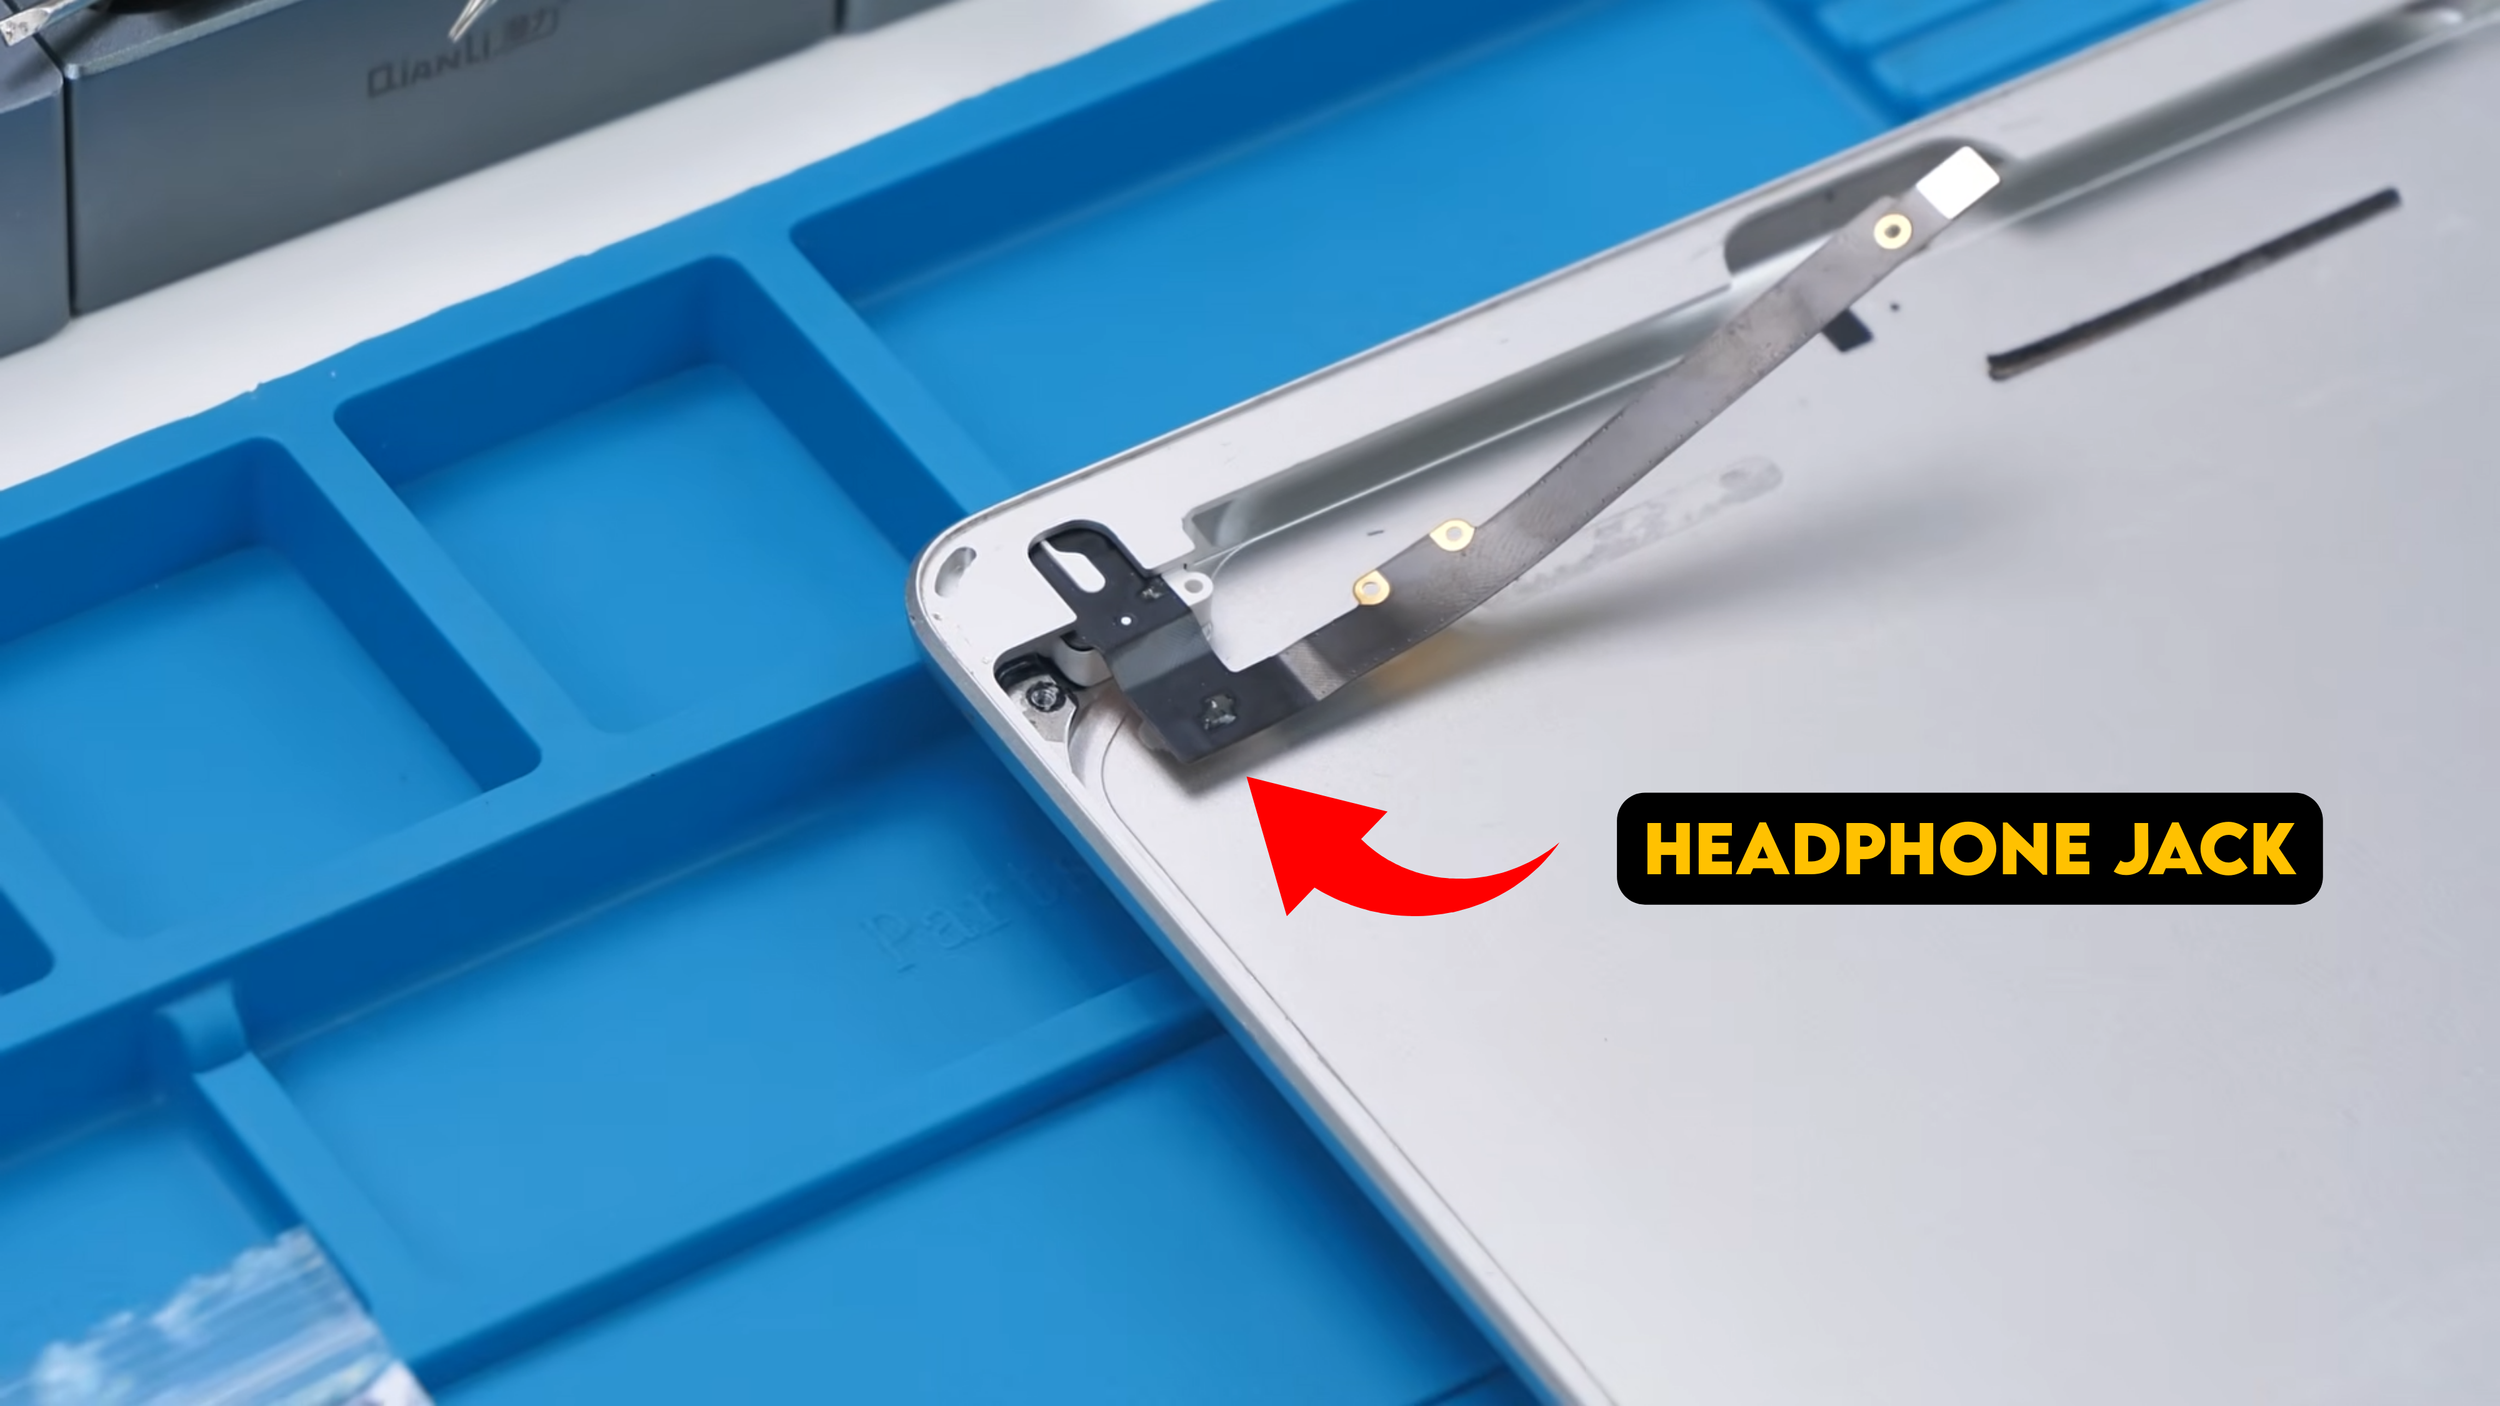
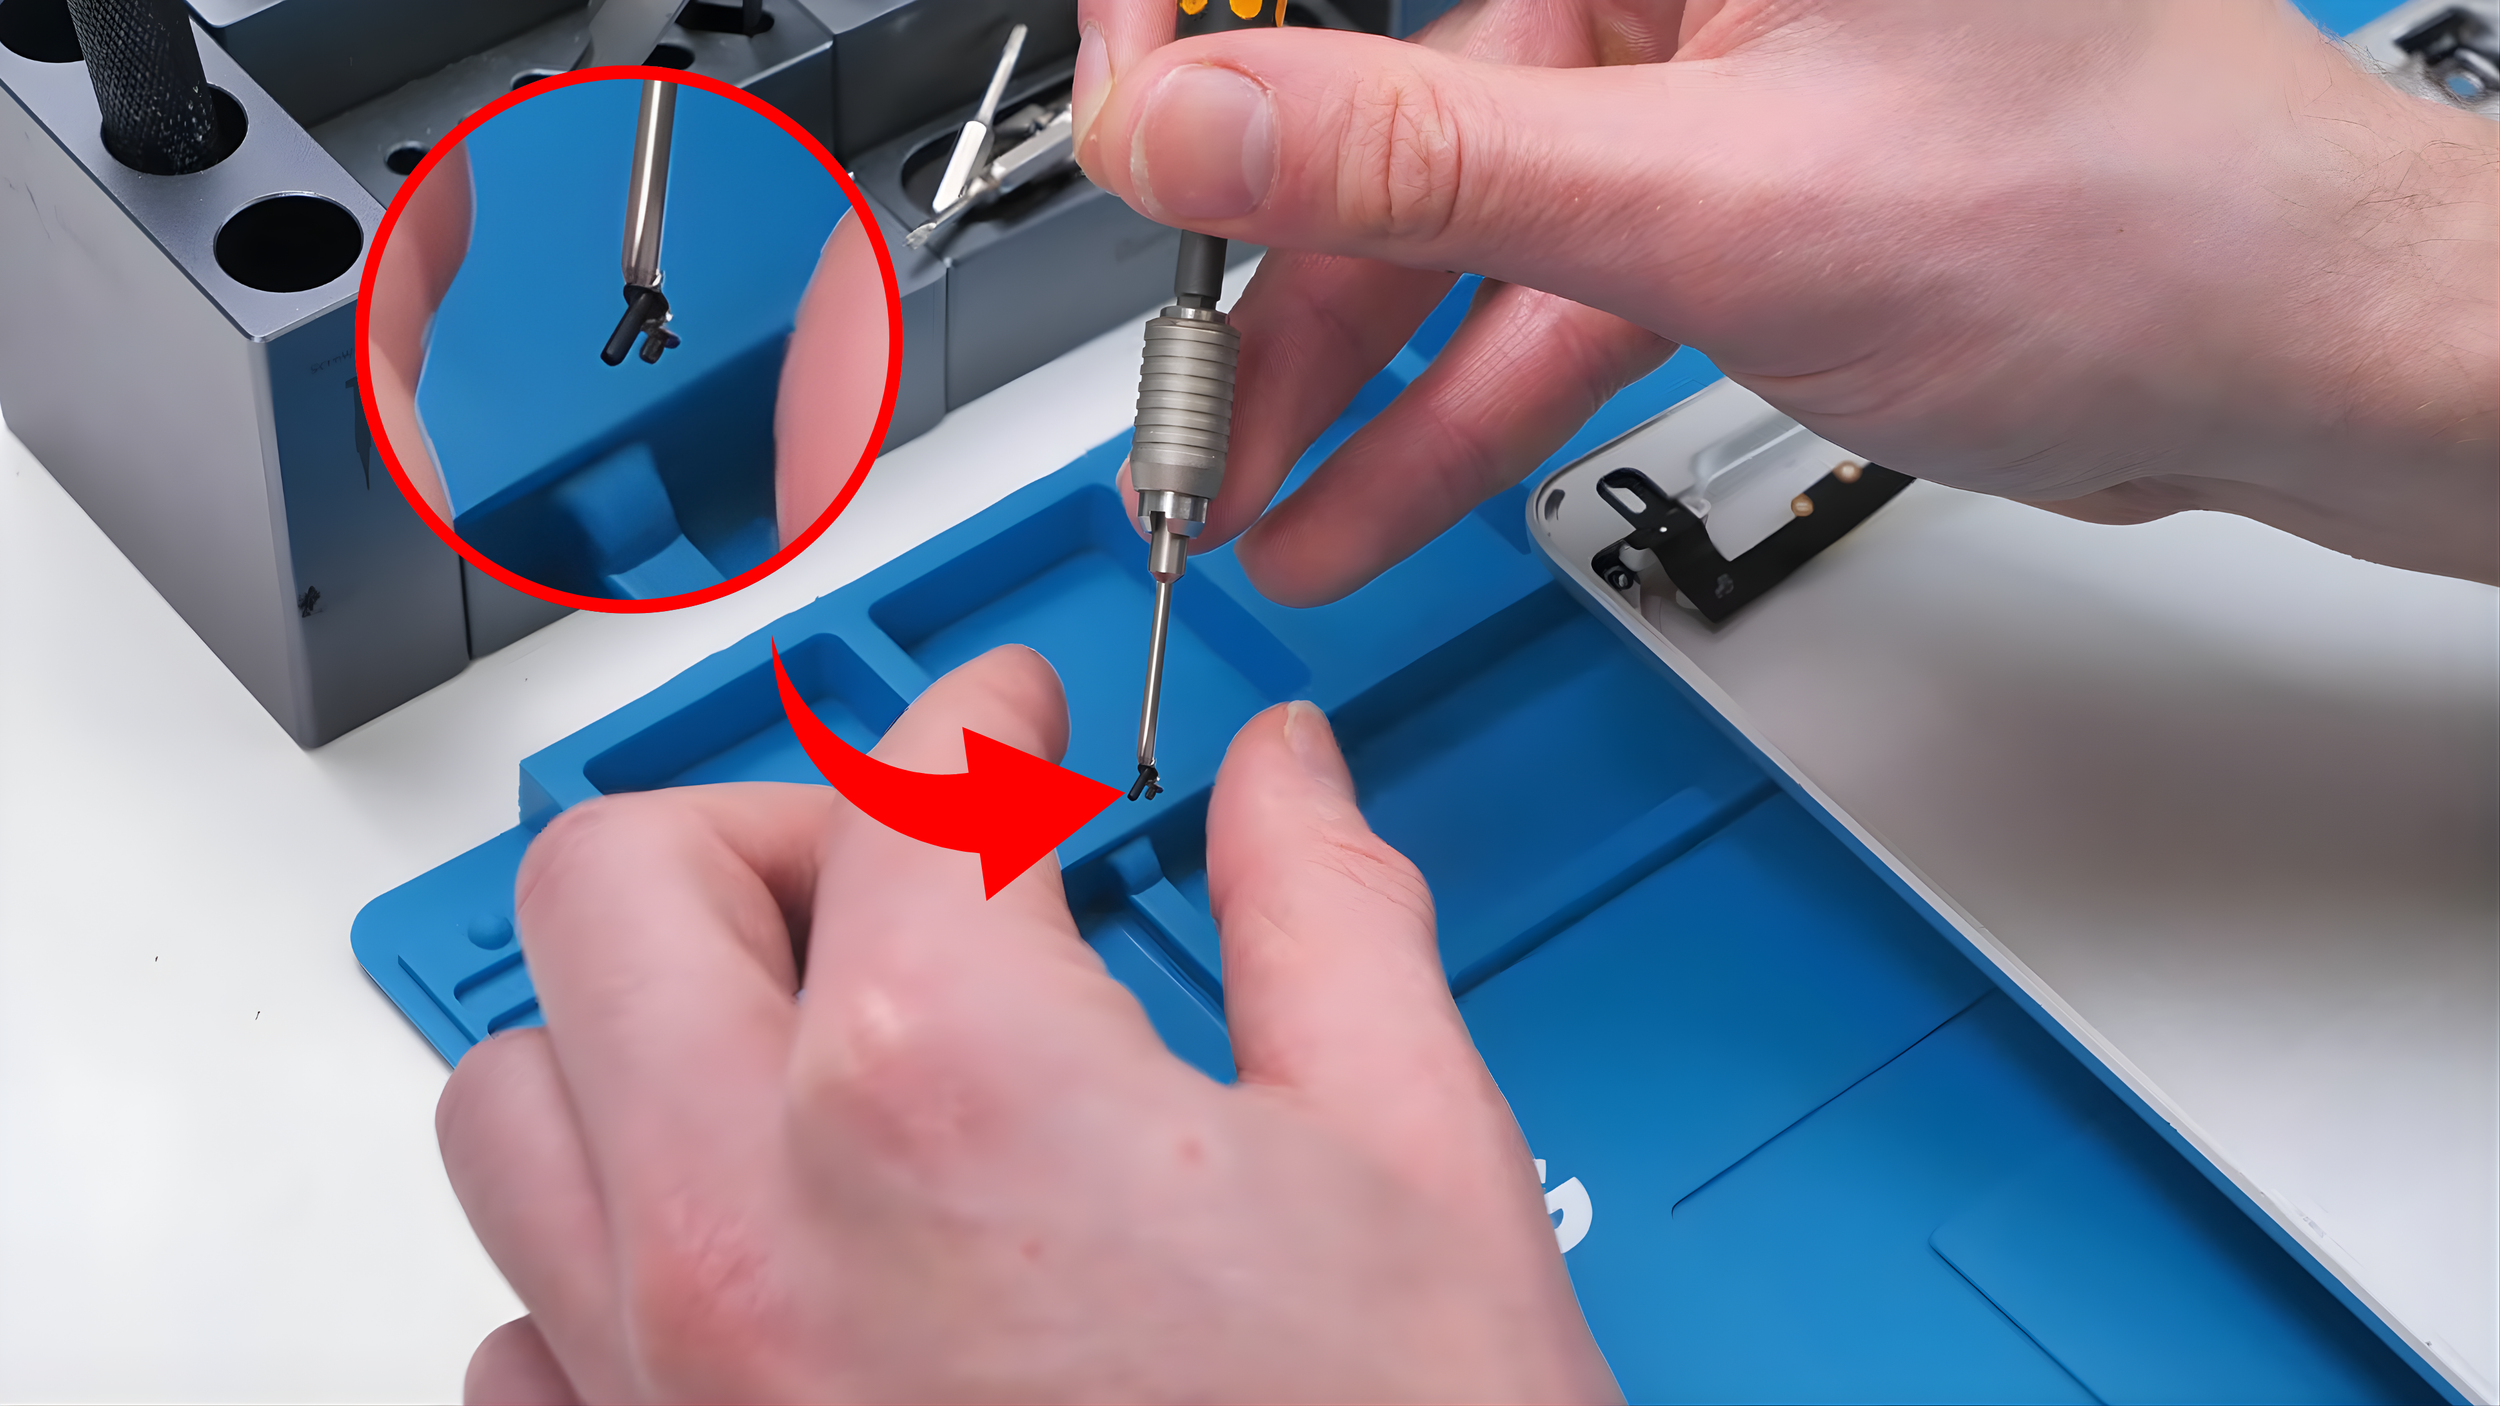
I chose one that looked long enough, strong and healthy, but it turned out to be too short once I tried threading it in. After switching to a longer black screw, everything lined up perfectly and the headphone jack was finally secured properly.
One part down. Many more to go.
A Part I Was Nervous About
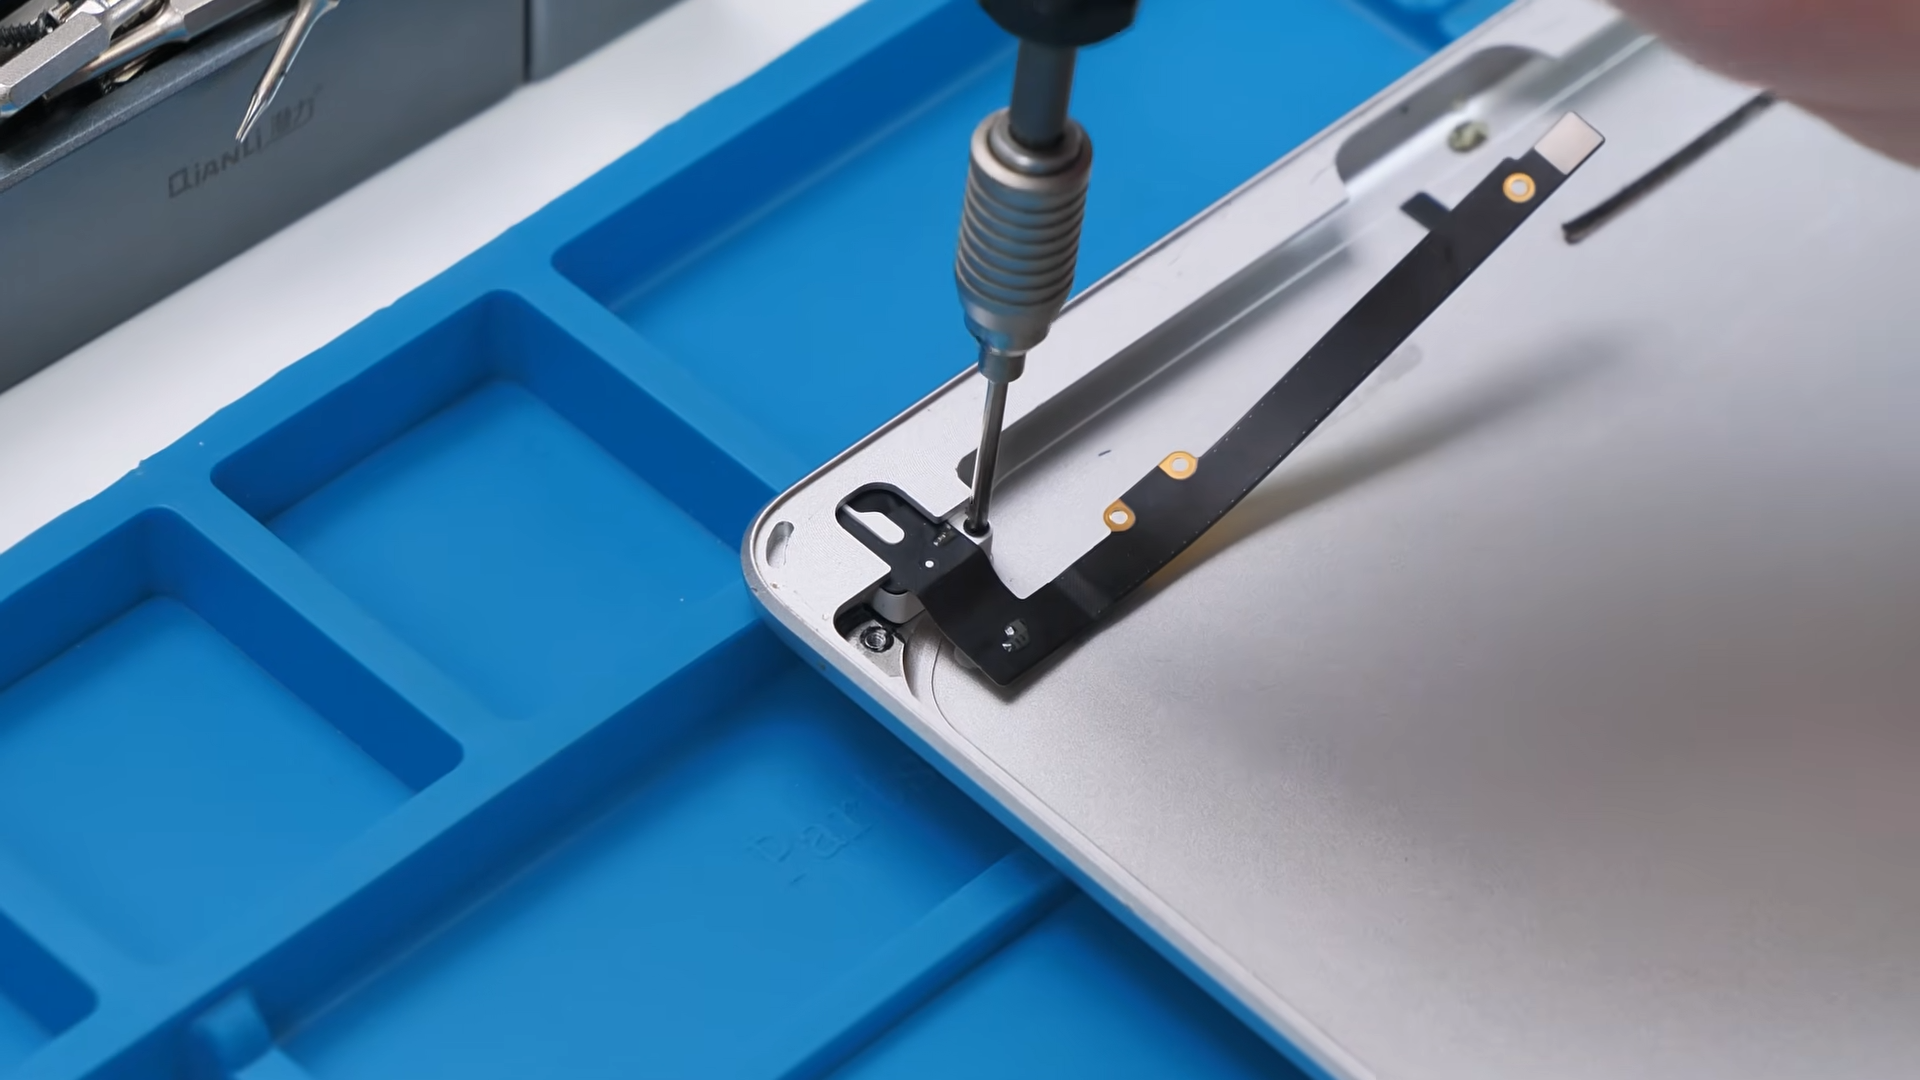
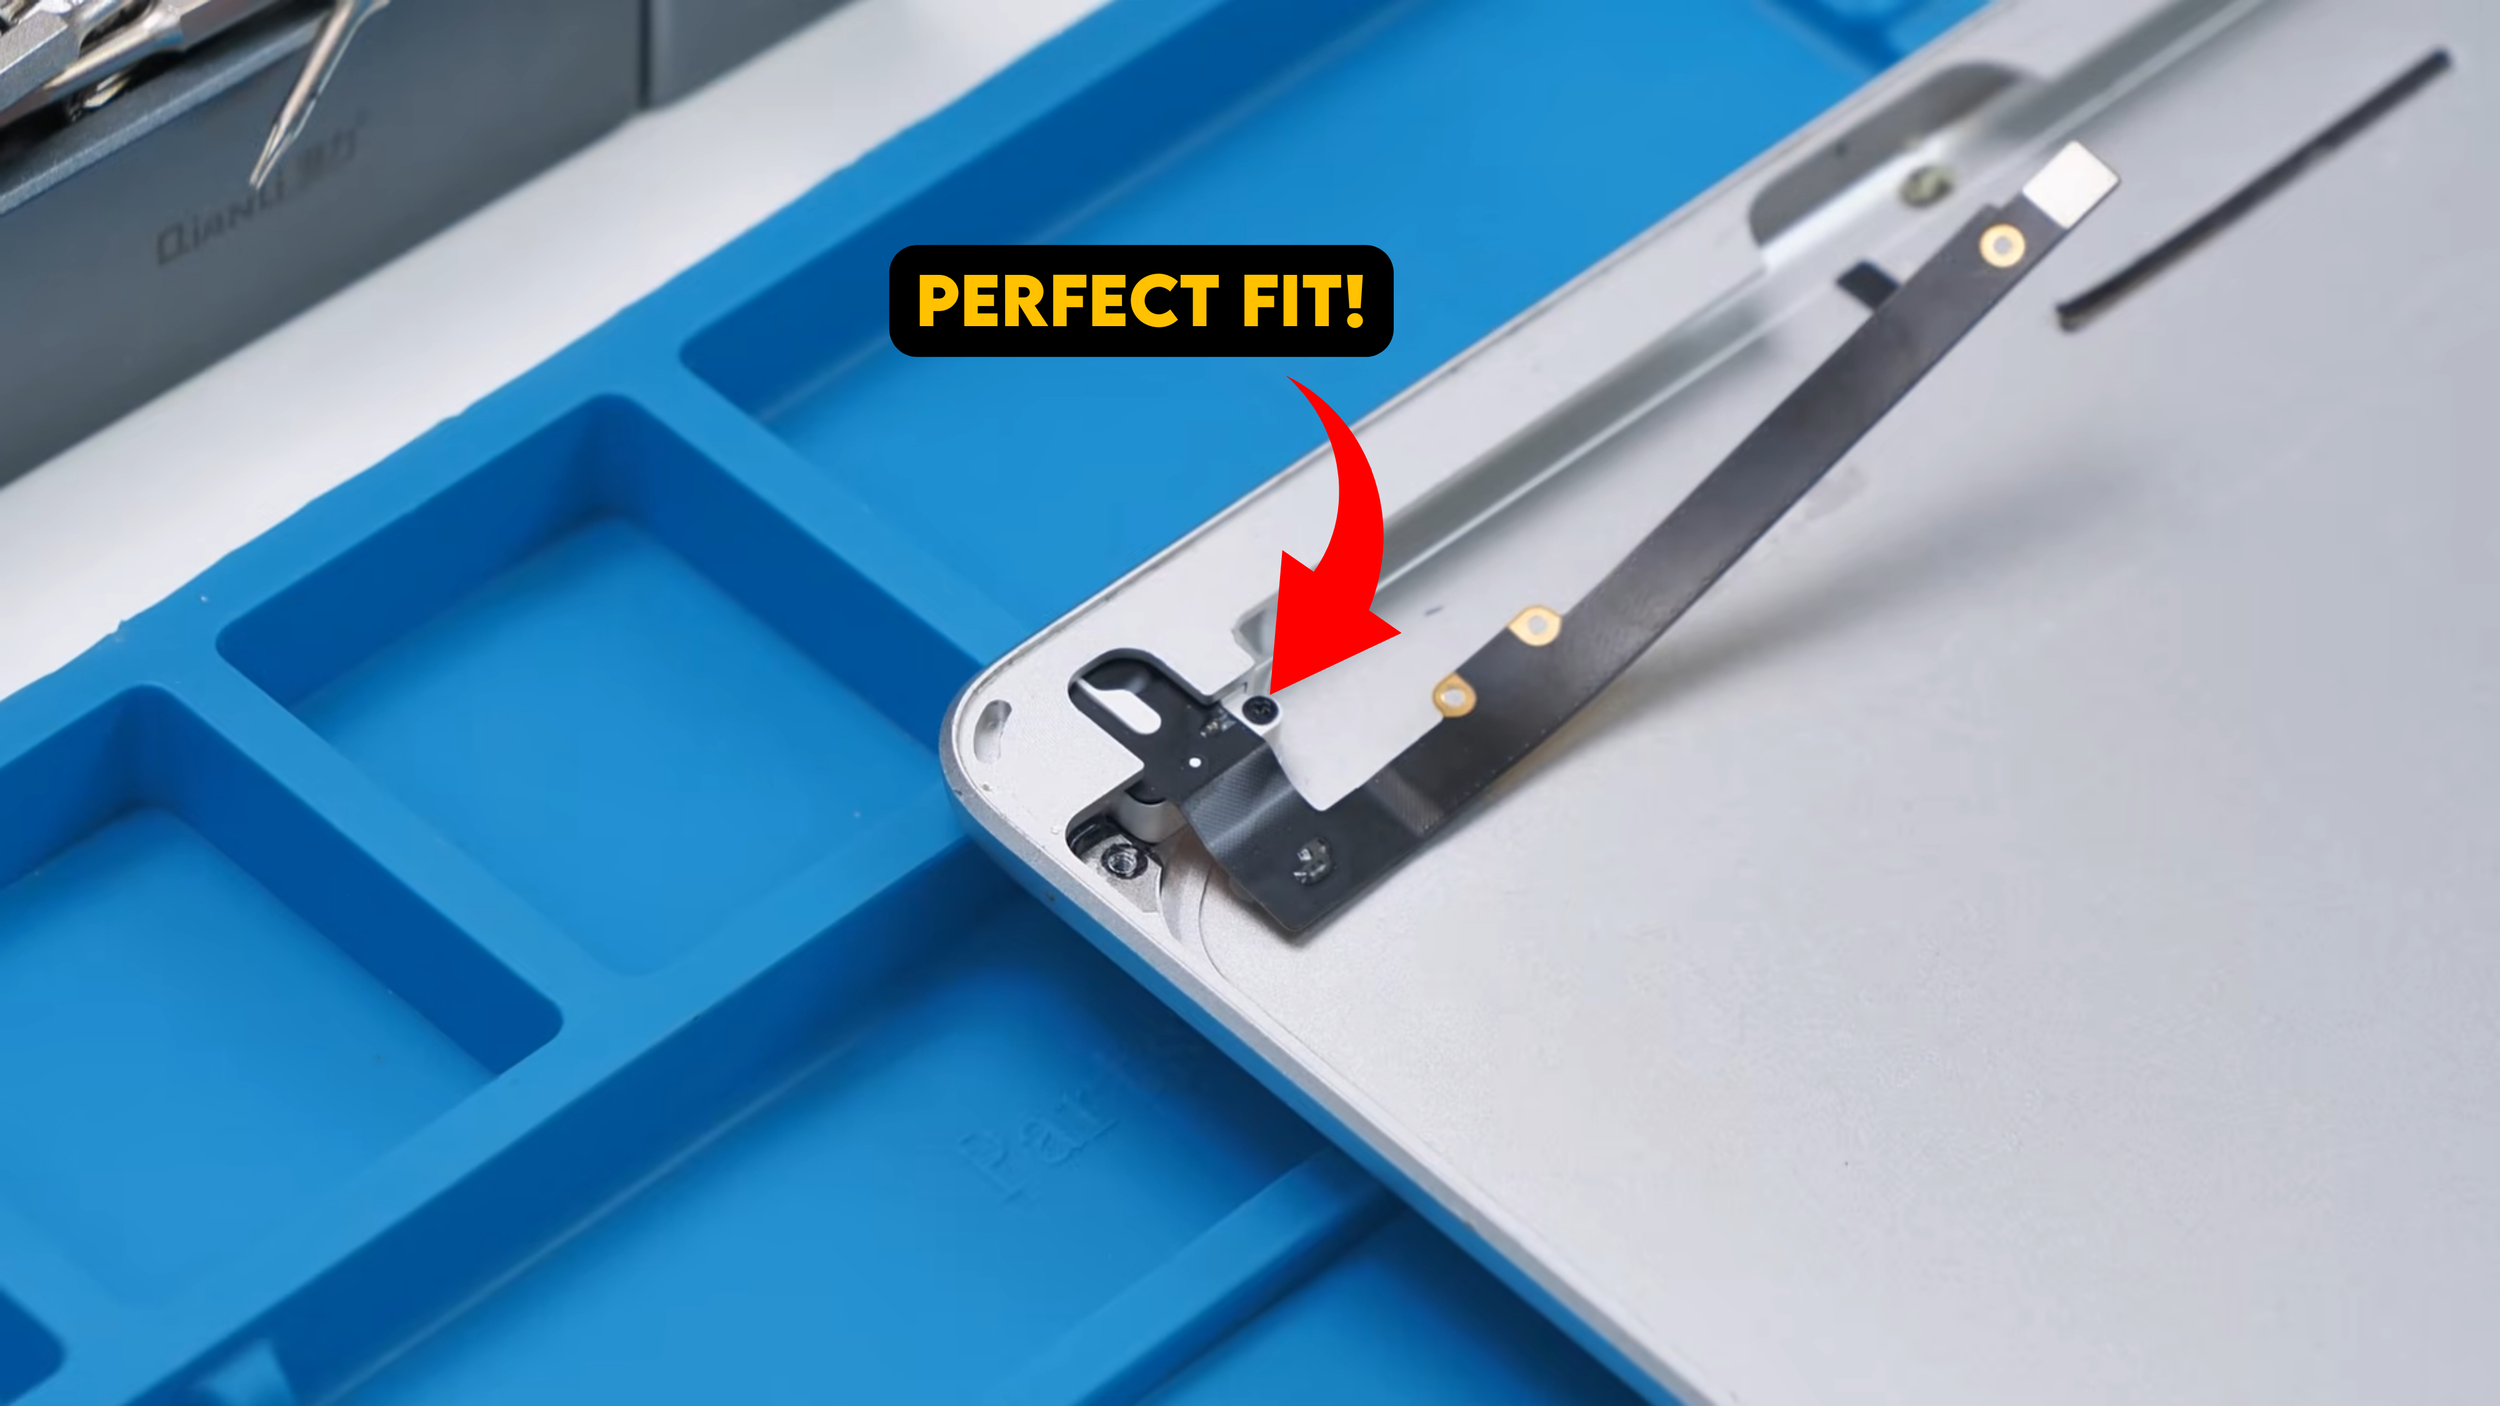
Next was a part I was actually scared to install because I hadn’t done it before, and the old housing still had remnants of the original part stuck in place.
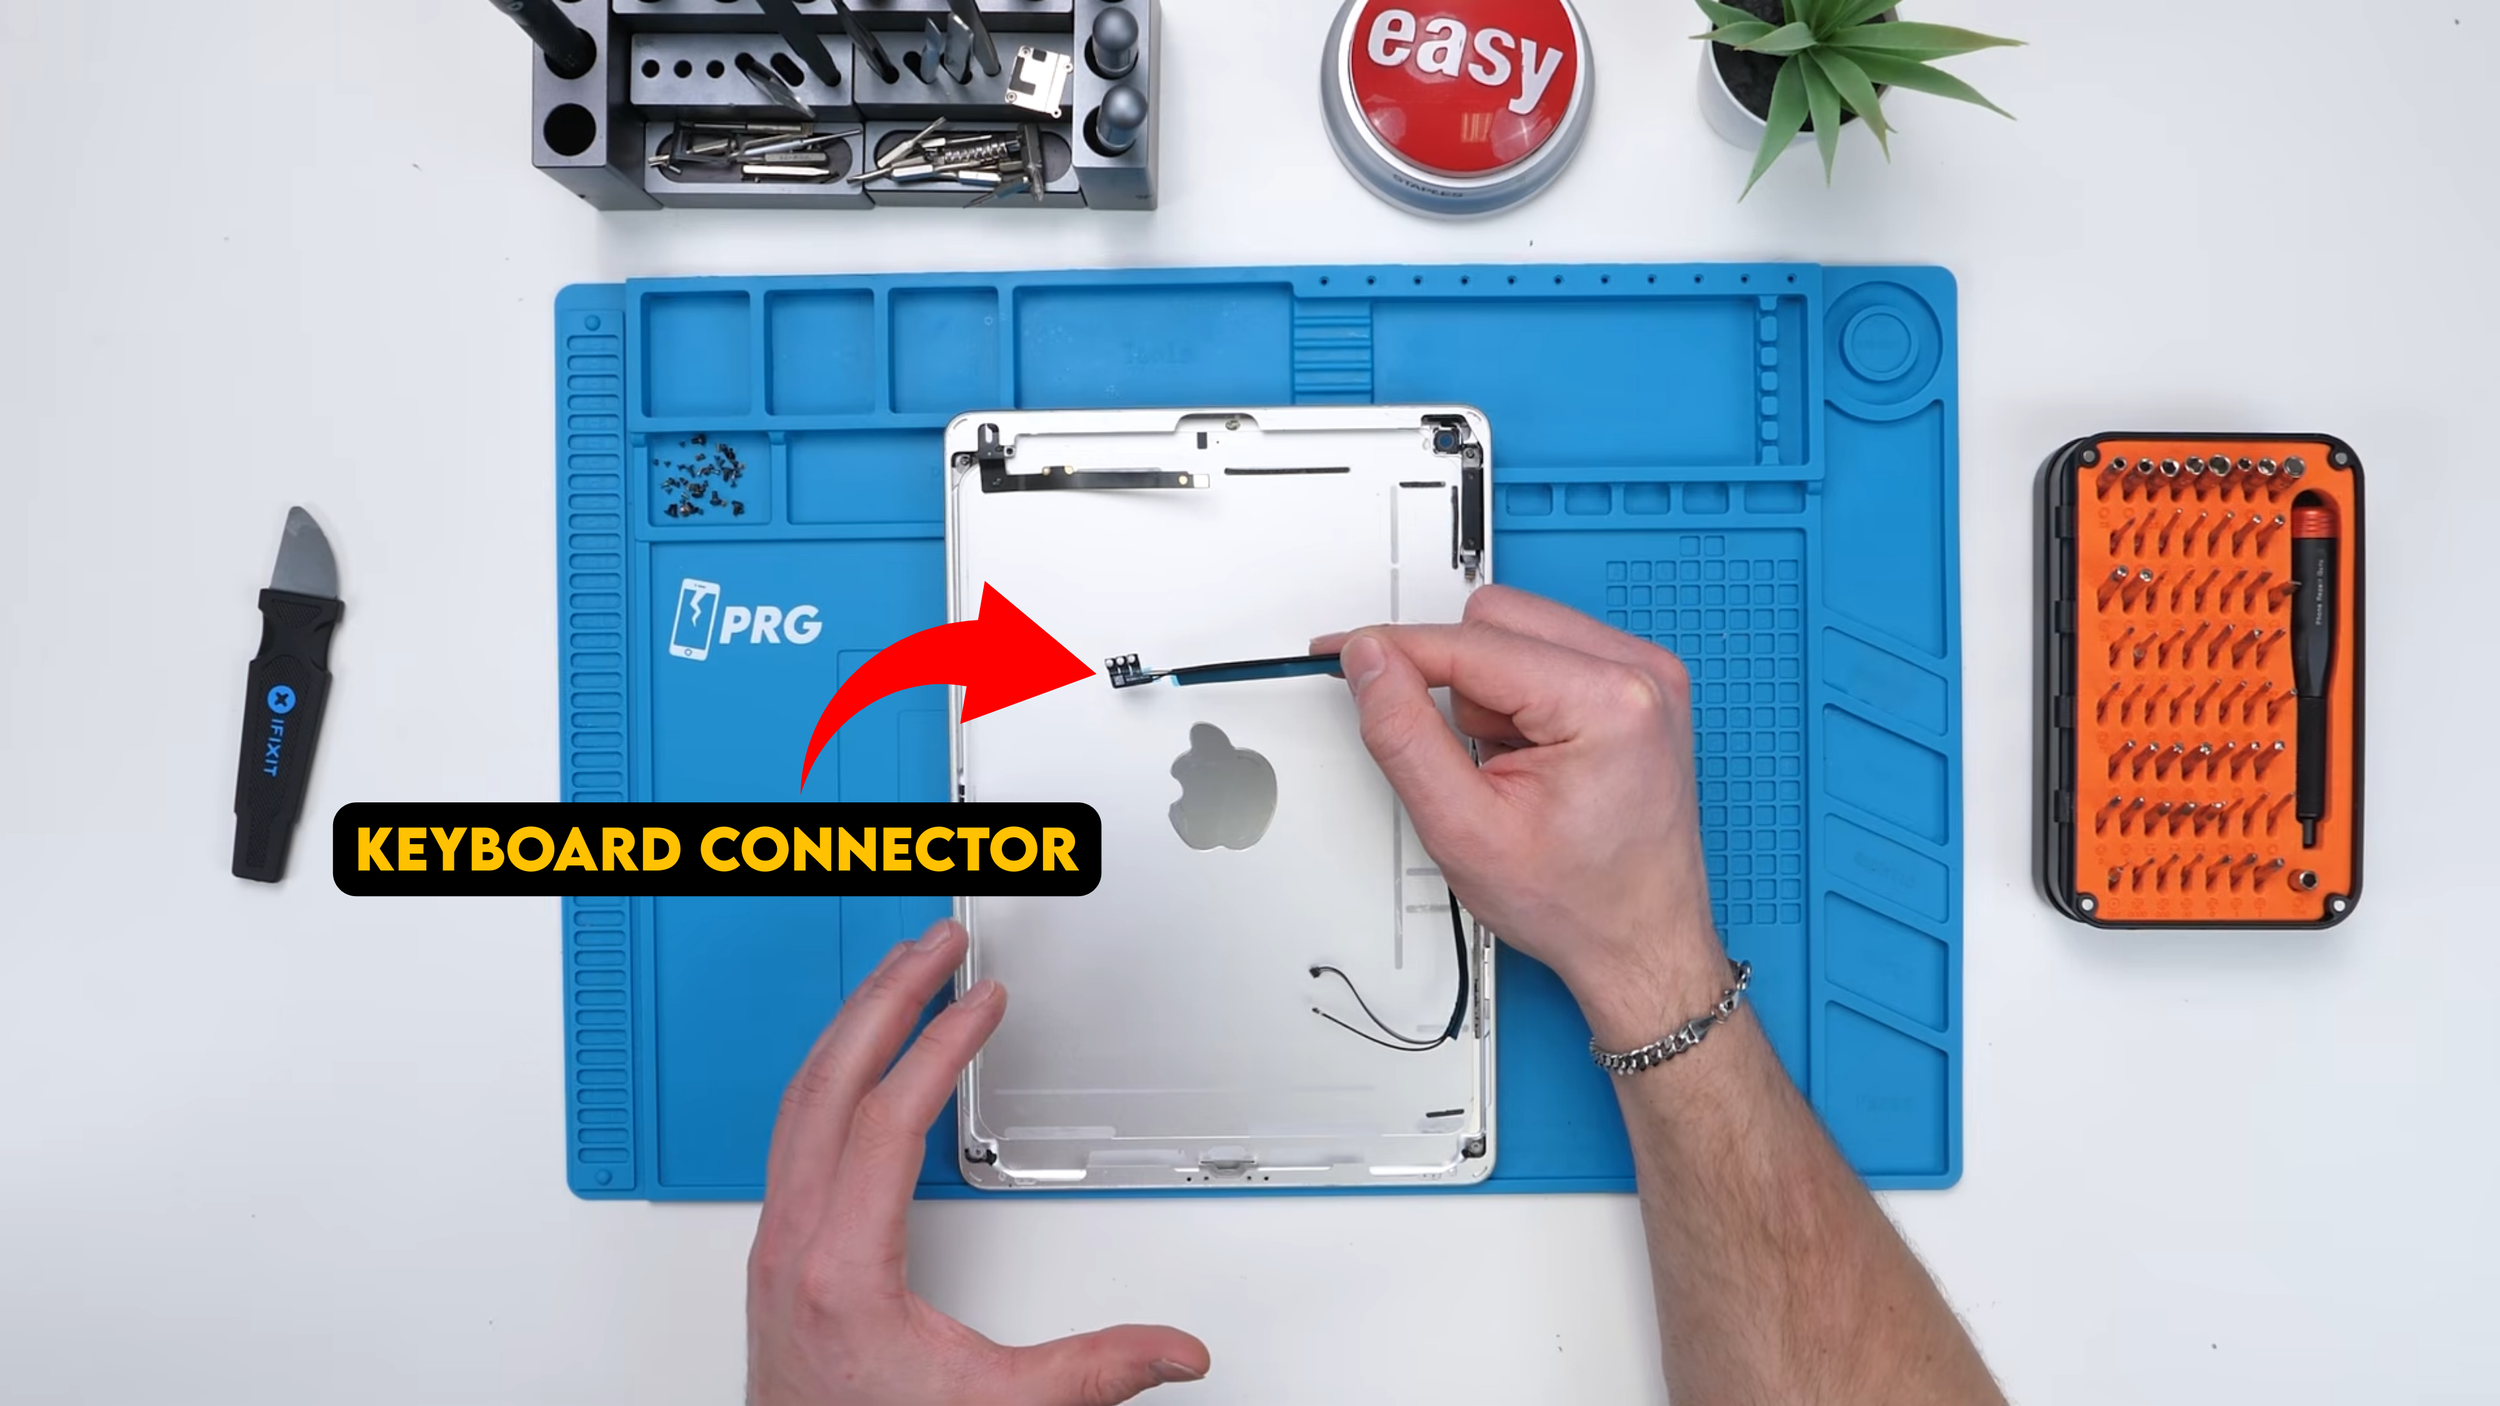

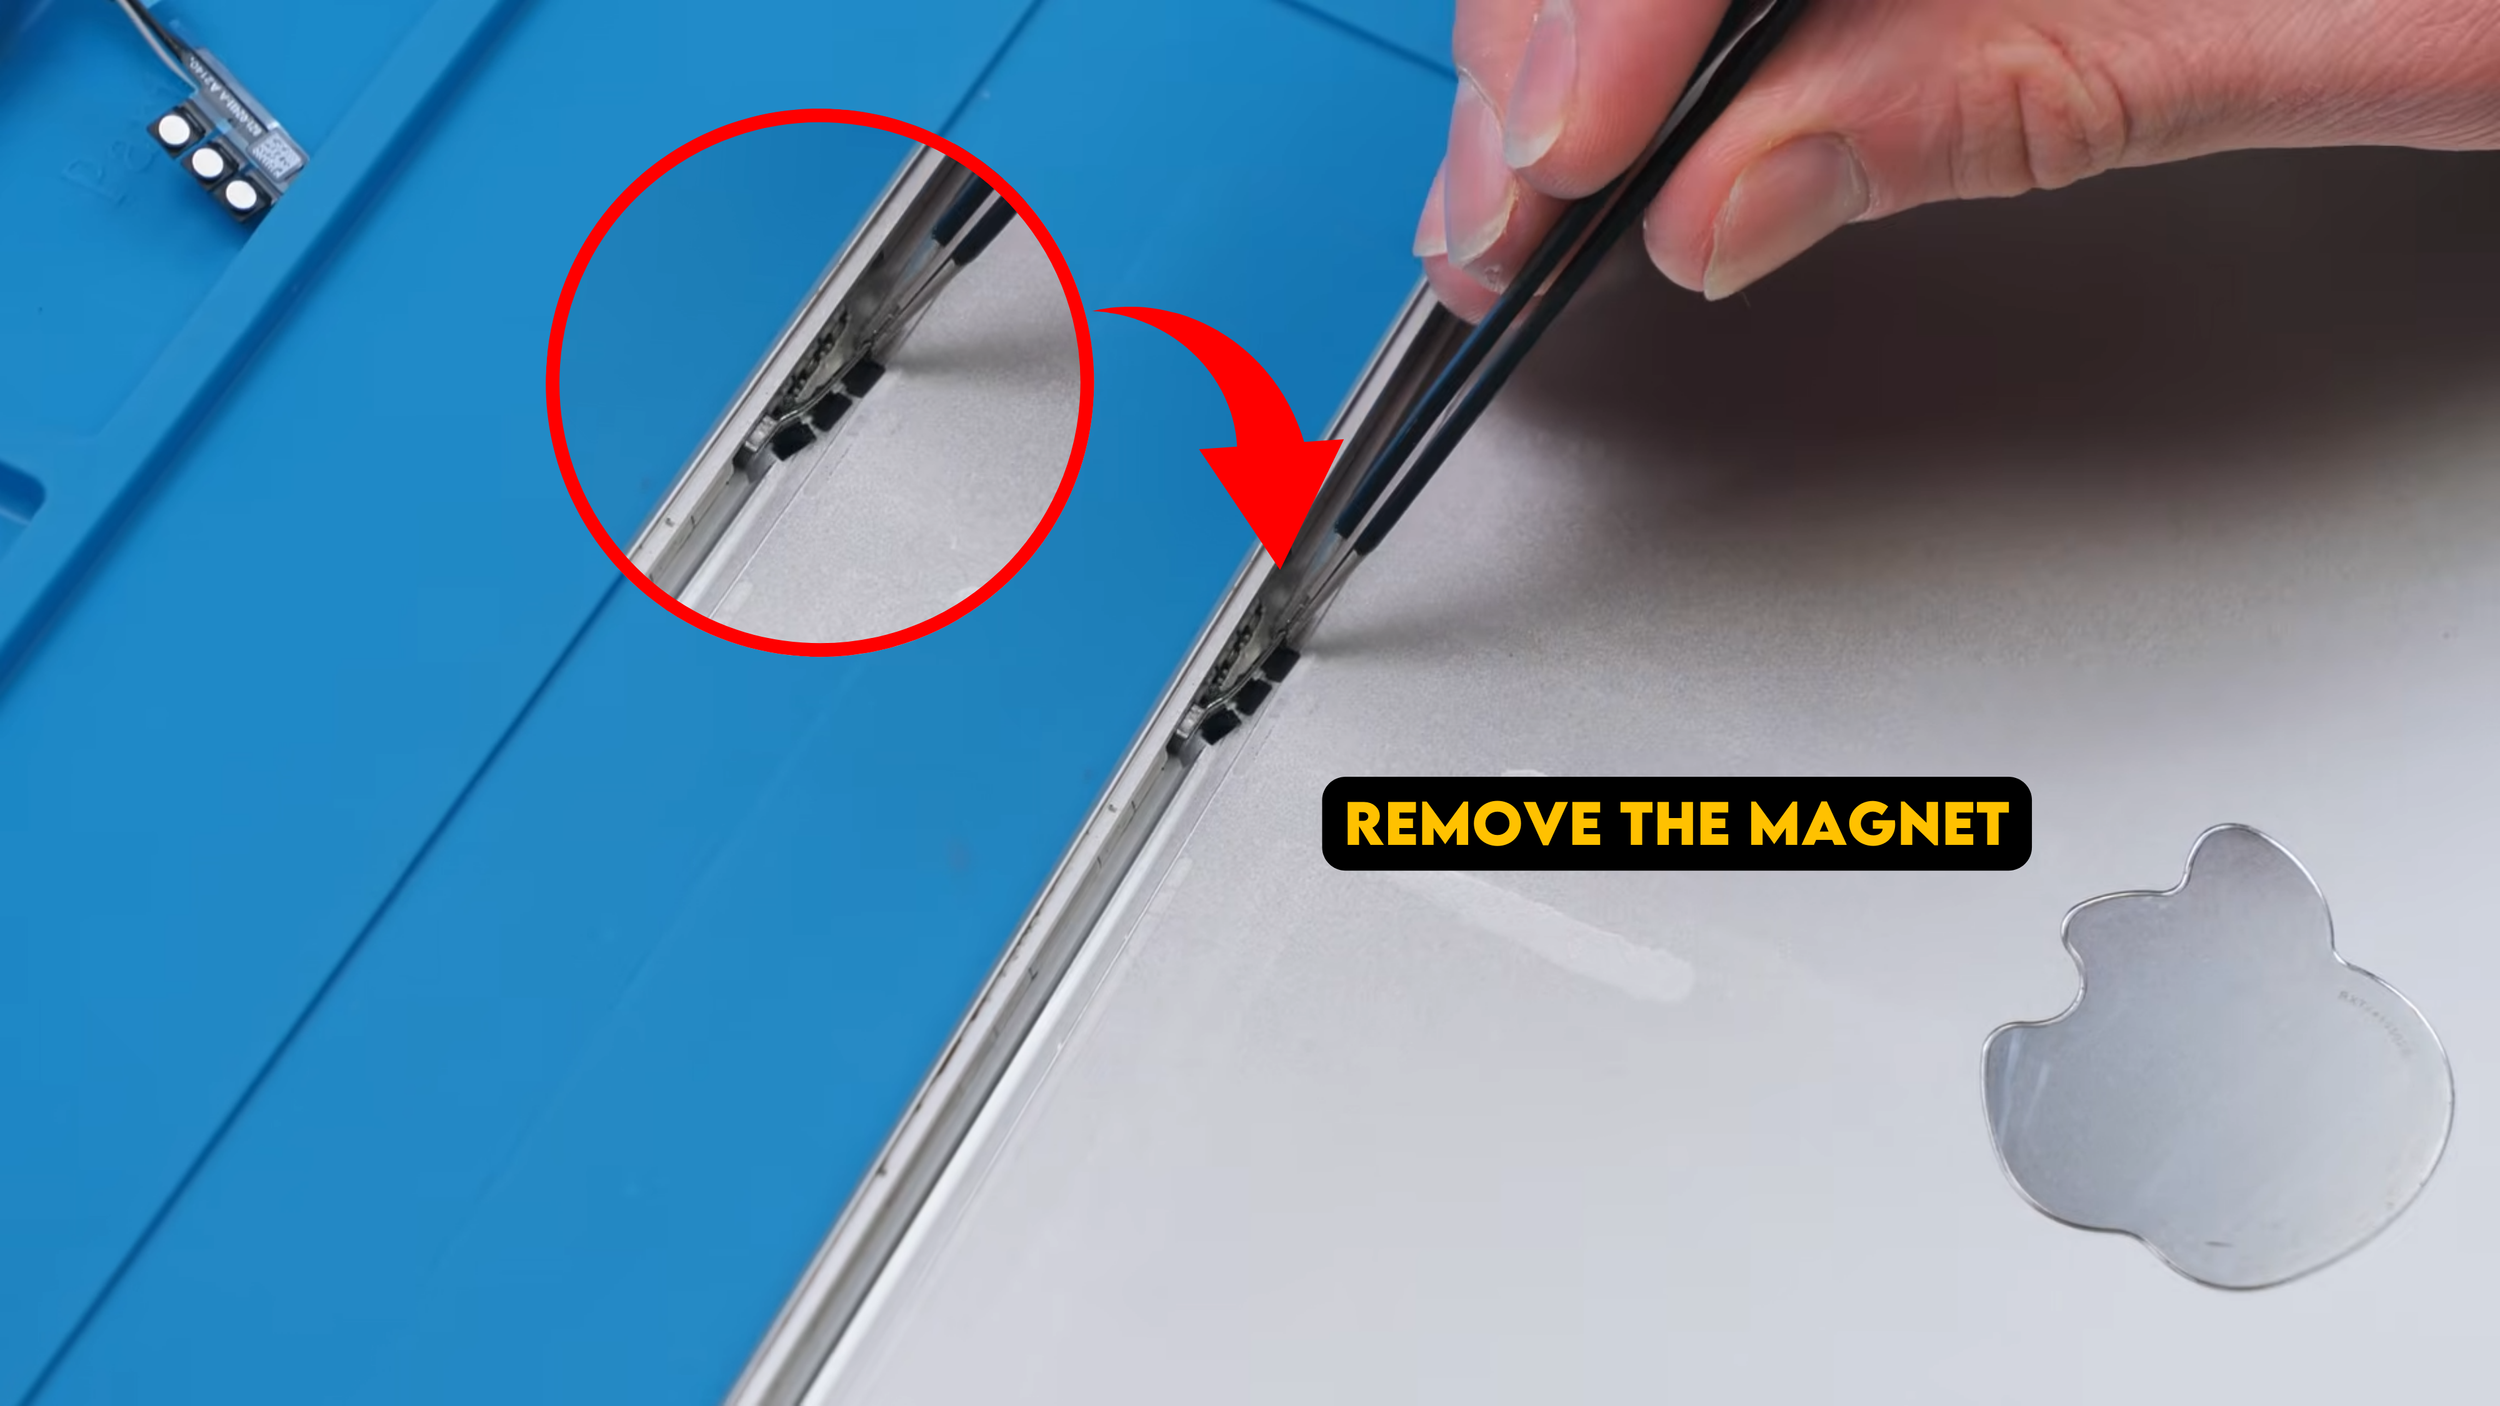
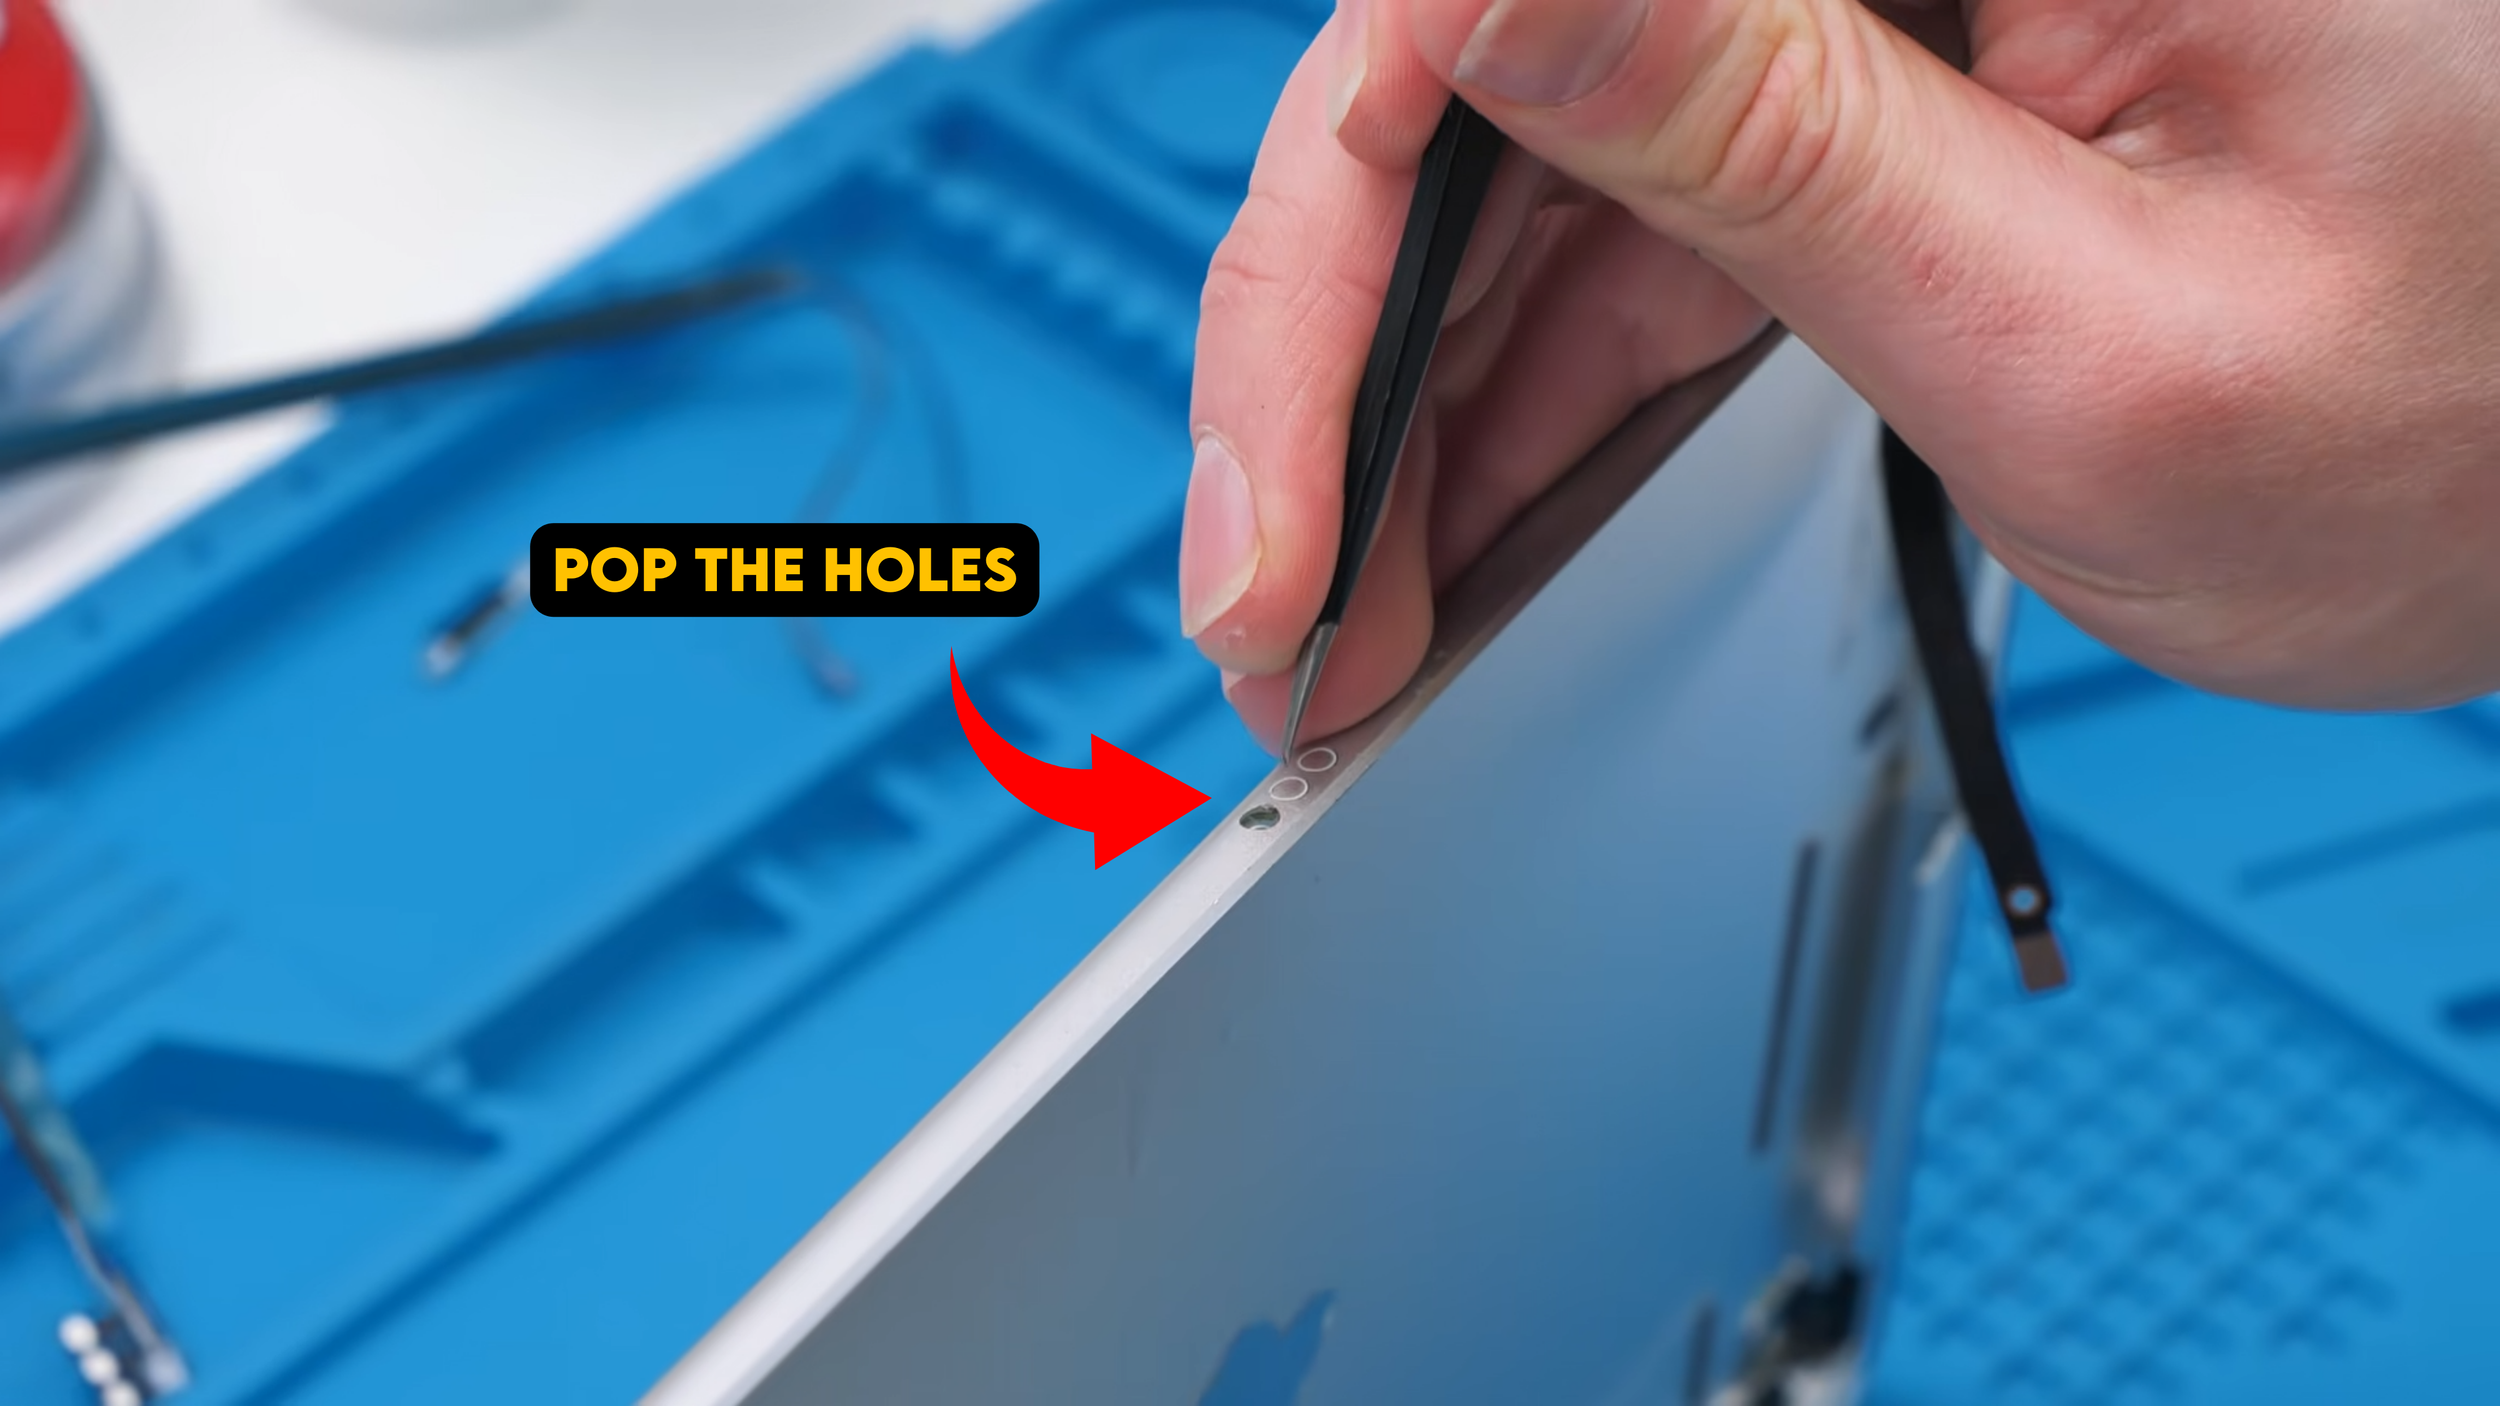

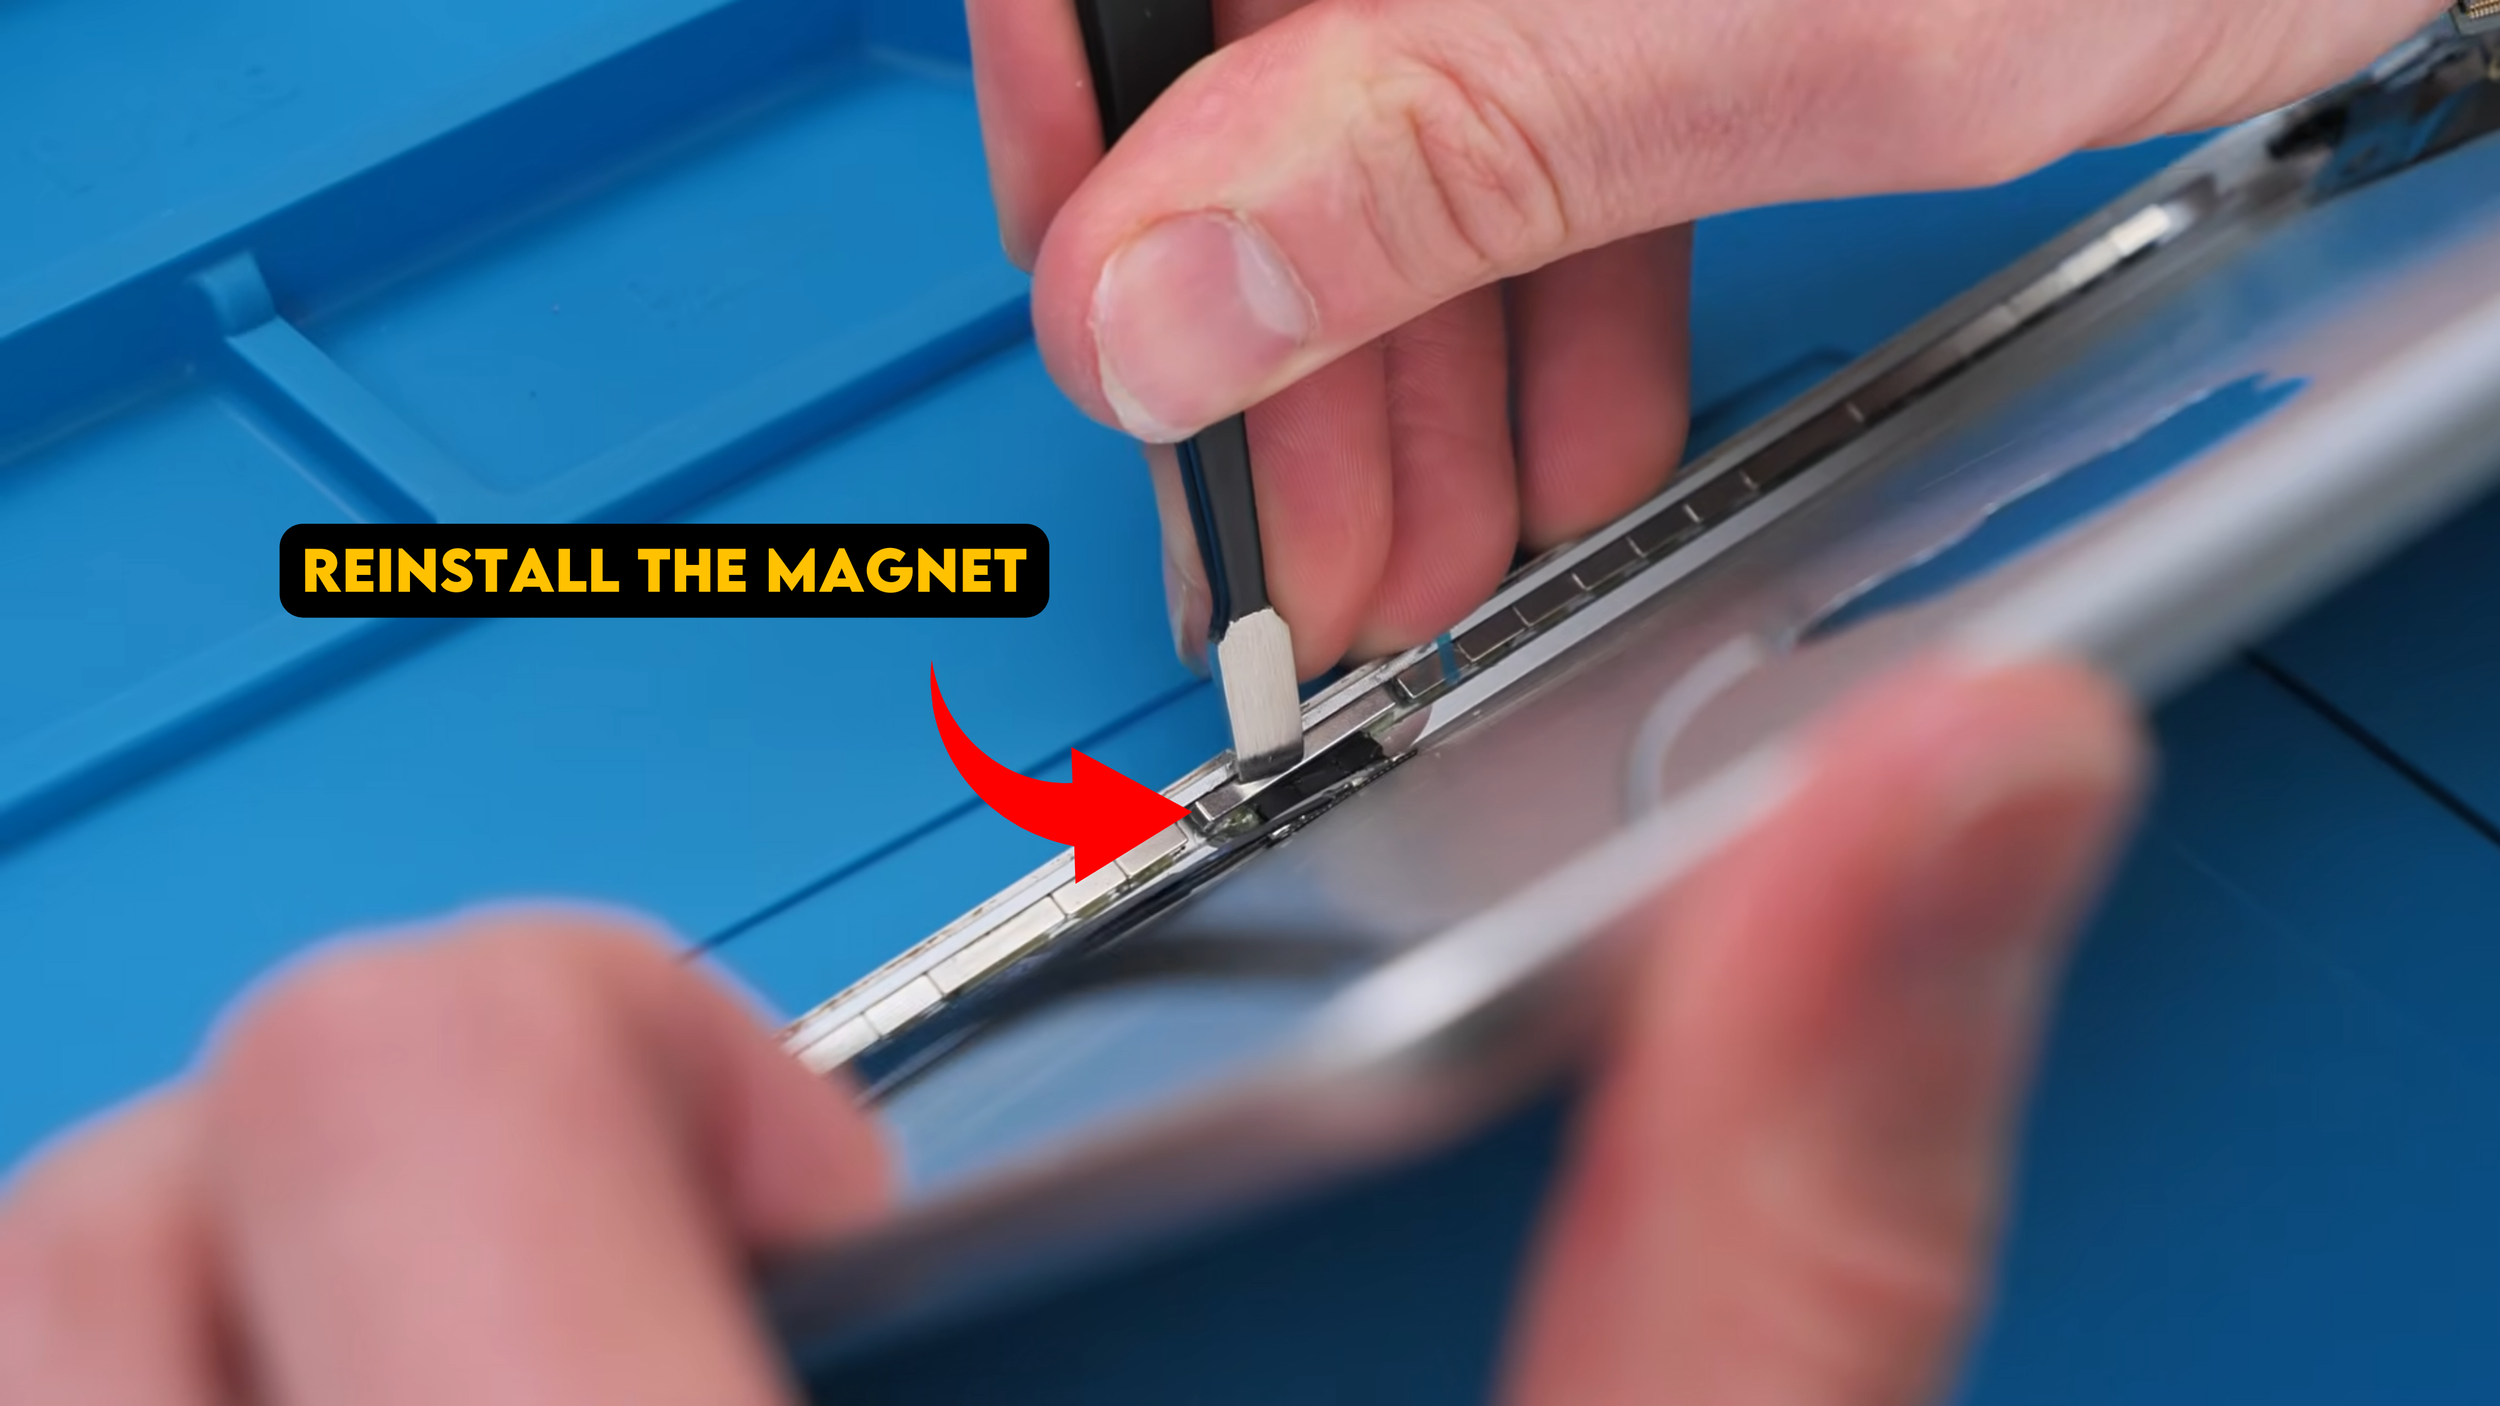
There are still remnants of the old part on the iPad, so I need to remove this magnet that’s stuck on tightly. Then I pop out the holes in the casing, which wasn’t as bad as I expected. After that, I installed the keyboard connector flex cable and reinstalled the magnet.
Now we had two parts installed.
Installing the Speakers
Next: the speakers.
They come as a pair and they’re pretty big, but installation is easy. They slide straight in. iPads also don’t have water resistance ratings, which means less sealing drama than phones.
And nobody is dunking their iPad in water anyway.
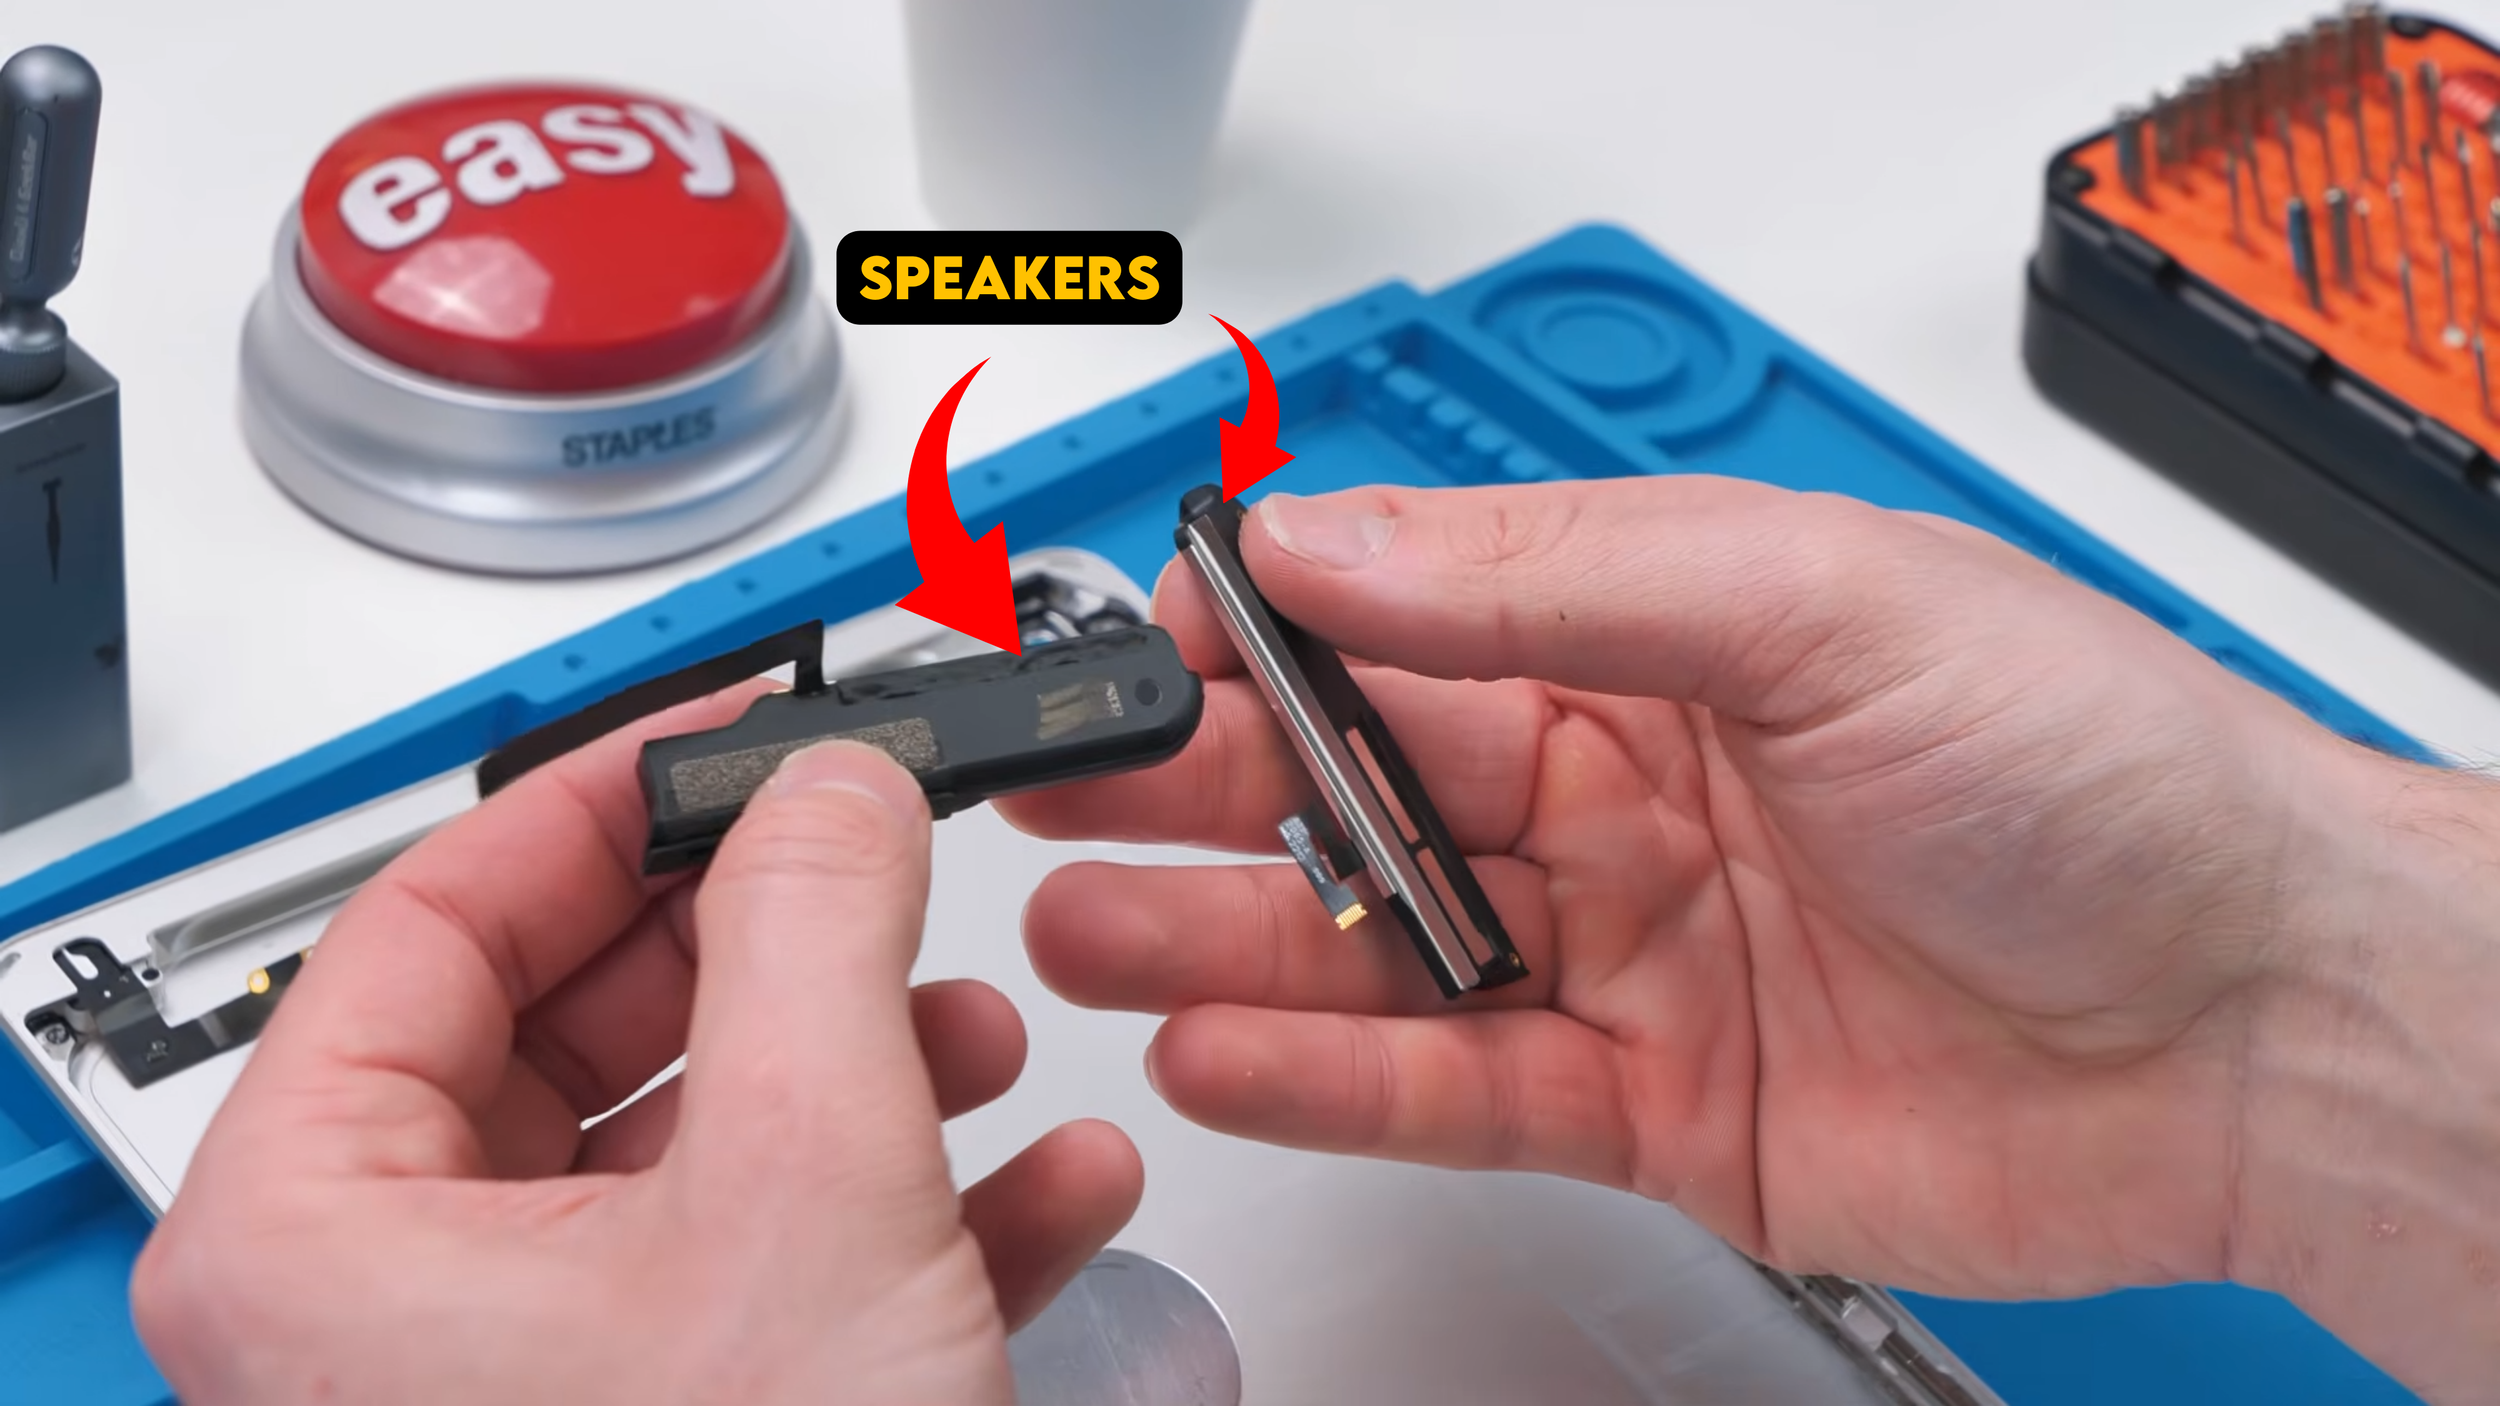
There were screw holes for the speakers, two at the bottom and a few more, but we weren’t touching all of them yet because something else needed to go above the speakers first.
Installing the Wi Fi and GPS Antennas
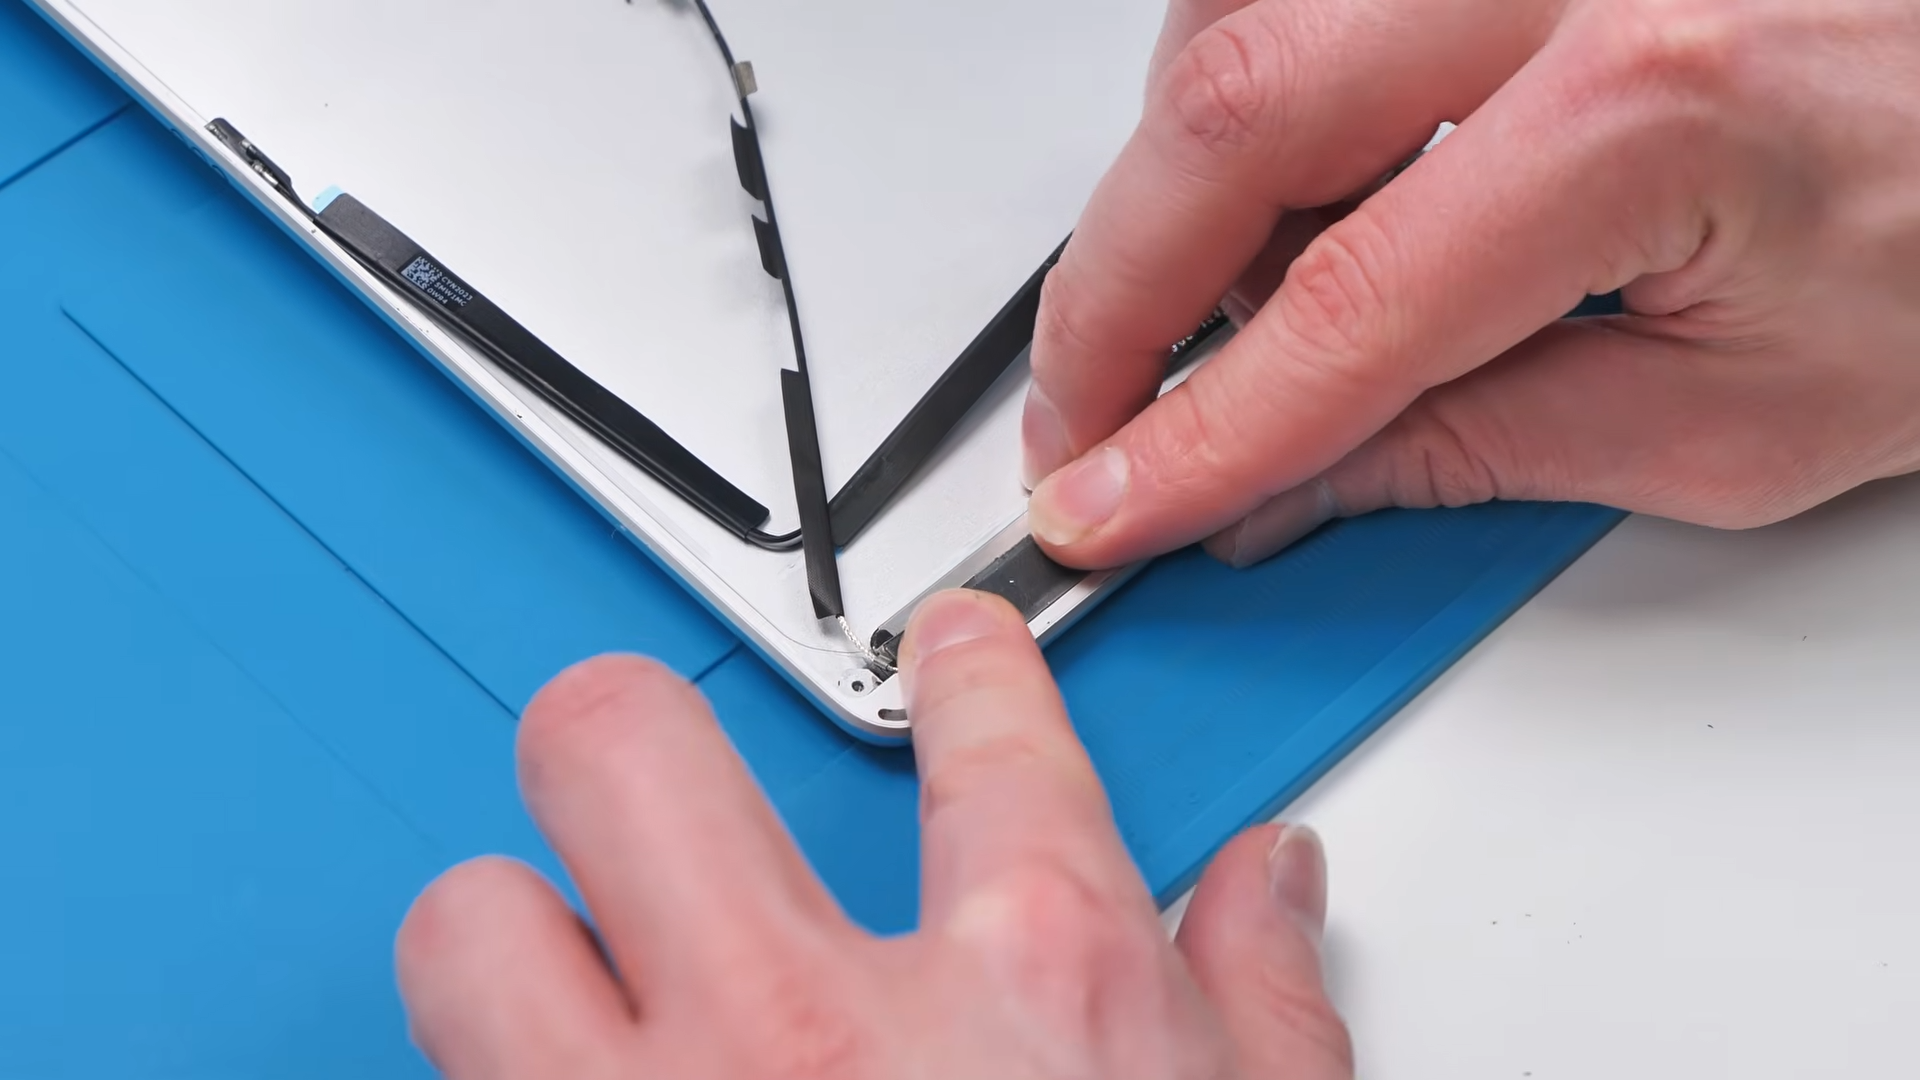
The two parts that sit above the speakers are the Wi Fi antenna and GPS antenna. They both went into place and stuck down thanks to leftover adhesive, since these parts are usually pulled from other iPads. That meant less work and fewer steps.
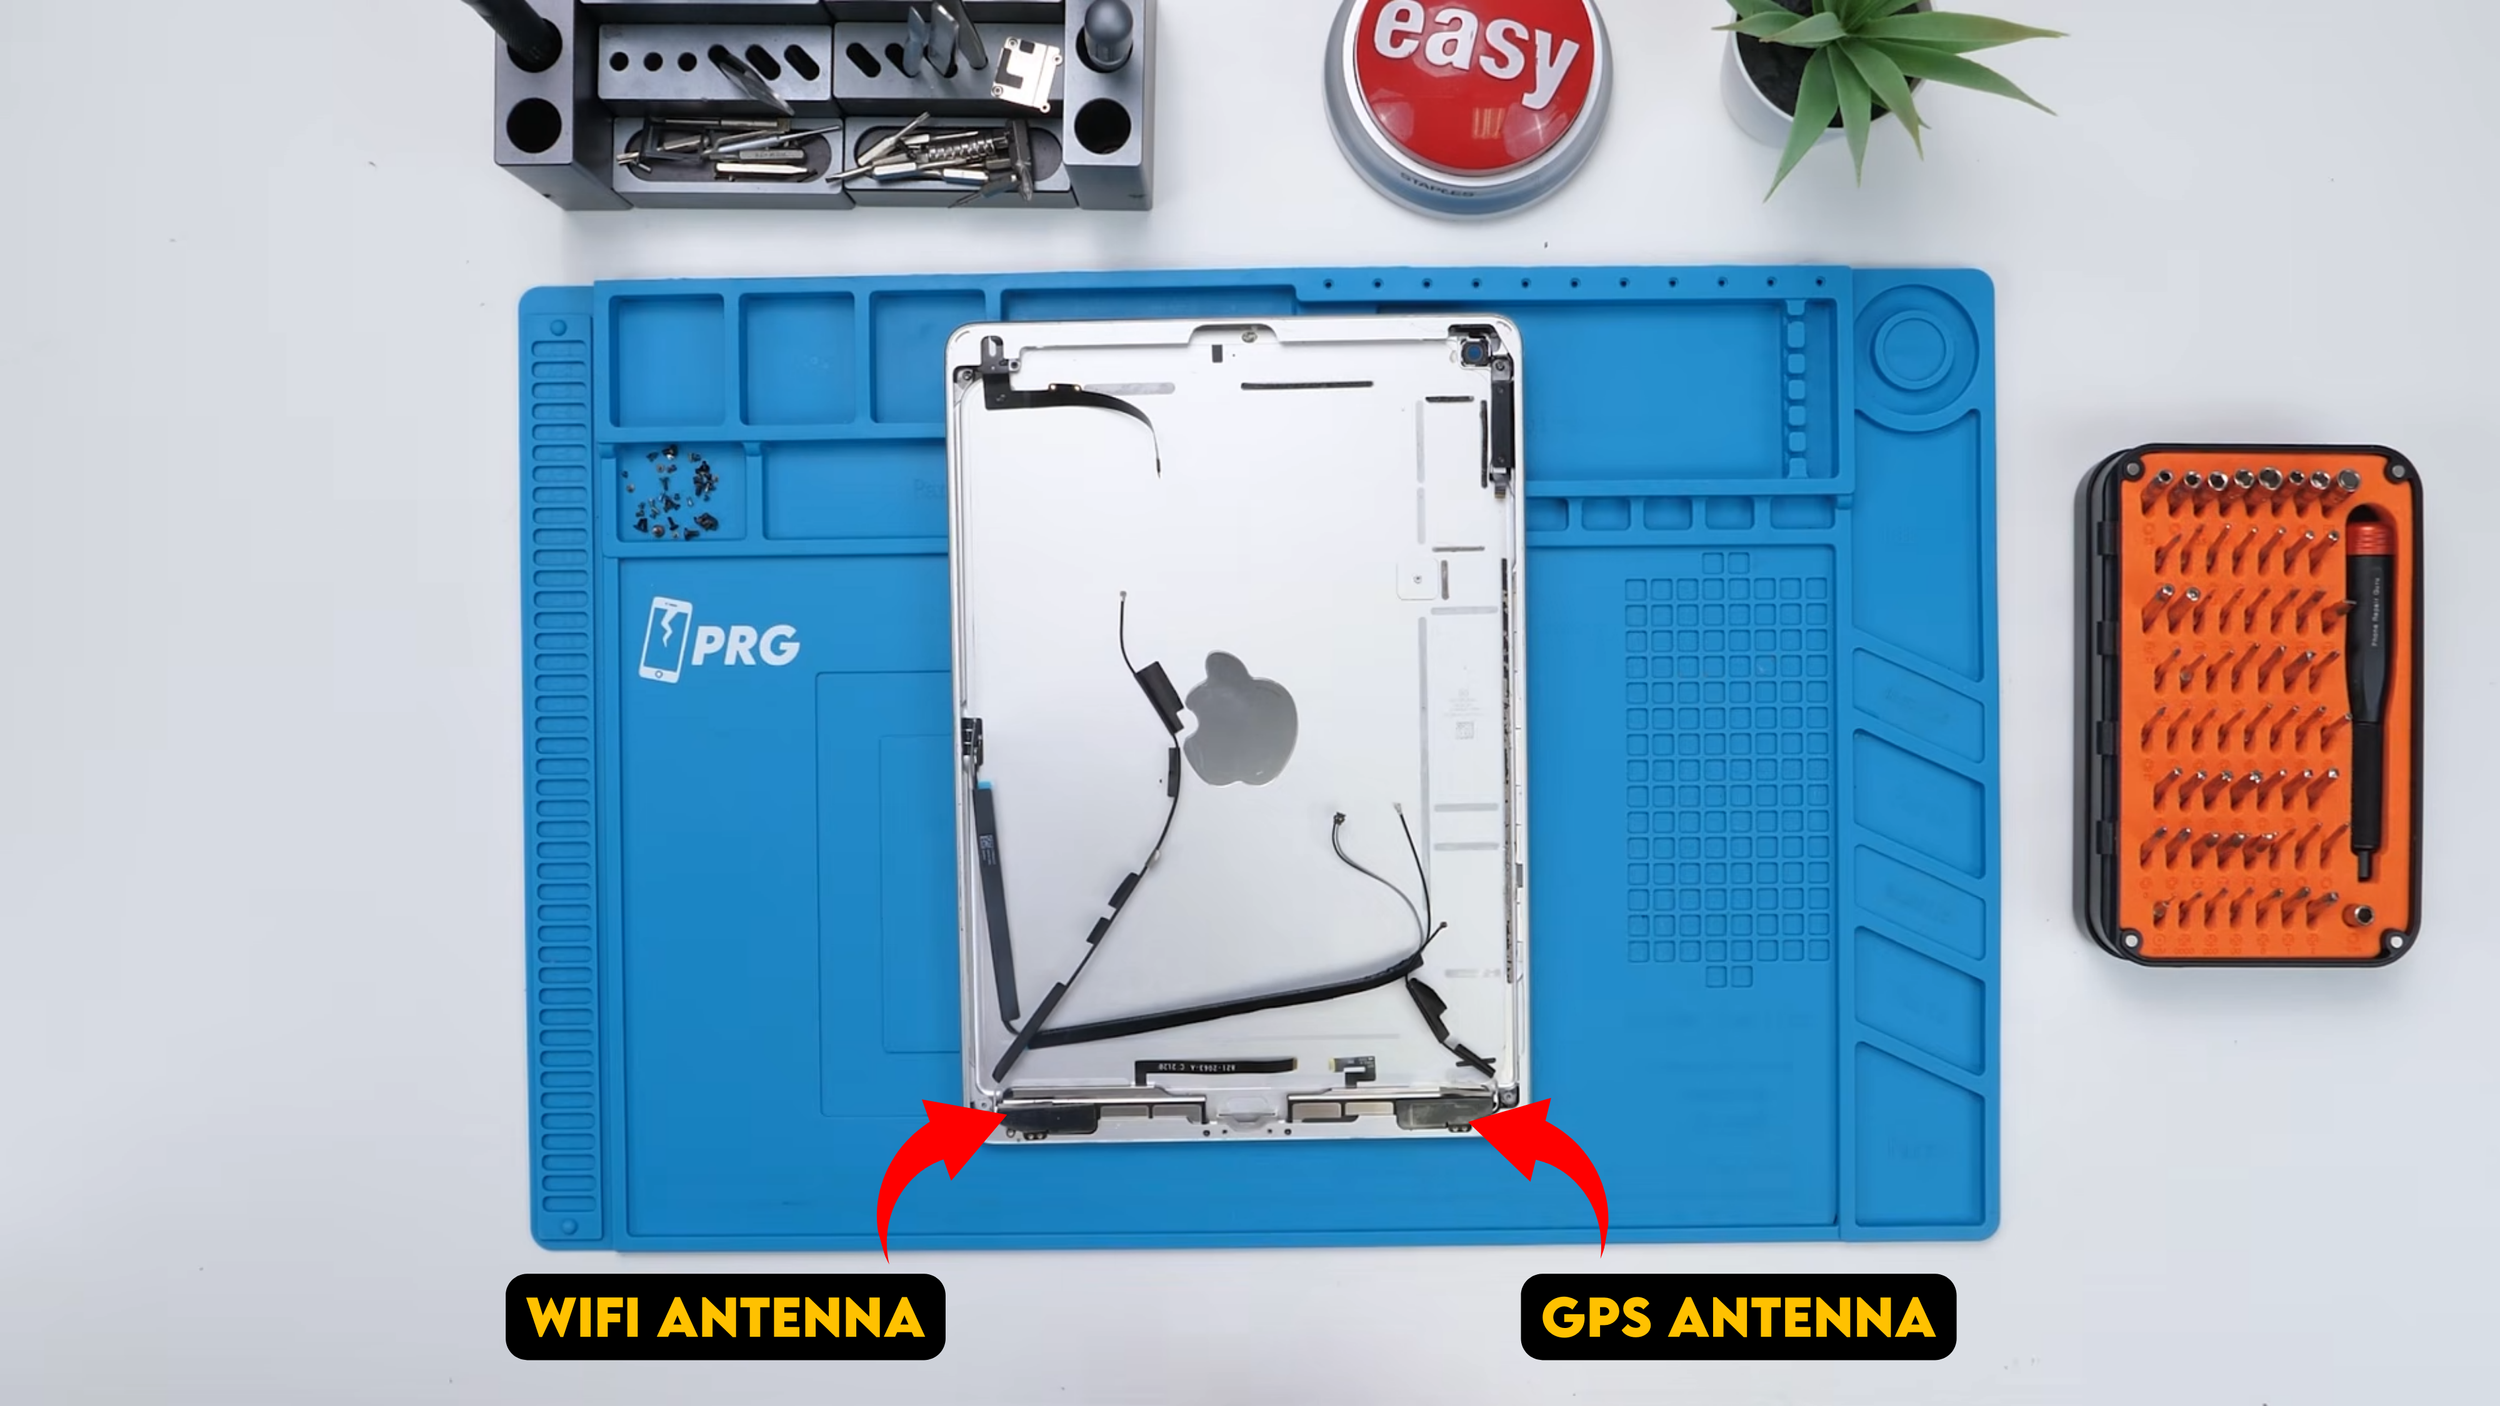
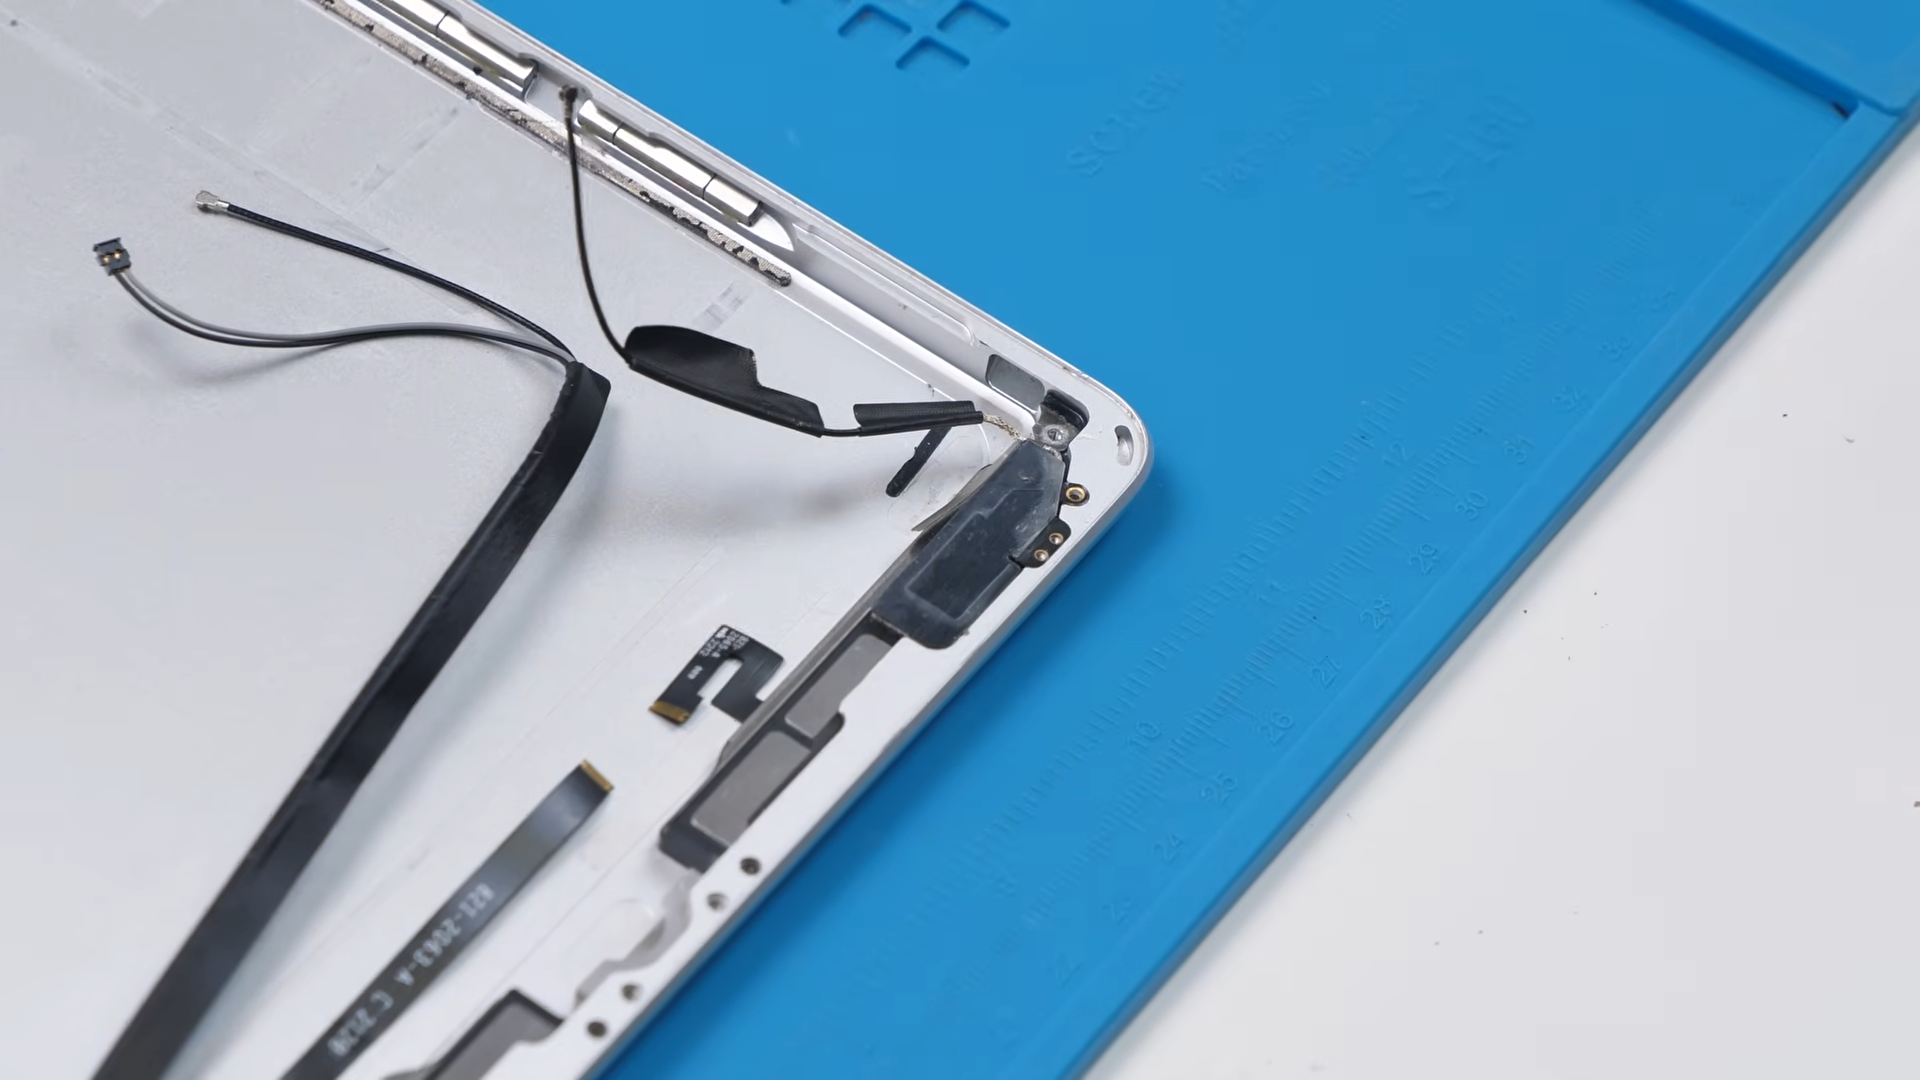
And this is the moment where I called out why these matter. People break these all the time during opening, then wonder why Wi Fi or GPS doesn’t work properly later.
More screw guessing happened here too: one bigger screw and two smaller ones. So far the screw situation wasn’t awful, and I really hoped it stayed that way.

Installing the Microphone Cable
Next was one of those parts you probably didn’t know was here.
If you flip the housing, there’s a tiny hole, and that hole is for the microphone. The microphone cable had two microphones, one that goes up top and the other that aligns with the hole in the housing.
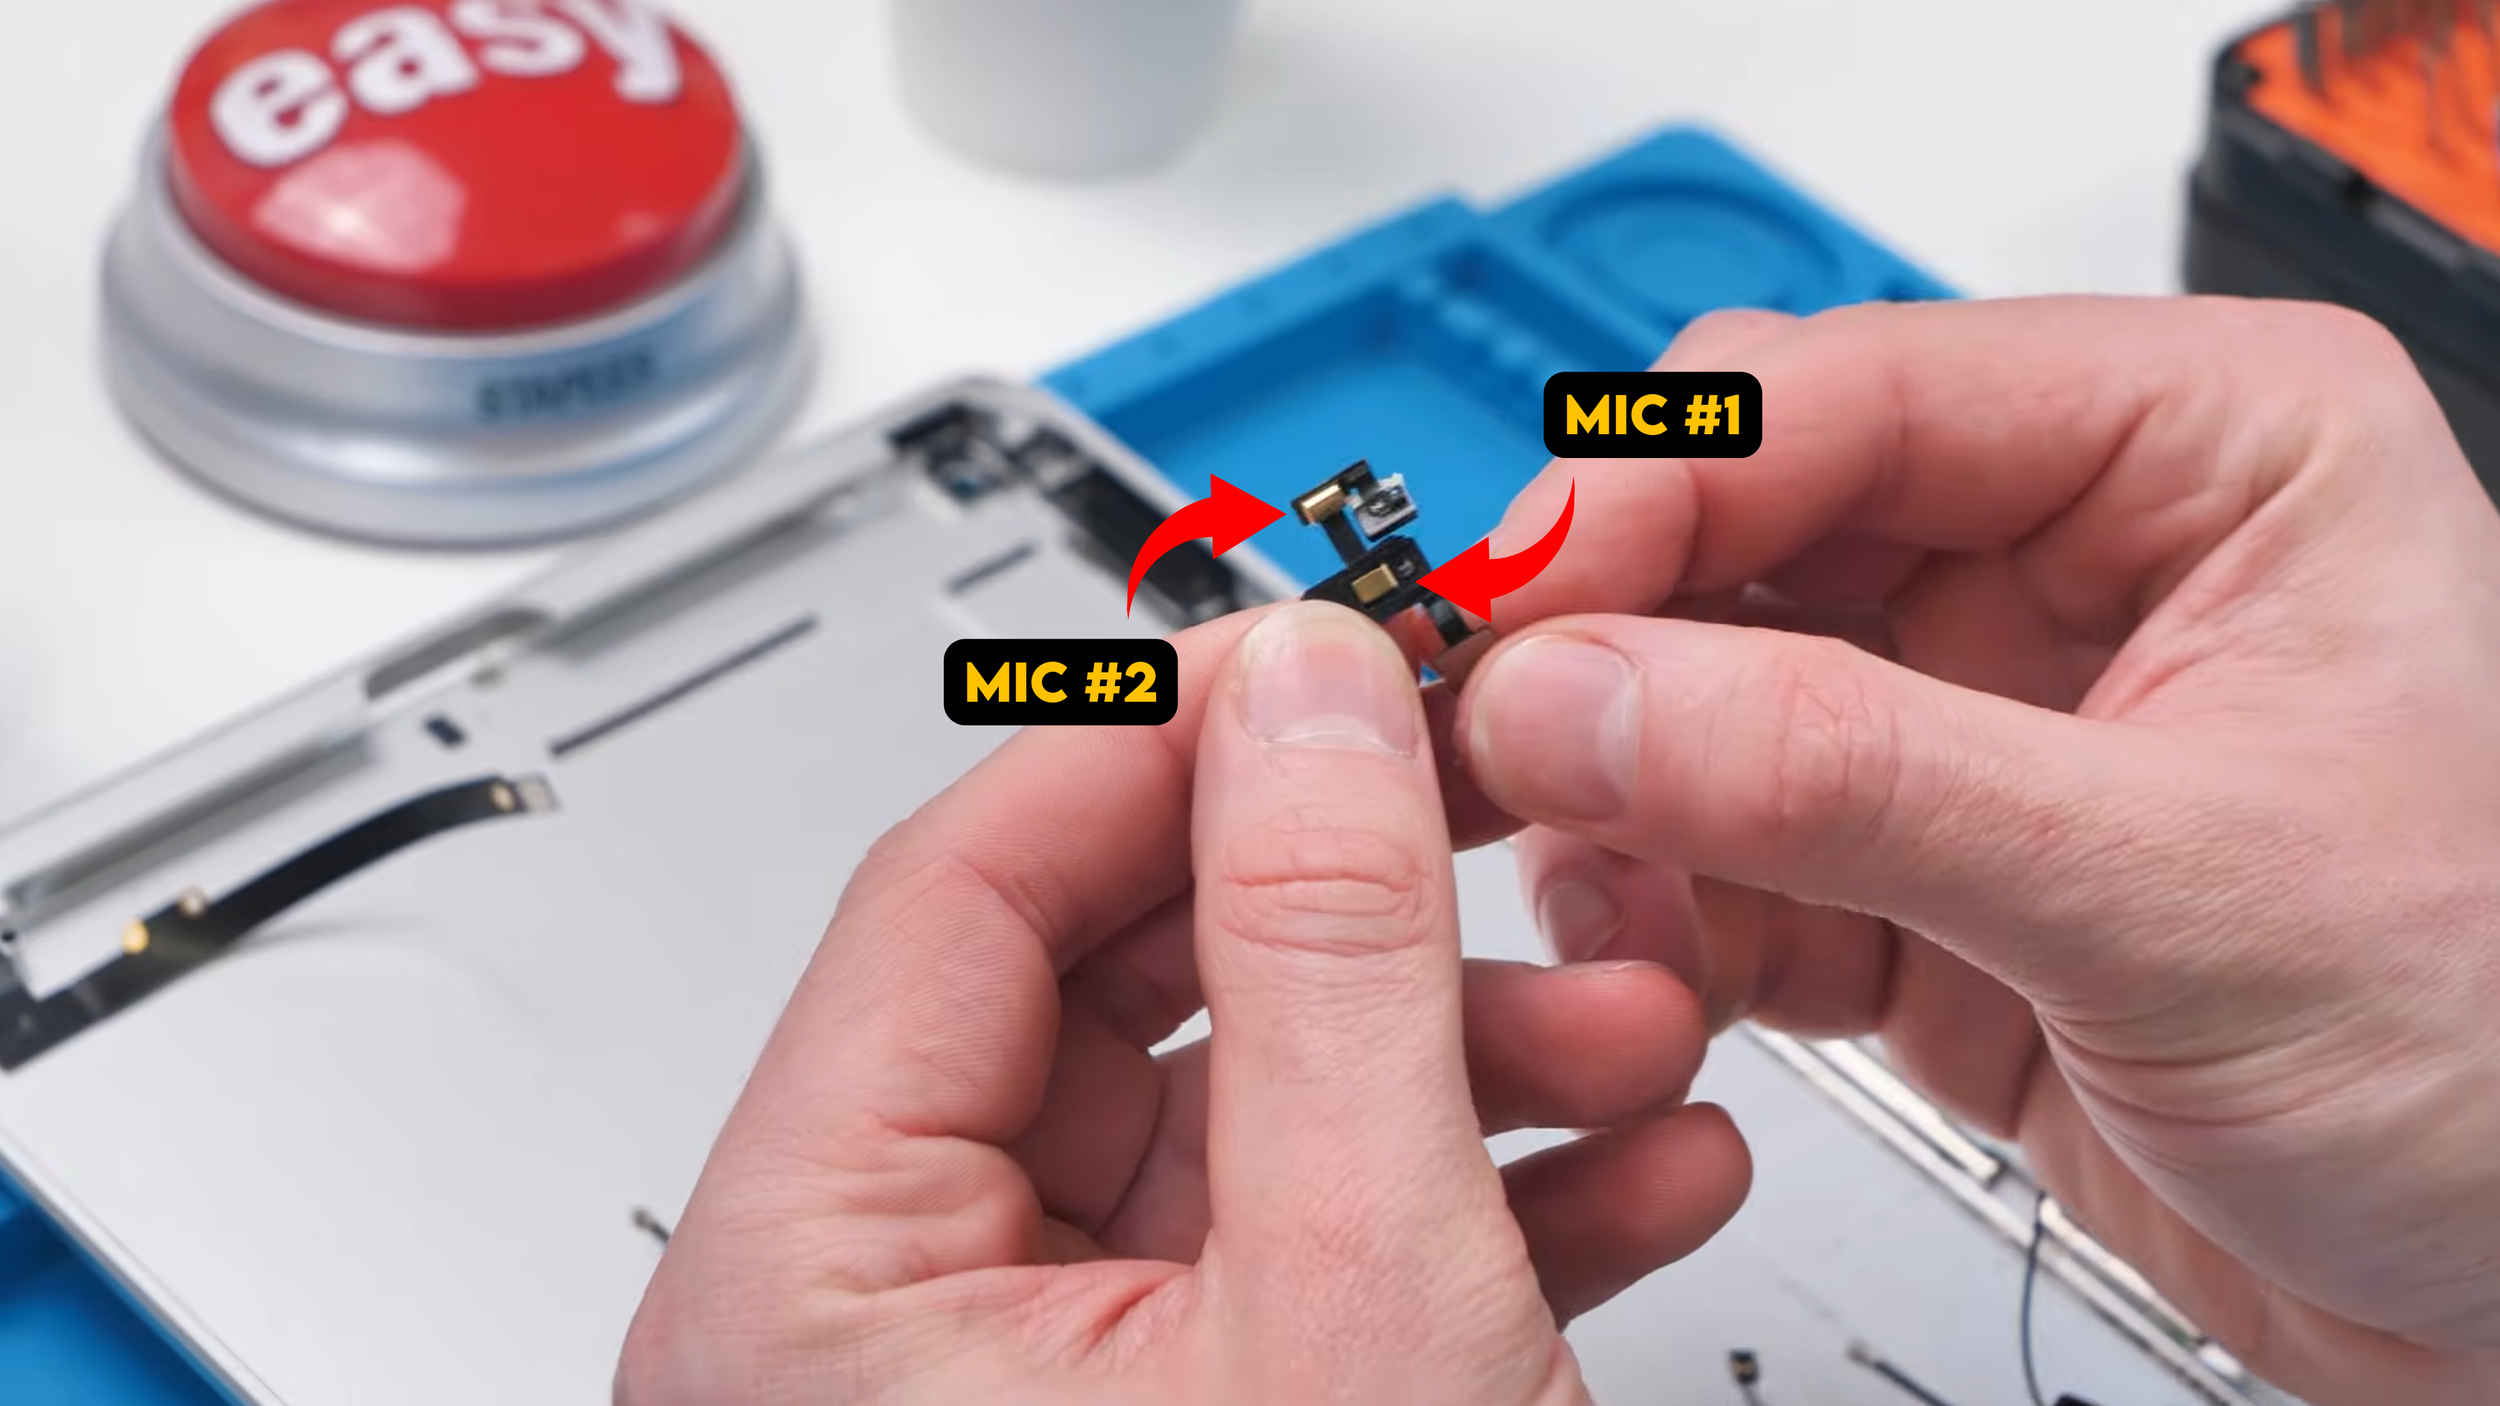
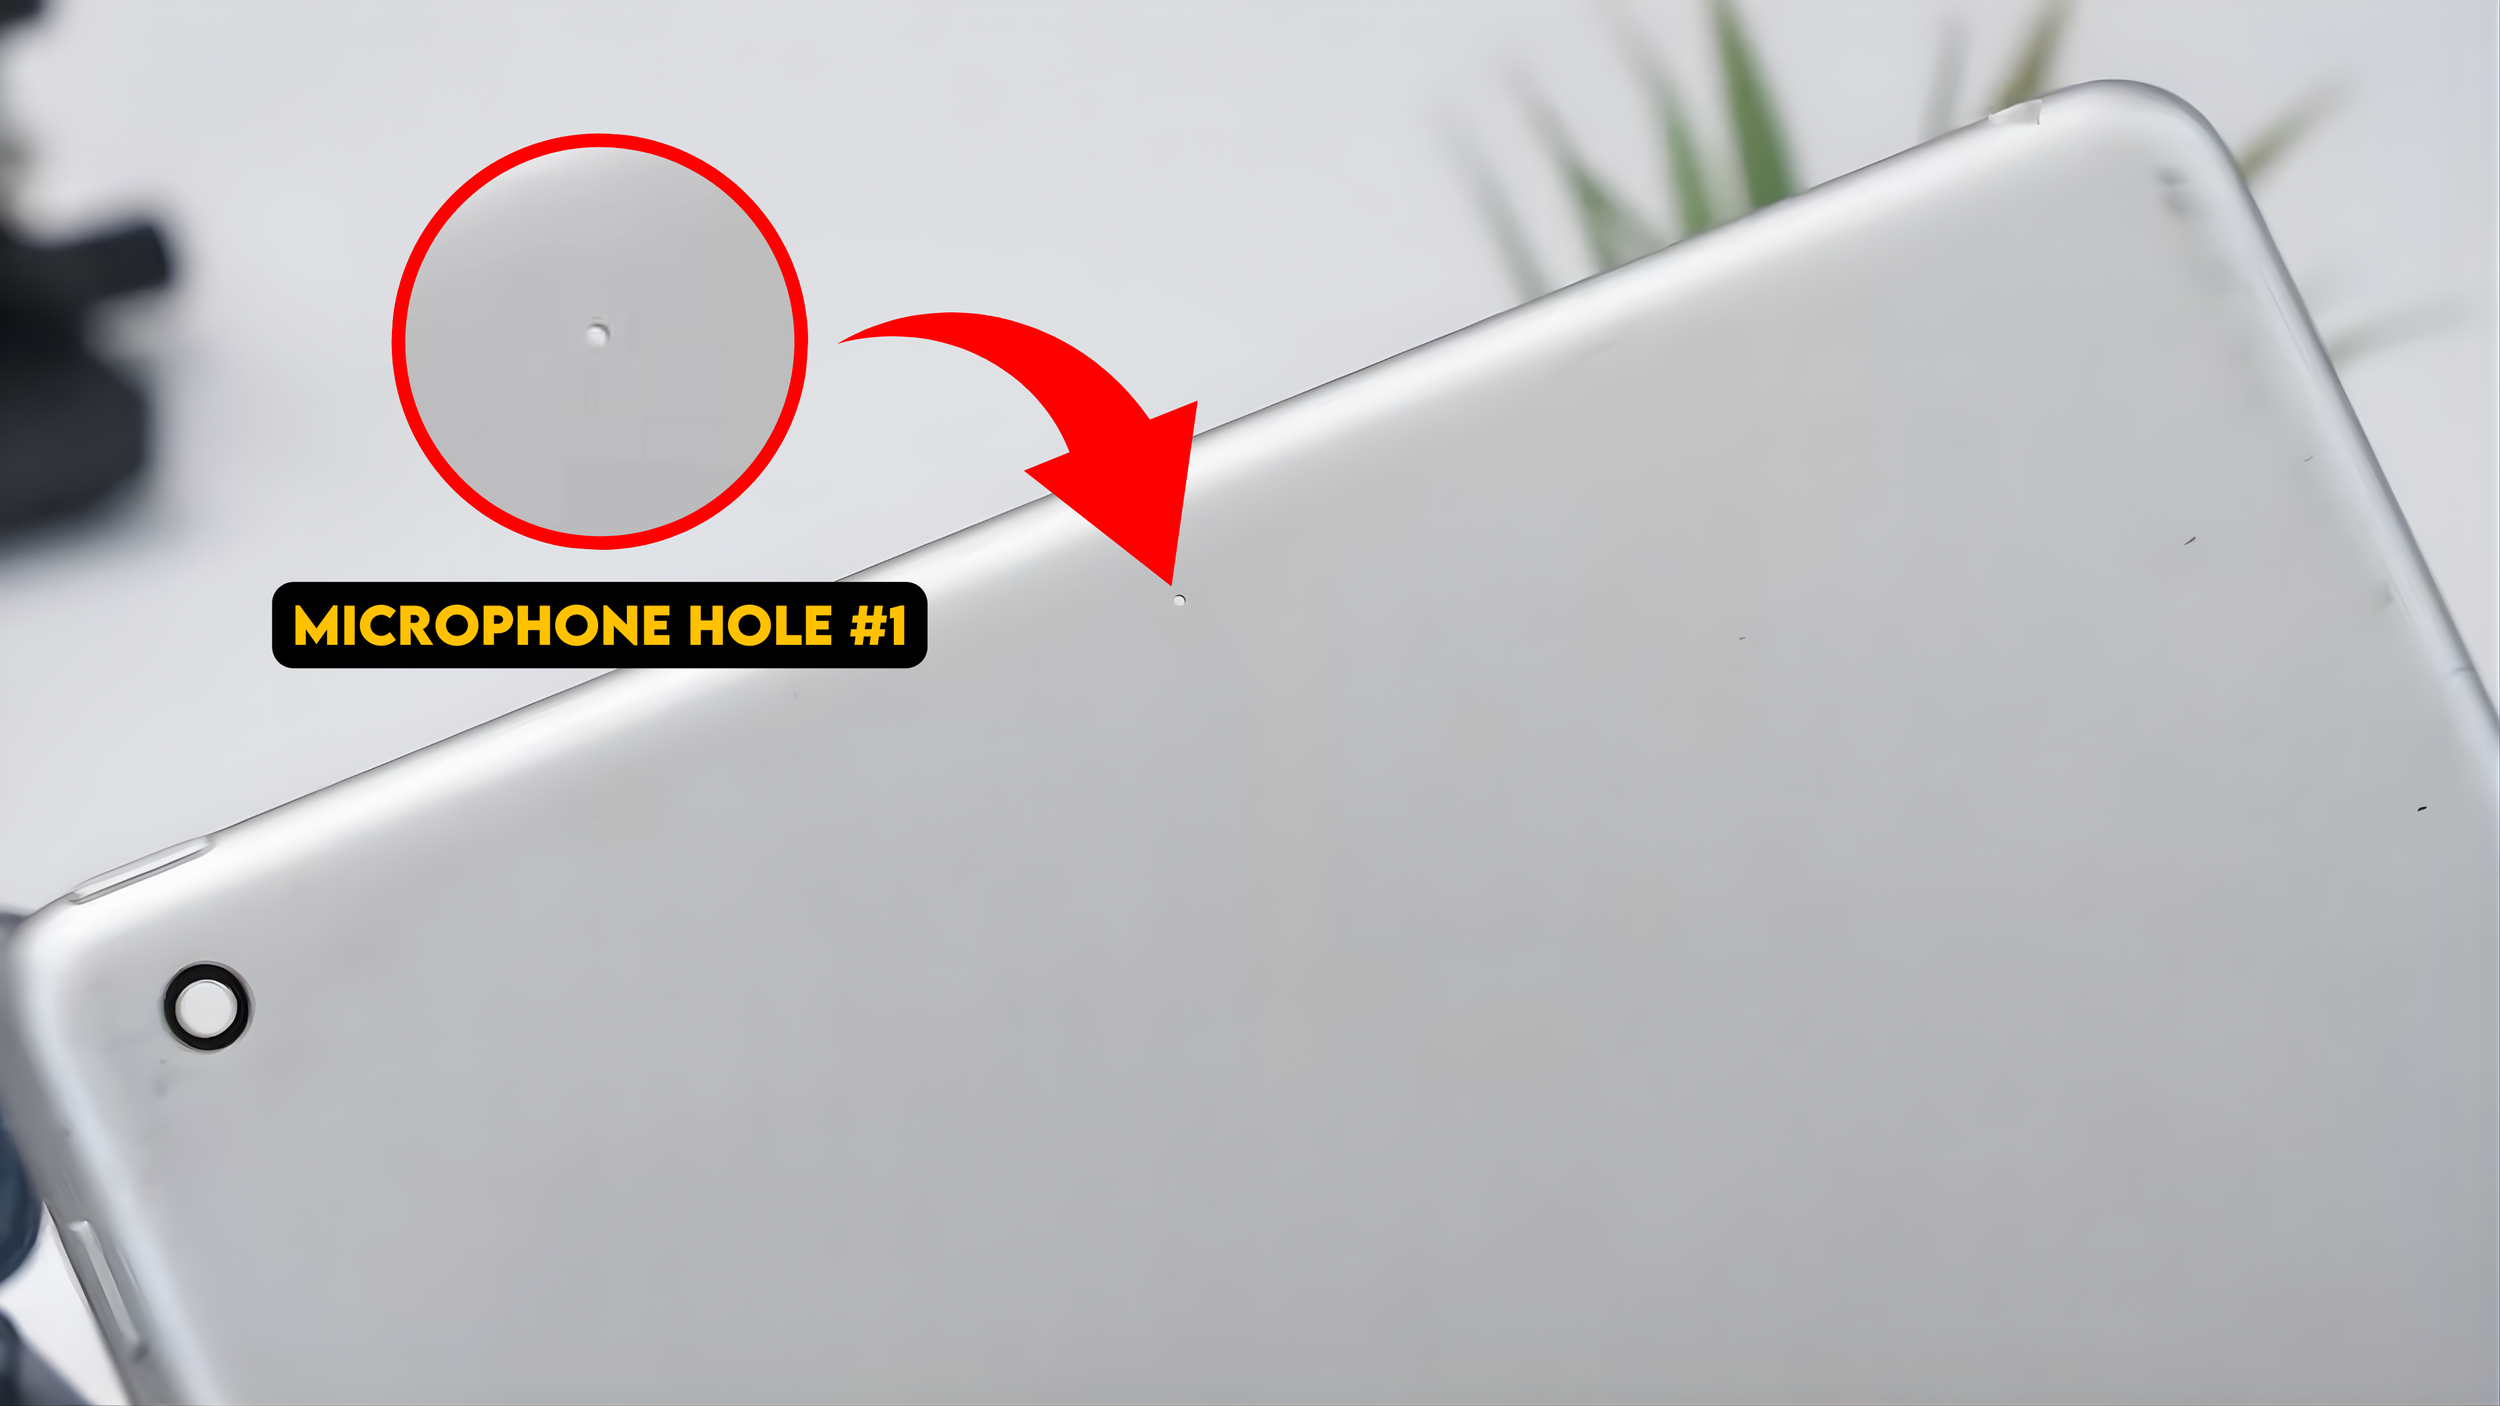
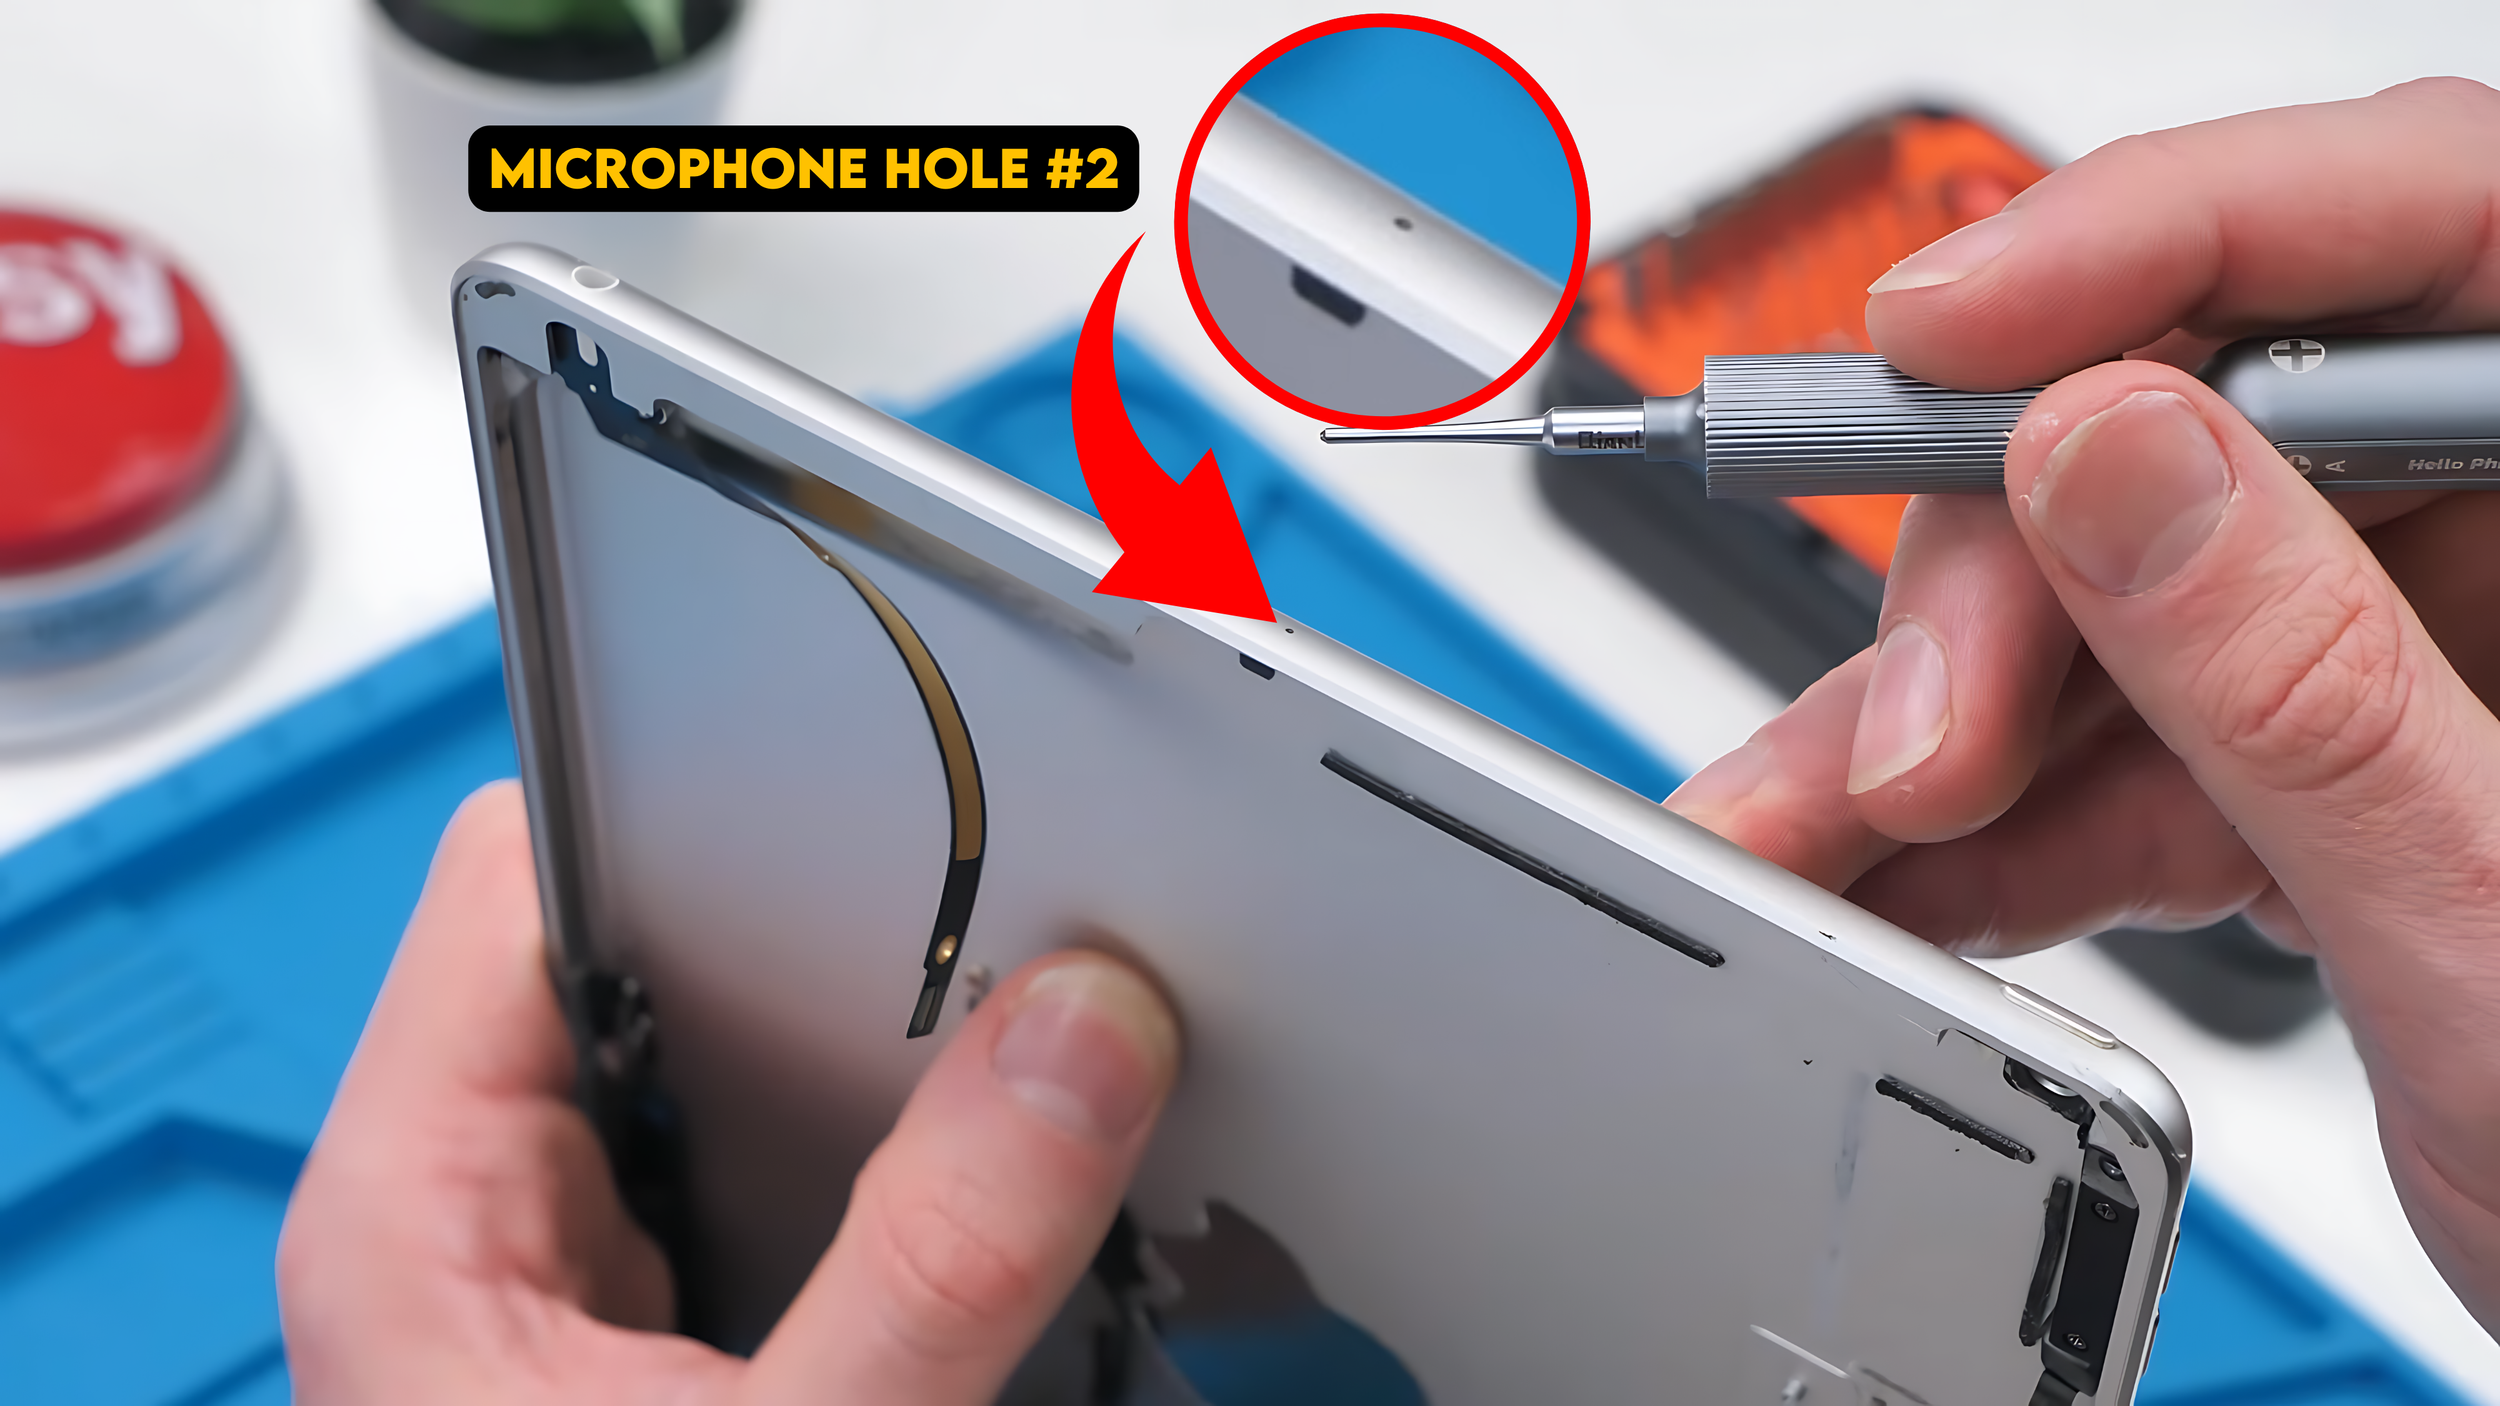
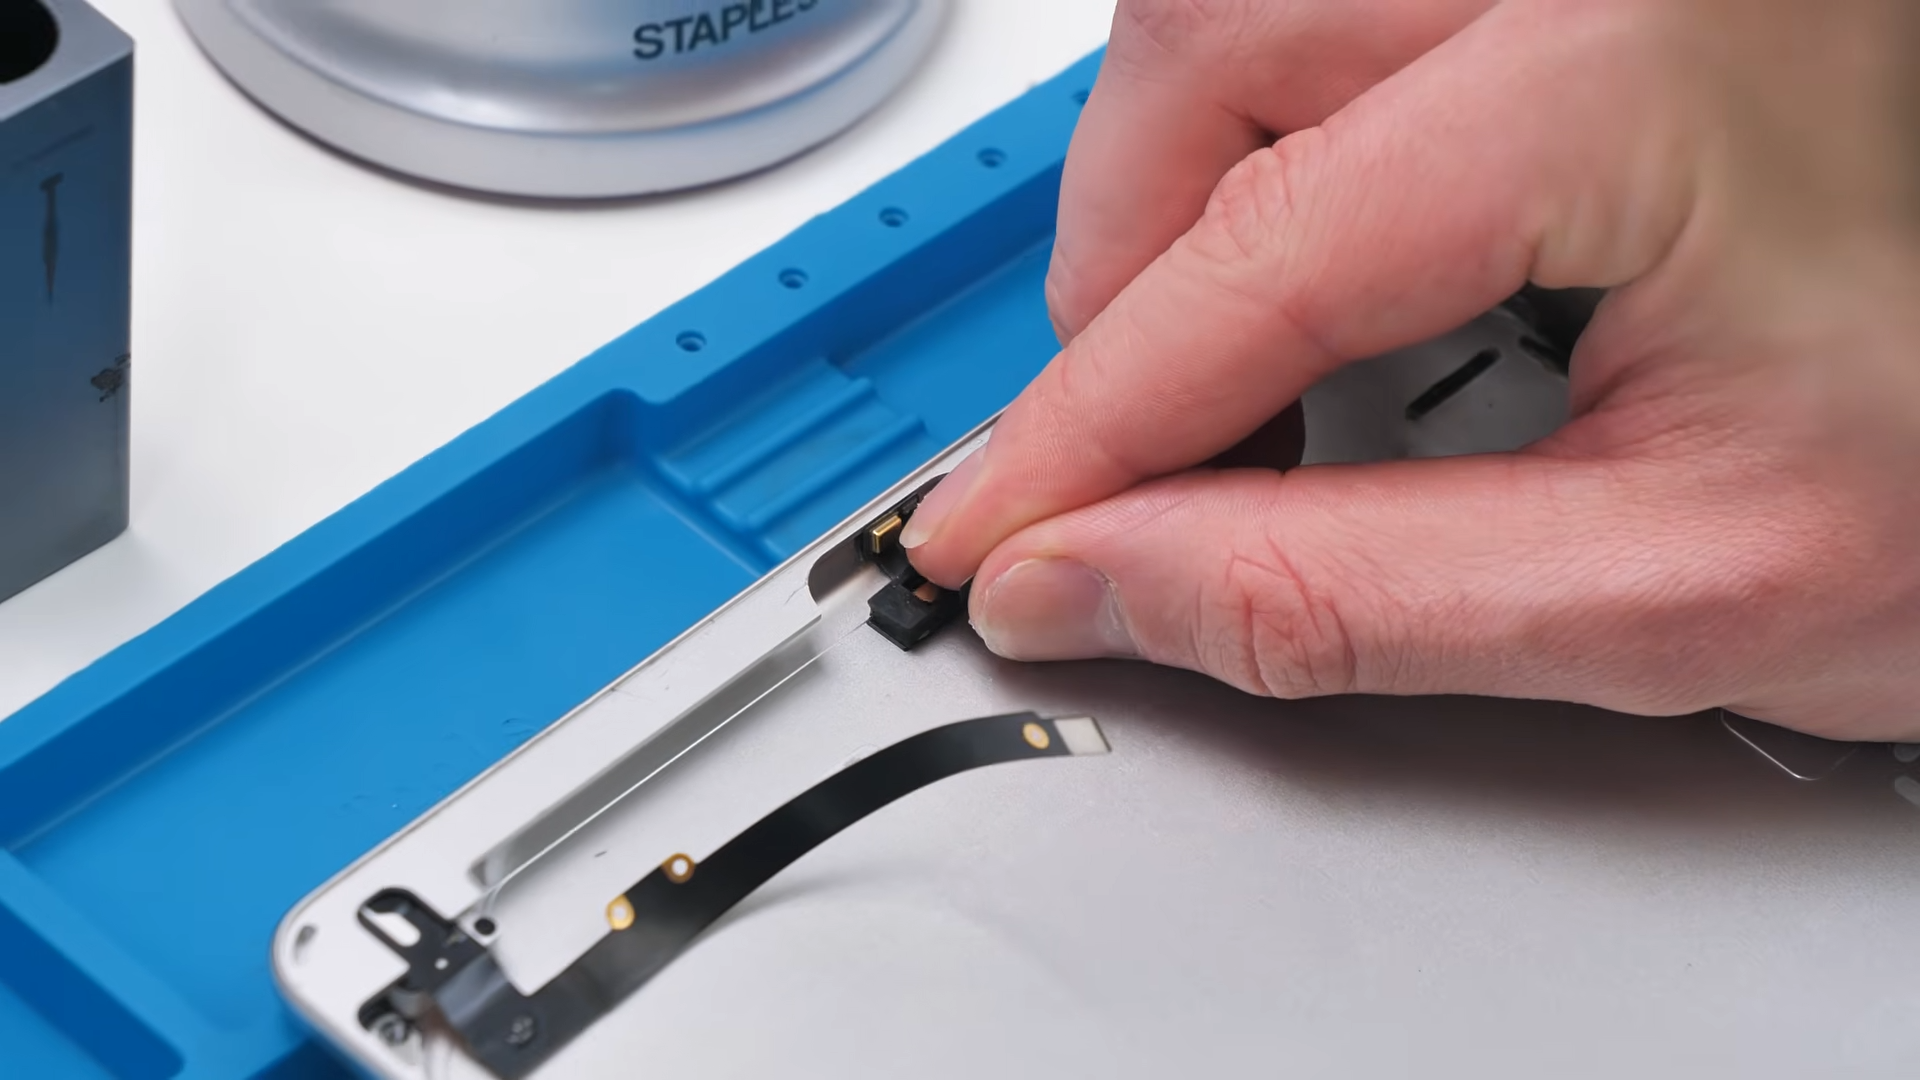
It slid into place and stuck down with leftover adhesive. At this point the build was moving insanely fast.
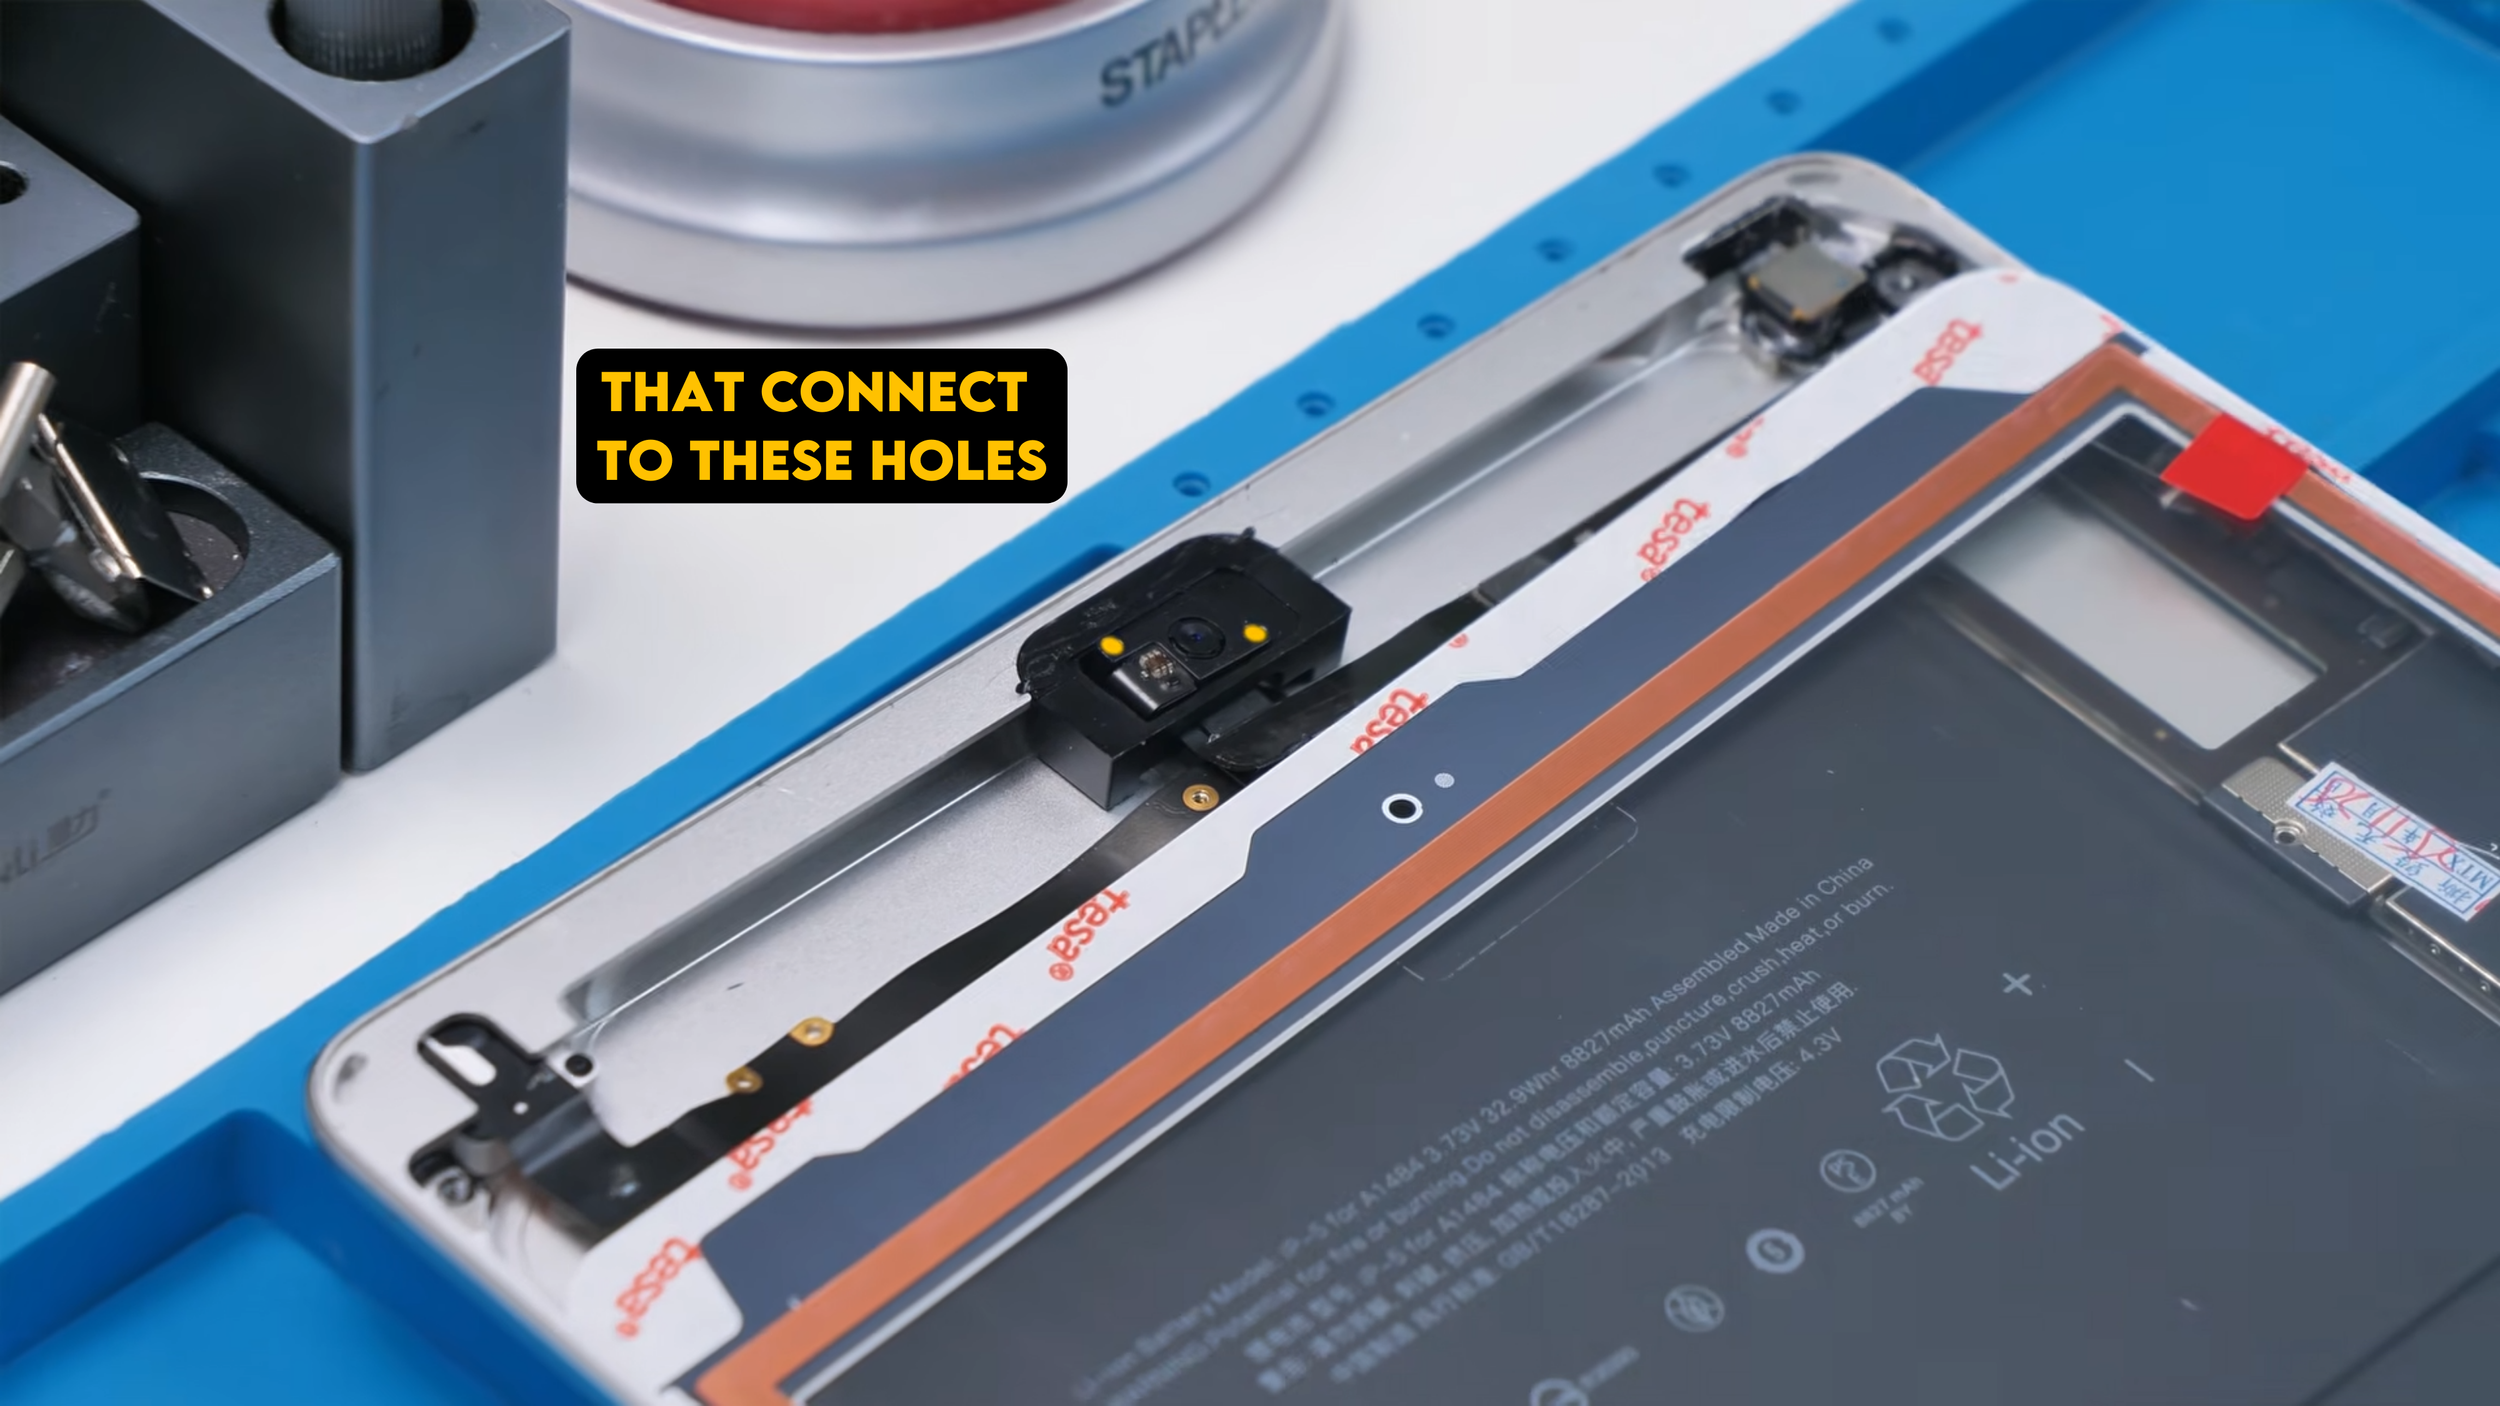
Installing the Cameras
Next up were the cameras, technically two separate components but simple enough to handle in one sequence. The front camera needed a small bracket that unfortunately did not come with the replacement part, so I have to salvage it from the old housing because without that bracket the camera simply will not sit correctly or align with the opening.
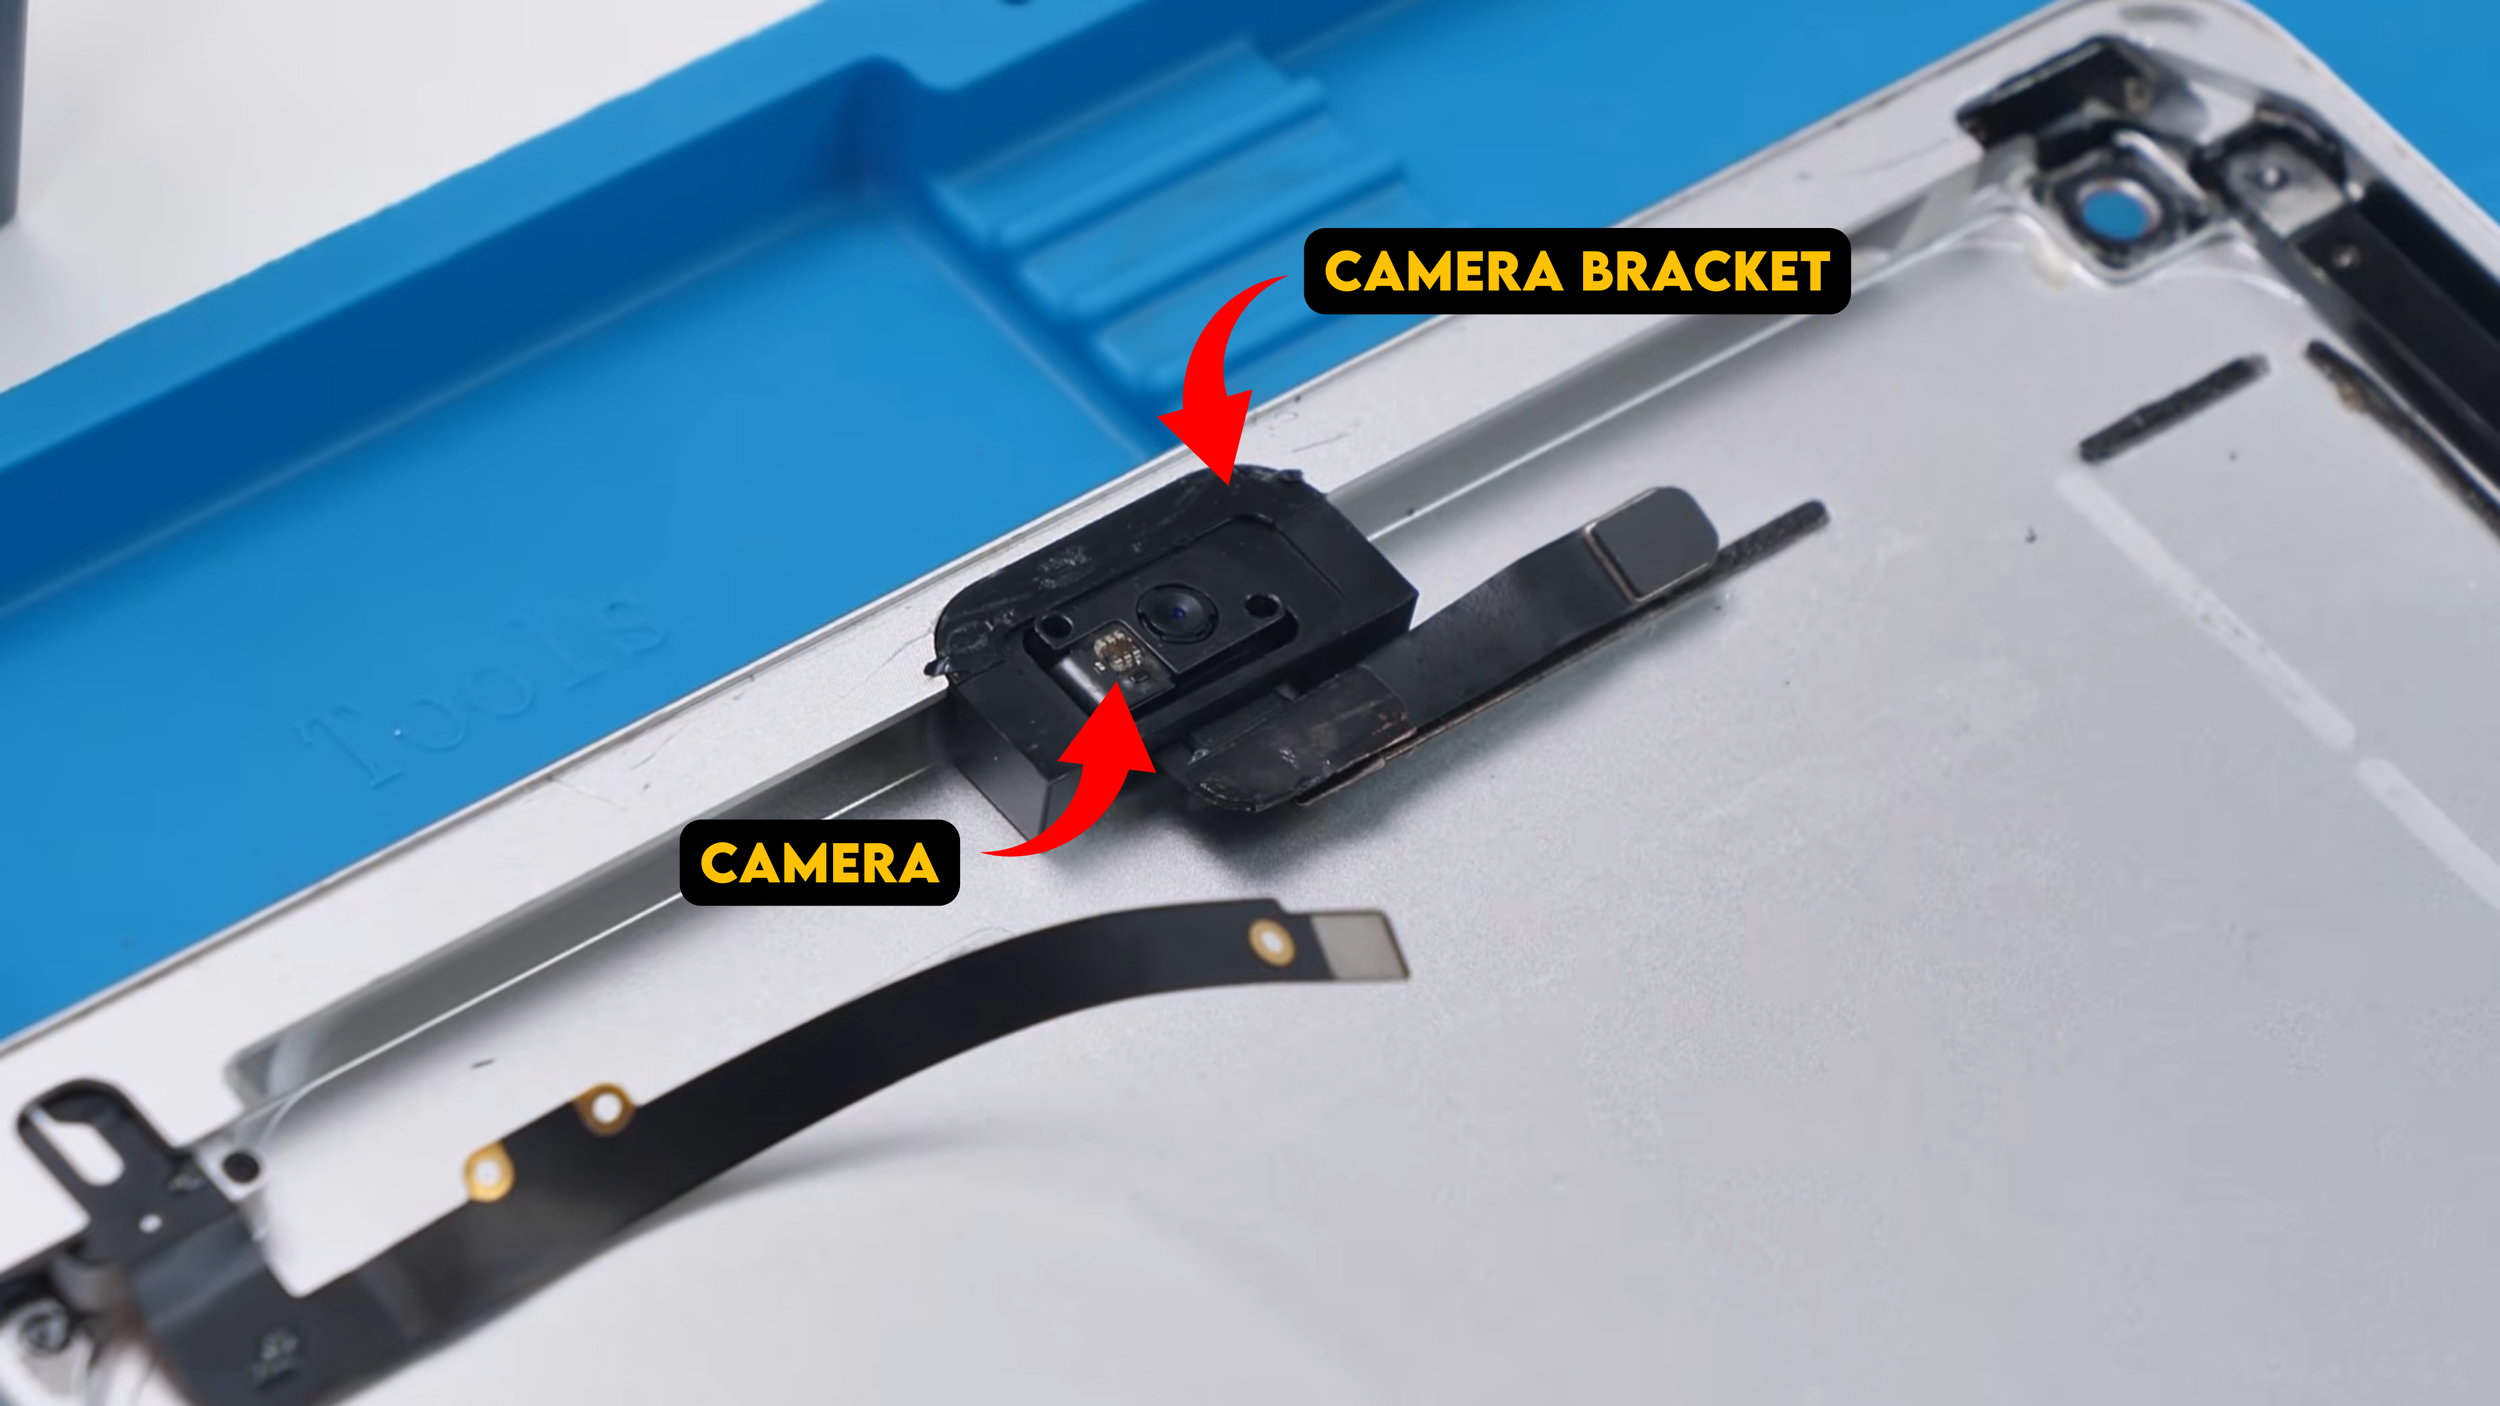
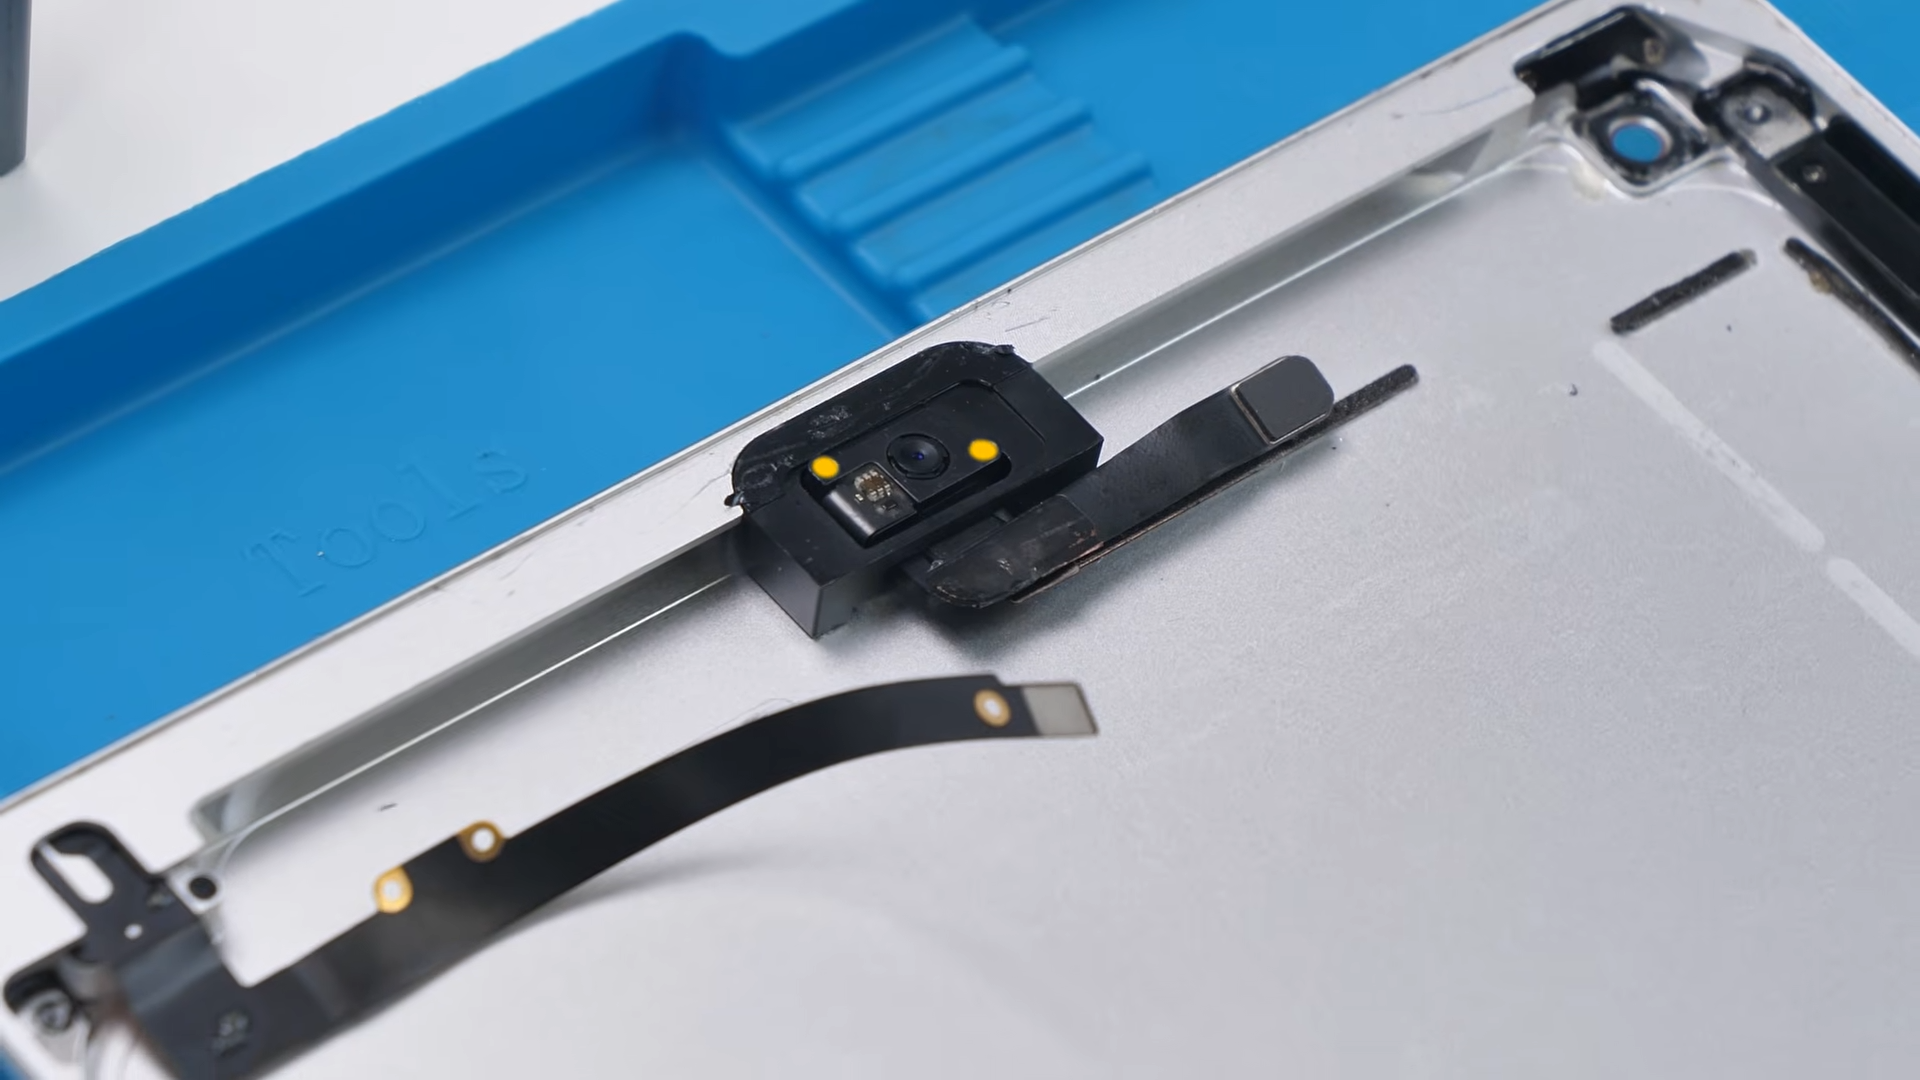
Once I transferred it over, the front camera slid neatly underneath and the bracket locked it into position exactly the way it should. You might have noticed two small holes near that area, and those are actually meant to help with proper alignment and support, which becomes important when everything is sealed and the device starts moving around.
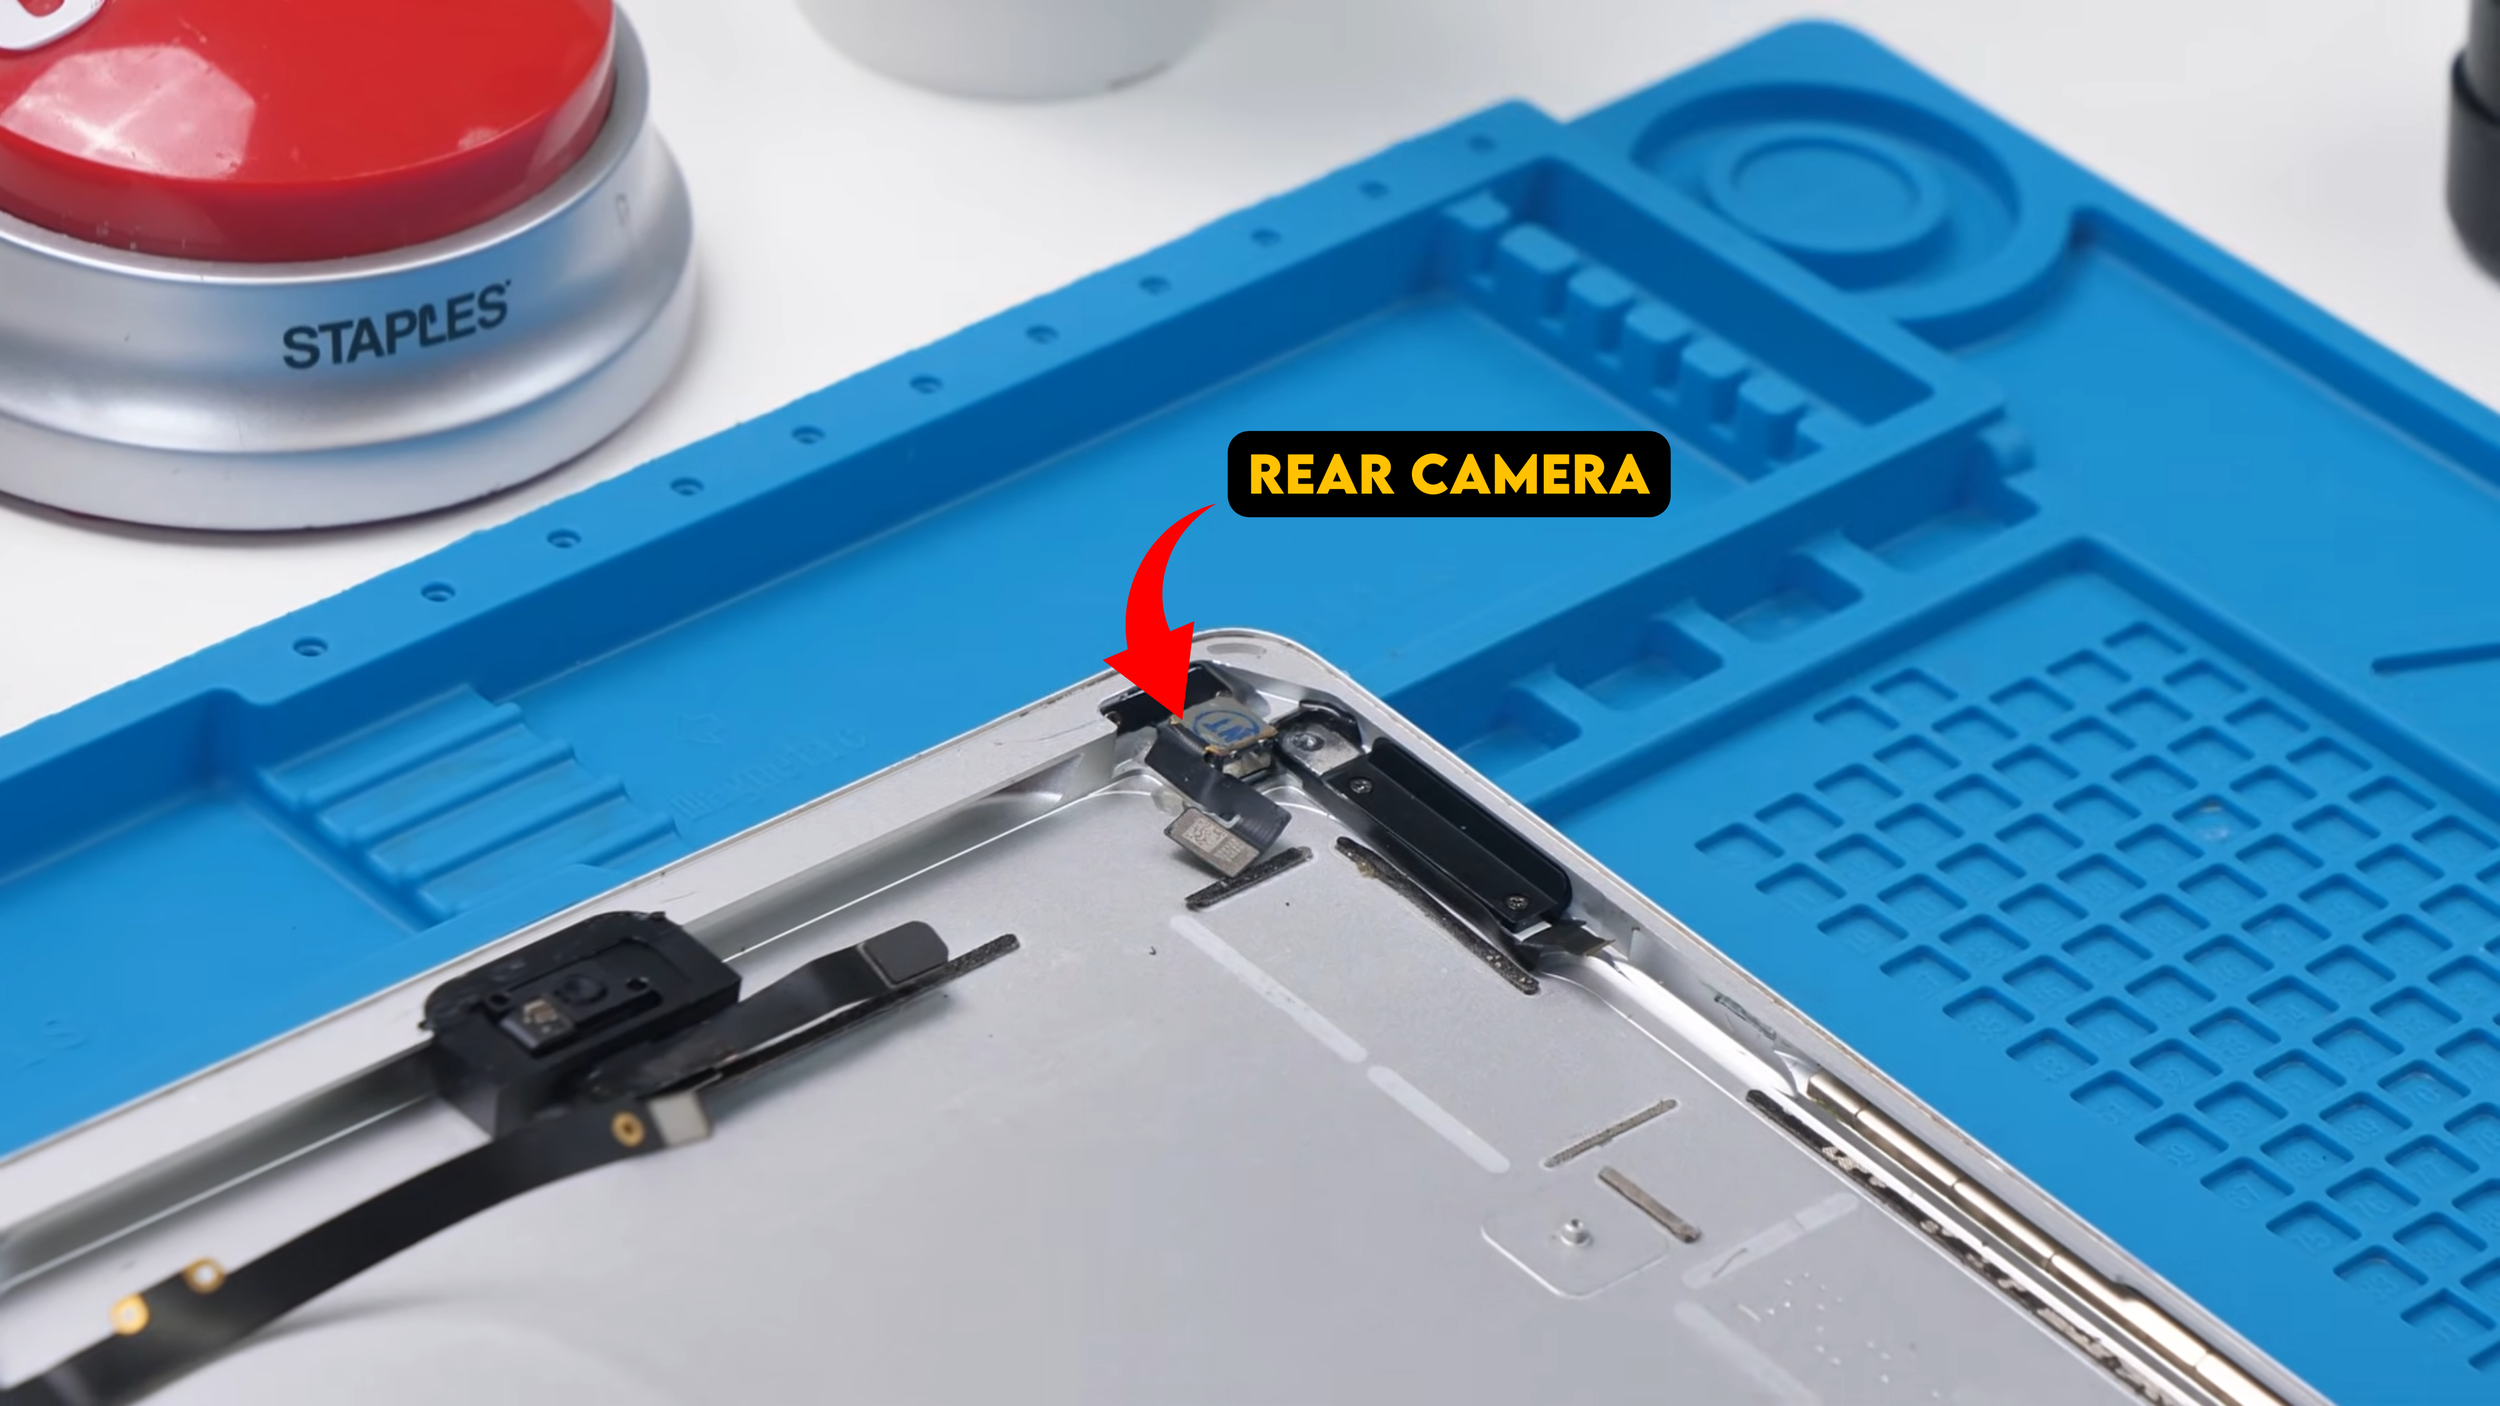
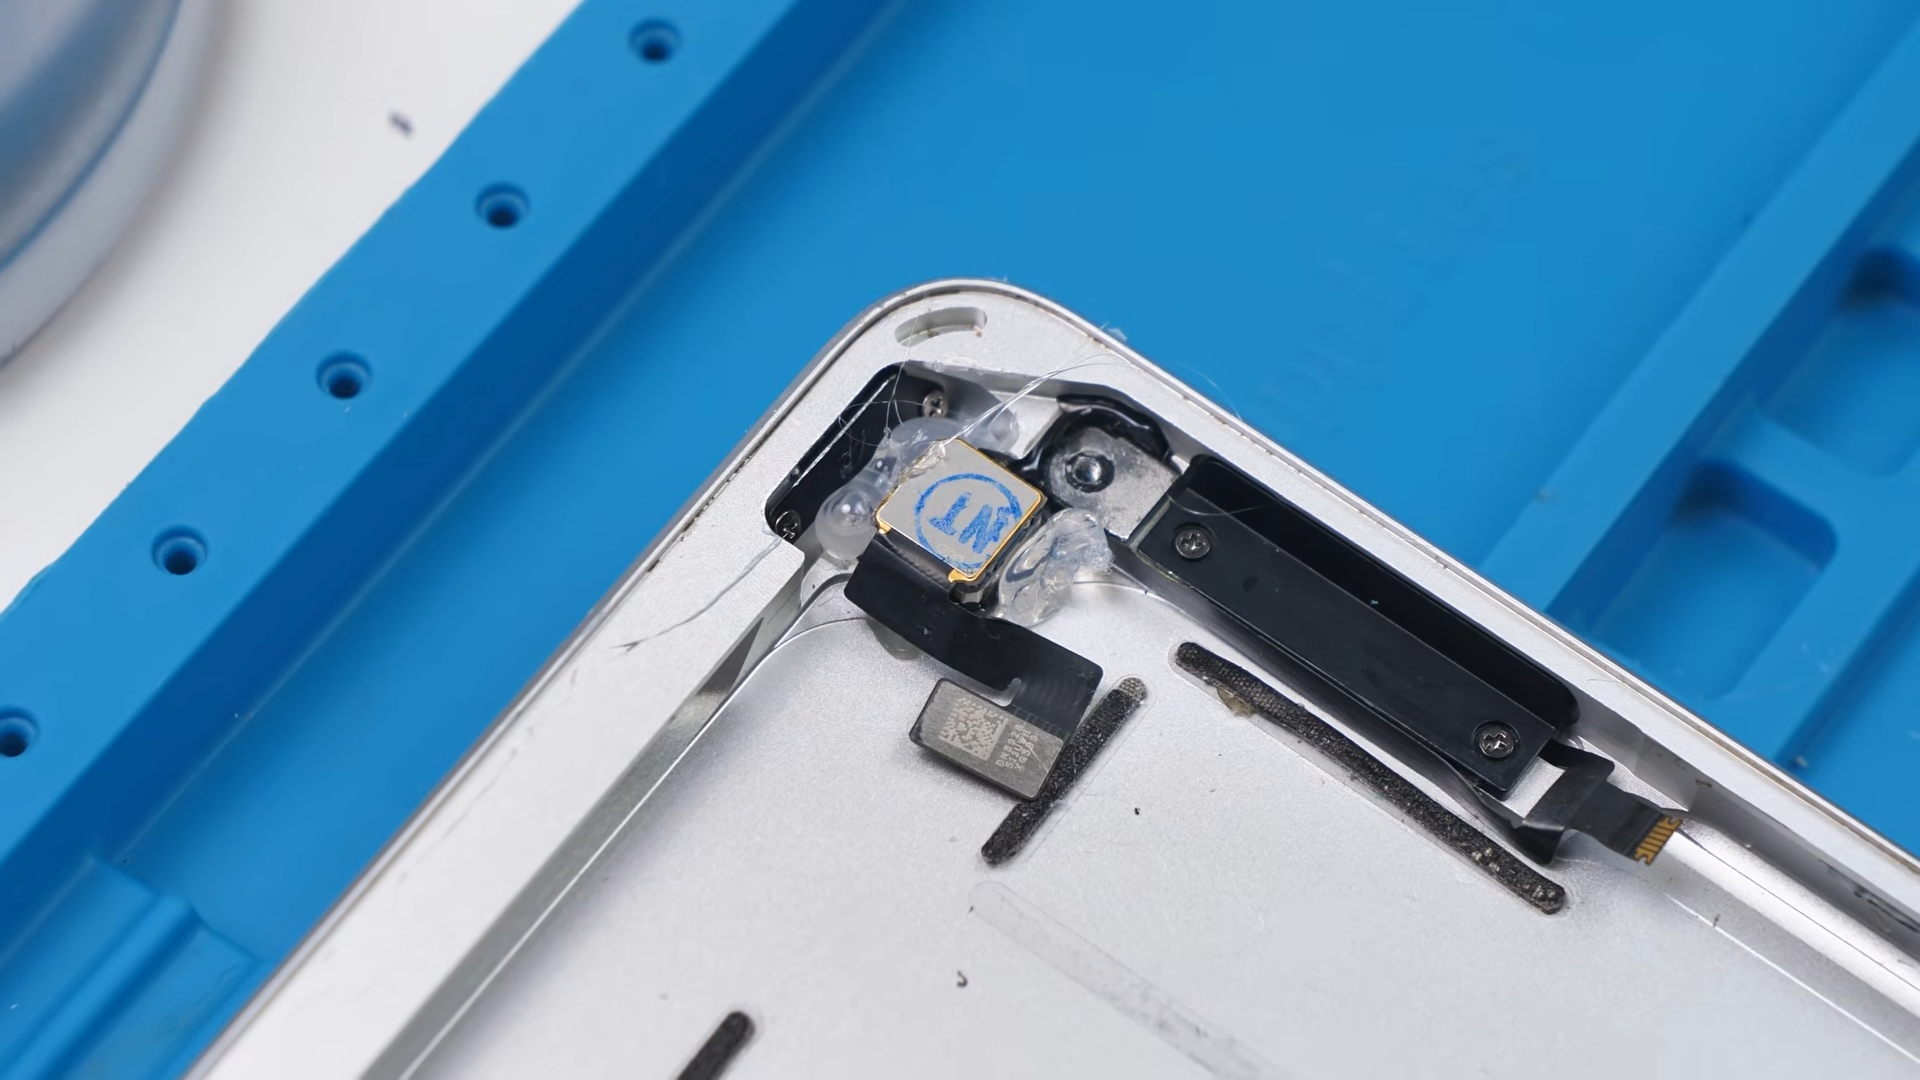
The rear camera was a bit more straightforward in theory, but trickier in execution. It did not come with a bracket and had no proper mounting structure, which meant adhesive was the only way to secure it.
Normally I would use cold press glue for something like this, but I had completely run out and what was left had hardened. That left me with one very questionable but effective option: the glue gun.
It was not elegant and it definitely did not look professional, but it held the camera in place, which was the main objective.
The Buttons
Next would have been the buttons, but the buttons were actually one of the few good parts that were already in the housing. So for now, I didn’t touch them.
Now it was time for the big boys.
Battery and Motherboard Installation
The battery and motherboard had to be installed together in a way because the motherboard sits above the battery, and alignment matters. If the battery sits crooked or misaligned, it can crowd the board or look weird and you don’t want that.
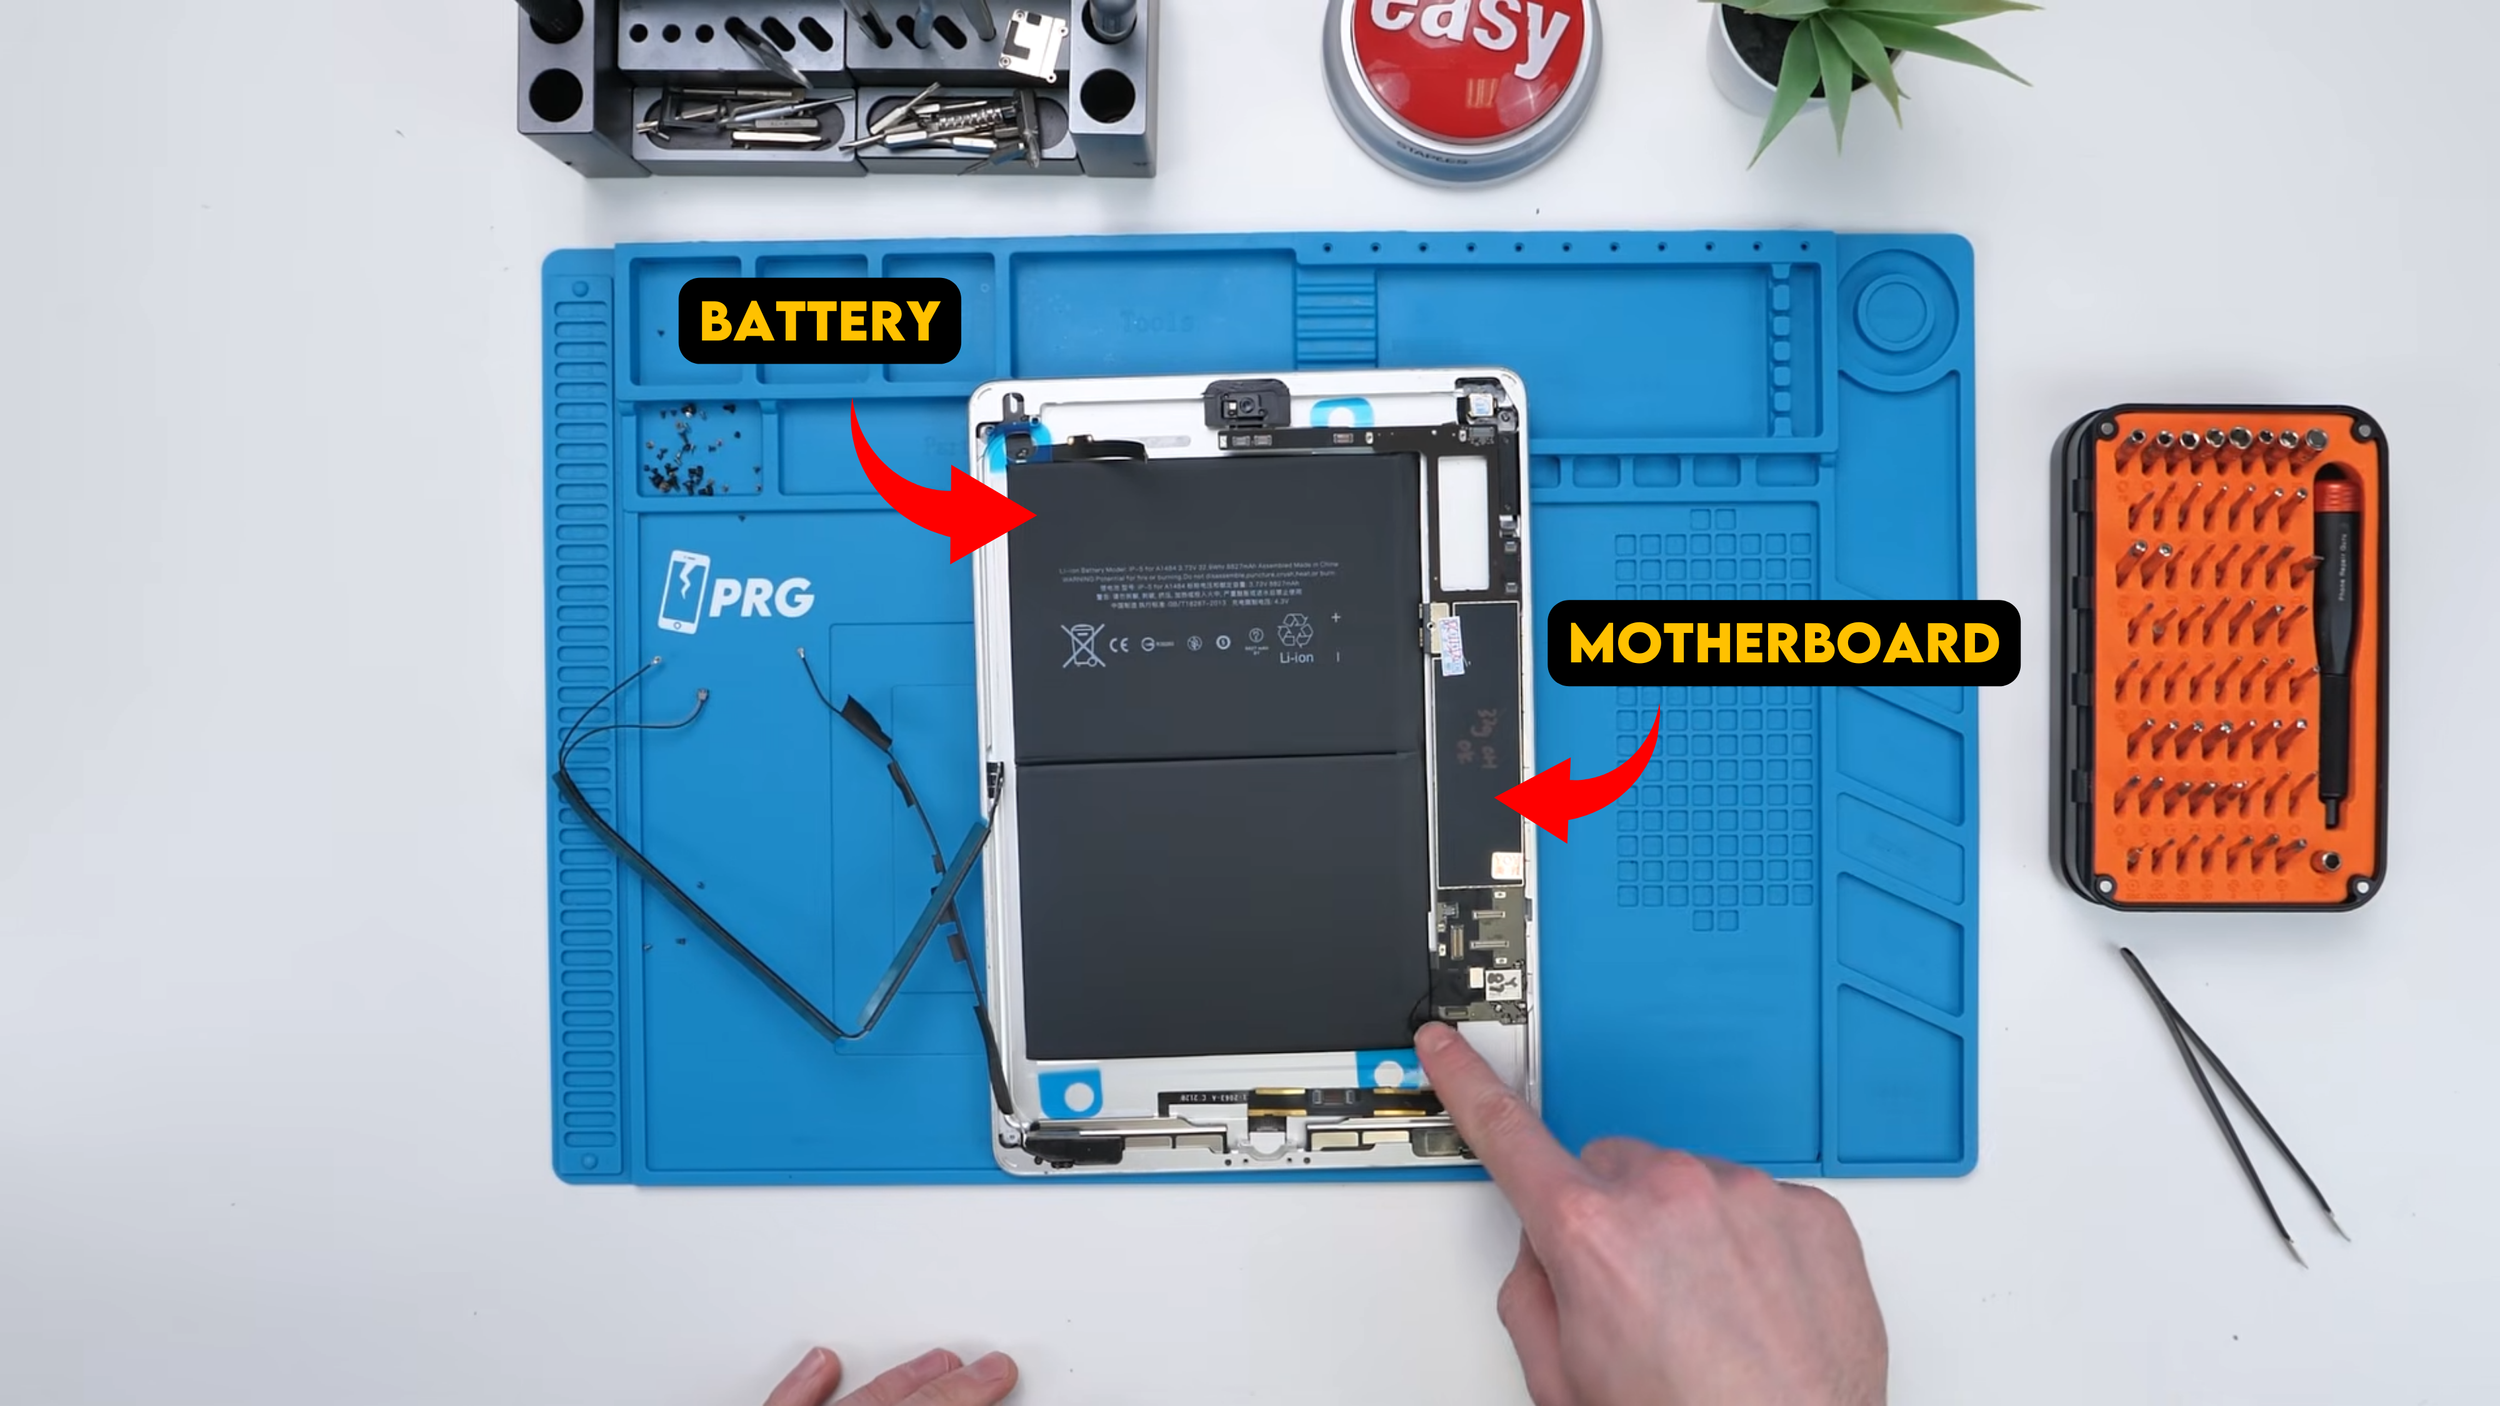
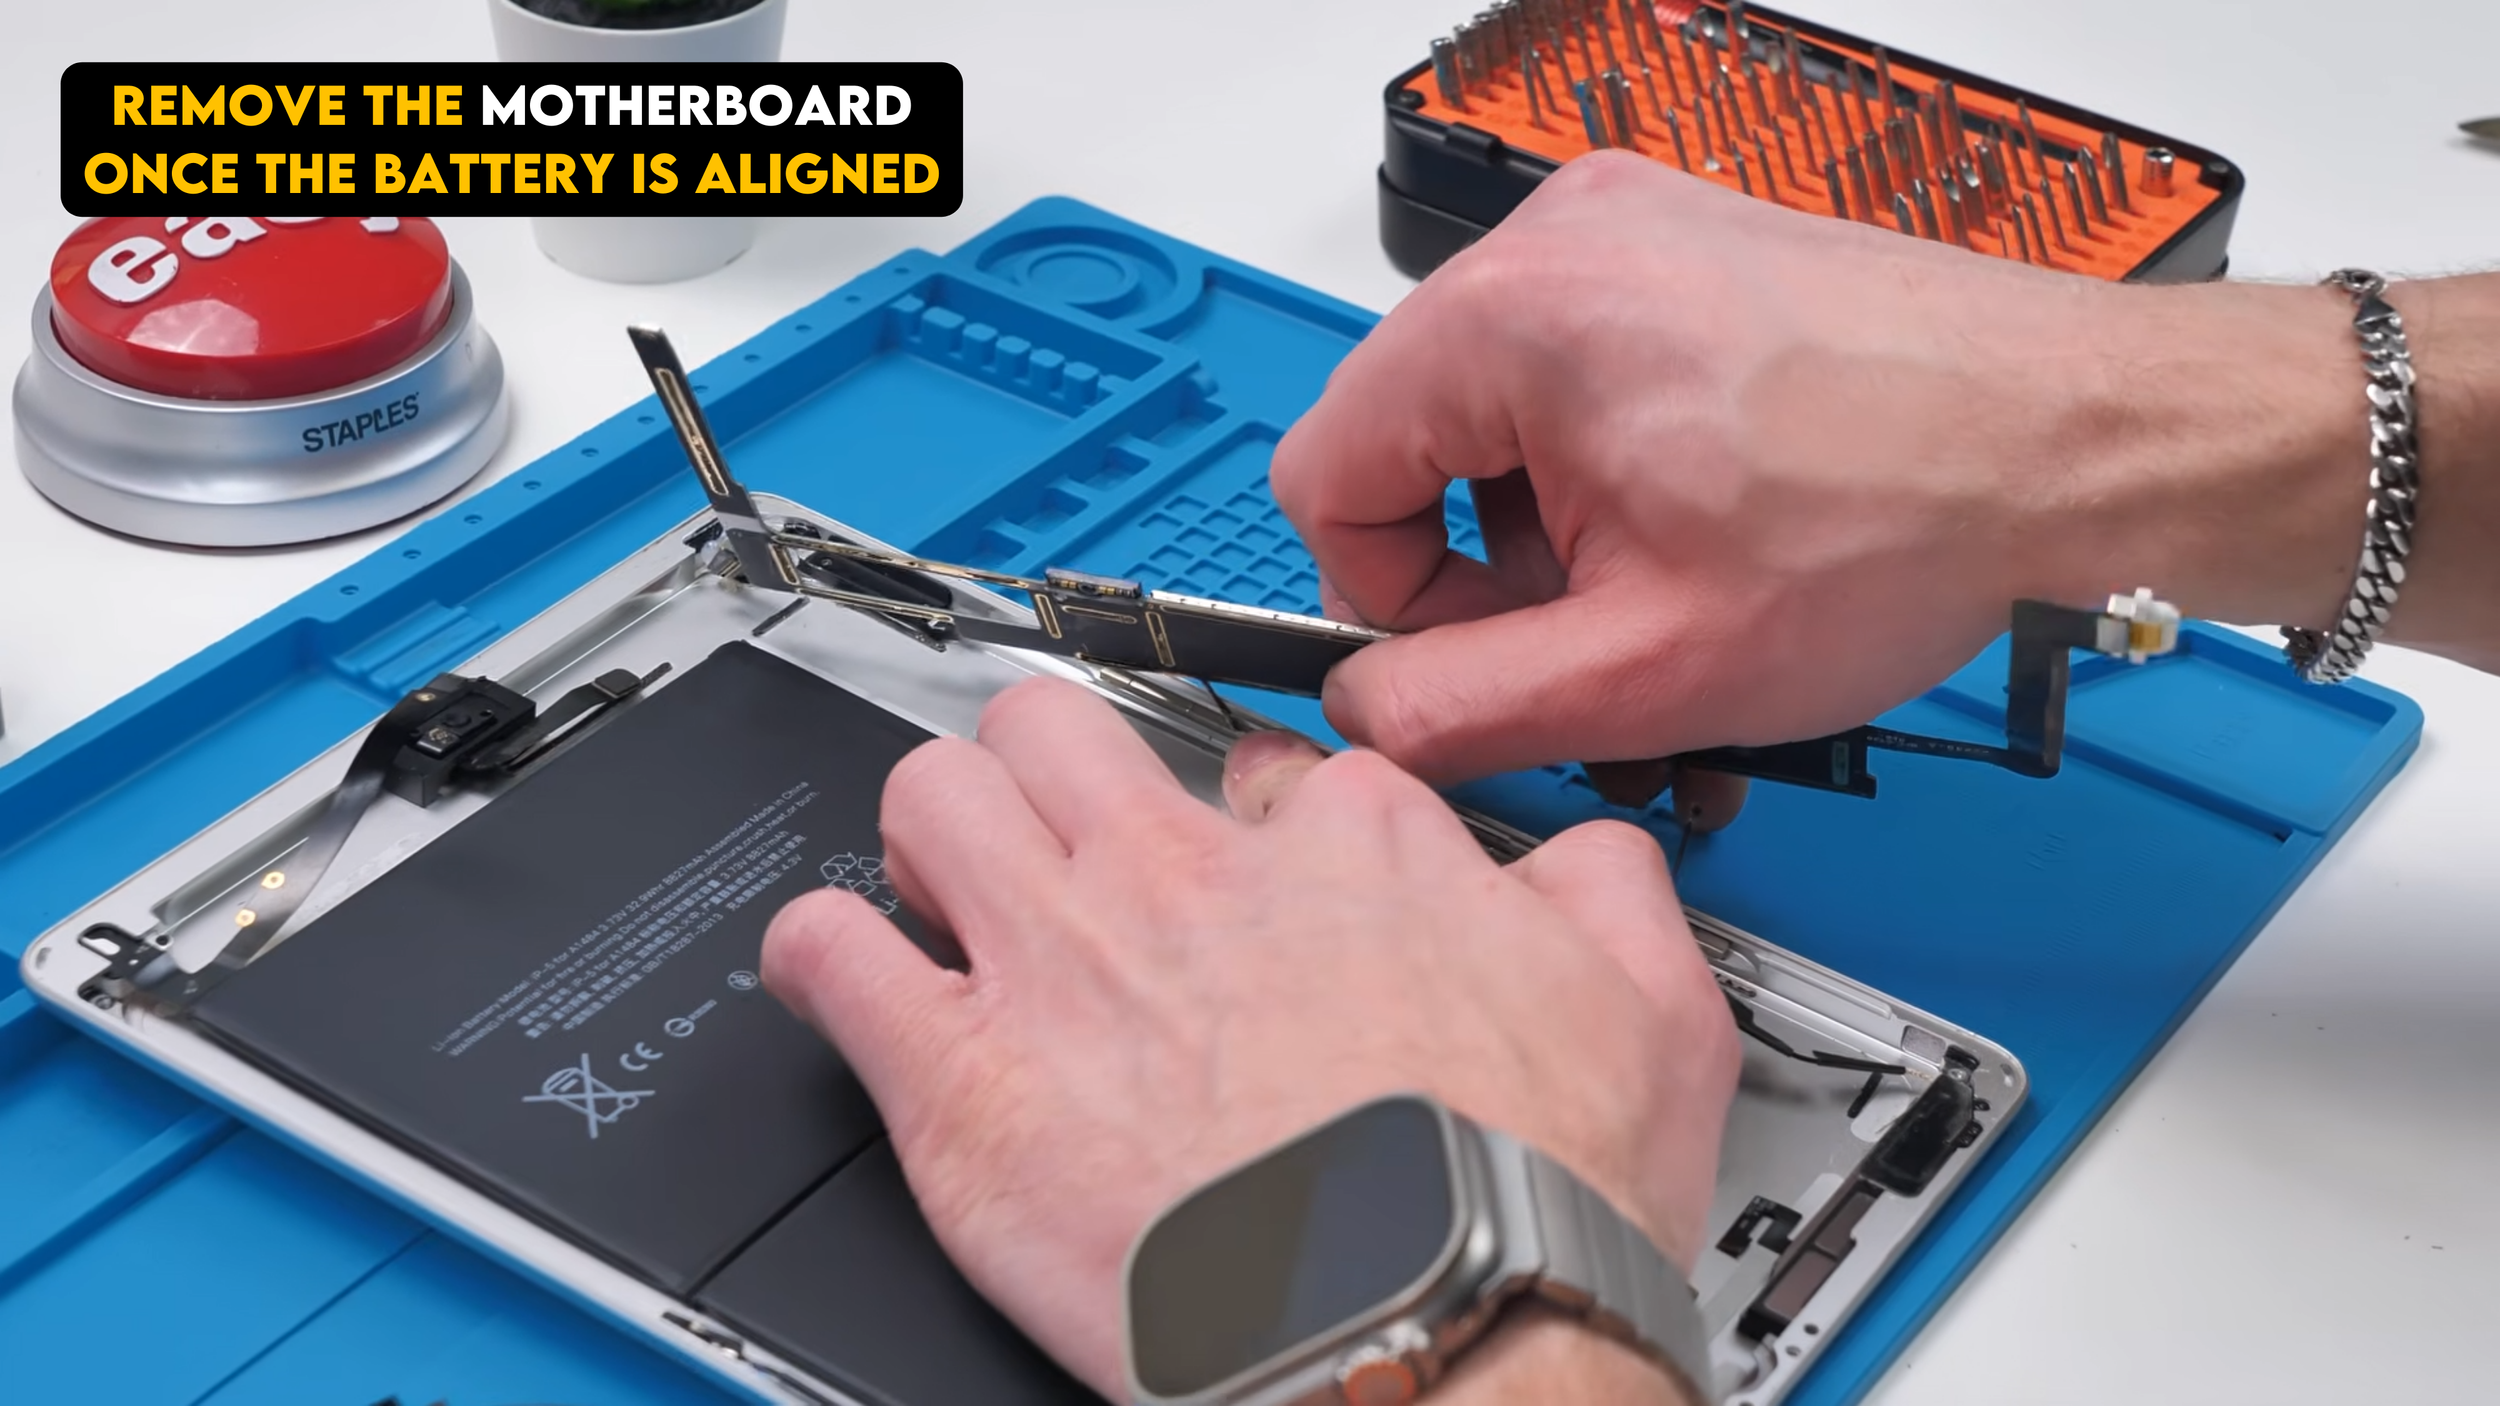
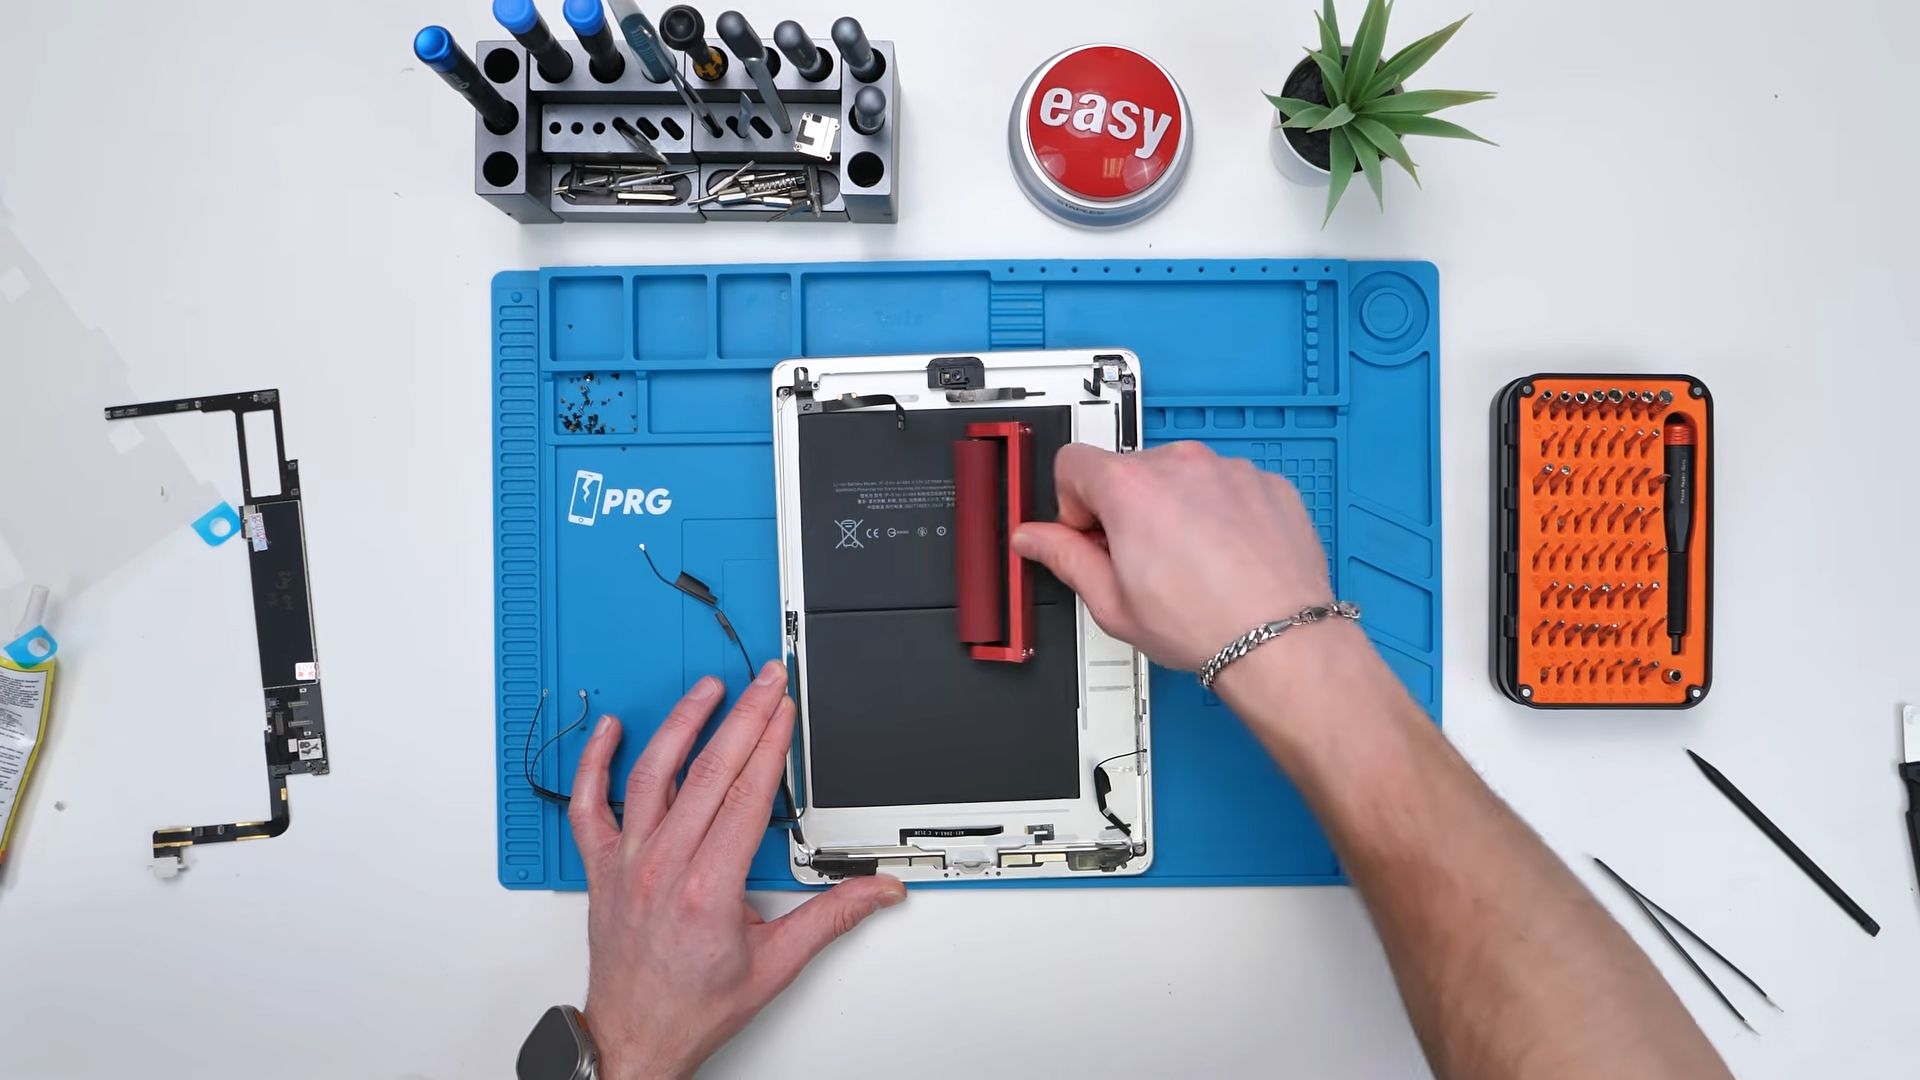
I place the motherboard first to help align the battery. Then I slide the battery into place and adjust it until it sits straight and leaves enough room for the board. Then I pressed it down properly using a roller. I use this roller way more than I expected. It’s efficient for making sure batteries adhere evenly to housings, especially on iPads. You roll it over, apply even pressure, and it helps ensure the adhesive really bonds.
Next step was bending back all of the flex cables so that when the board goes in for real, nothing fights you or folds under the wrong way.. Then slide the motherboard back in place.
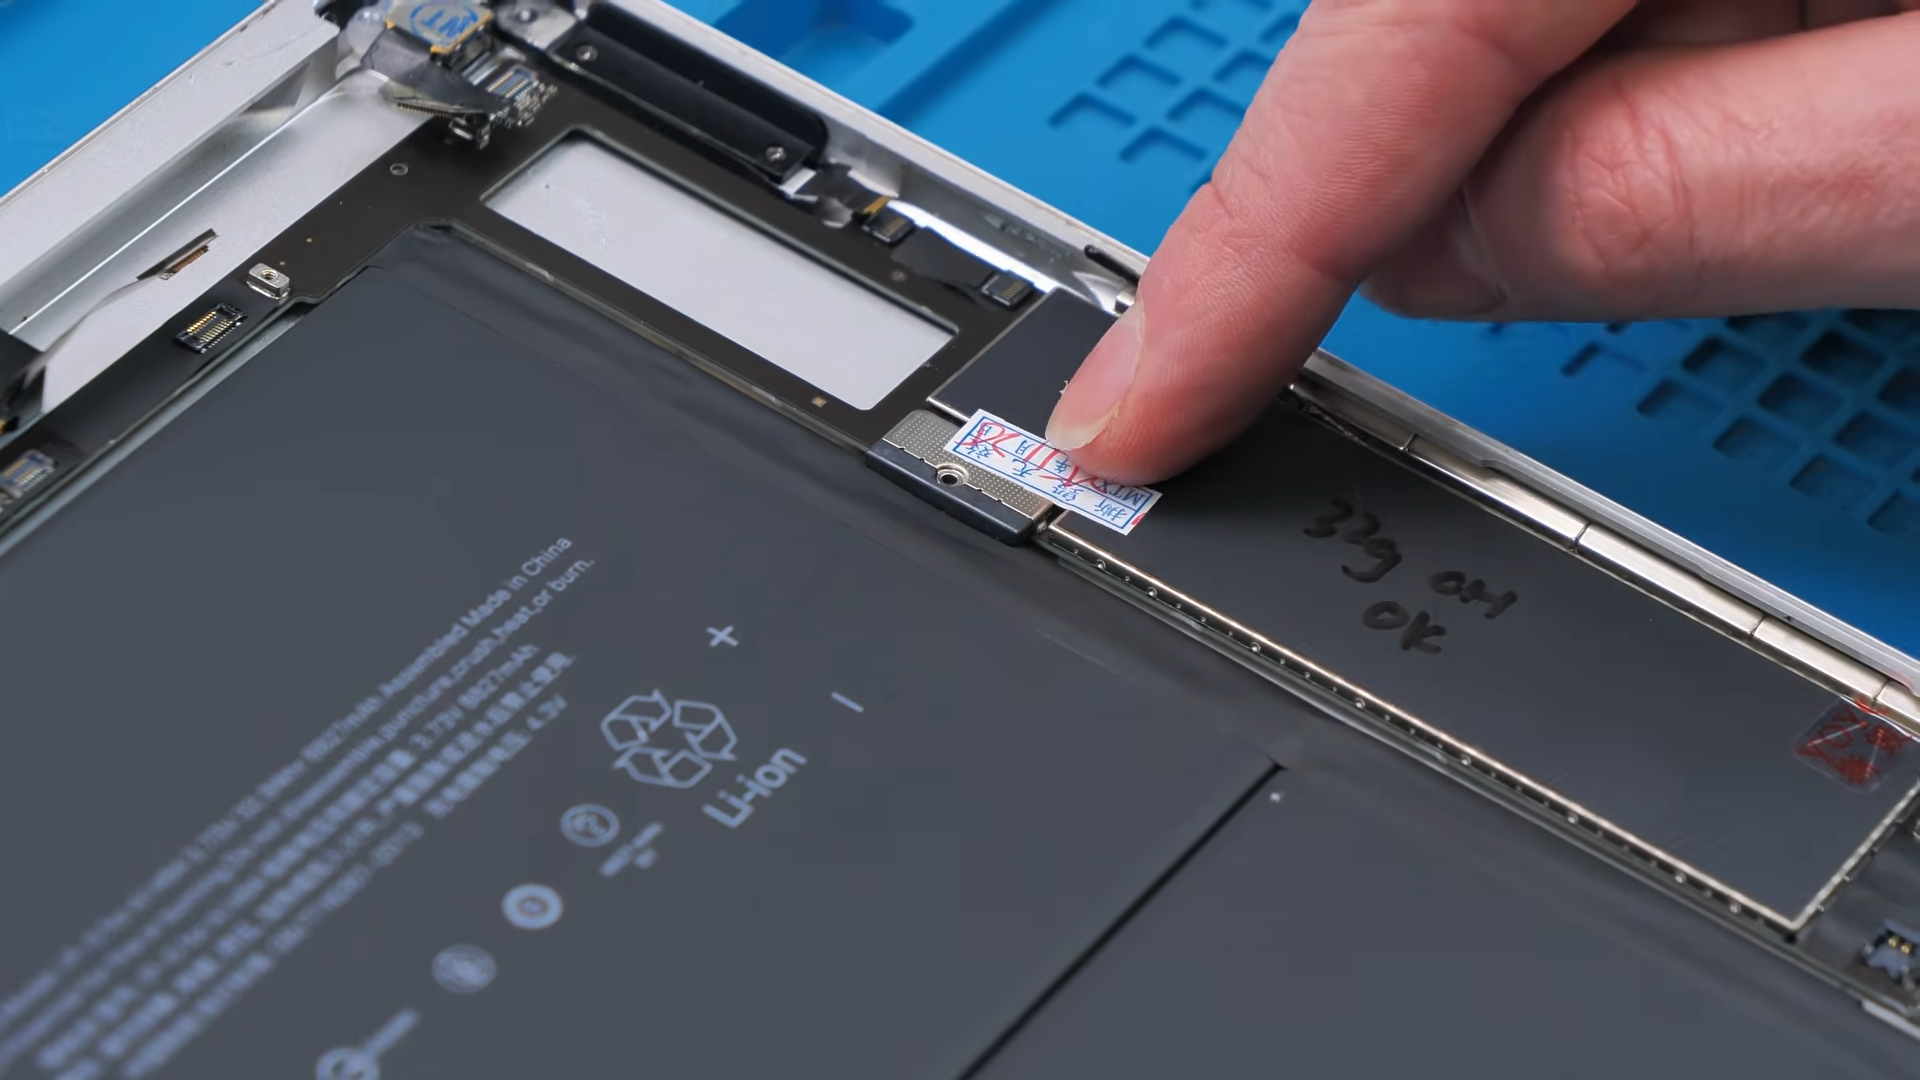
Interestingly, there’s one screw that connects the battery to the motherboard, and it’s basically the only screw that really keeps the motherboard in place on the housing. Also, if you ever need to disconnect the battery while working, you can just pop it off easily.

After that, I connected everything to the motherboard. That was everything that needed to go inside the housing.
Now we had to close it up.
Digitizer and Home Button
To close everything up, the digitizer had to go in, but before that, we needed to install the home button onto the digitizer. The home button came with pre installed adhesive, which made my life a lot easier. I placed it exactly where it should go and pressed it down.
New digitizers usually have a plastic peel covering the inner glass. You normally peel it back to install the home button cleanly, otherwise you can run into issues while placing it.
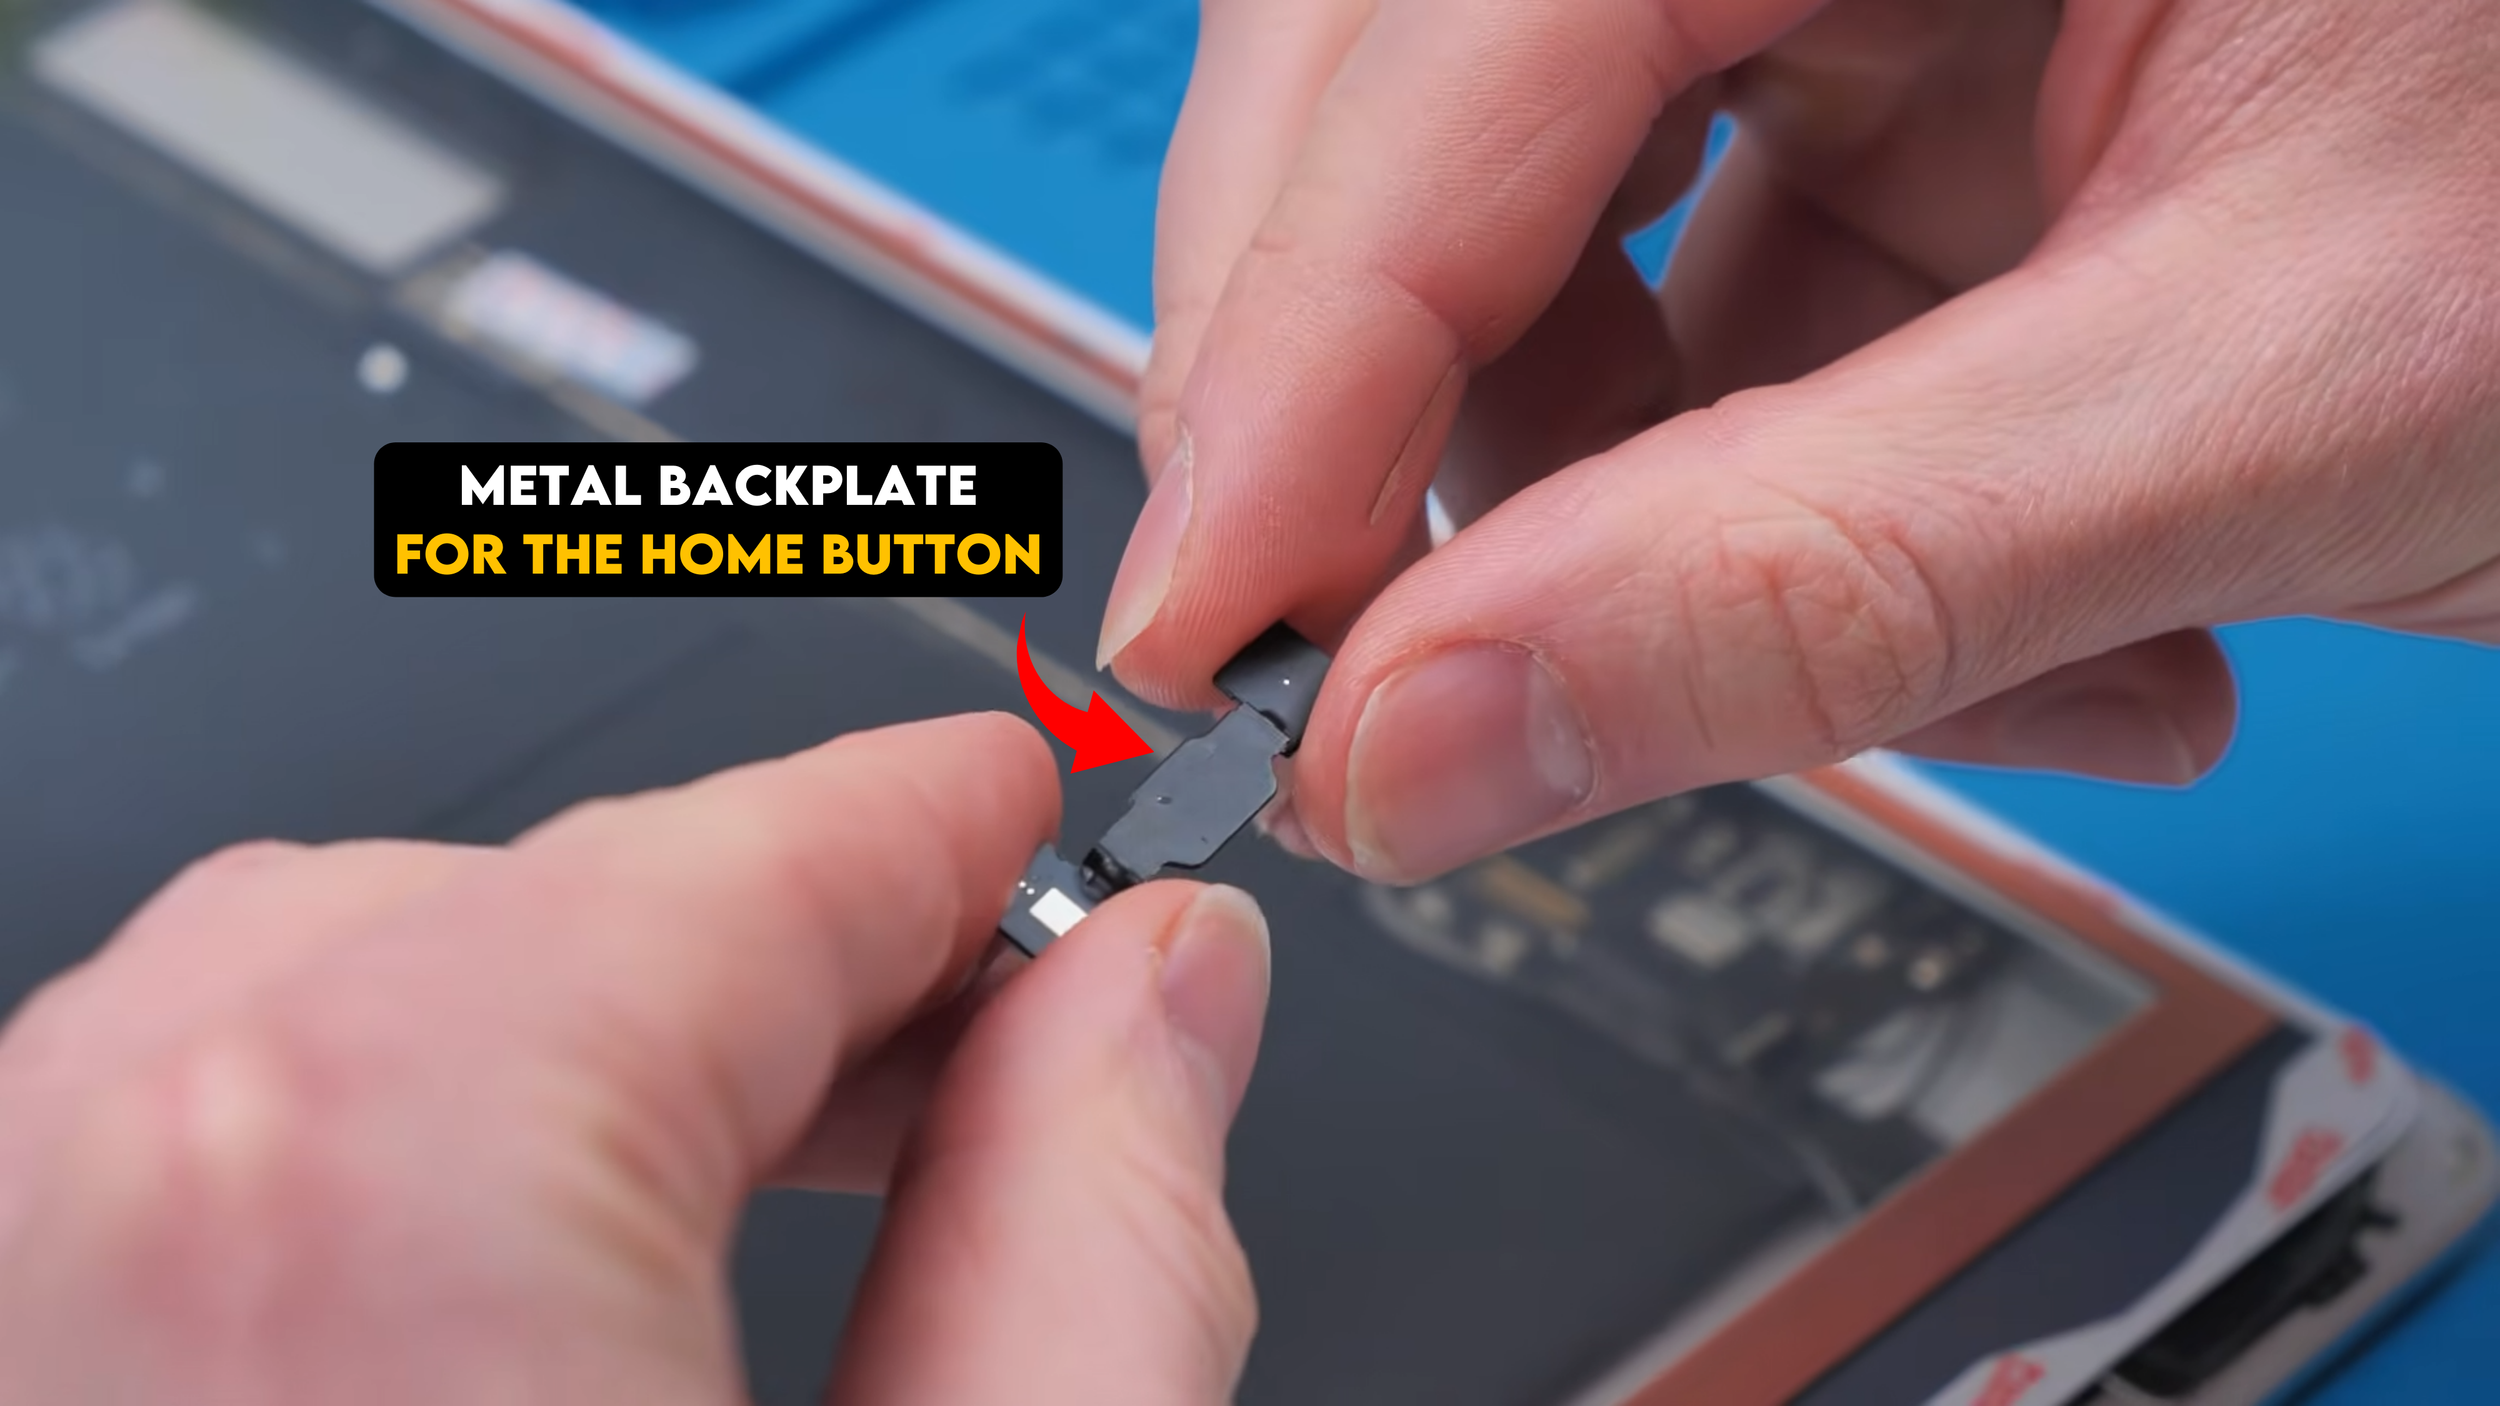
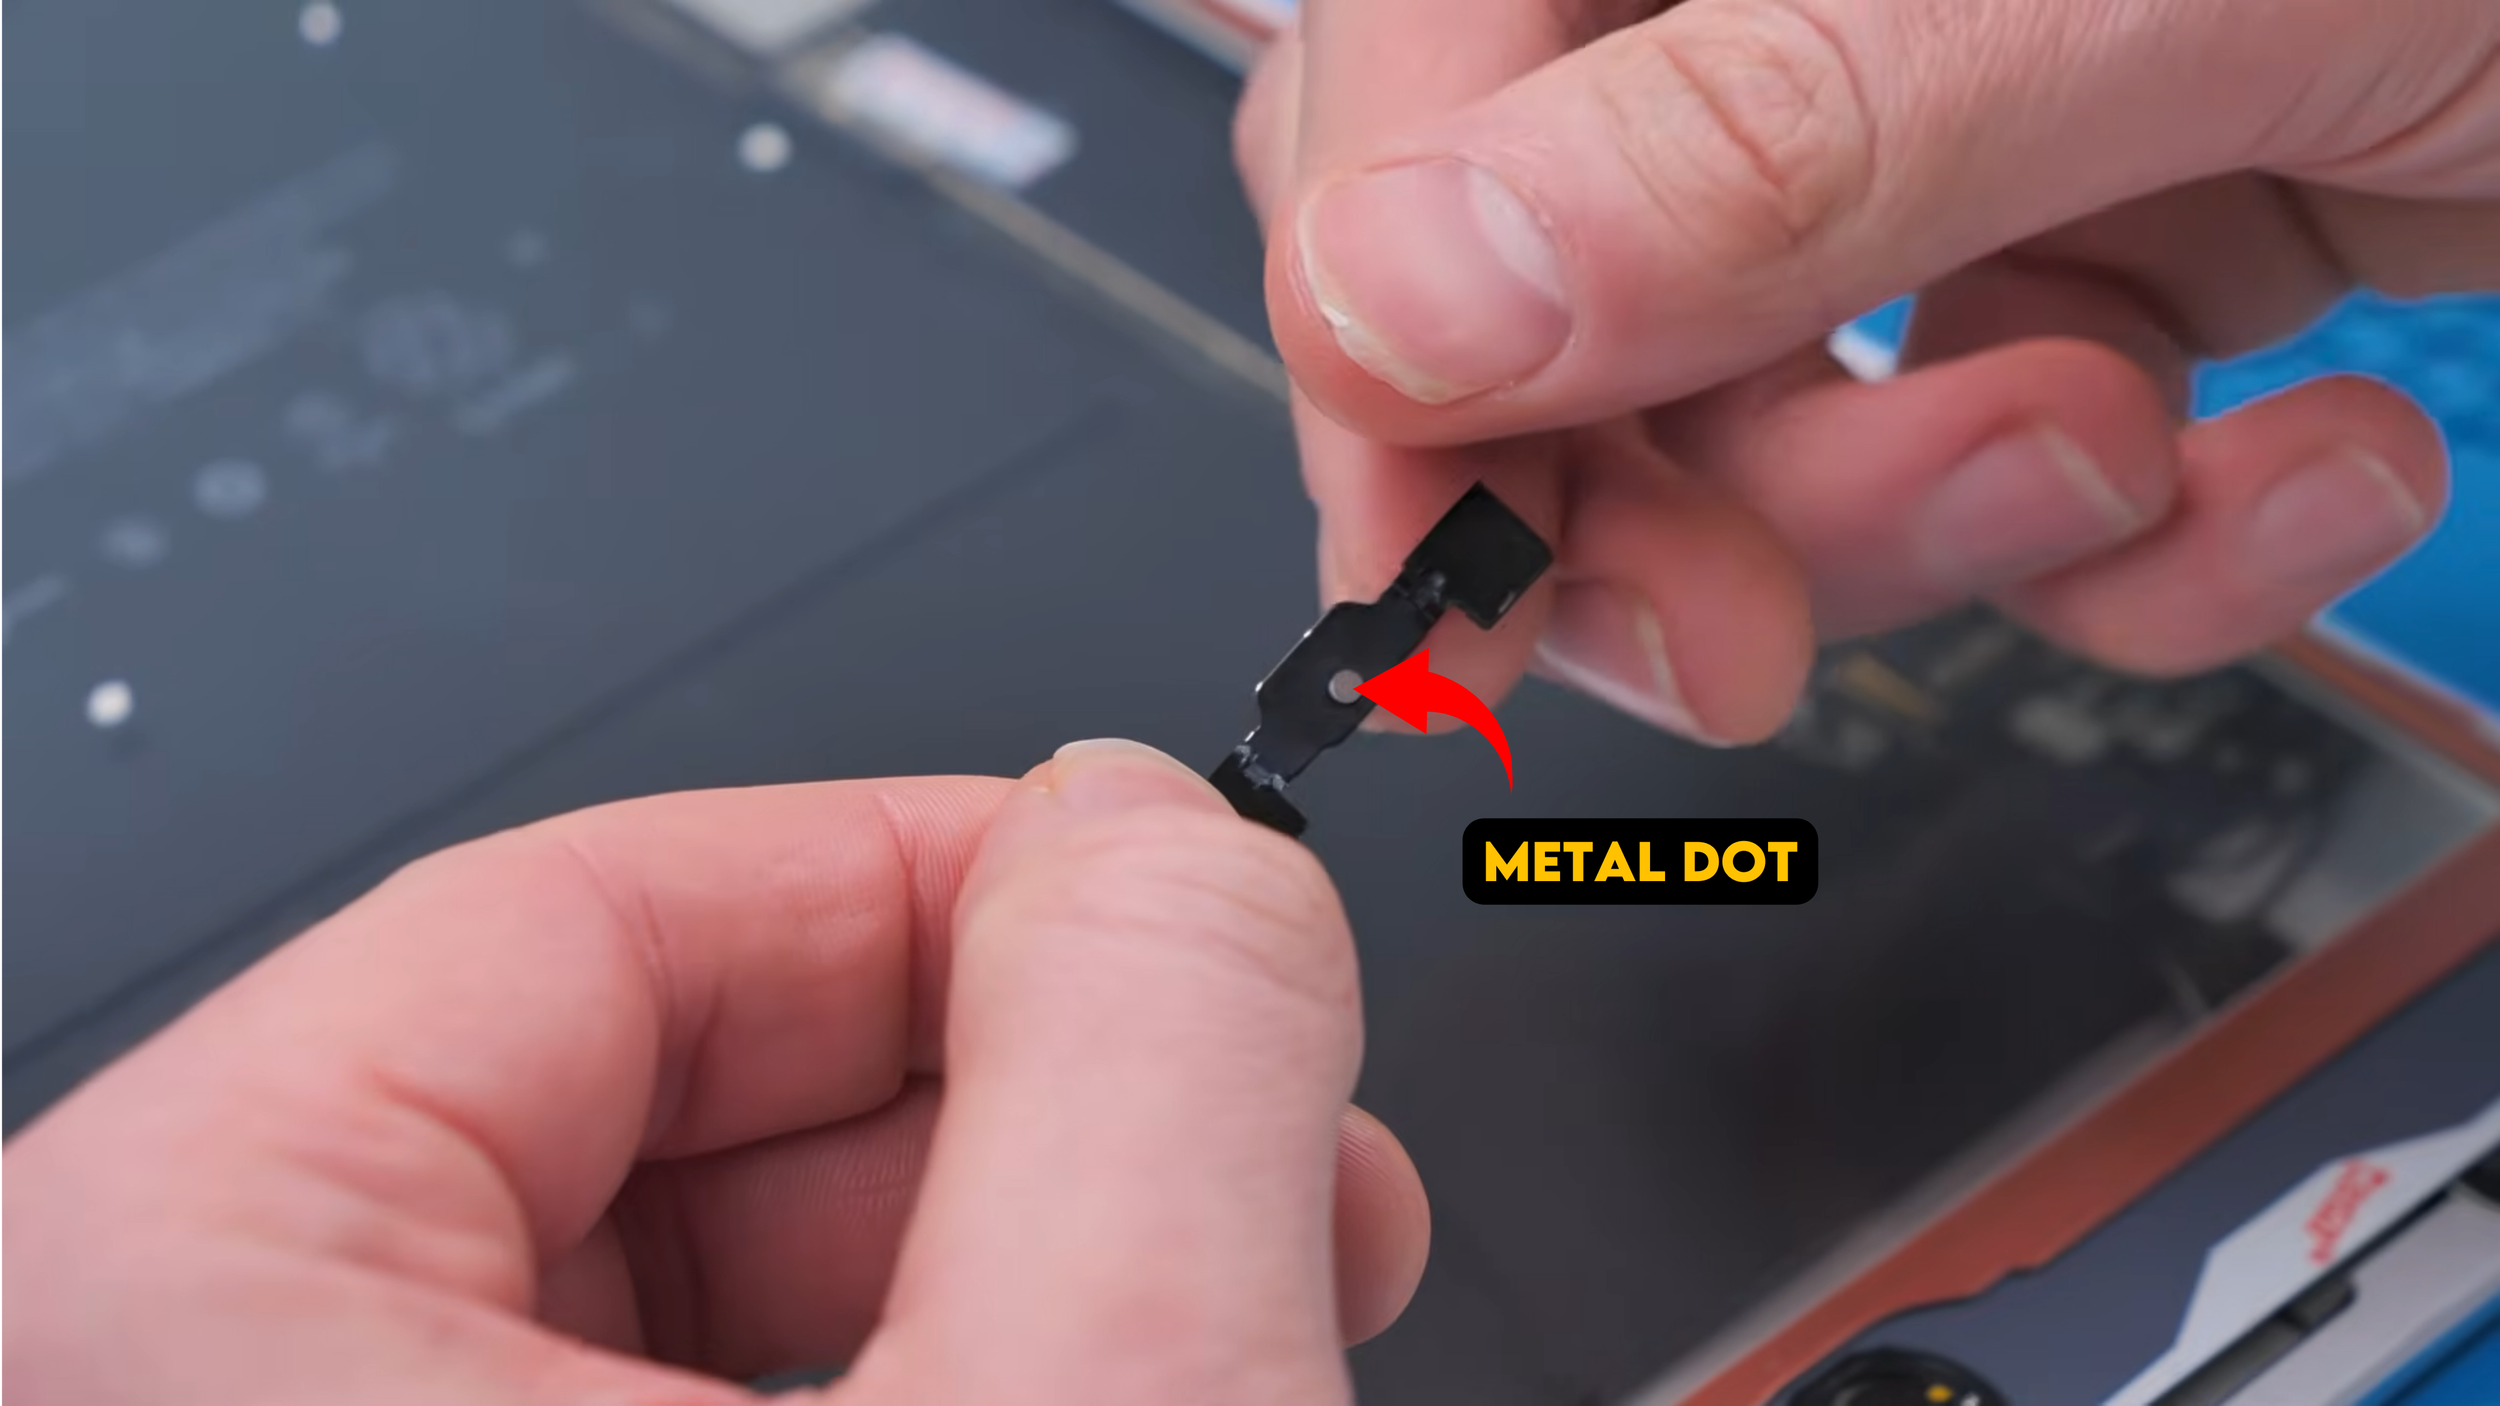
Then there’s another important detail: the home button isn’t going to work on its own. It needs the metal back plate so it has something to press against. That back plate has to be perfectly aligned with a little metal dot. If it’s not aligned, the home button won’t function properly.
Most new digitizers also come with a little cutout that lets you remove the peel and test the home button before fully sealing it down, because it’s easy to mess up and you want to confirm it works before committing.
Then I noticed something.
The Missing Digitizer Bracket
We were missing a bracket on the digitizer.
There’s supposed to be a bracket that keeps the front camera perfectly aligned with the camera hole. It doesn’t come with every digitizer, but it typically should, and it’s kind of a shame they didn’t include it because those two little holes near the camera are literally made for it.

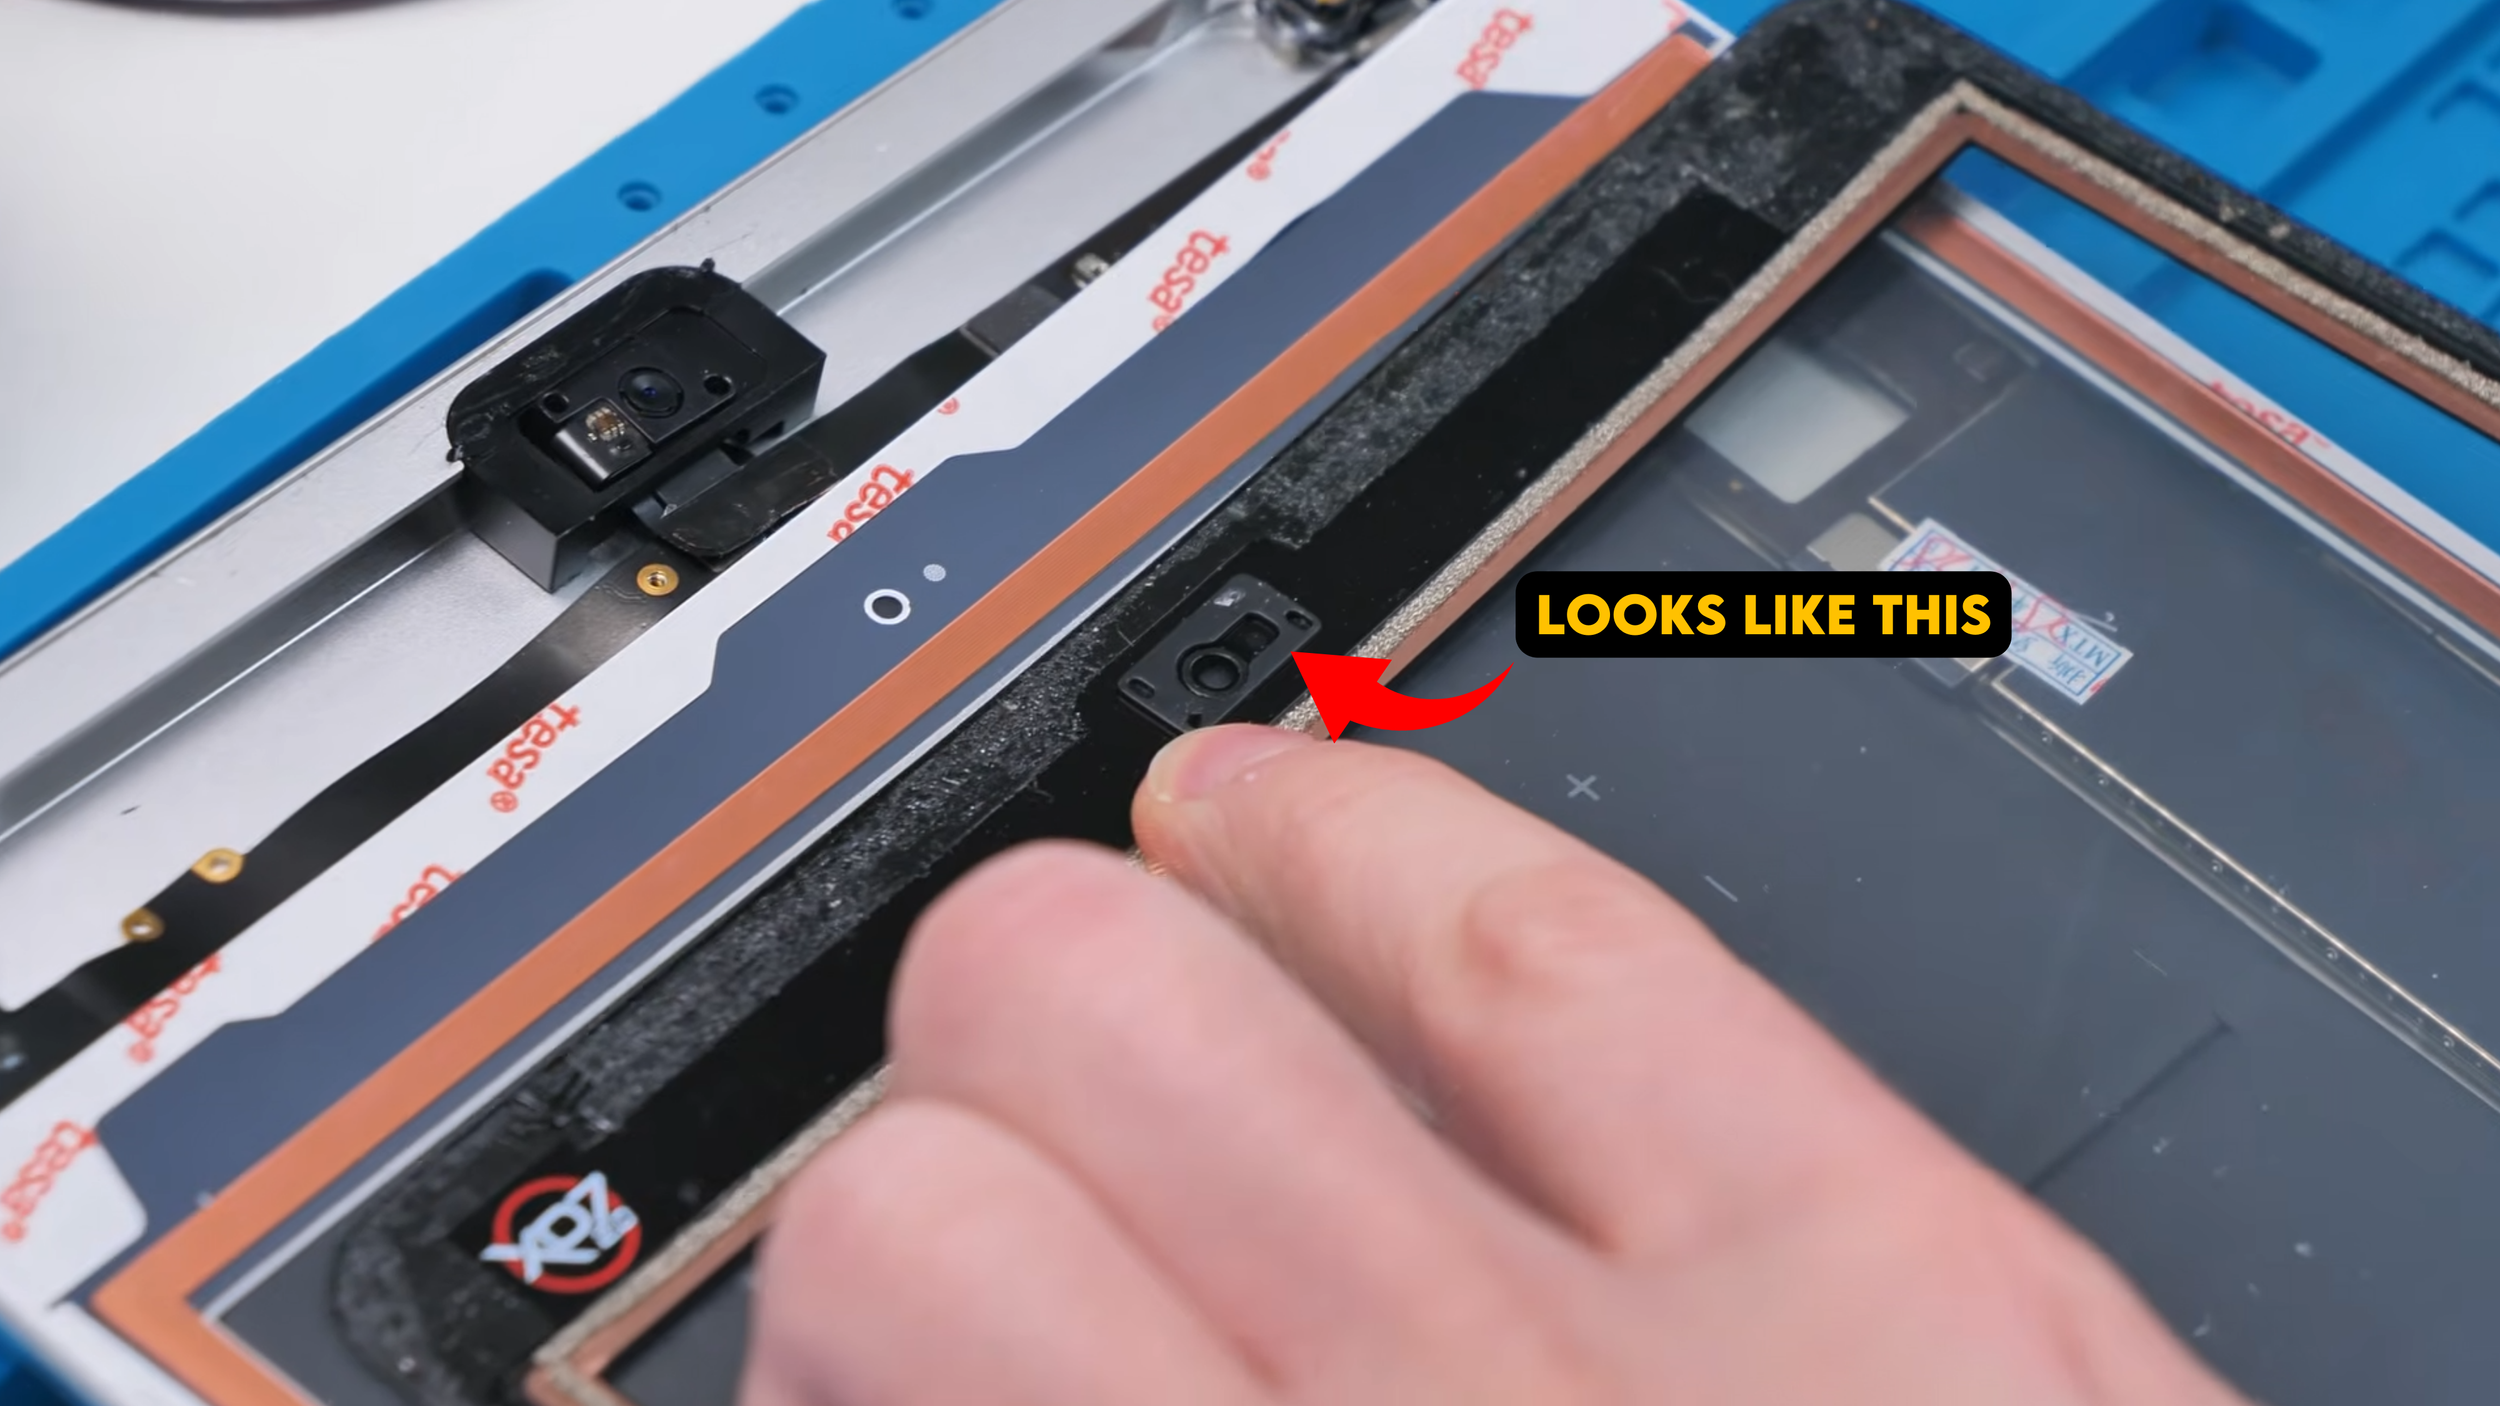
On other digitizers, there are little plastic pieces that go into those holes and keep everything tight and snug, so if the iPad shakes around, the camera stays aligned with the digitizer and that bracket wasn’t here.
So the build would work, but it’s not as mechanically secure as it should be.
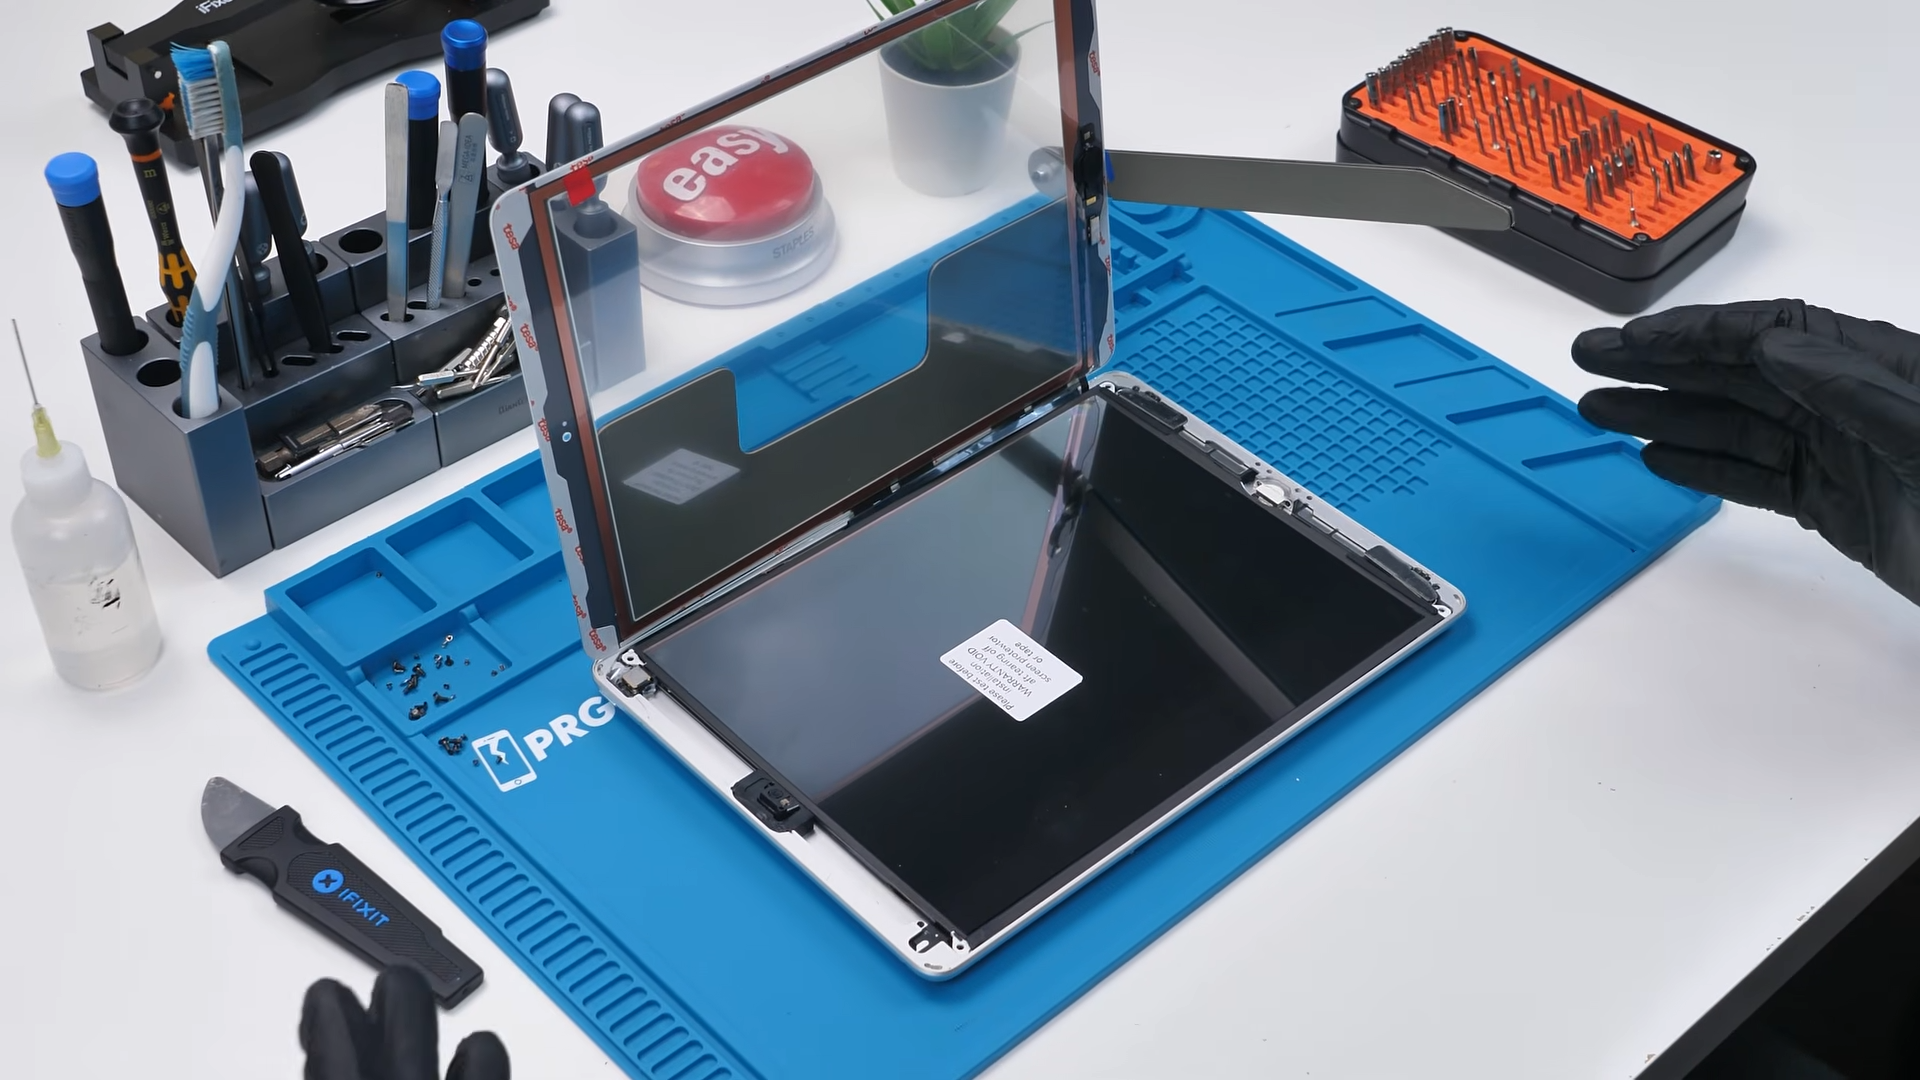
Installing the Digitizer and LCD
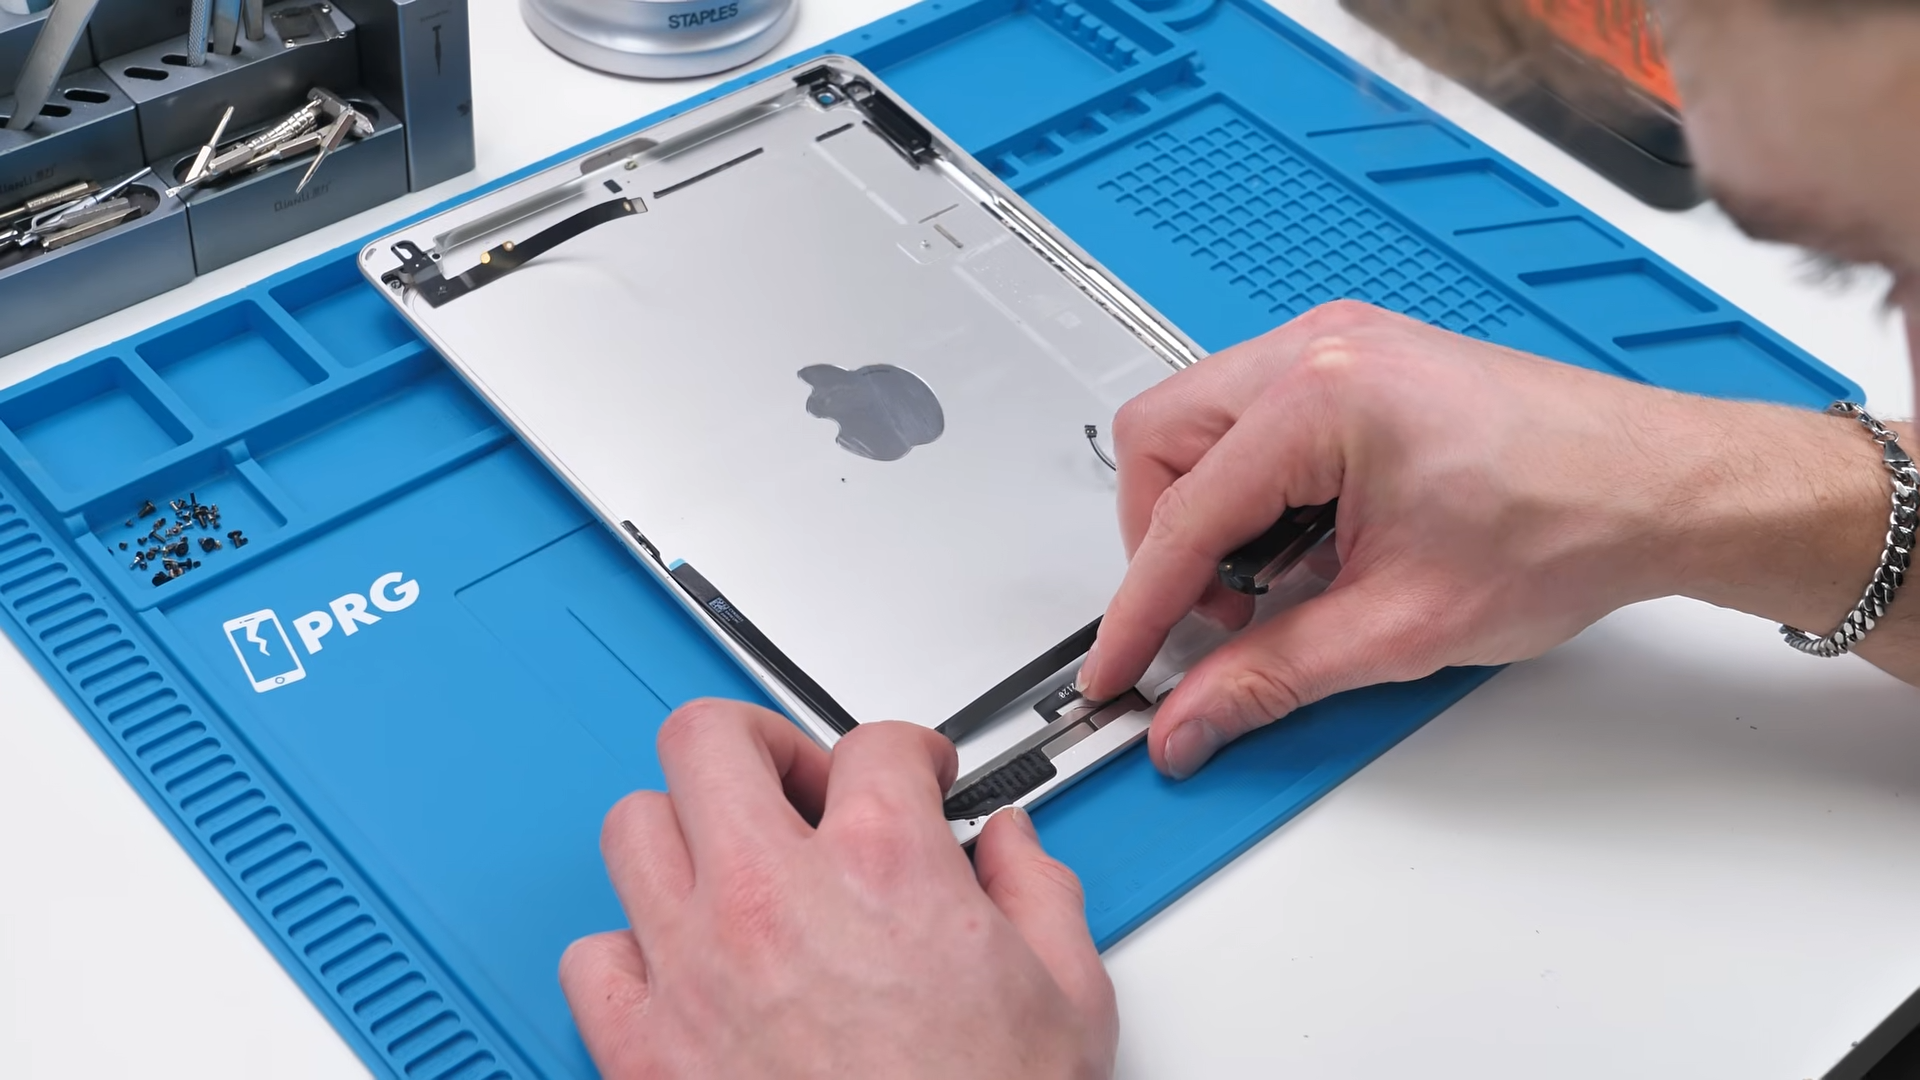
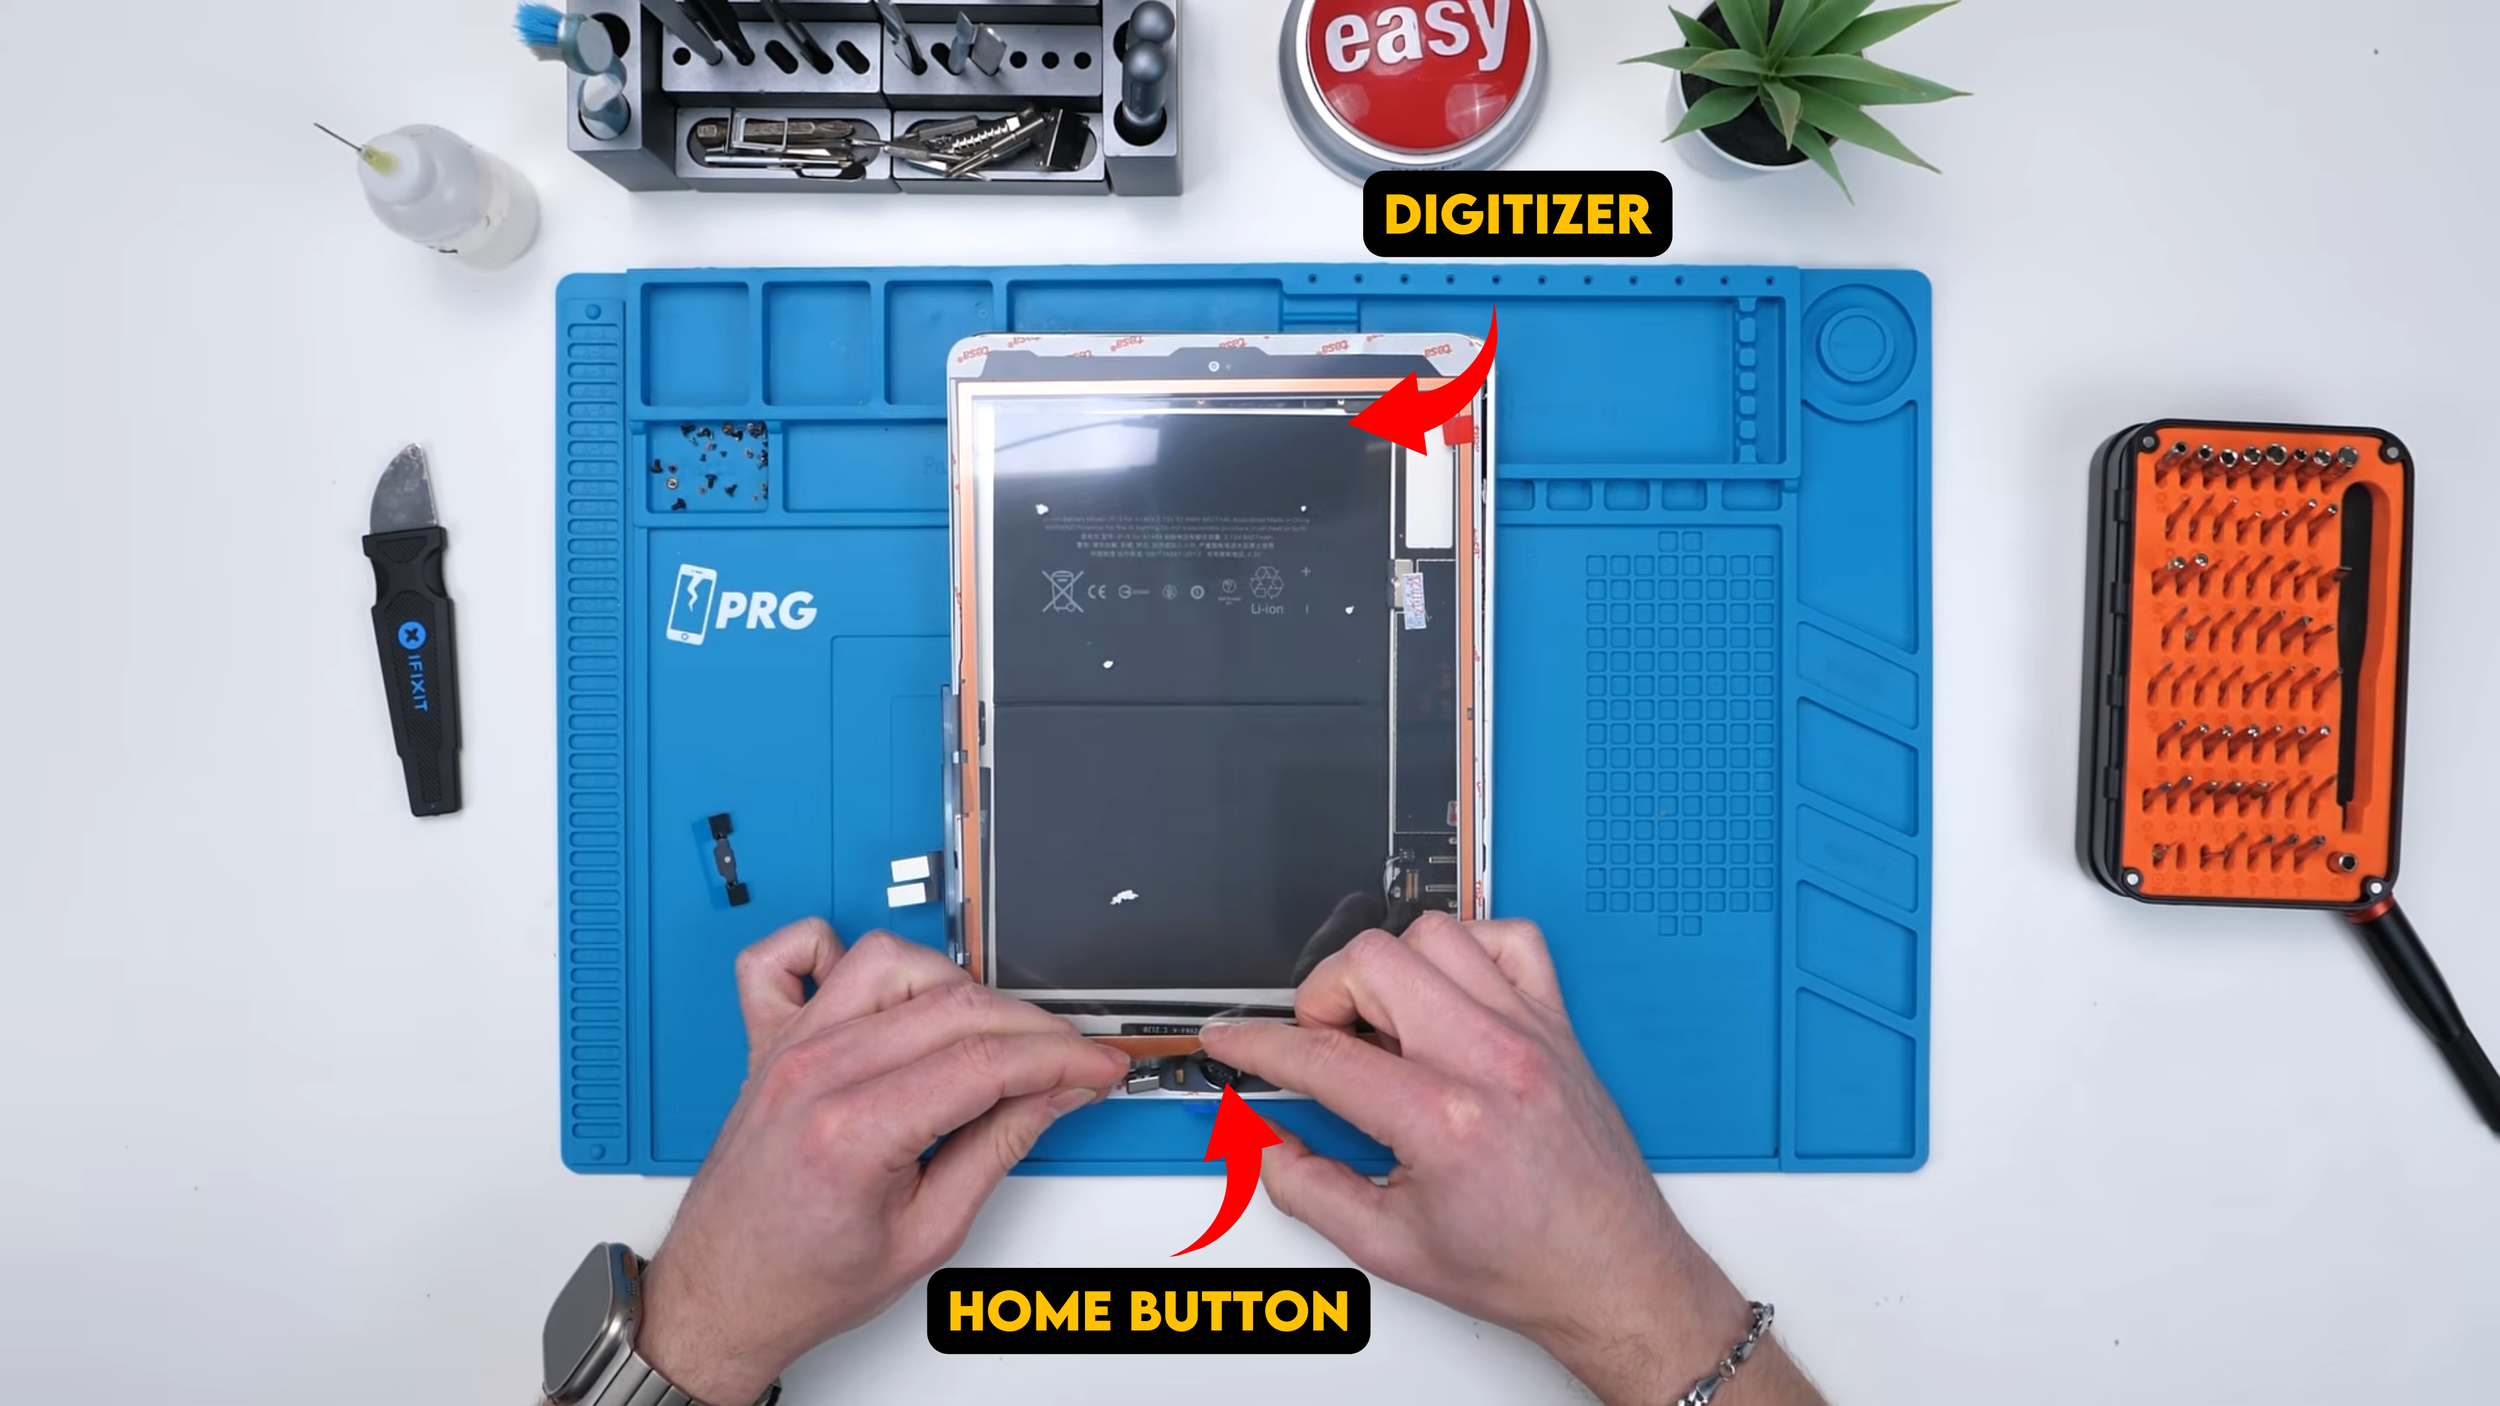
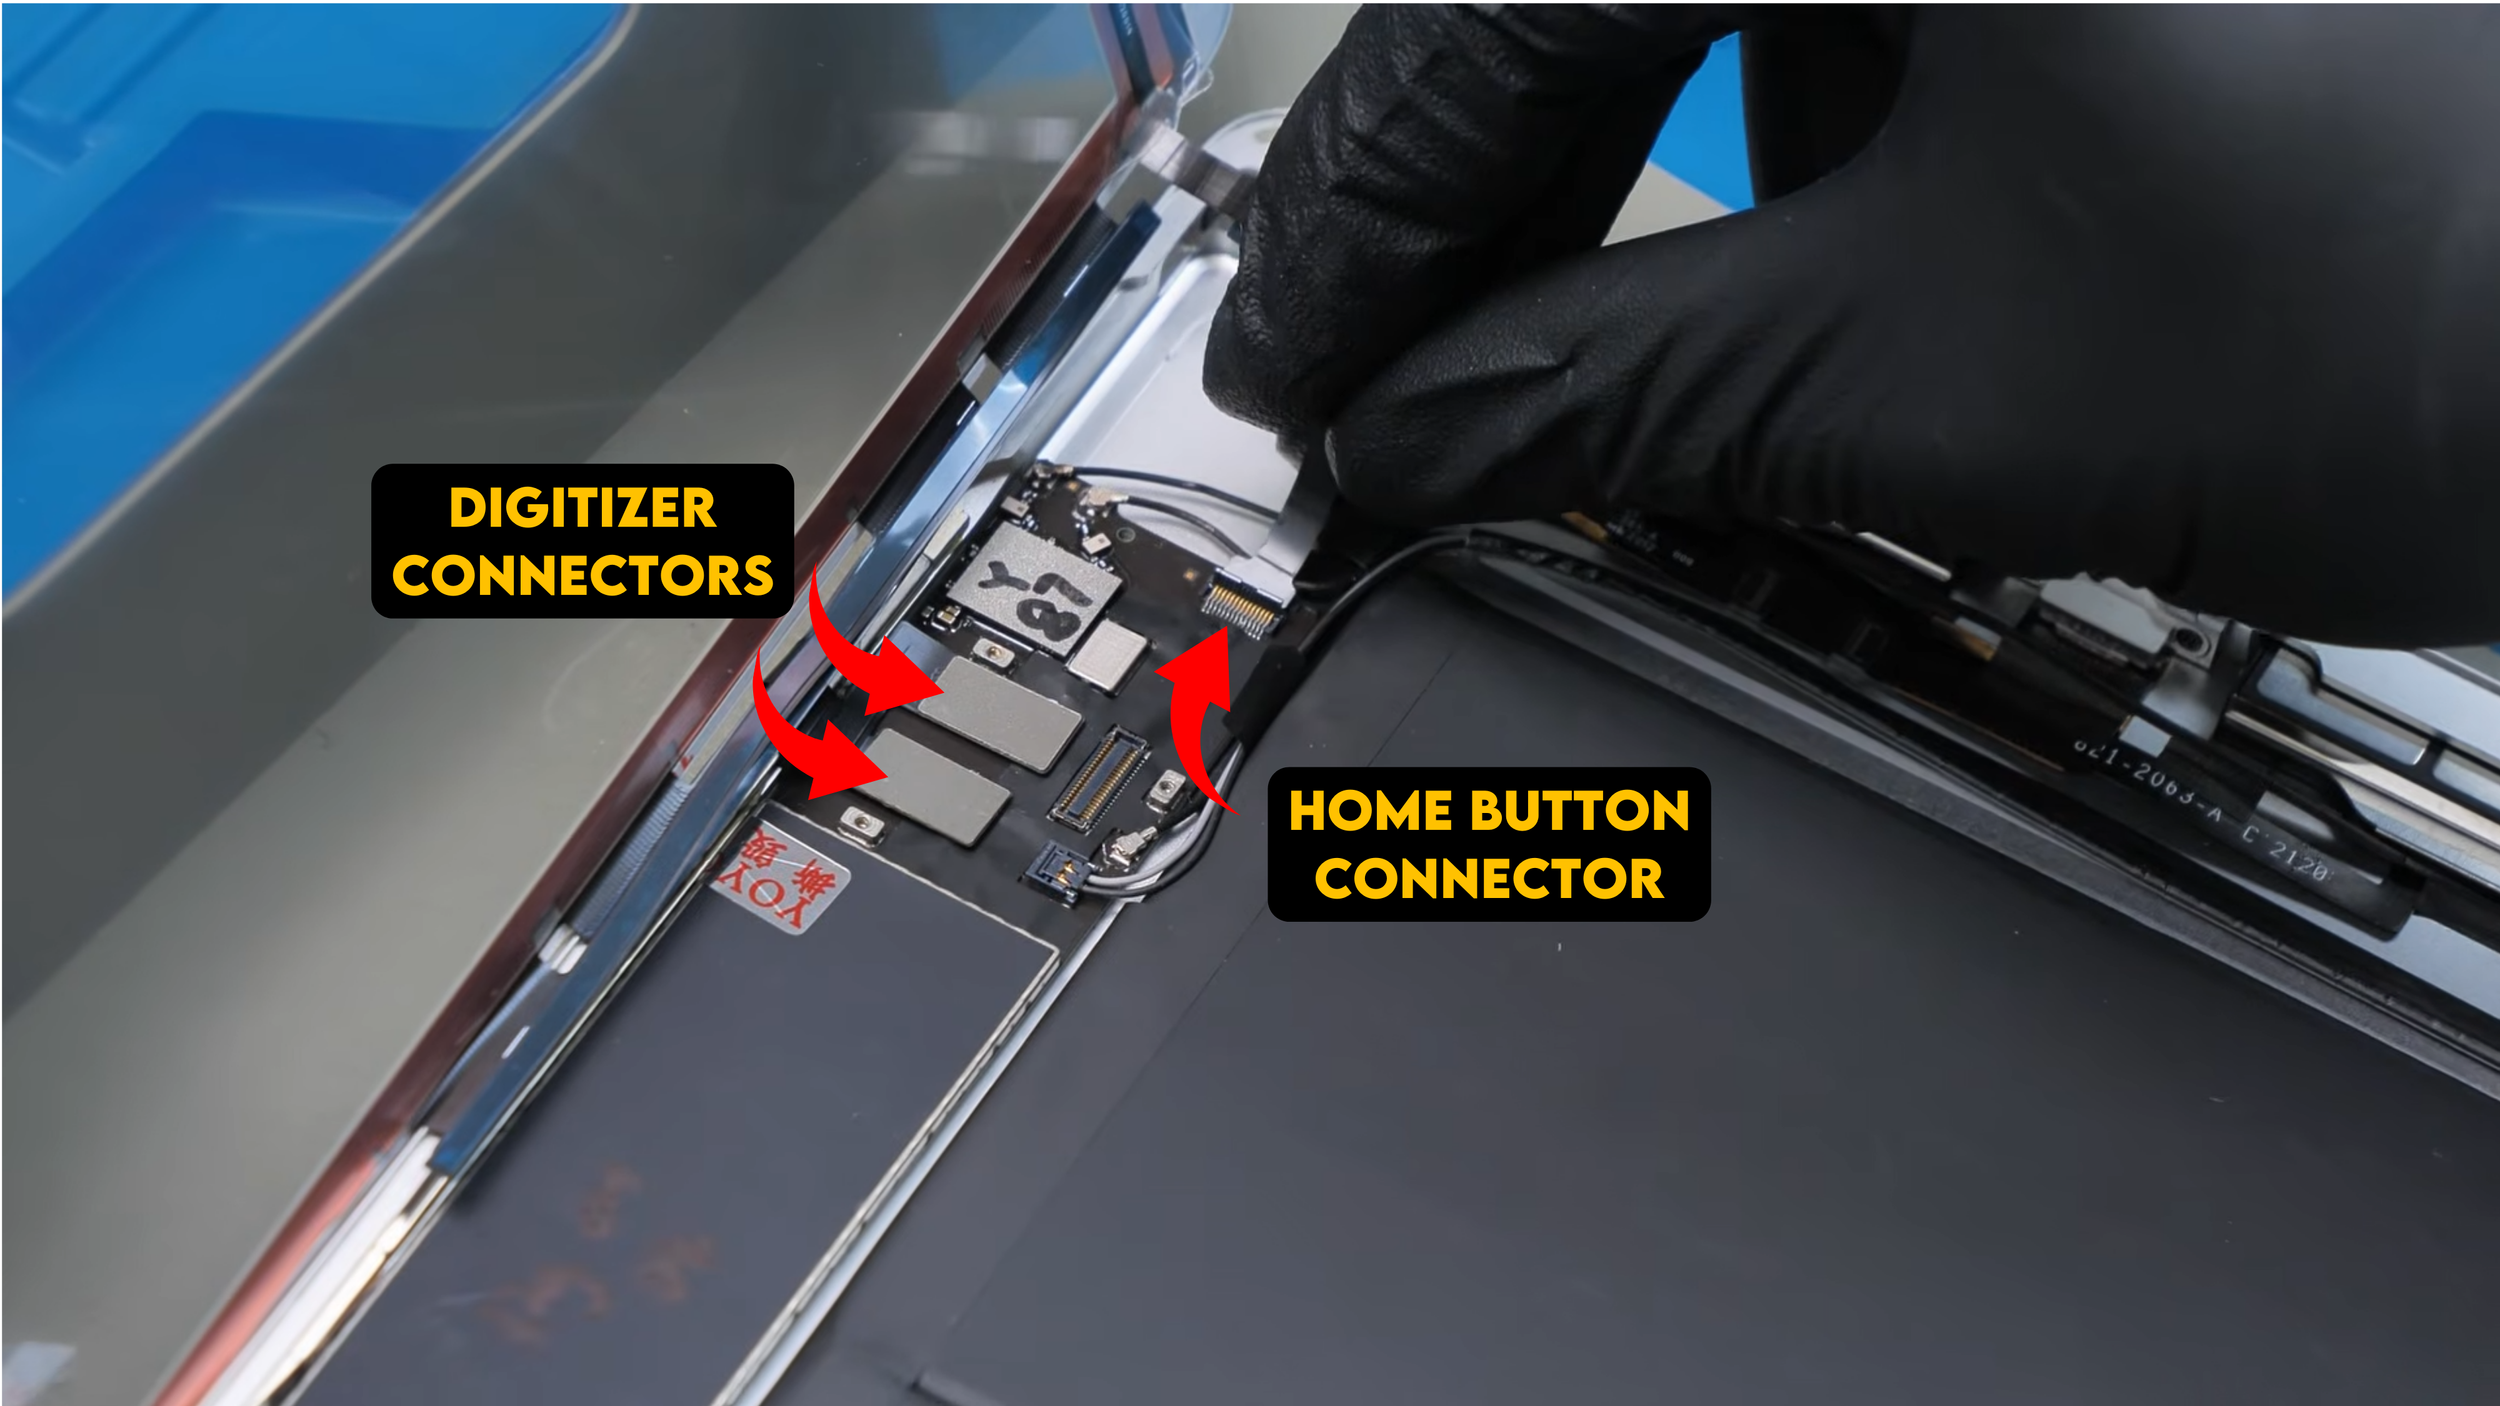
At this point I put on gloves because the next part is extremely fragile and loves to collect fingerprints. Before installing the LCD, though, the digitizer had to go in first since both components kind of work together during this stage. I carefully clicked in all of the digitizer connections, the two main connectors along with the home button connector, making sure each one seated properly before moving forward.
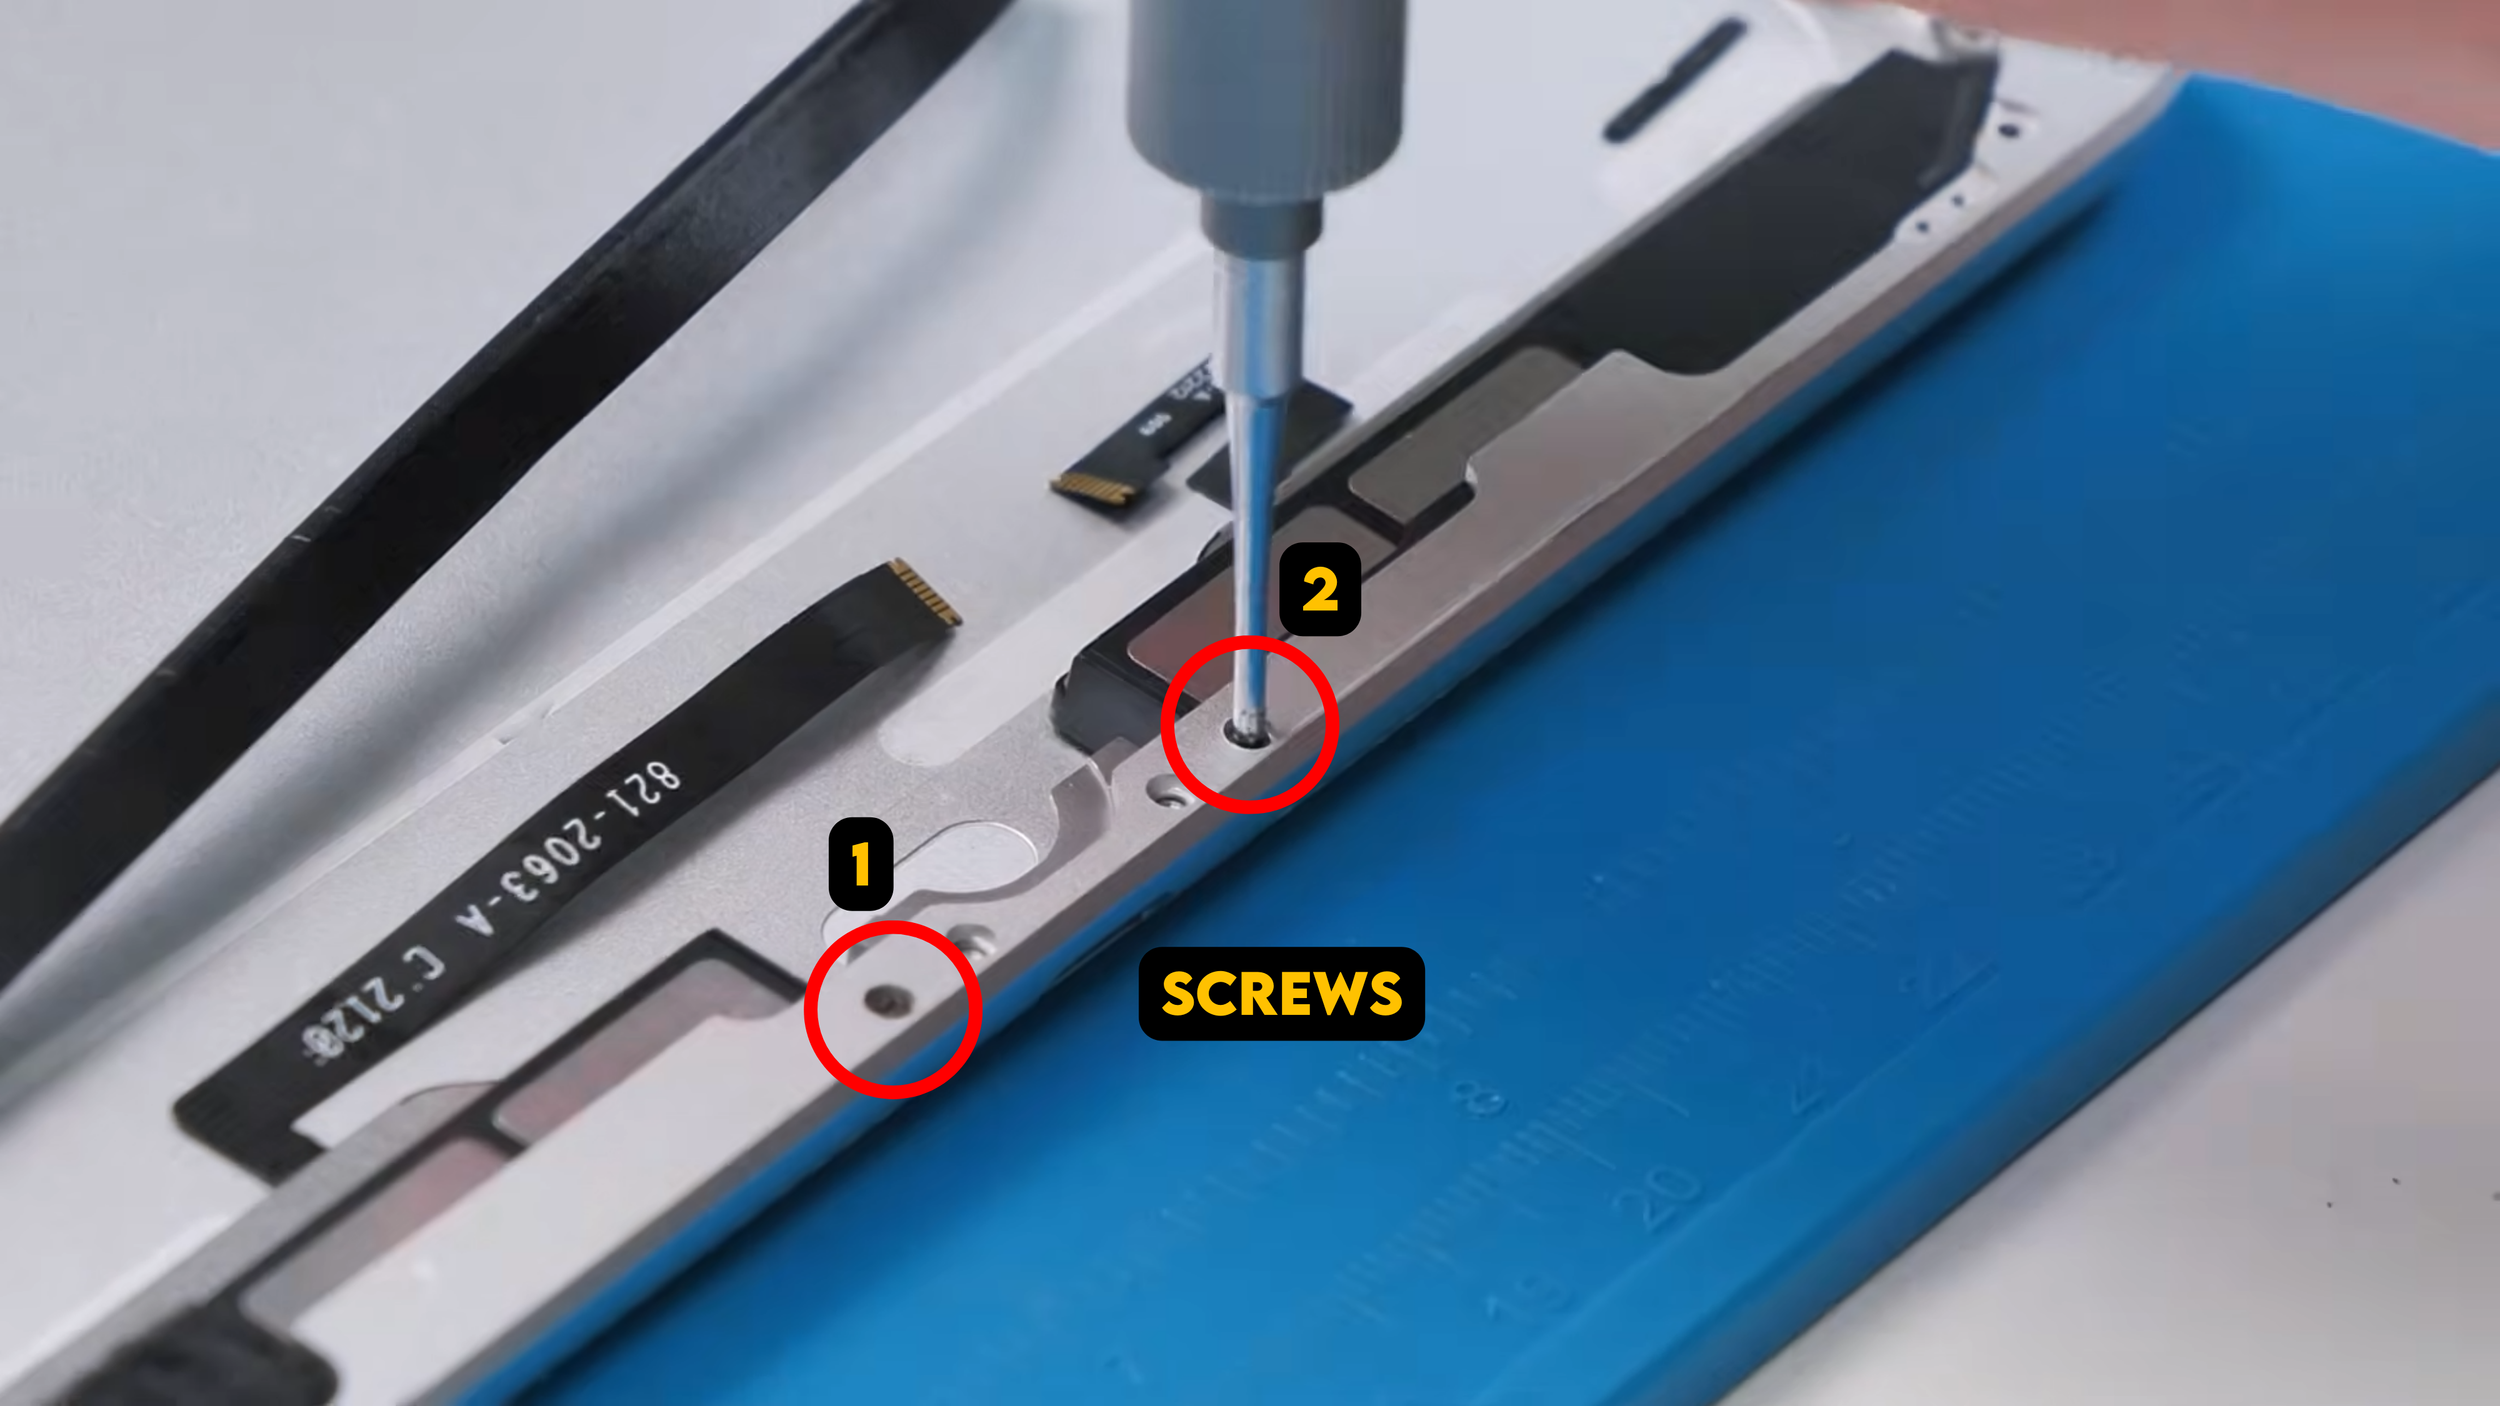
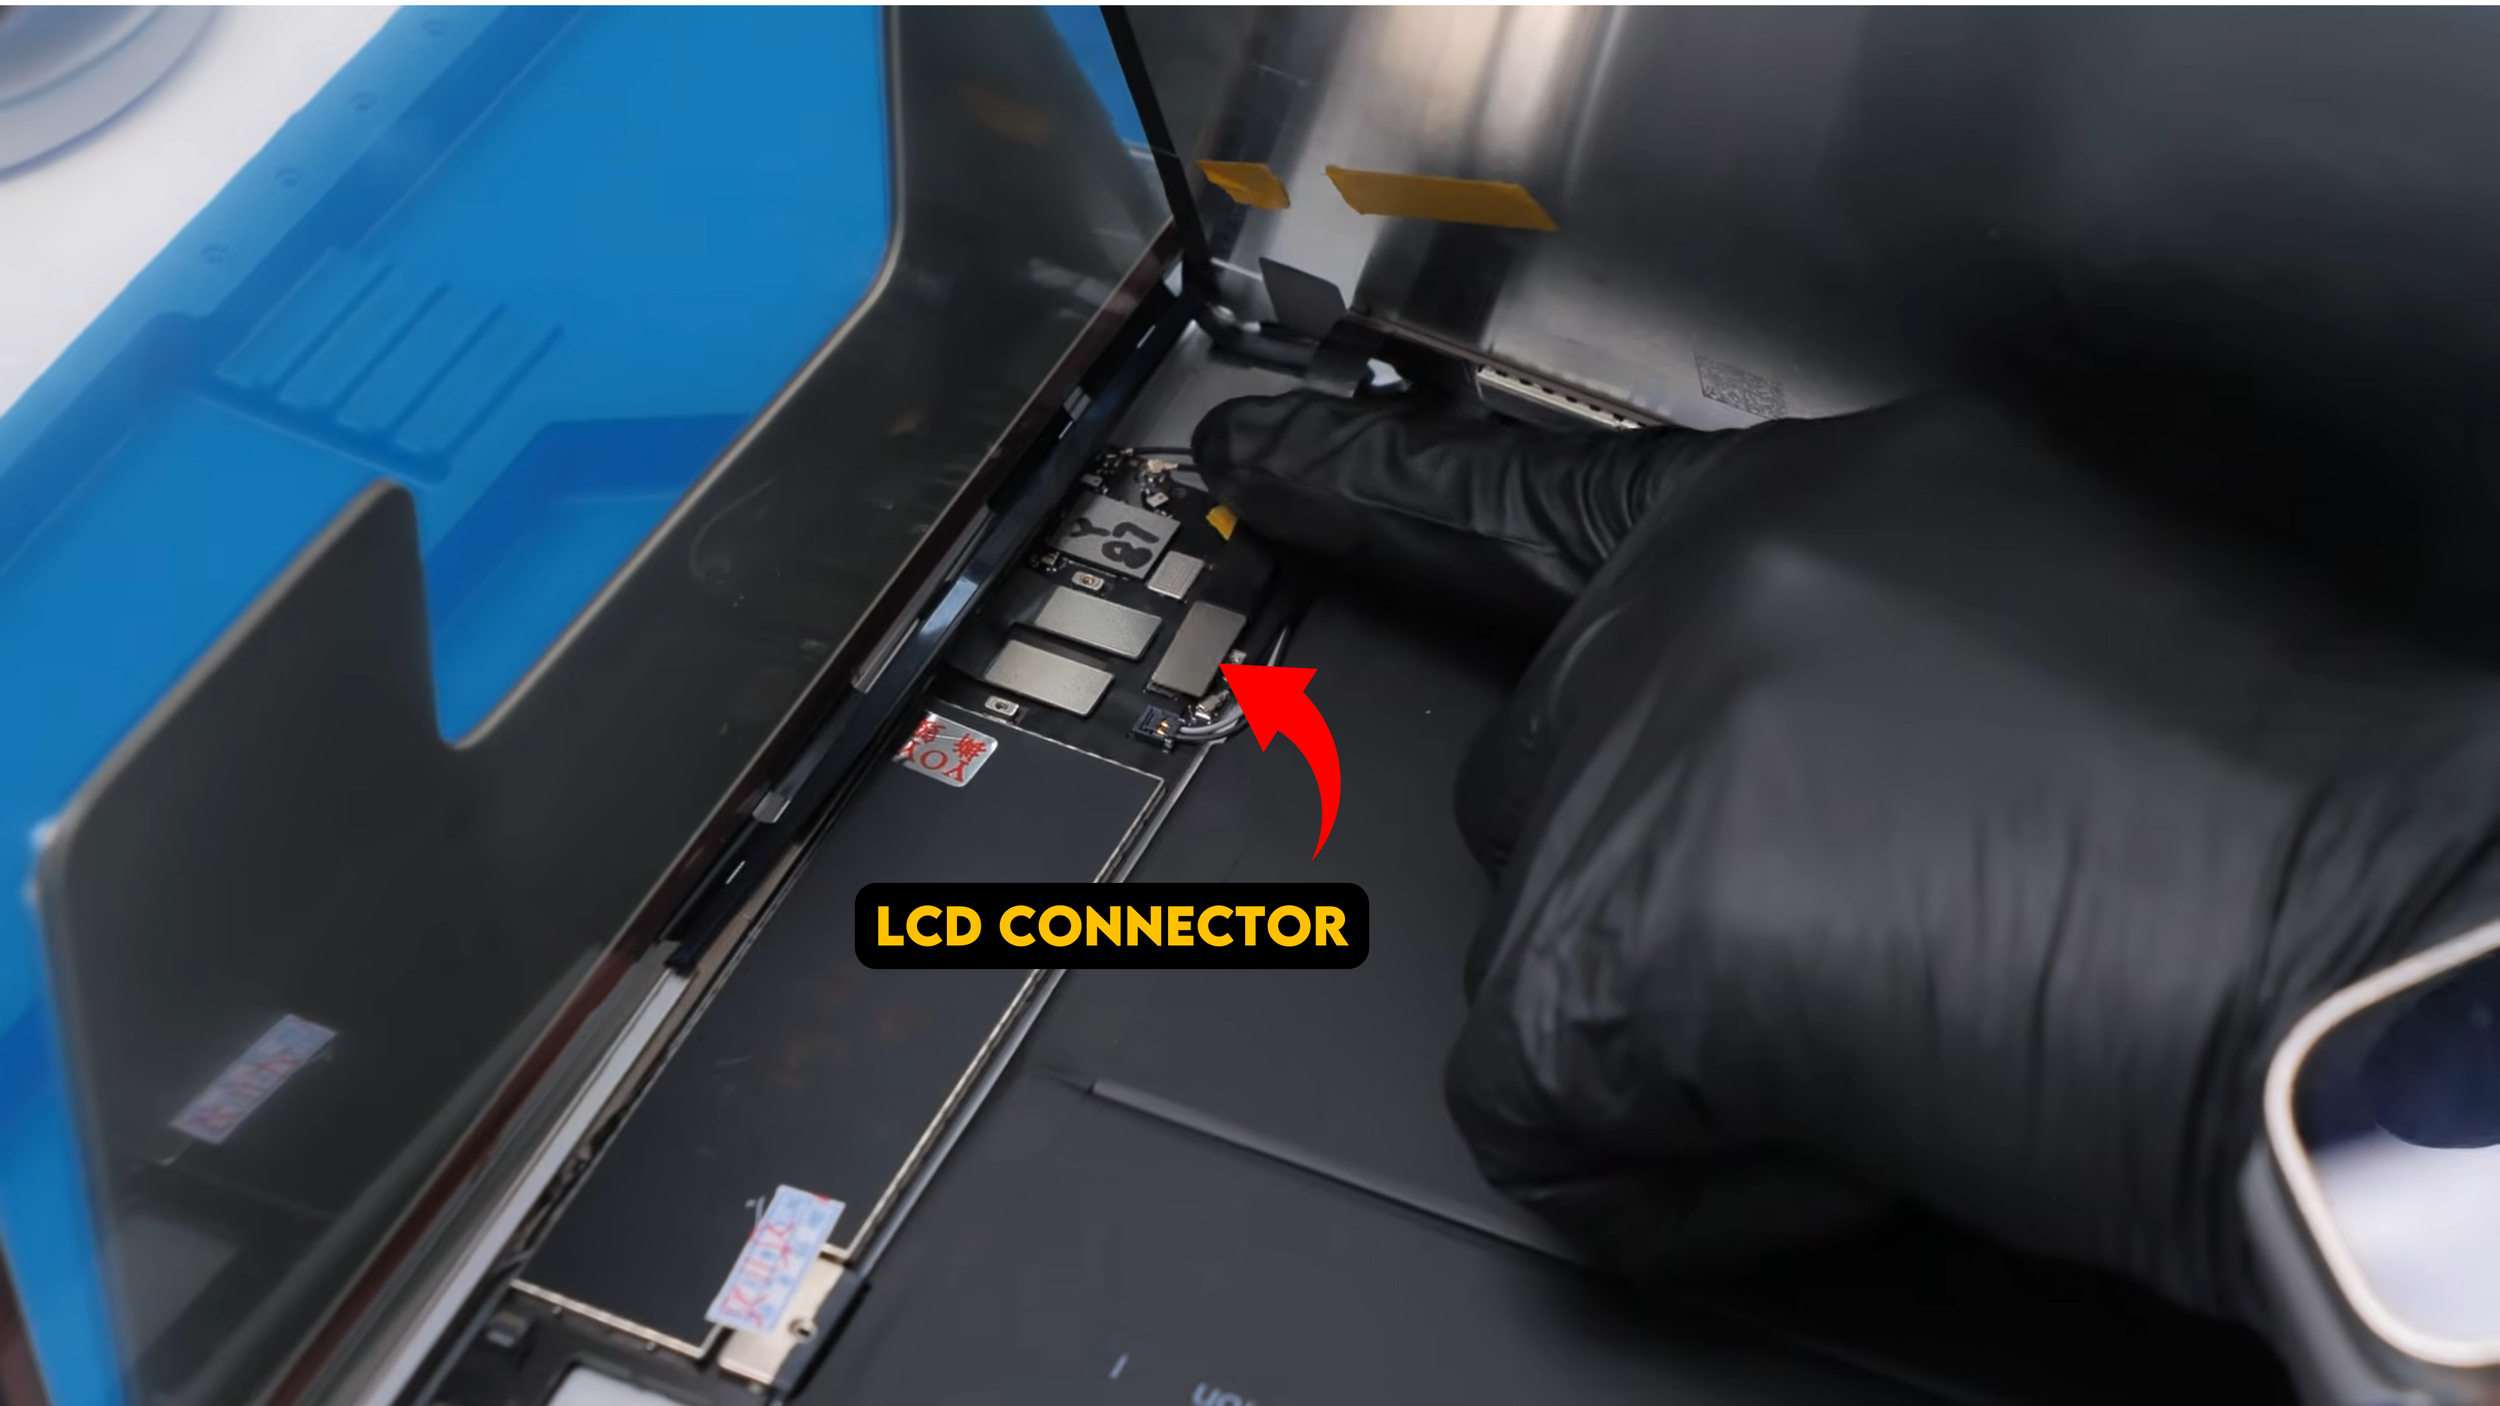
With the digitizer fully connected and in place, it was finally time for the LCD. Installing it is fairly straightforward. You position it slightly angled, lean it back into place, and press the connector in until it clicks. This particular connector felt very solid and snapped in nicely, which is always reassuring. Once connected, I laid the LCD down and noticed the mounting points in each corner where the larger screws go, the ones responsible for keeping the display stable so it does not shift or rattle inside the housing.

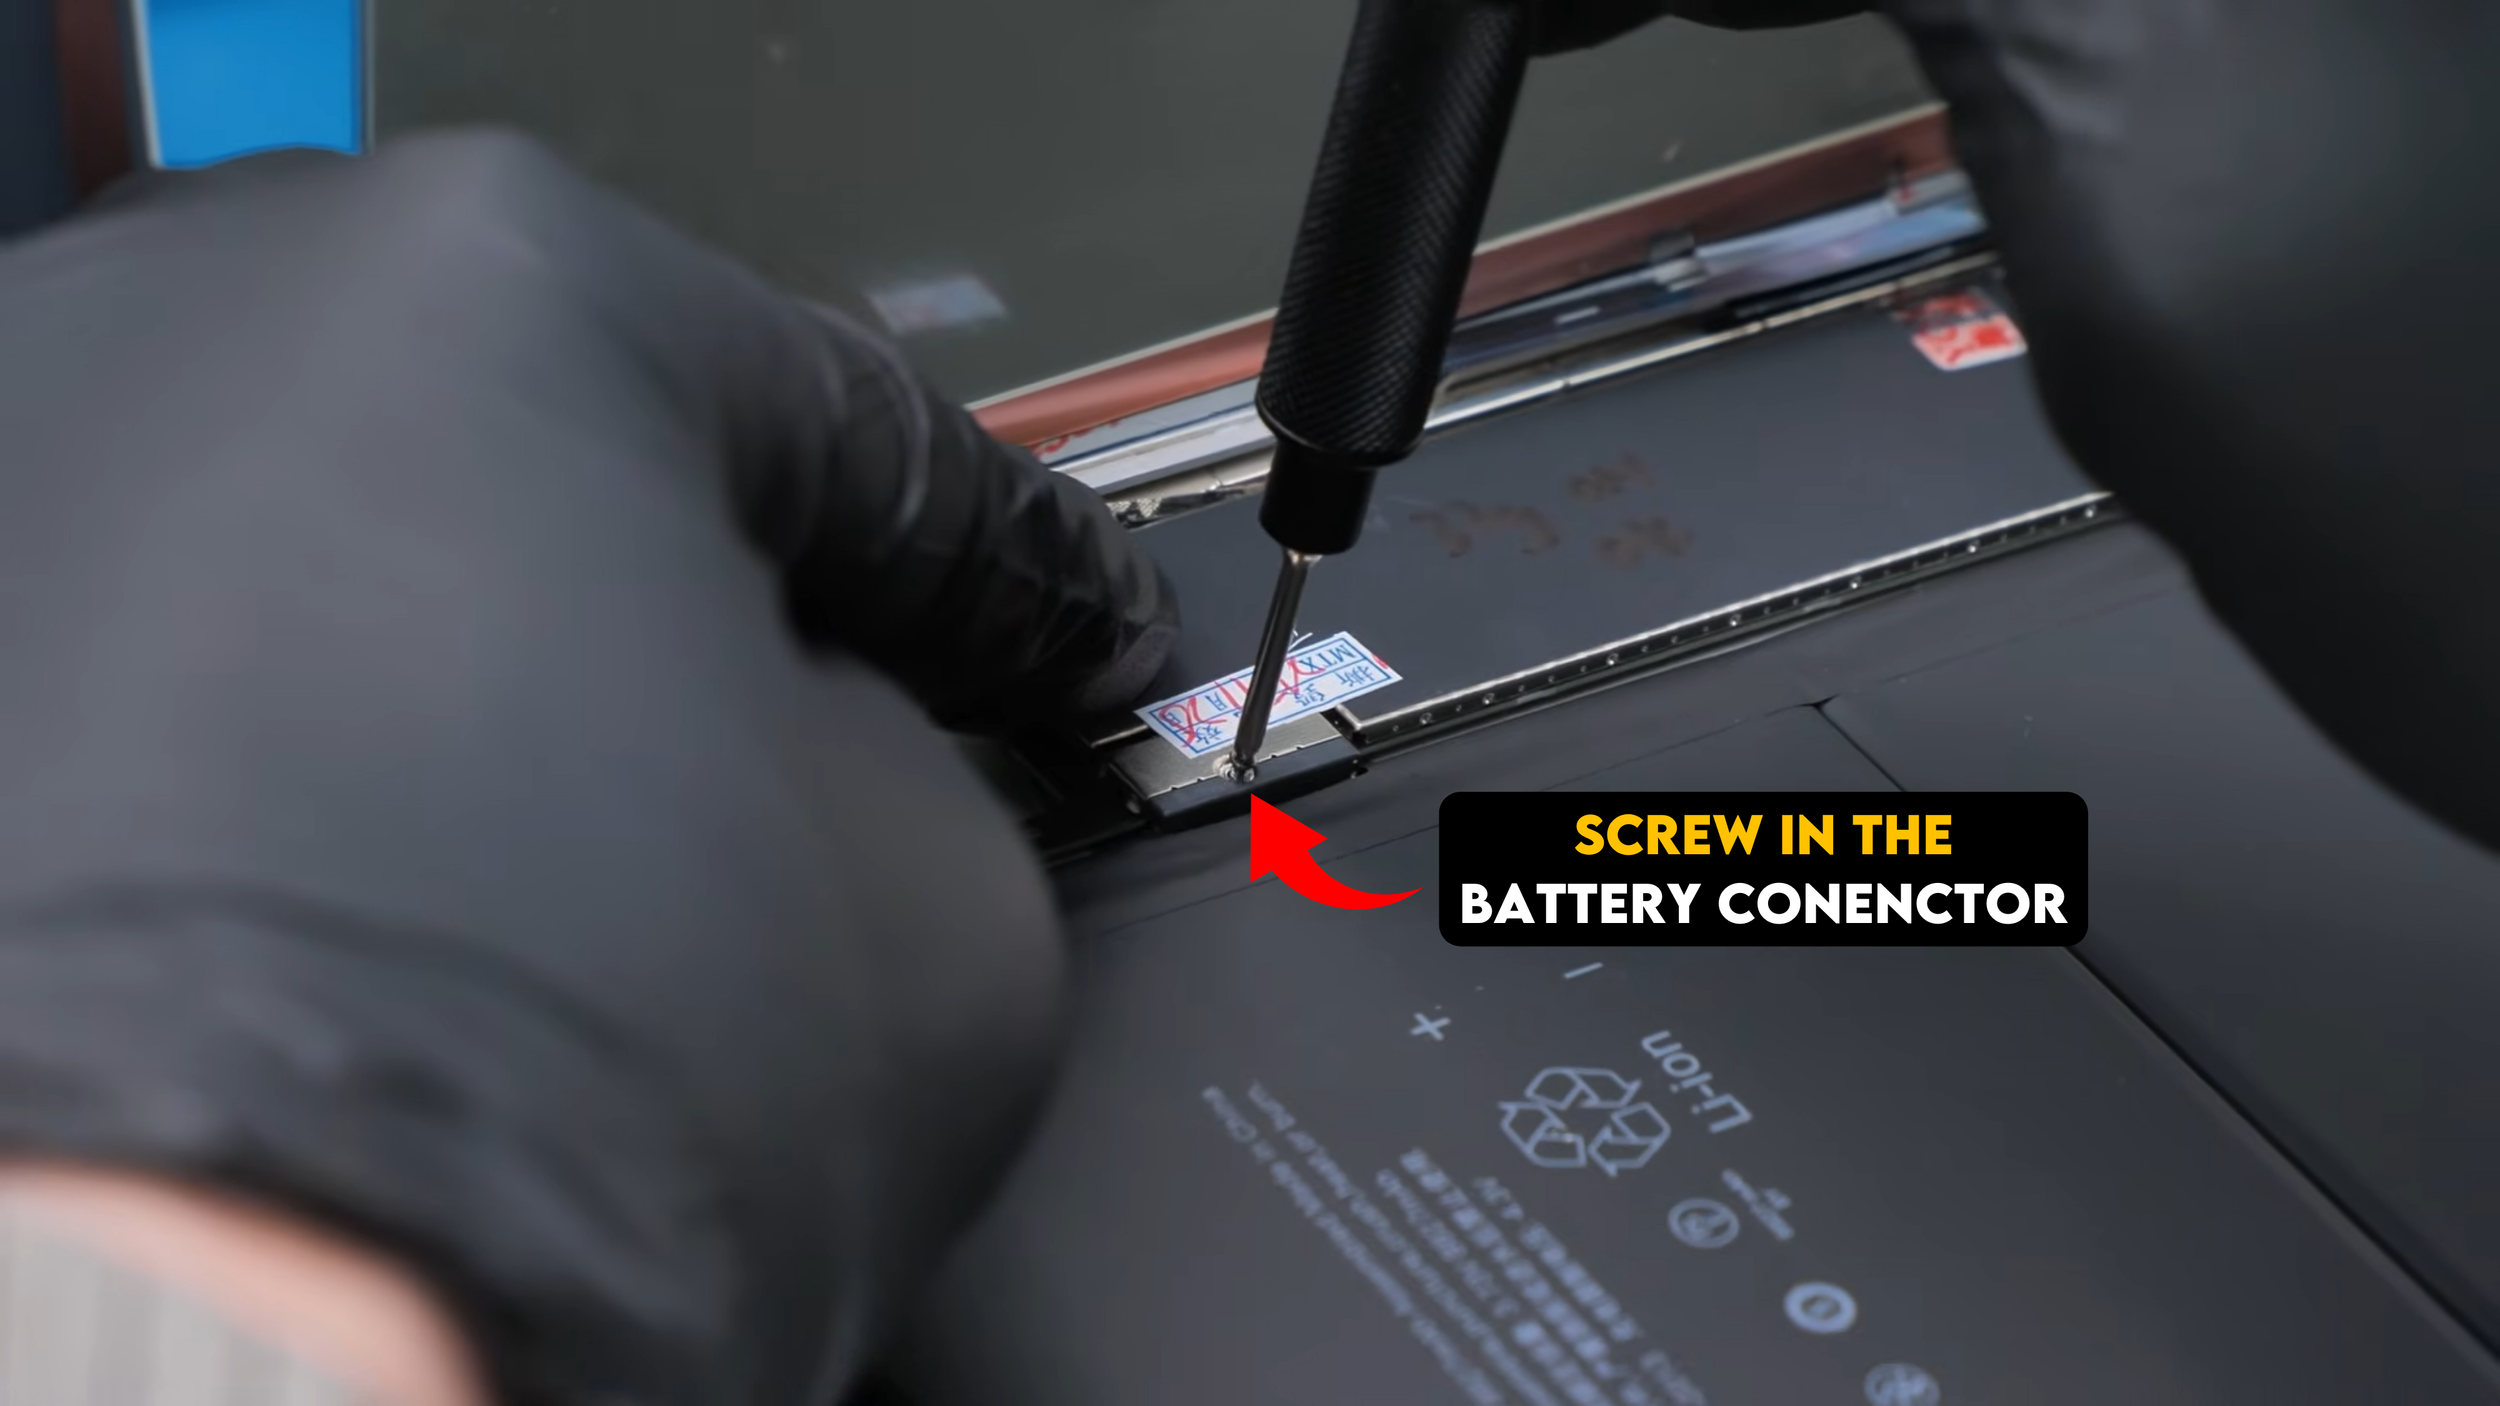
Right before securing everything, I realized I had forgotten one important detail. The battery connector still needed to be screwed down. That connection is relatively fragile on its own, and without the retaining screw, even a small drop could potentially knock it loose. After securing the battery connector properly, I flipped the LCD back down into place, and now we were finally ready for the last few steps of the build.
The Ballsy Move
Normally at this stage, I would test everything before sealing the iPad up, just to make sure there are no surprises. But for some reason I decided to take the risky route this time.
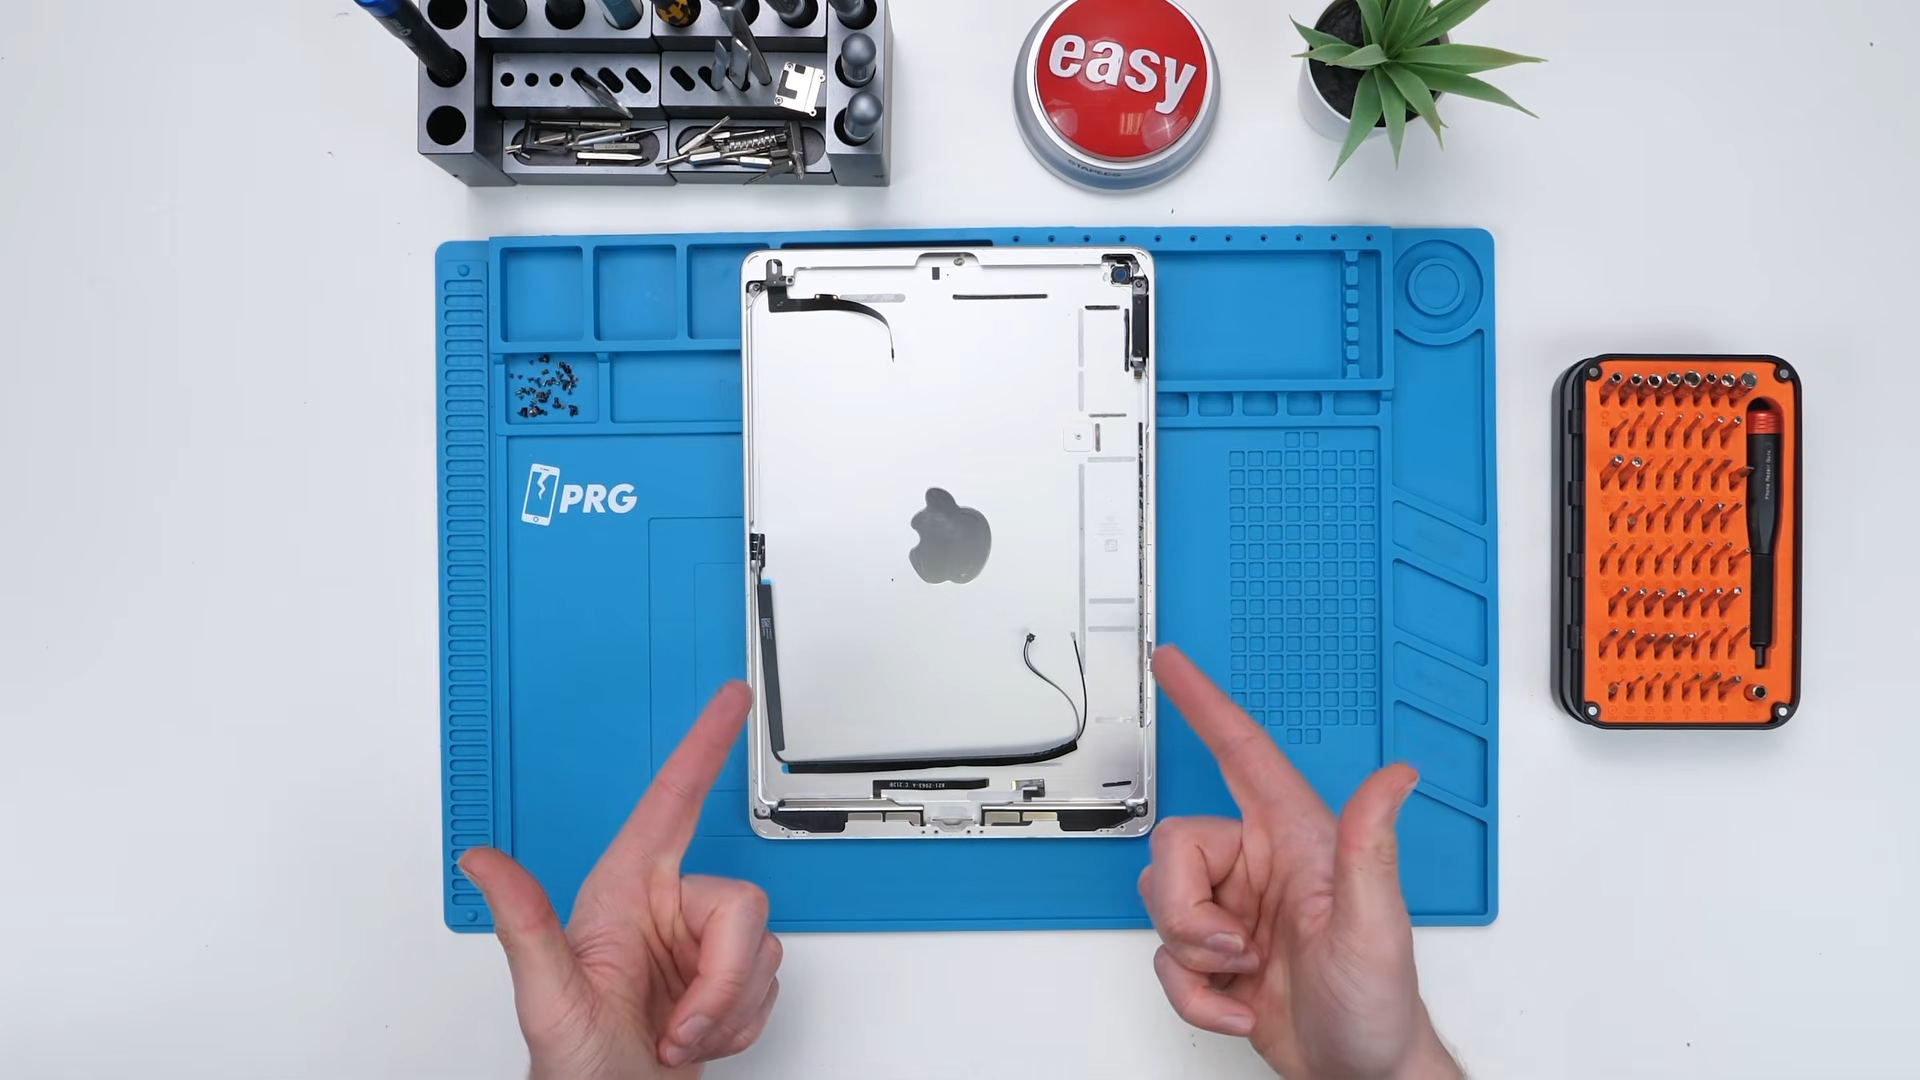
Instead of powering it on, I went ahead and installed the remaining screws, peeled off all the adhesive covers, pressed everything down properly, and fully sealed the device because I was confident that I had installed every component correctly.
At that point, there was no turning back. The AliExpress iPad is officially built, sitting there fully assembled, and I still had no idea if it actually worked.
I genuinely couldn’t believe I had committed to sealing it without a test boot, but the only thing left to do now was find out whether all that confidence was justified.
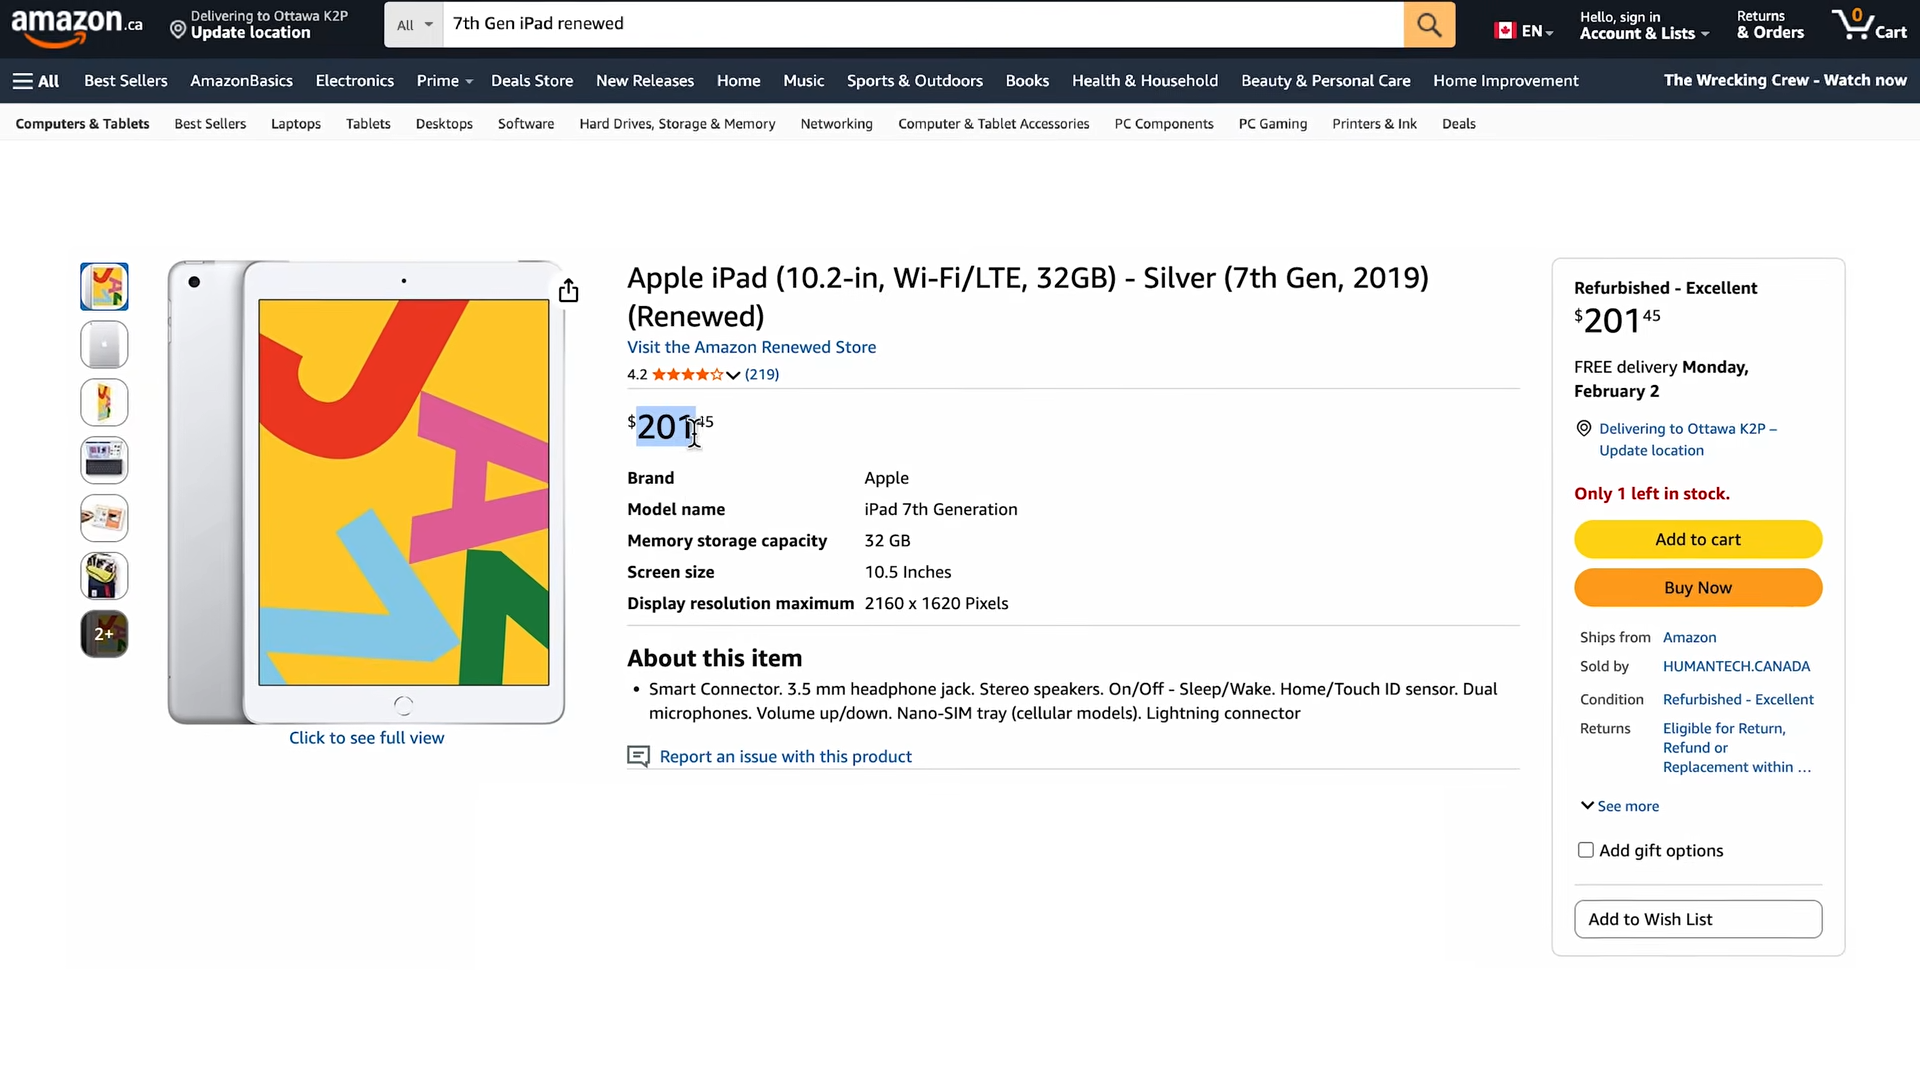
Cost Breakdown vs Refurbished iPad
For reference, a refurbished iPad 7th Generation goes for around $200 Canadian right now, give or take depending on condition and seller. So we added up the cost of the parts.
There were three parts that cost more than everything else, which makes sense.
Battery: $31 Canadian
LCD: $80 Canadian
Motherboard: $93 Canadian
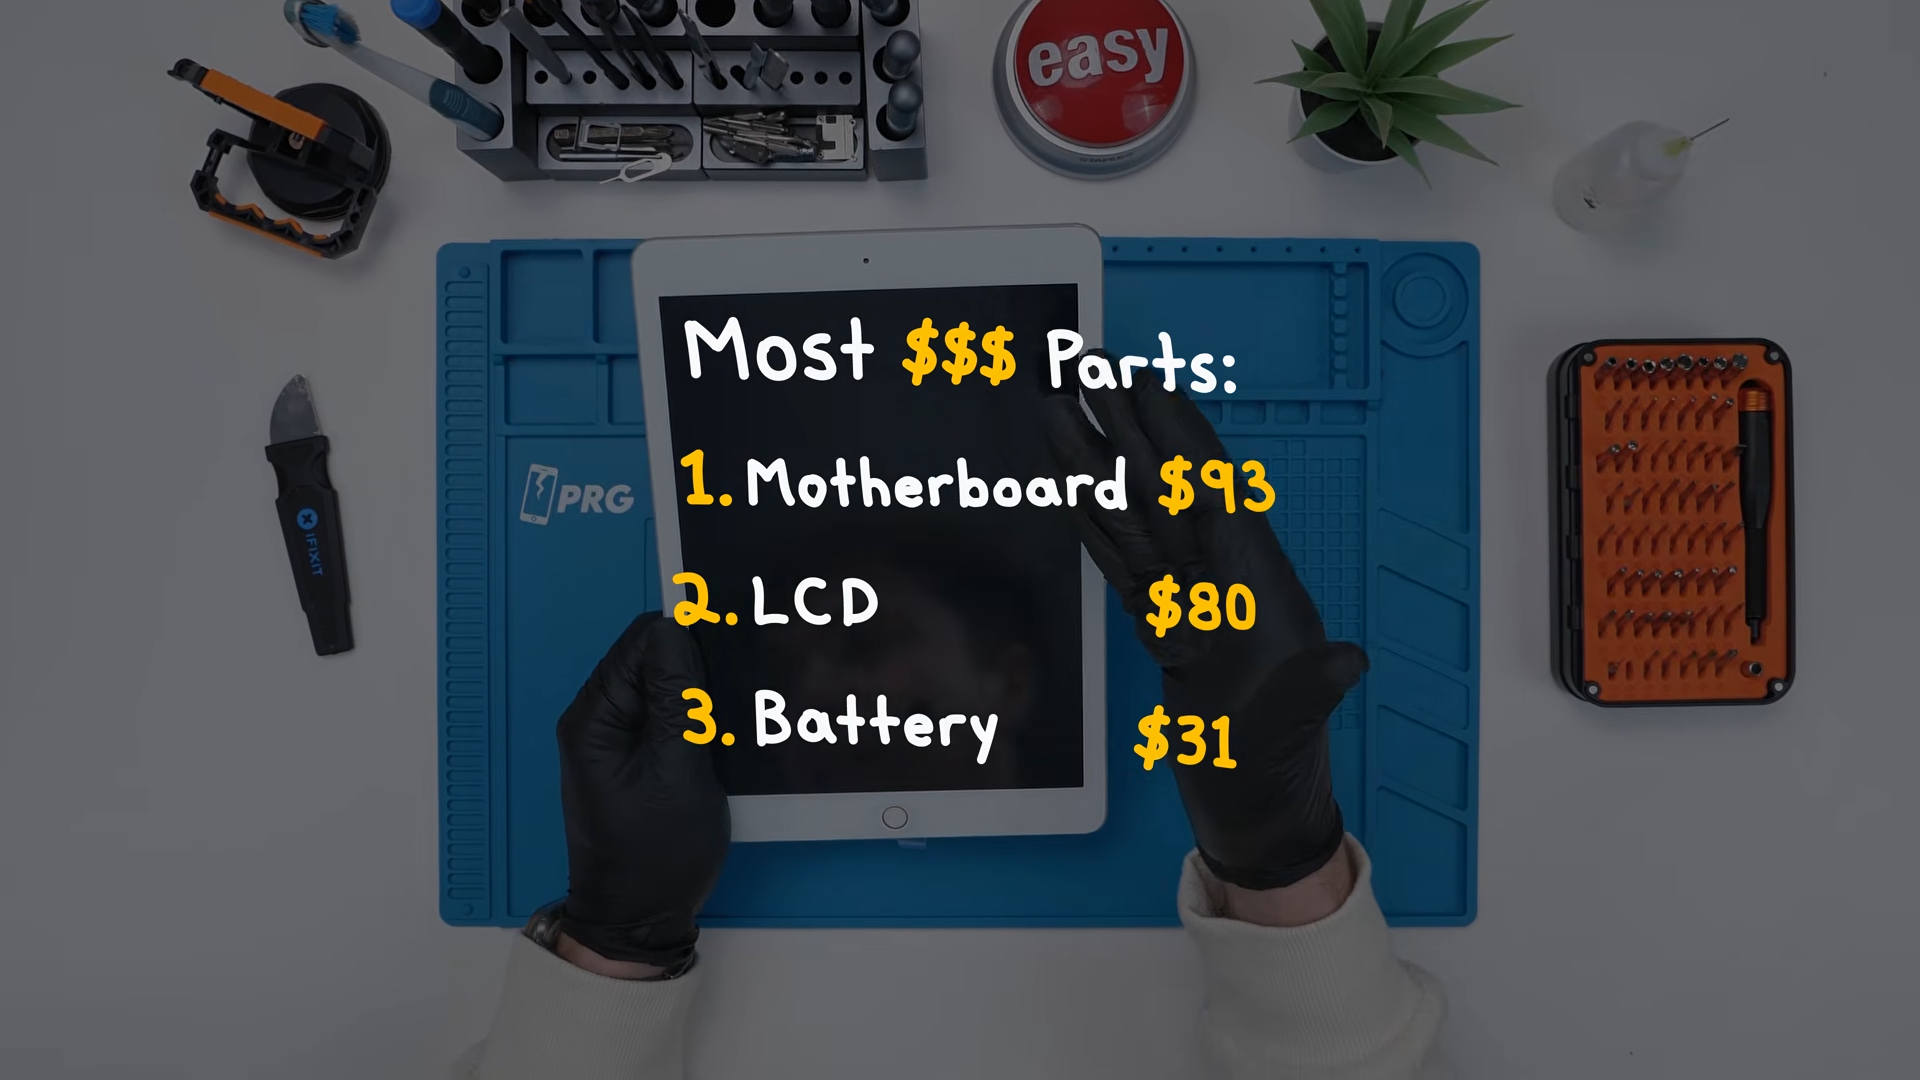
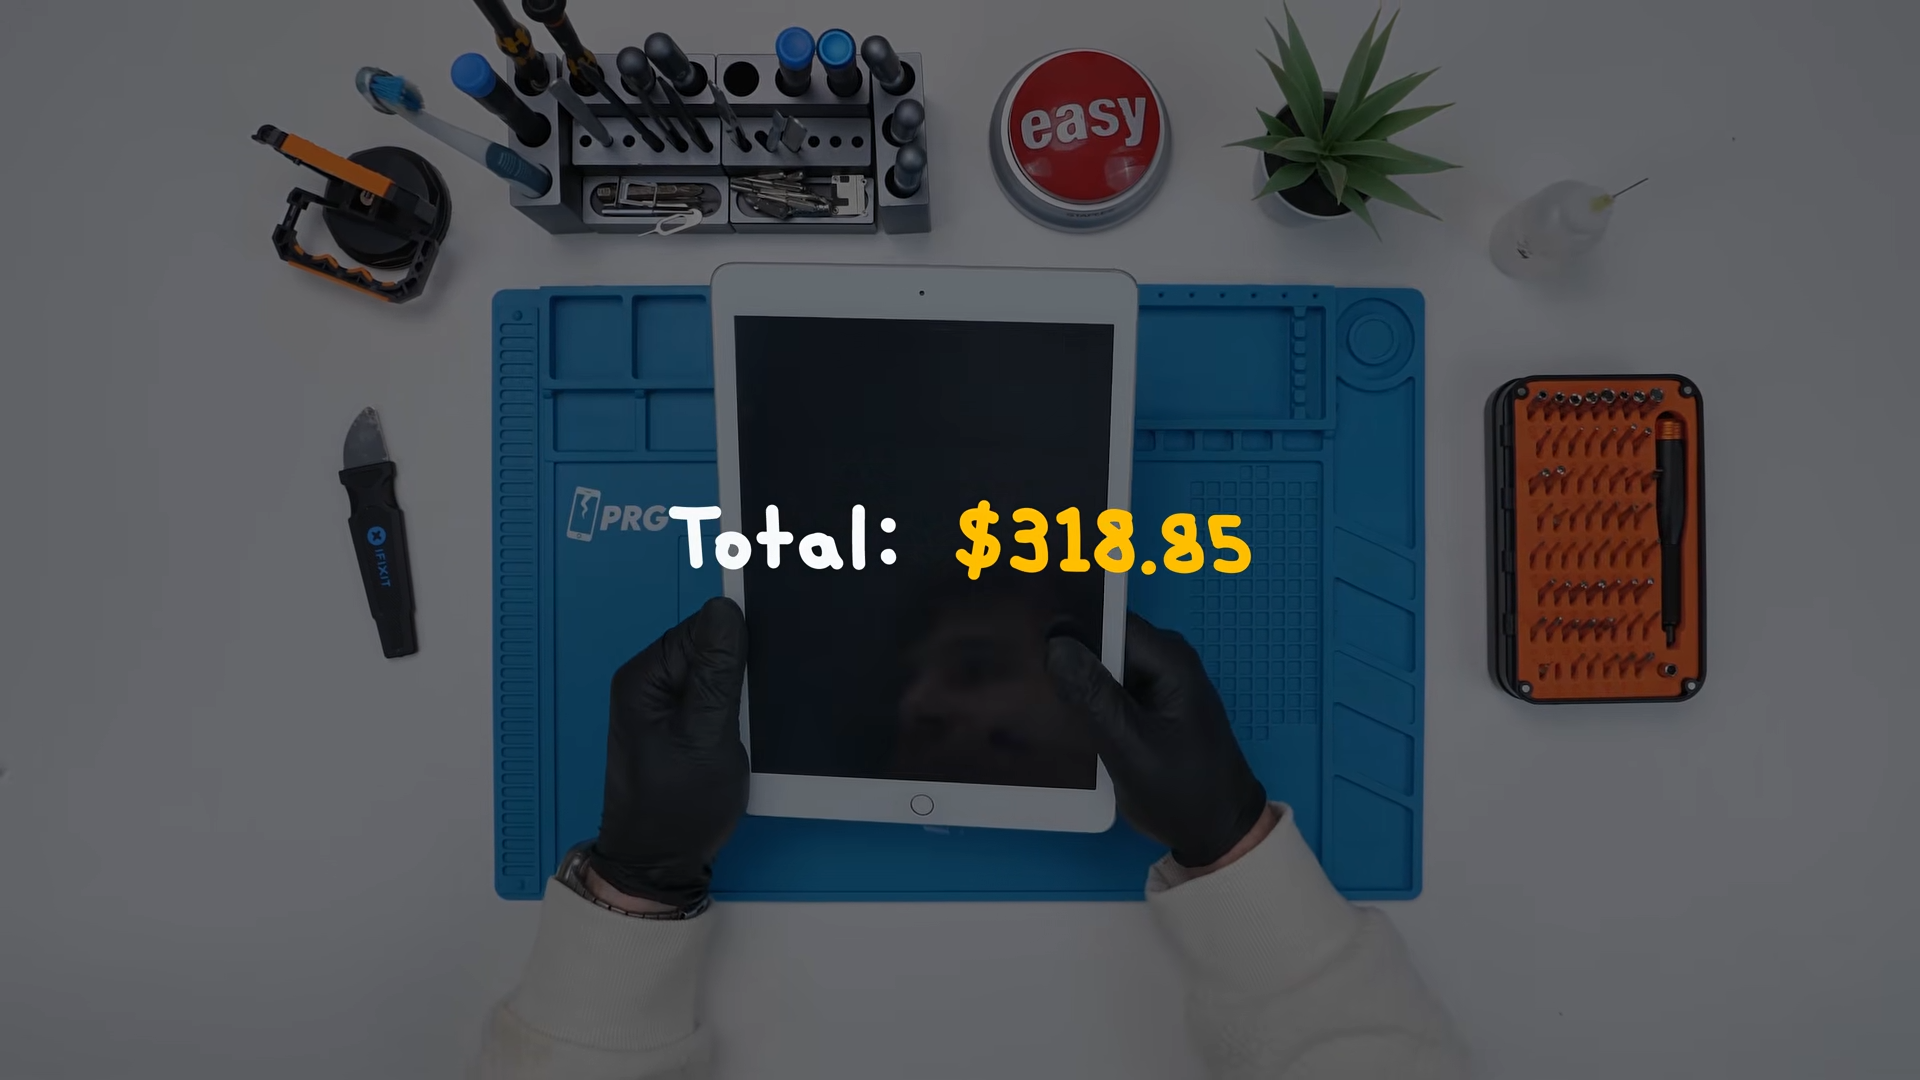
Just those three parts alone put the build over $200 already, which was disappointing. But the bigger question was still the fun one.
It’s usually cheaper to build a phone from AliExpress, but the less common the device is, the more expensive and harder the parts are to find. That’s exactly what happened with this iPad and now it was time for the moment of truth.
Power On and Full Function Test
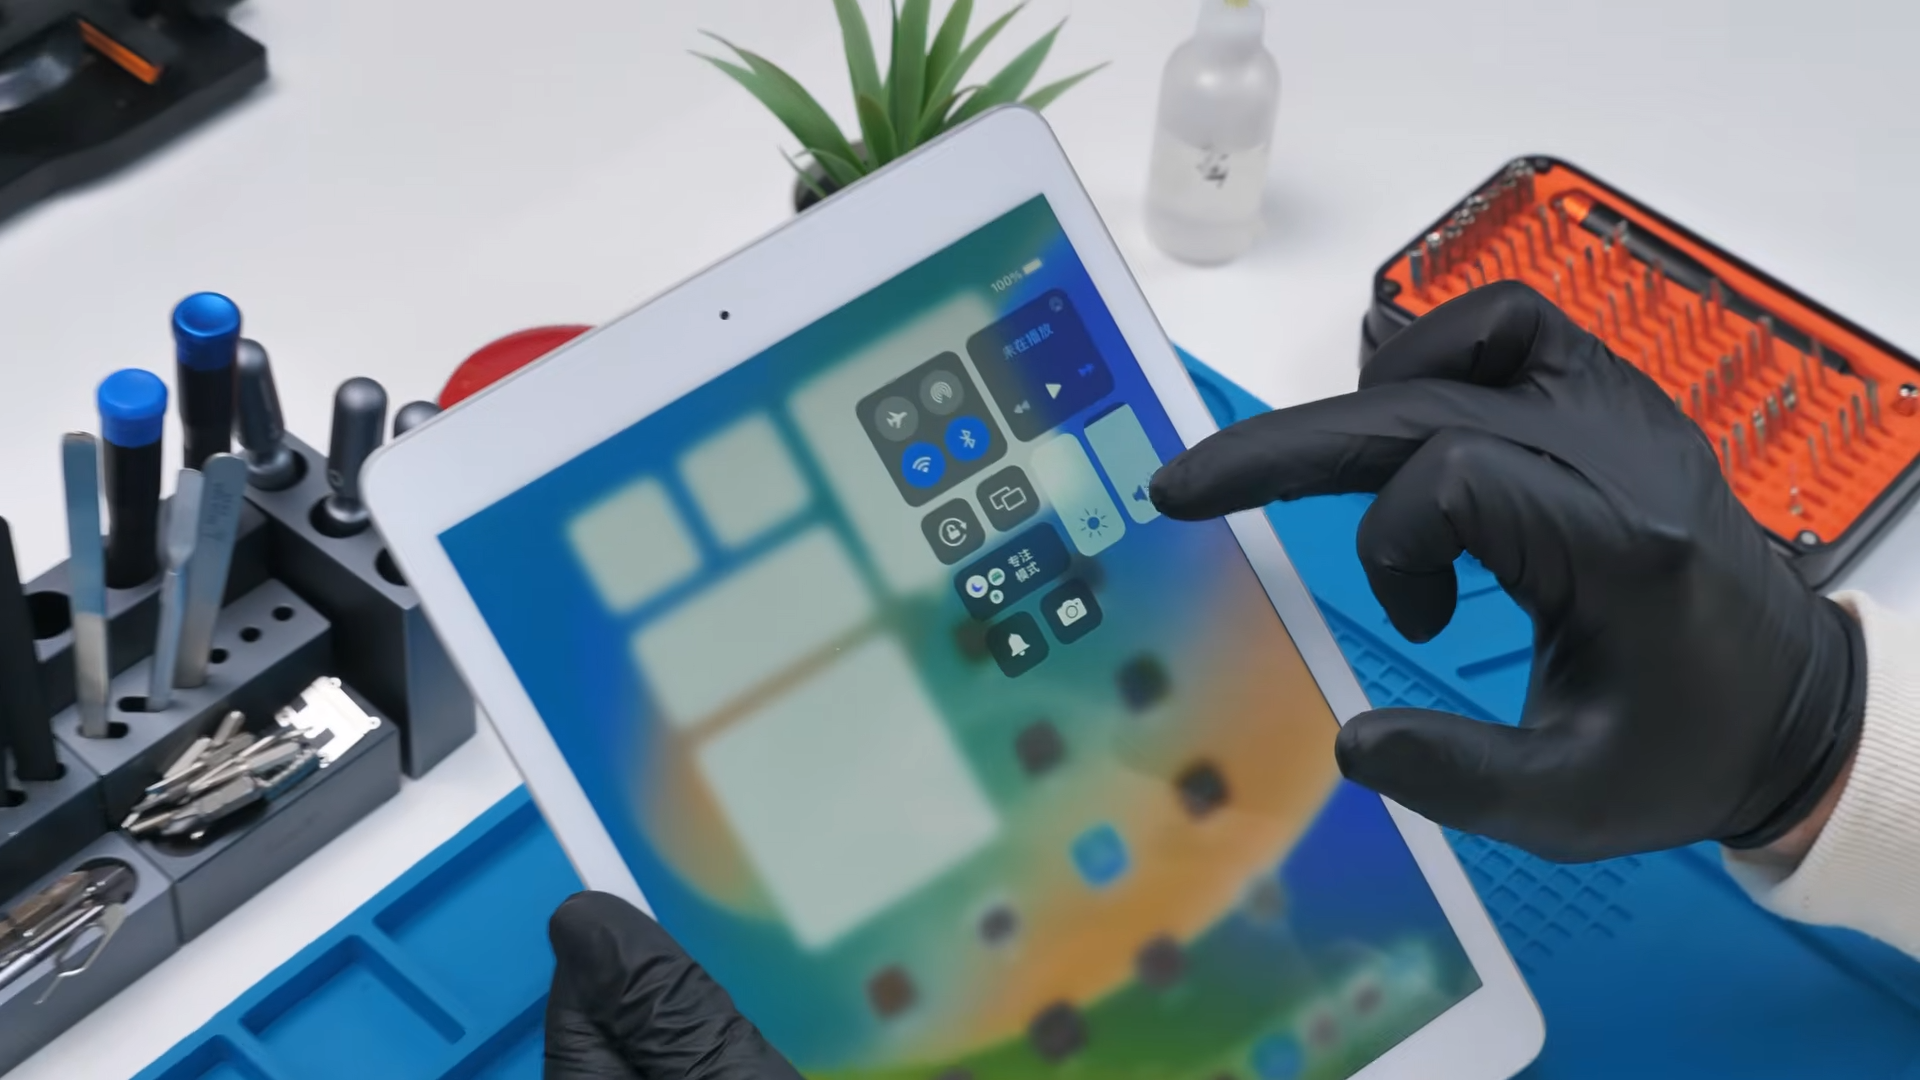
Now came the moment of truth. I hit the power button and the Apple logo appears almost instantly, which already felt like a small miracle considering I sealed everything up without testing a single component.
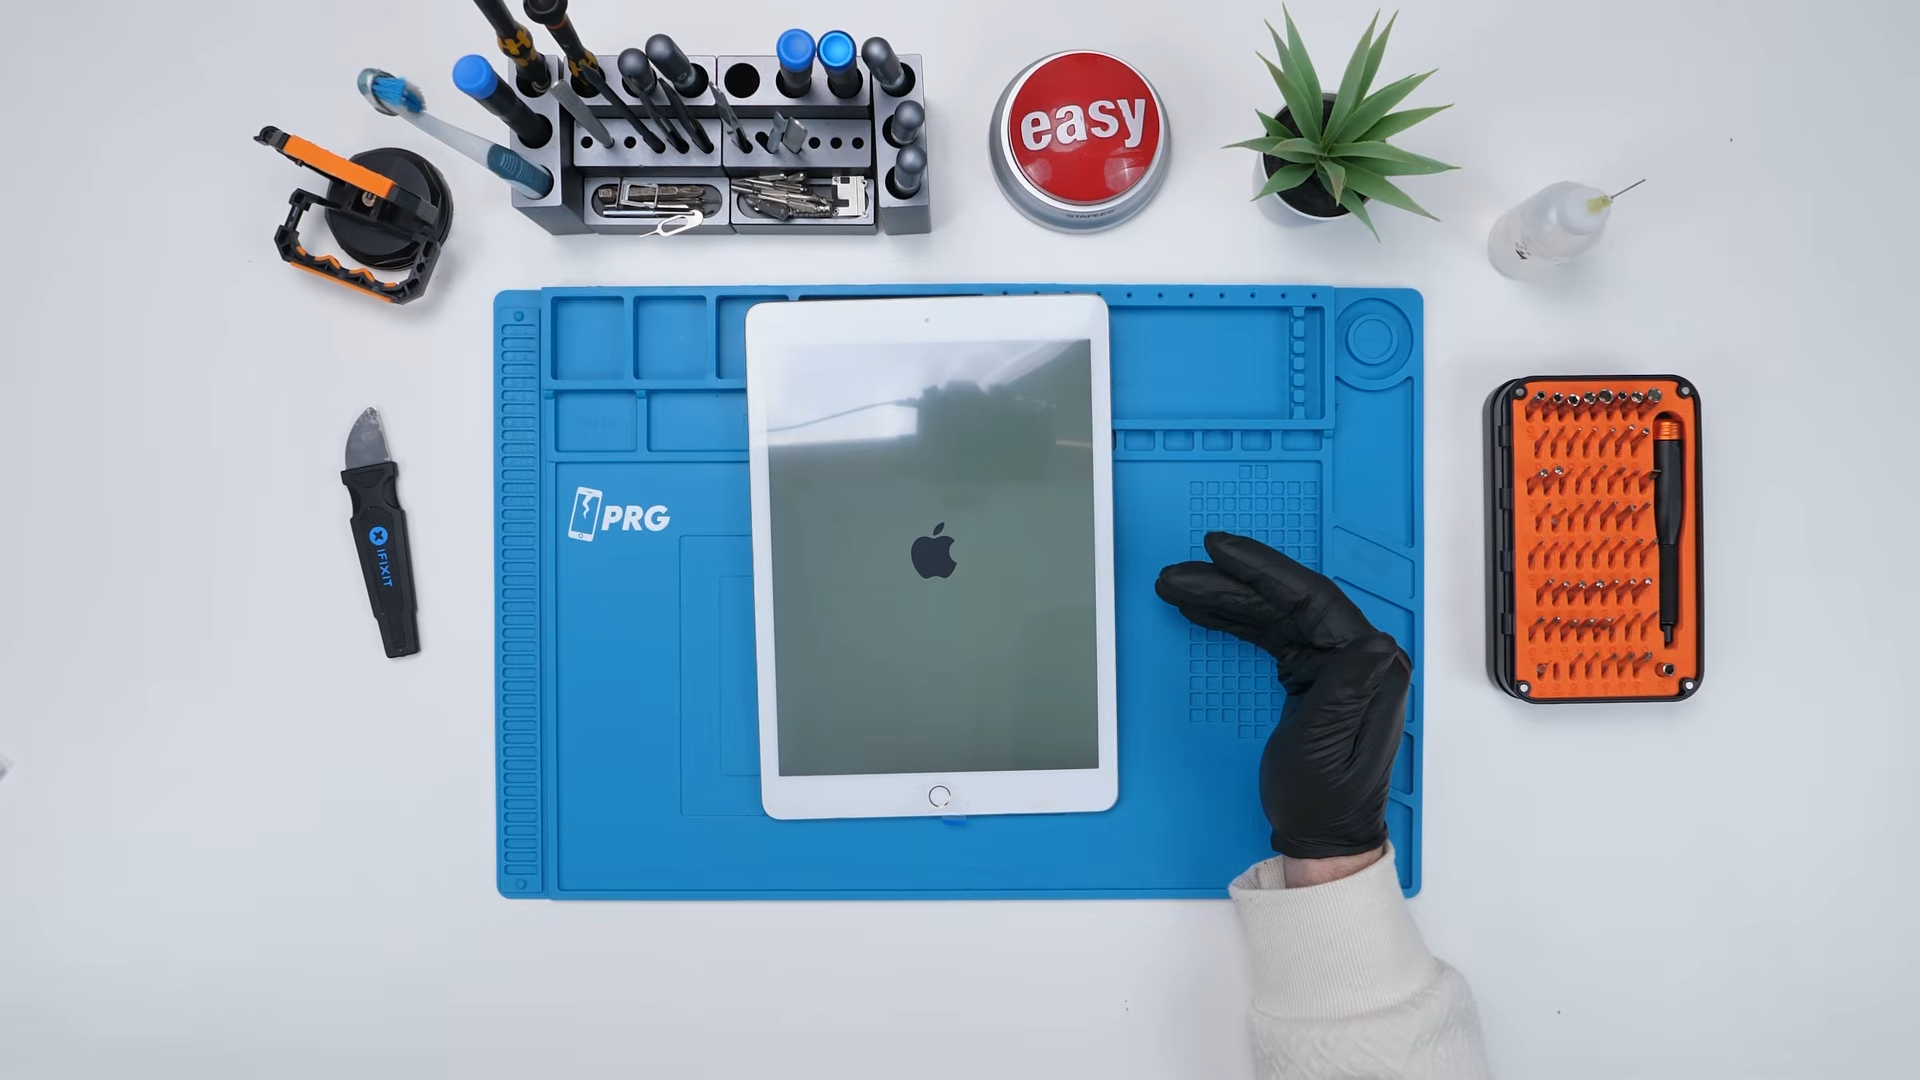
Then the screen went black. For a second I thought that was it. I genuinely could not believe I had been bold enough to fully assemble this thing without a test boot. It tried again, flashed, went black once more, and I honestly wasn’t sure what to expect. Then suddenly it comes to life. The display lit up properly and the iPad was on. At that point, I was just relieved that it even booted.
But booting is one thing and working is another.
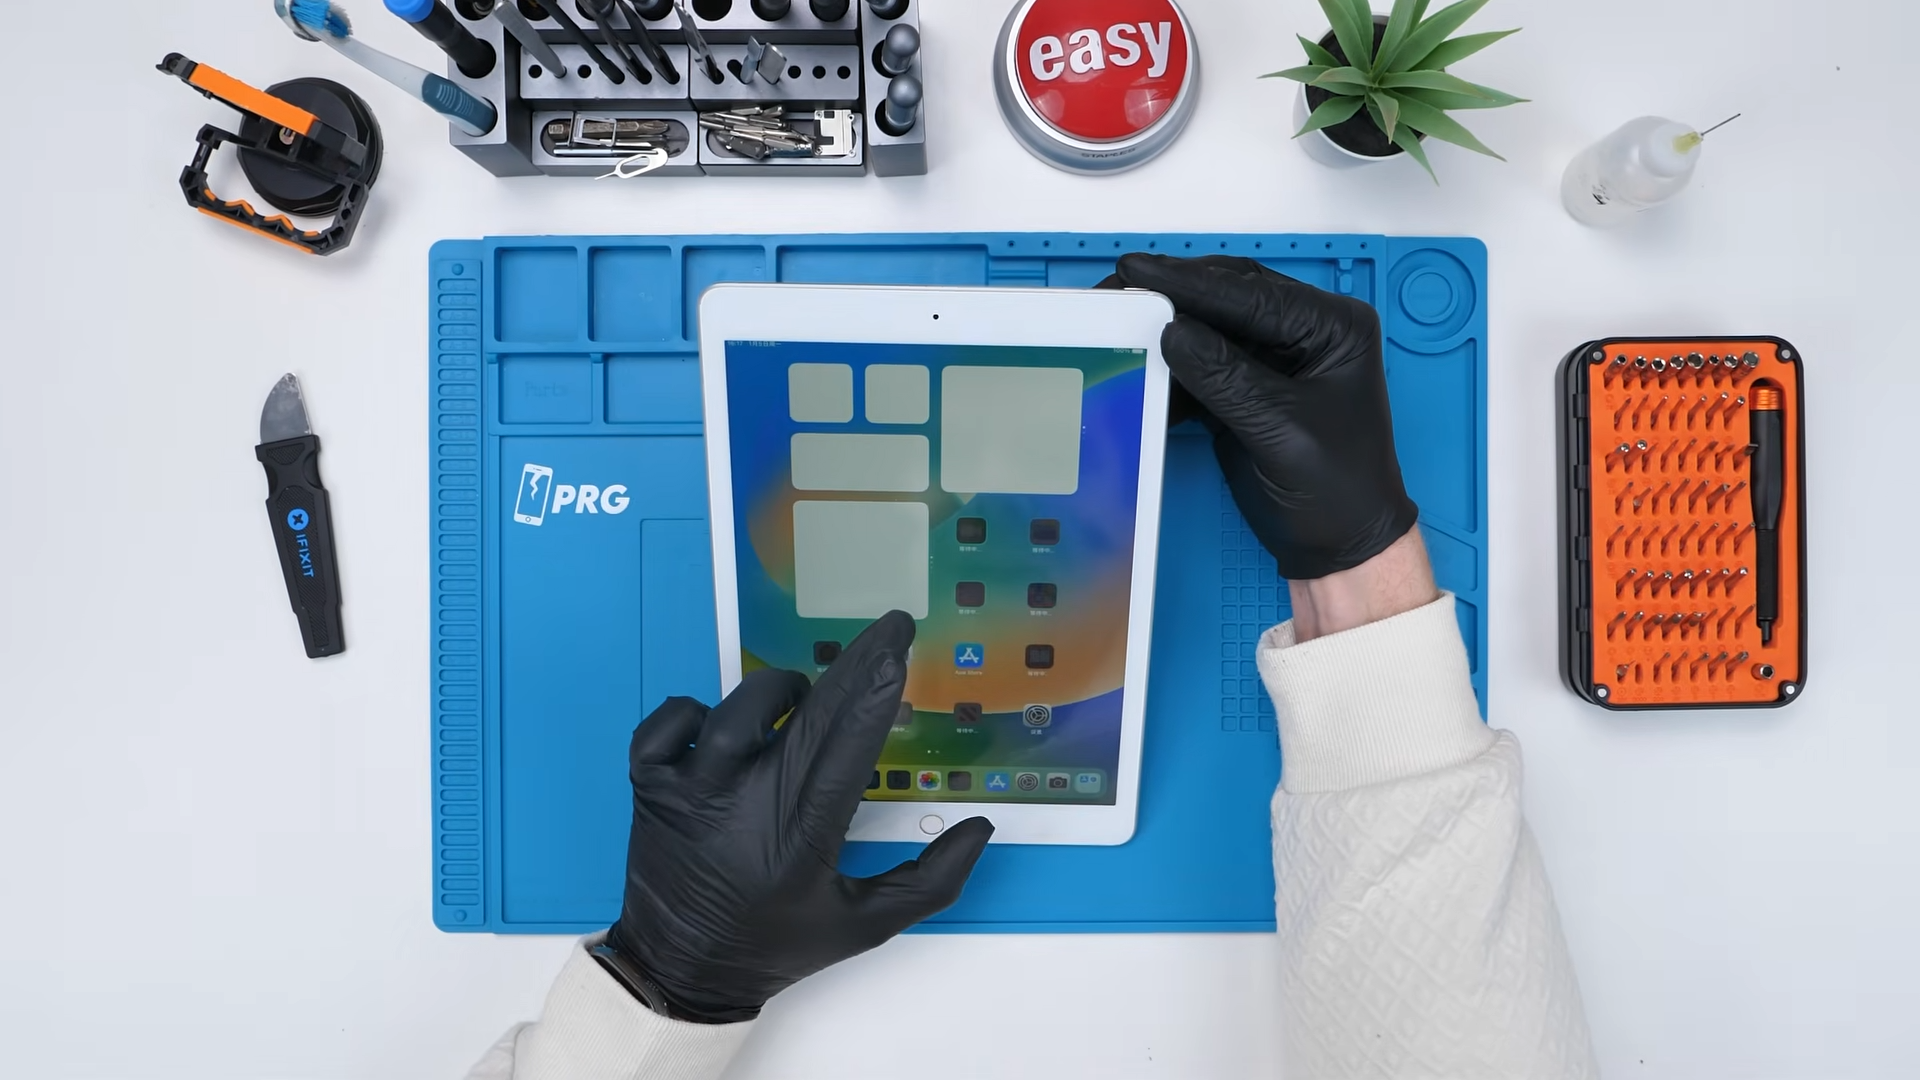
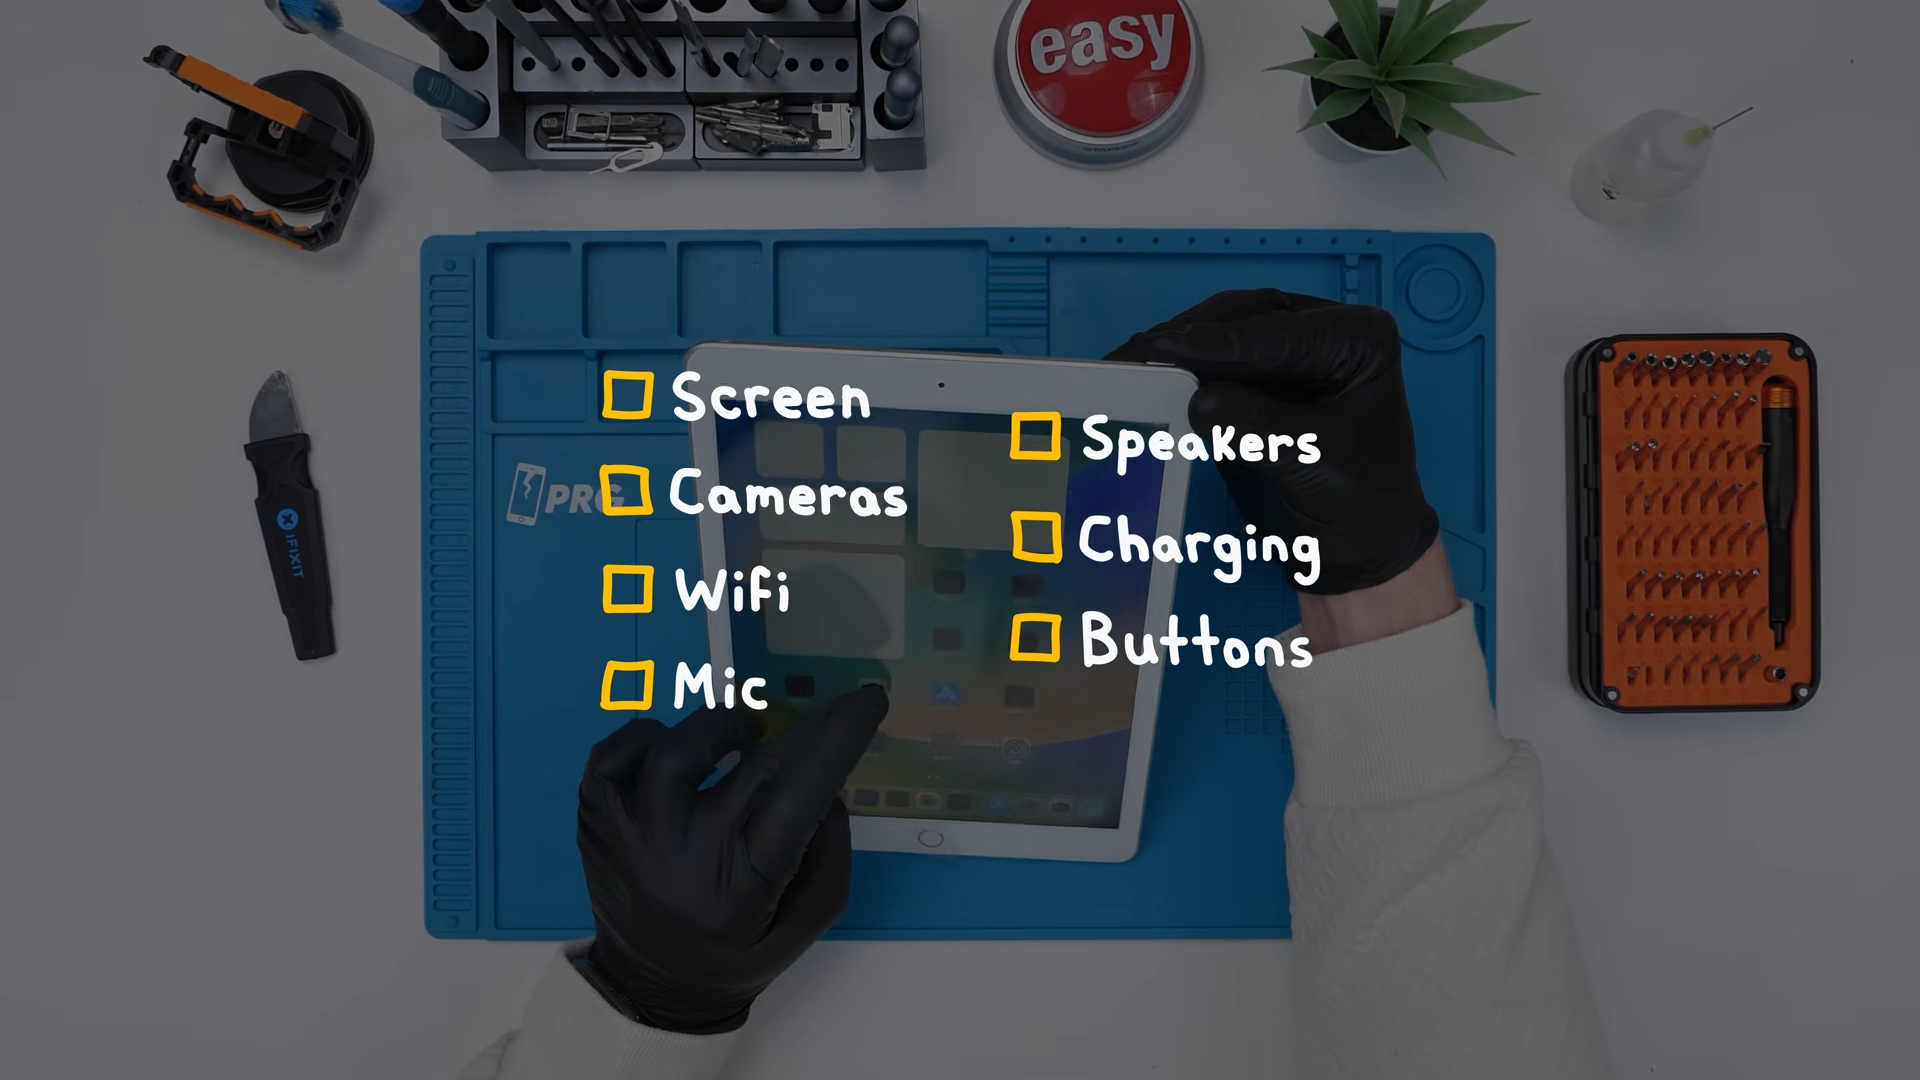
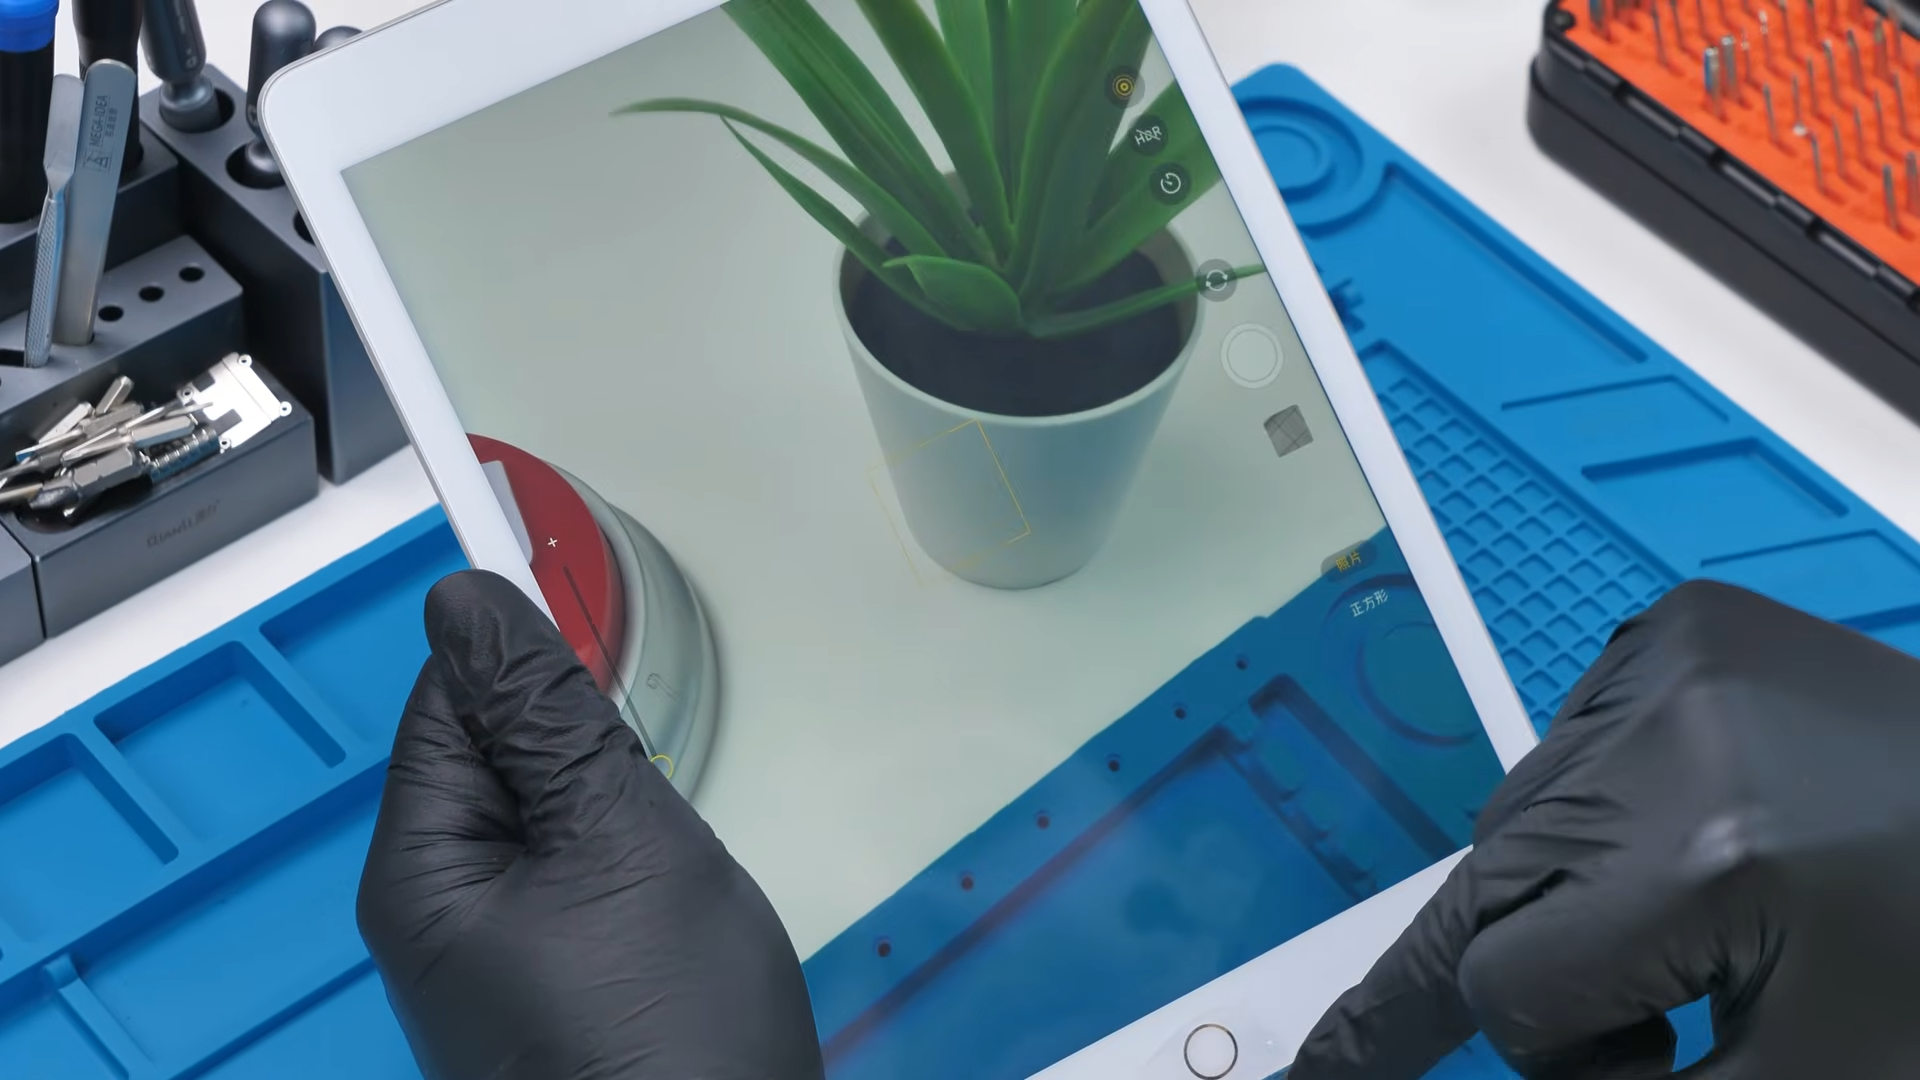
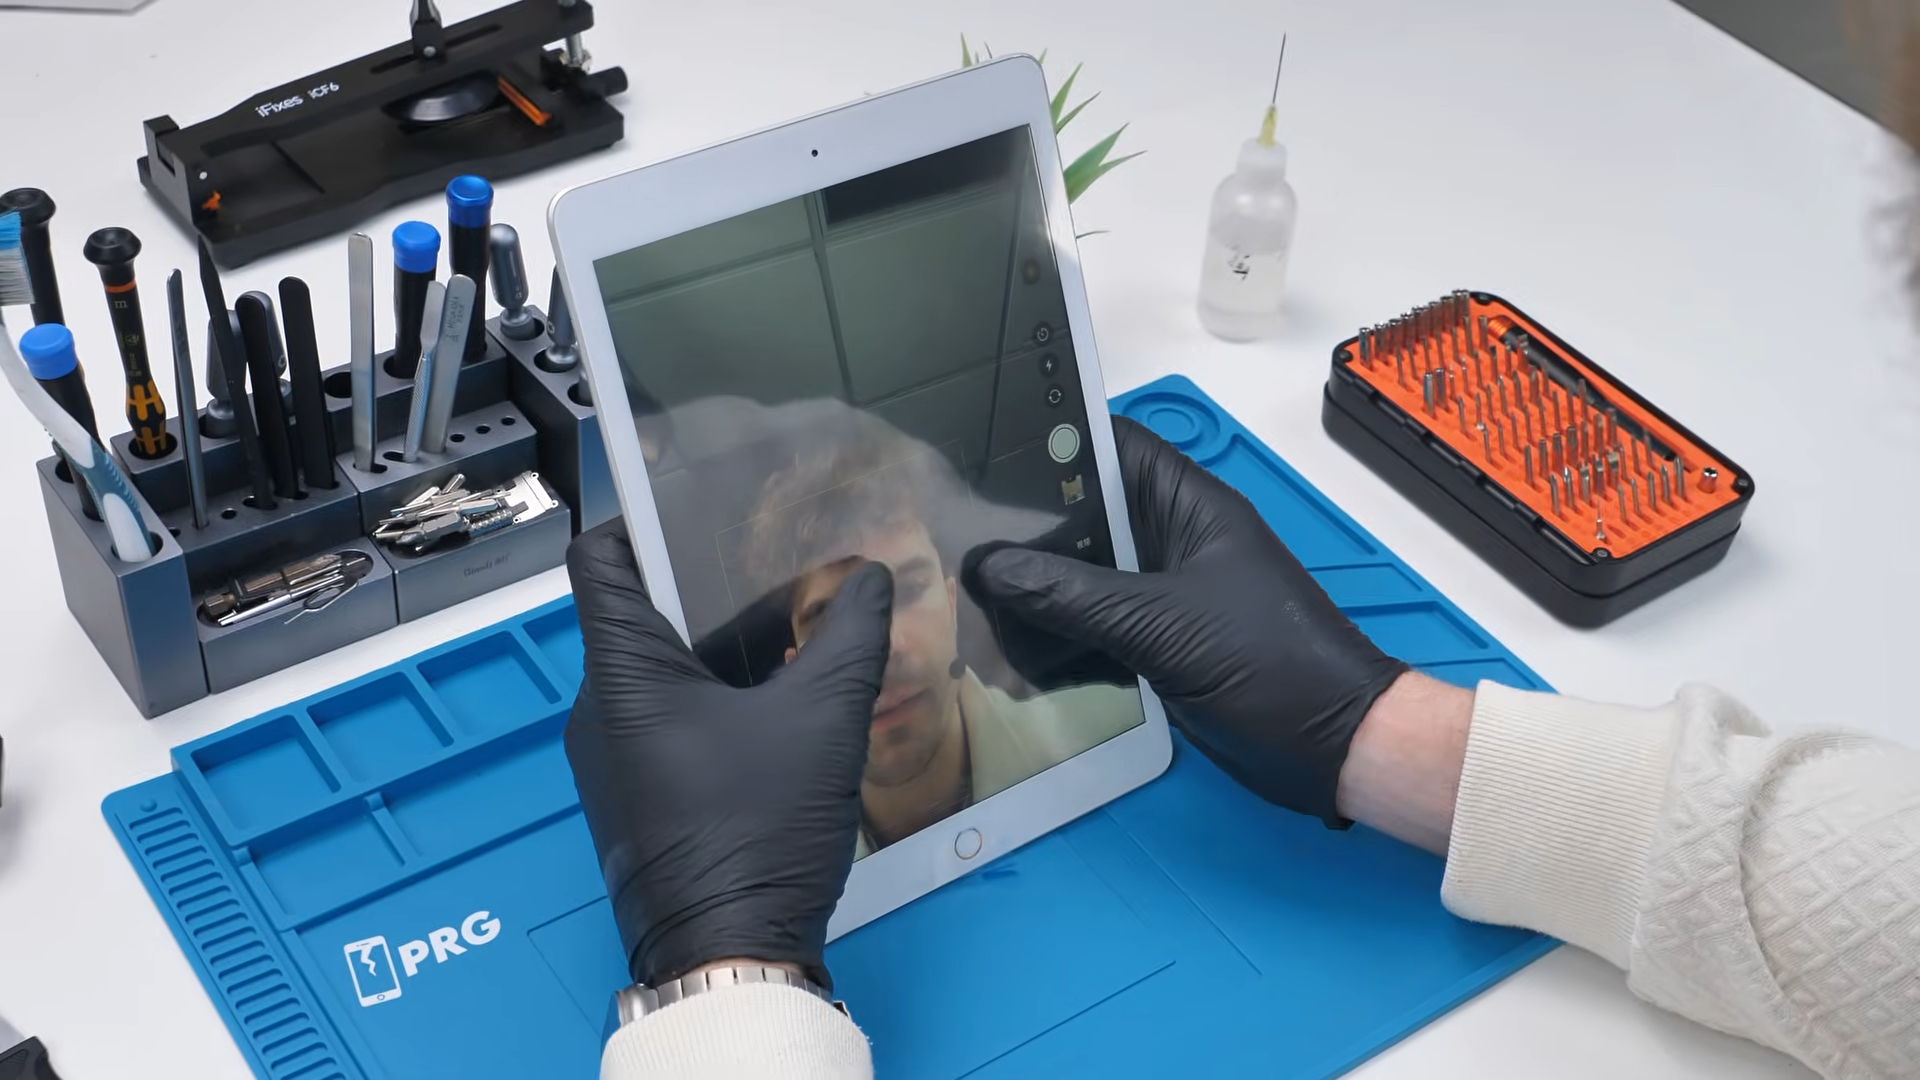
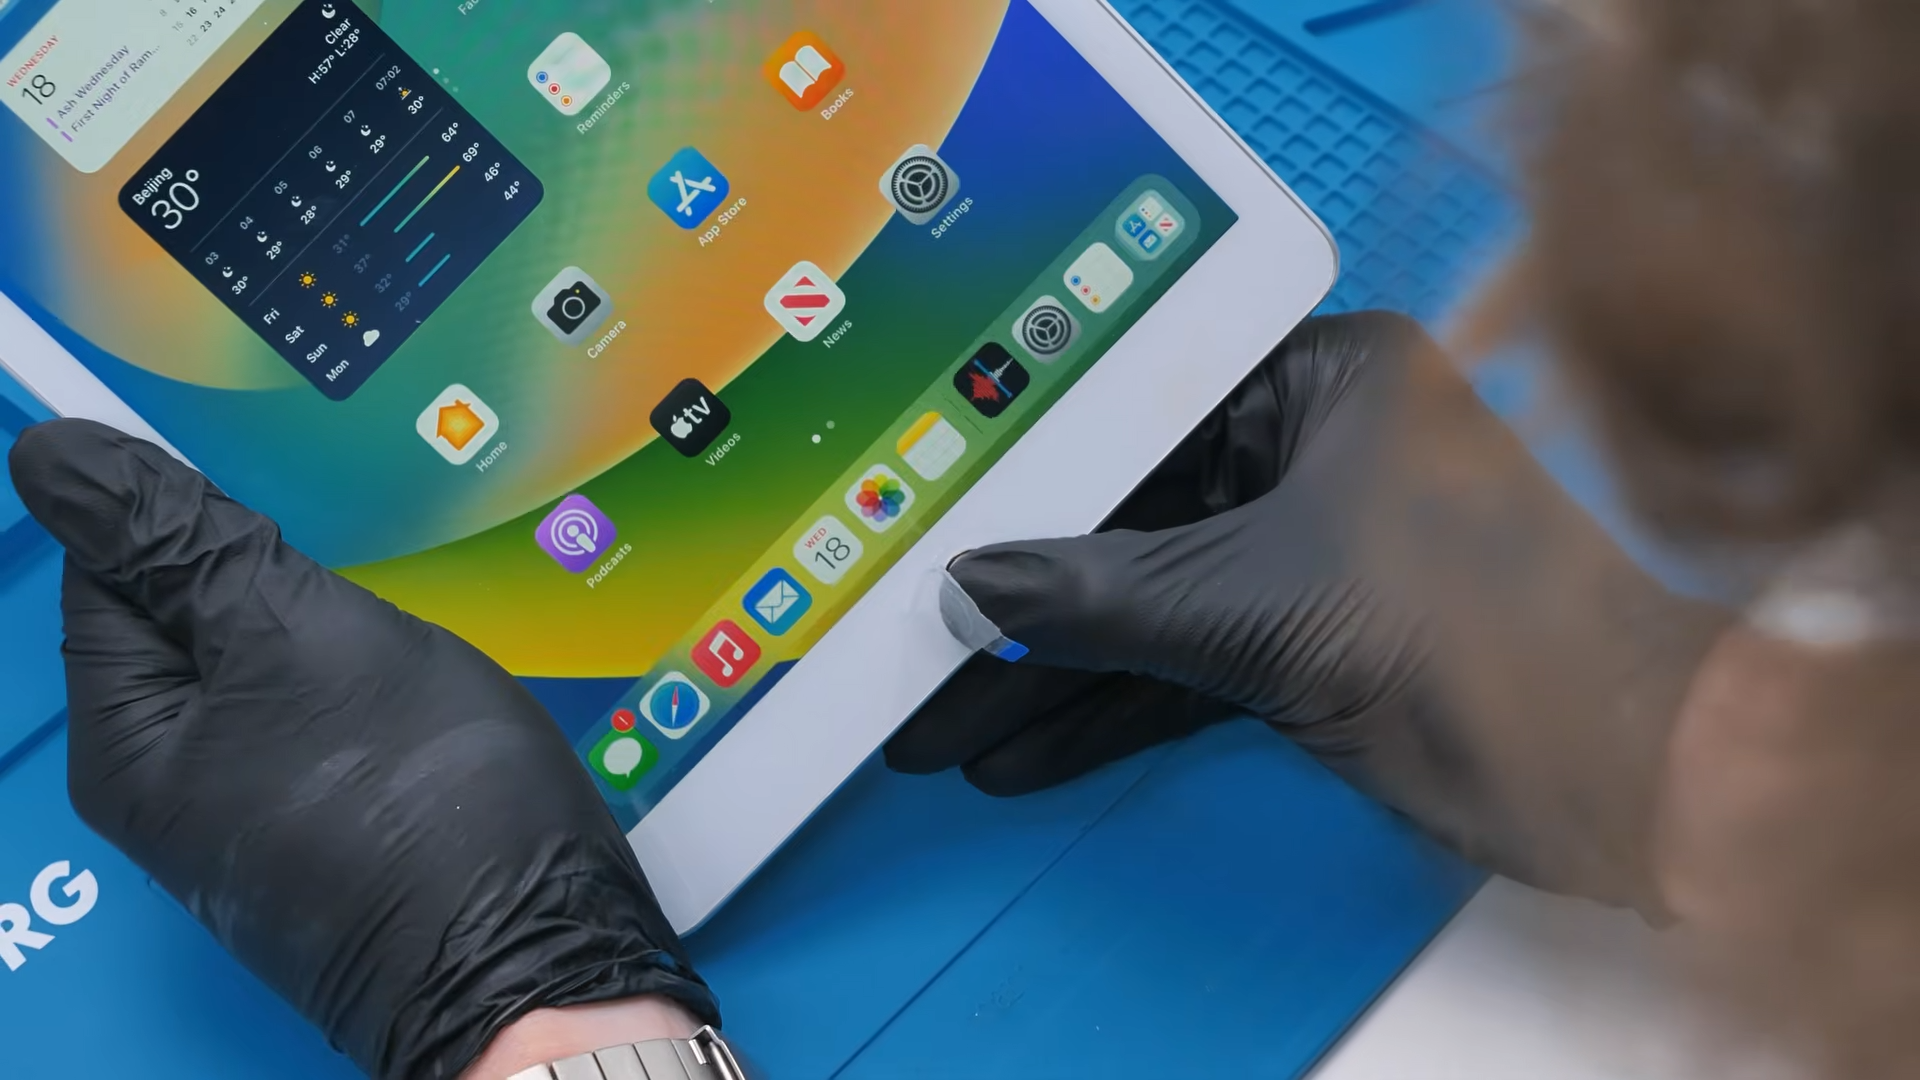
First, I checked the display and touch response. The screen looked good and it was responding properly to input, which immediately confirmed the LCD and digitizer were functioning together as they should. I opened the camera app to test both the front and rear cameras, and surprisingly, both worked without issue.
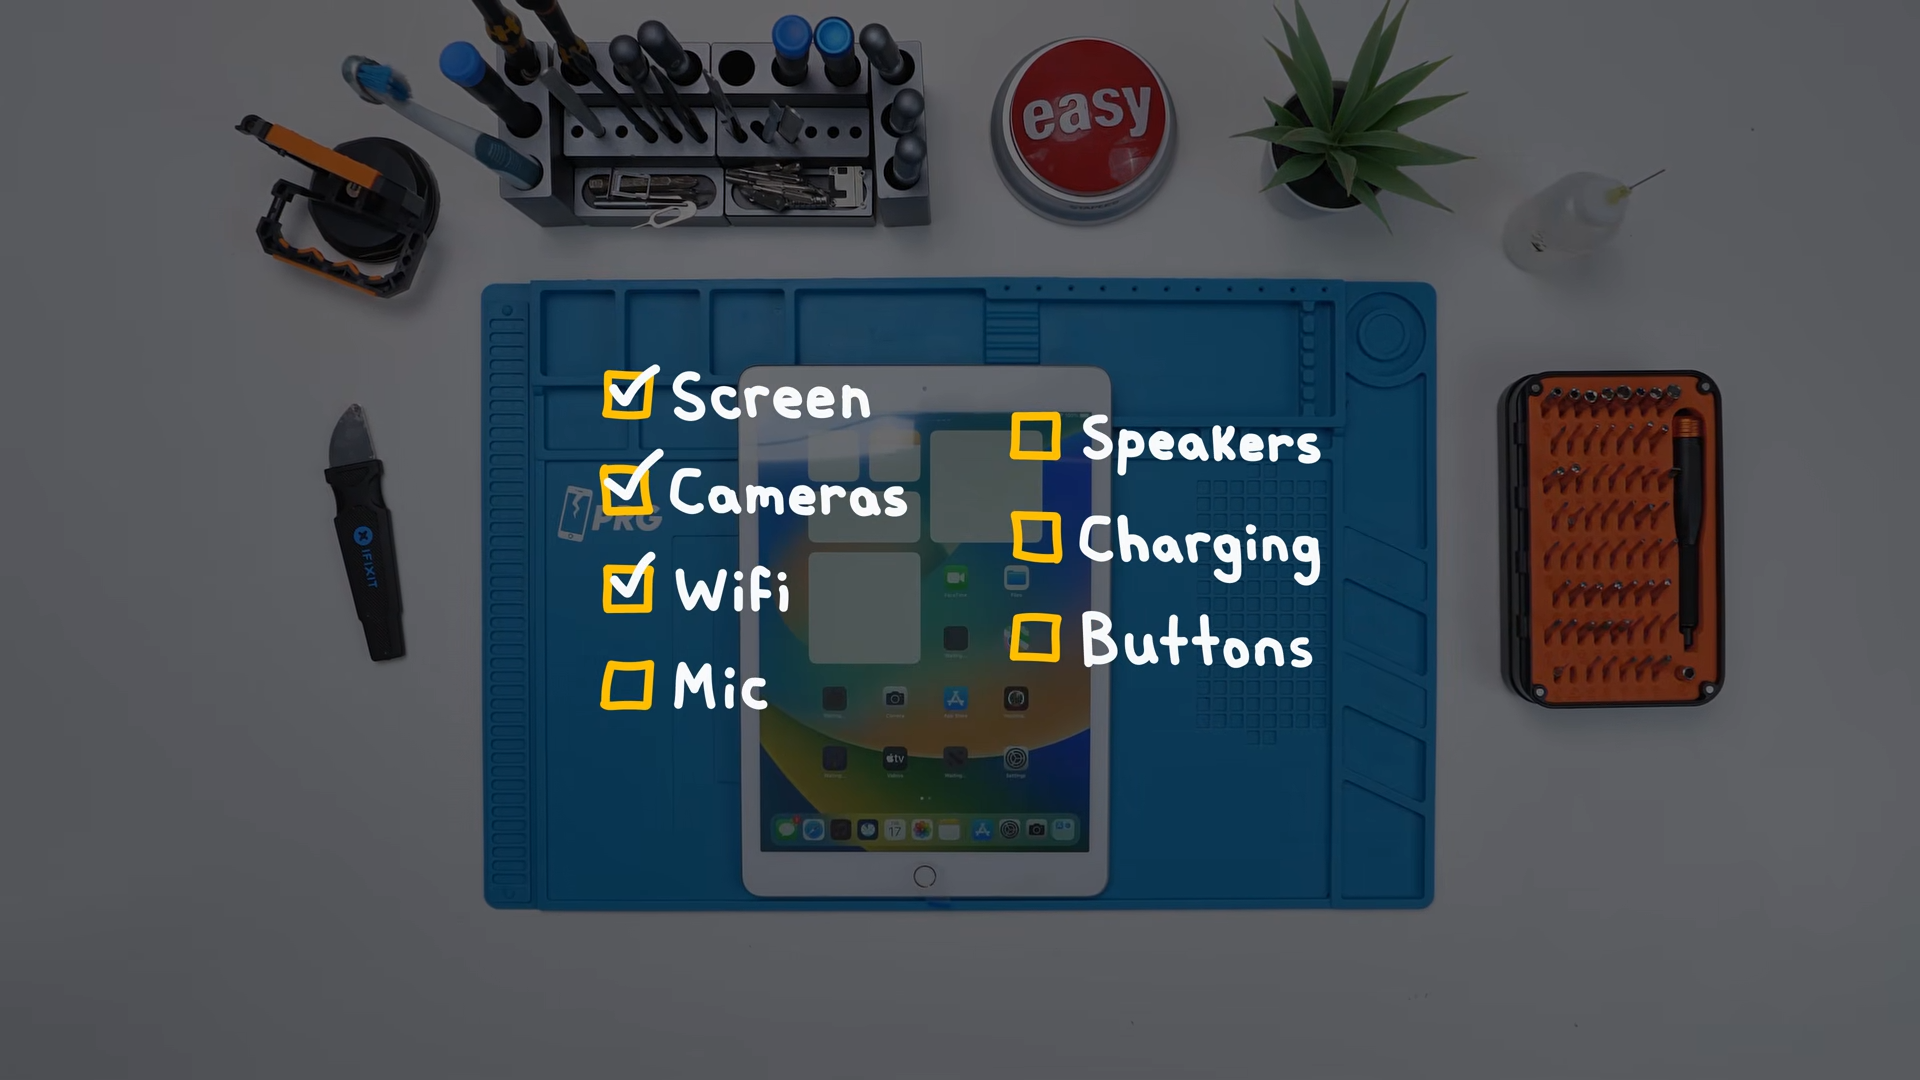
The only problem was that everything was set to Chinese, so before doing anything else, I connected the iPad to Wi Fi. Once connected, all the greyed out apps began downloading and the system settled in, which gave me confidence that the Wi Fi antenna and related board components were doing their job.
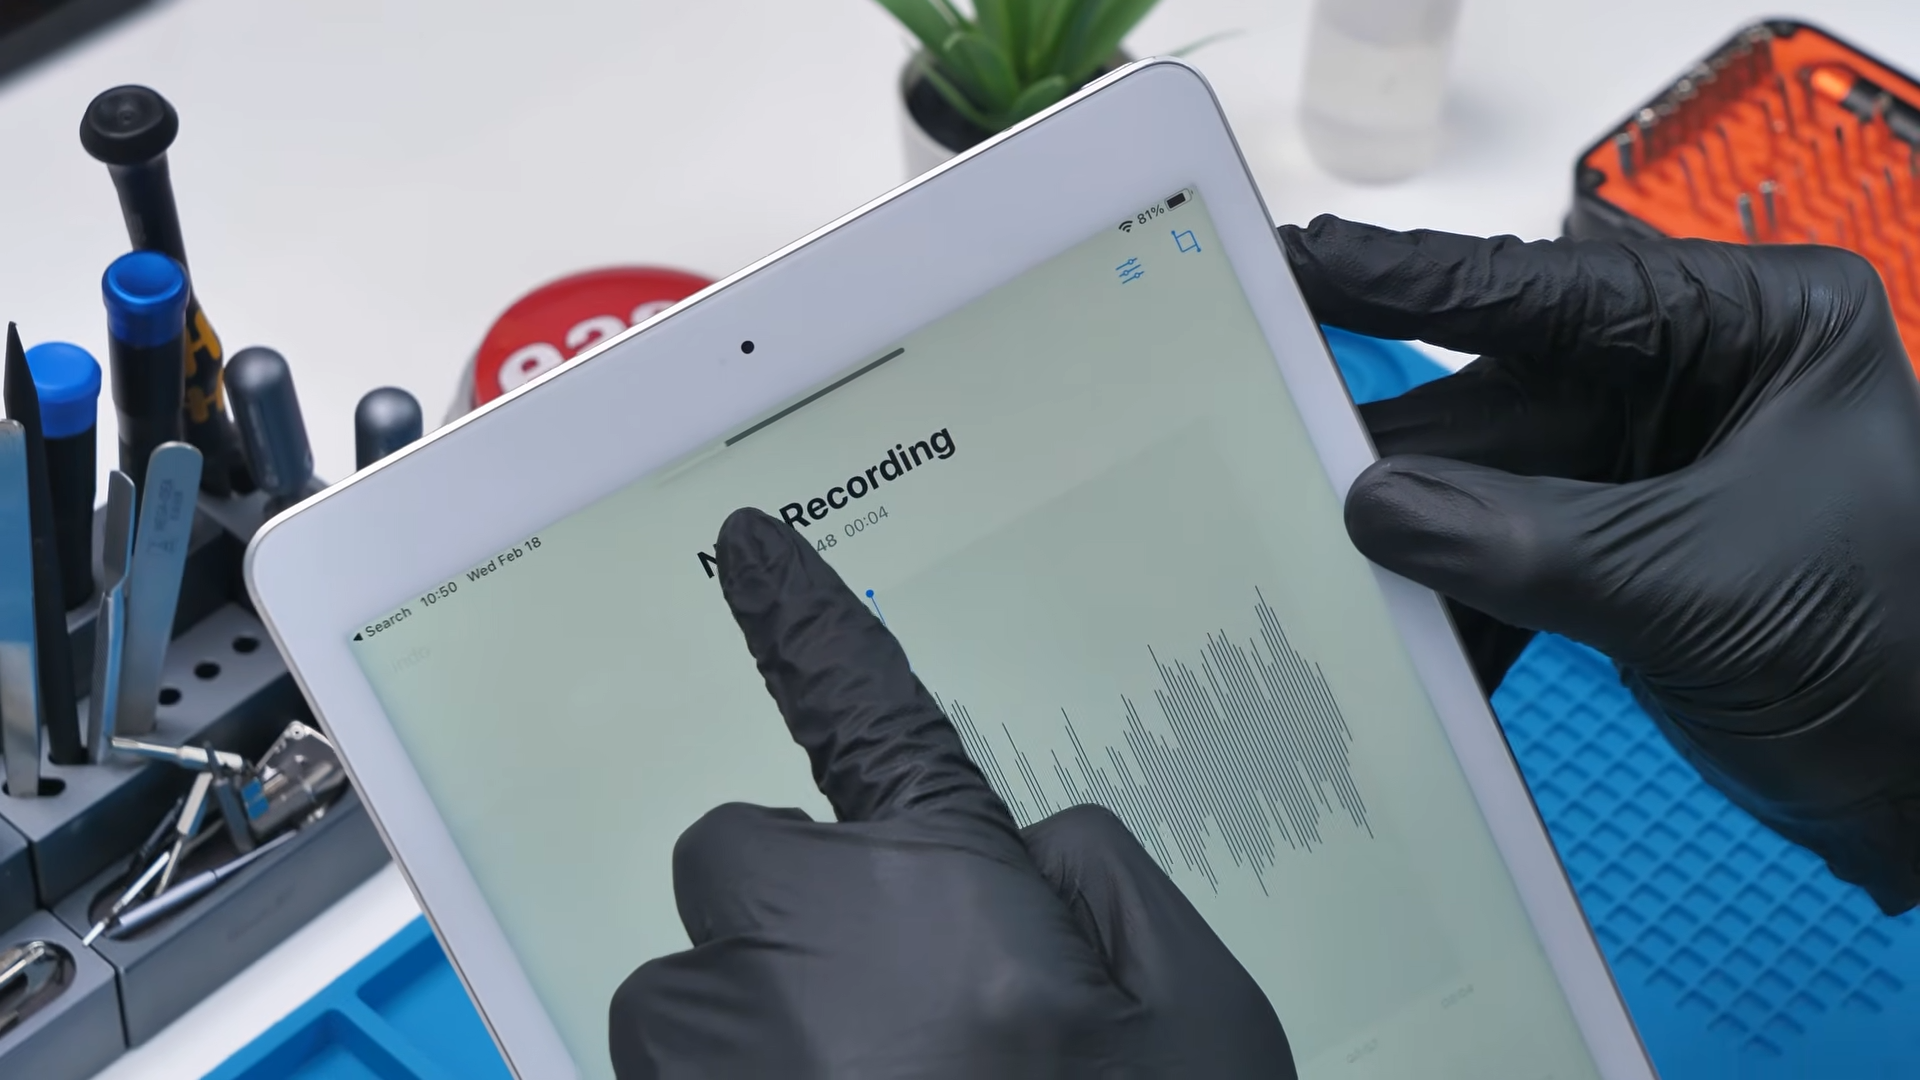
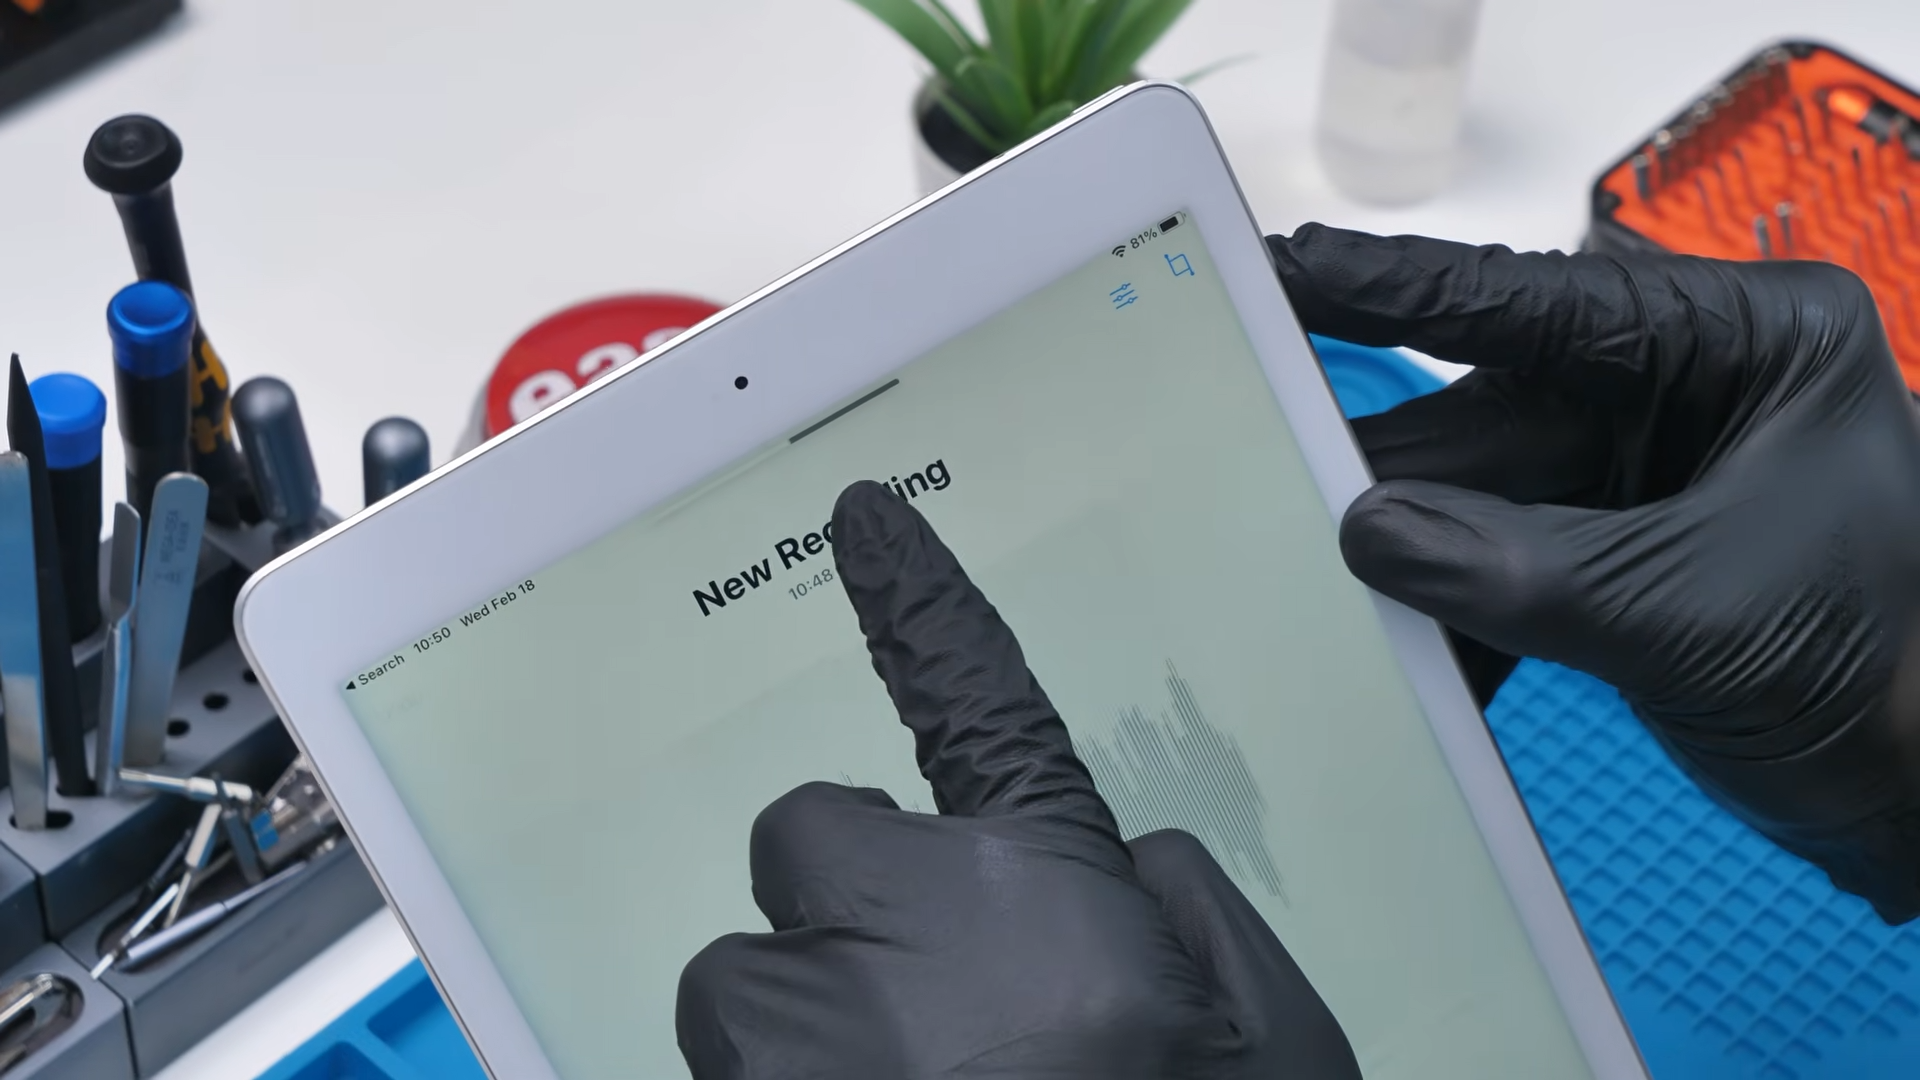
Next up was the microphone and speaker test. I opened Voice Memos and recorded a quick clip saying, “Hello. Hello. Testing. 1 2 3. Hello. Hello. Hello.” This test pulls double duty because when you play it back, you are not only checking the microphone but also the speakers. I hit play, and the audio came through clearly. That confirmed the microphone assembly and speaker pair were both working properly.
After that, it was time to test charging. I plugged the cable into the iPad and immediately saw that it was charging. That single moment confirmed that the pre soldered charging port, the battery, and the charging circuitry on the motherboard were all functioning together correctly.
Finally, I ran through the physical buttons. The power button was already confirmed since it turned the device on, but I tested it again anyway. Then I checked the volume buttons, and the volume bar appeared on screen exactly as it should. Last but not least was the home button. I pressed it, and it responded perfectly.
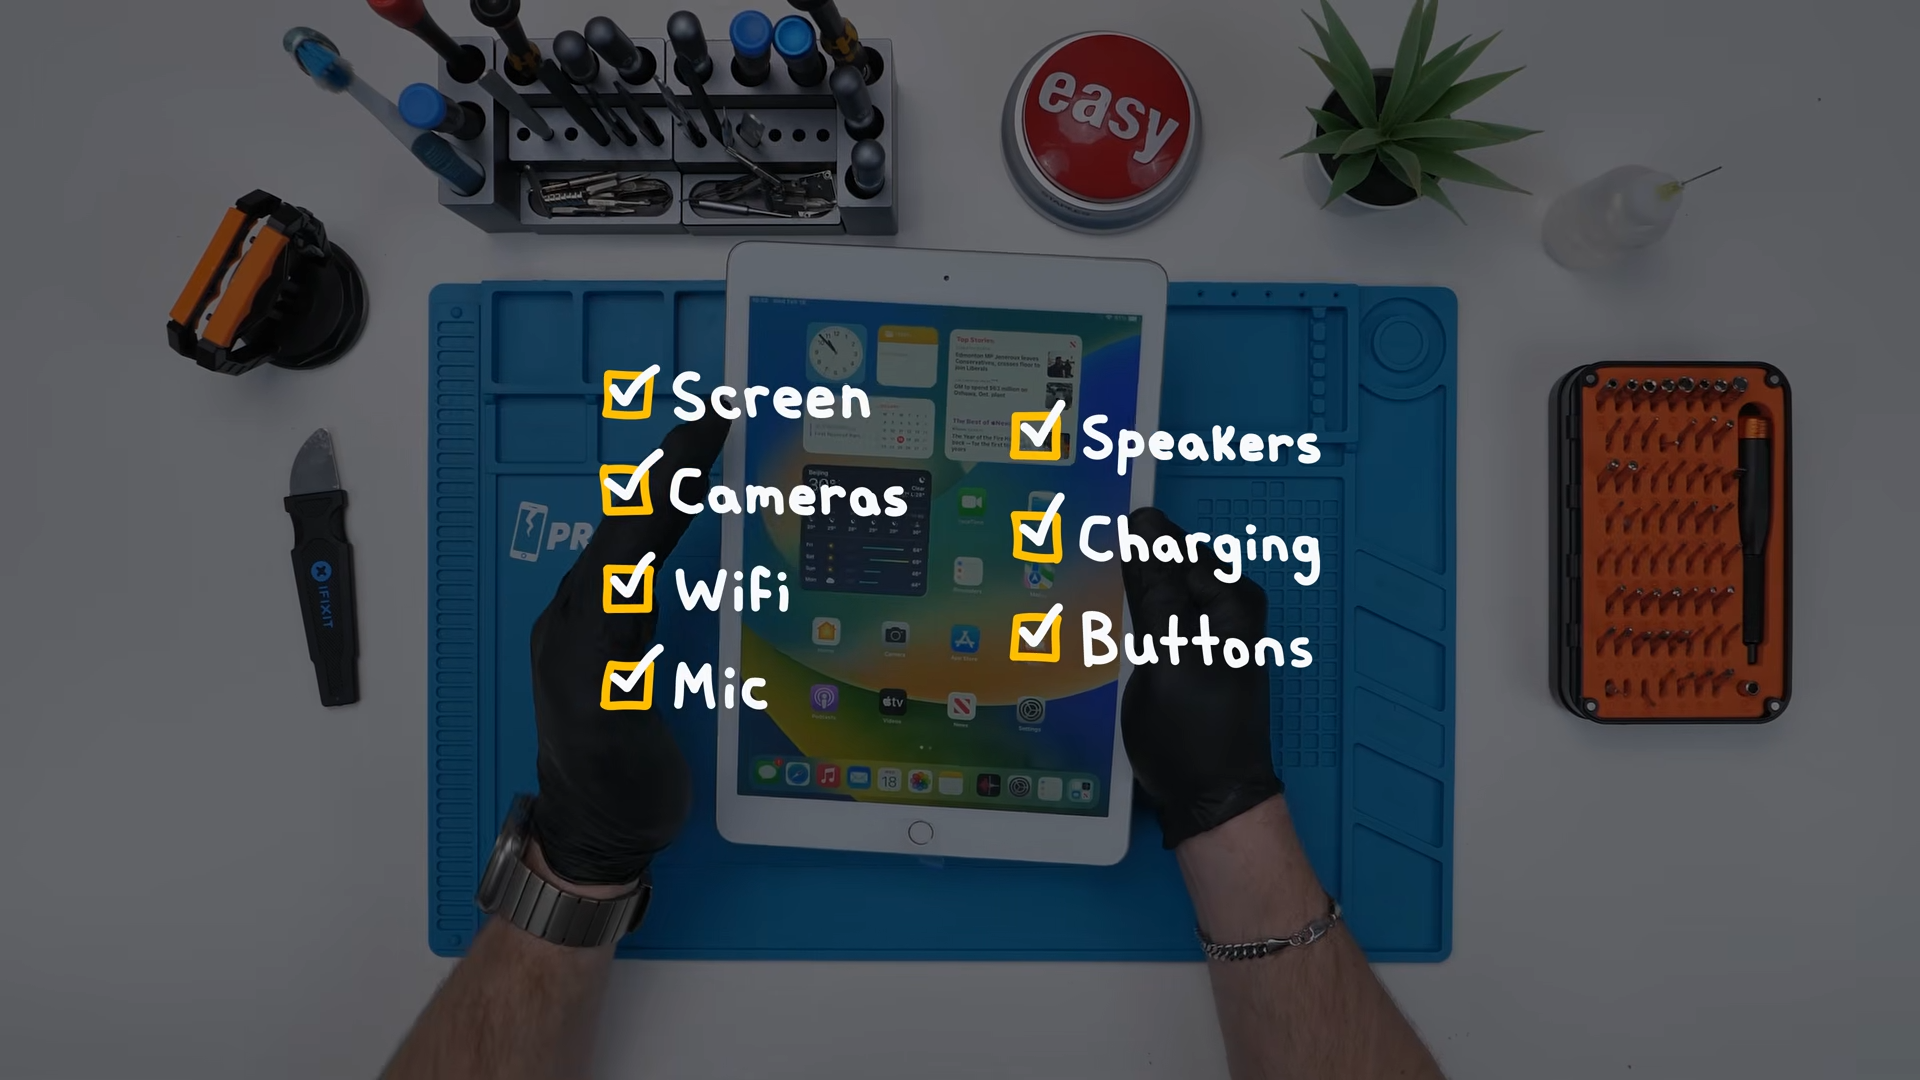
At that point, every major component we installed had been tested and verified. The AliExpress iPad was not just turning on, it was fully functional.
Final Thoughts
So yes, you can build a working iPad 7th Generation using parts from AliExpress. It actually booted, the display worked, touch worked, cameras worked, microphone and speakers worked, it charged properly, and all the buttons functioned, including the home button.
But the problem? It wasn’t worth it monetarily.
A refurbished iPad sits around $200 Canadian, and we blew past that price with just the battery, LCD, and motherboard alone. The build was fun and honestly kind of shocking that it worked, but it’s not the budget shortcut people hope it will be.
Still, I can’t lie, there’s something satisfying about looking at a pile of random parts and ending up with a fully functional iPad that shouldn’t exist. And if Apple is wondering, yes, the glue gun is now officially a repair method in my house.
My only regret is that I can’t put “Certified Glue Gun Technician” on my résumé.
See you in the next article!